The bottom of the text is coming out looking odd and not as depicted in Light Burn. Any ideas? Can laser speed be an issue? Thanks!
CP.lbrn2 (76.3 KB)
The bottom of the text is coming out looking odd and not as depicted in Light Burn. Any ideas? Can laser speed be an issue? Thanks!
That generally comes from mechanical problems in the Y axis drive train.
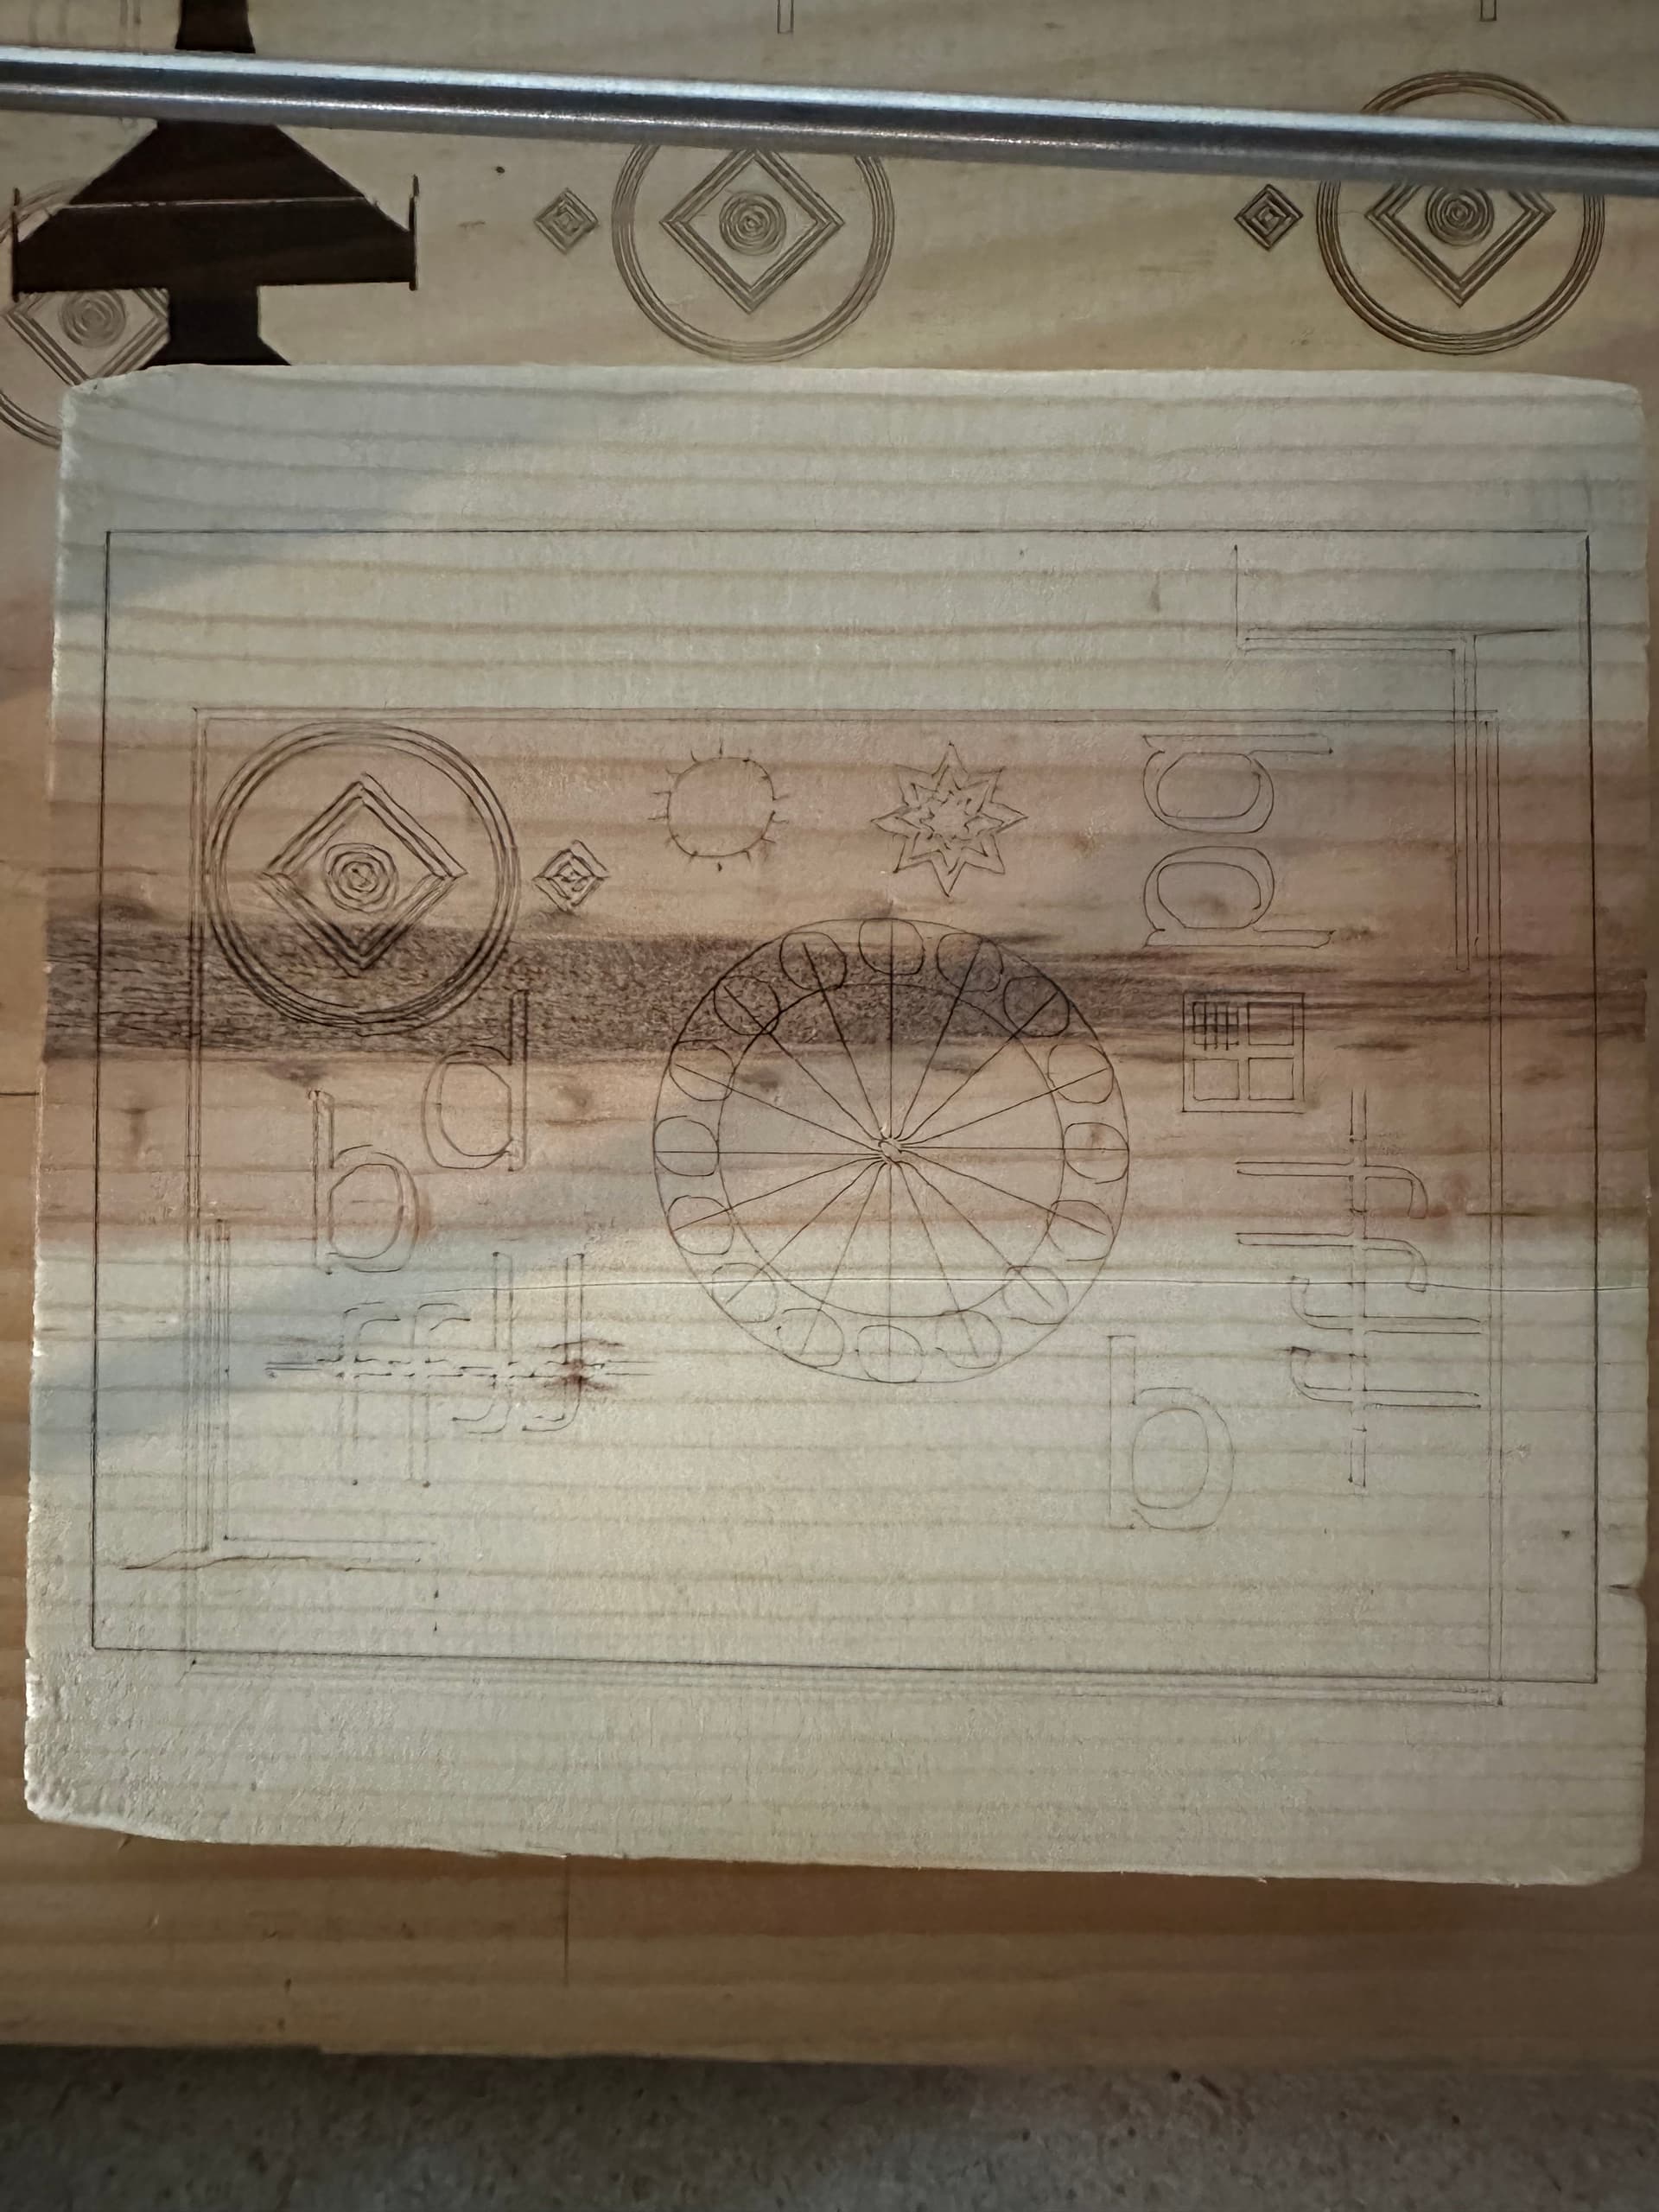
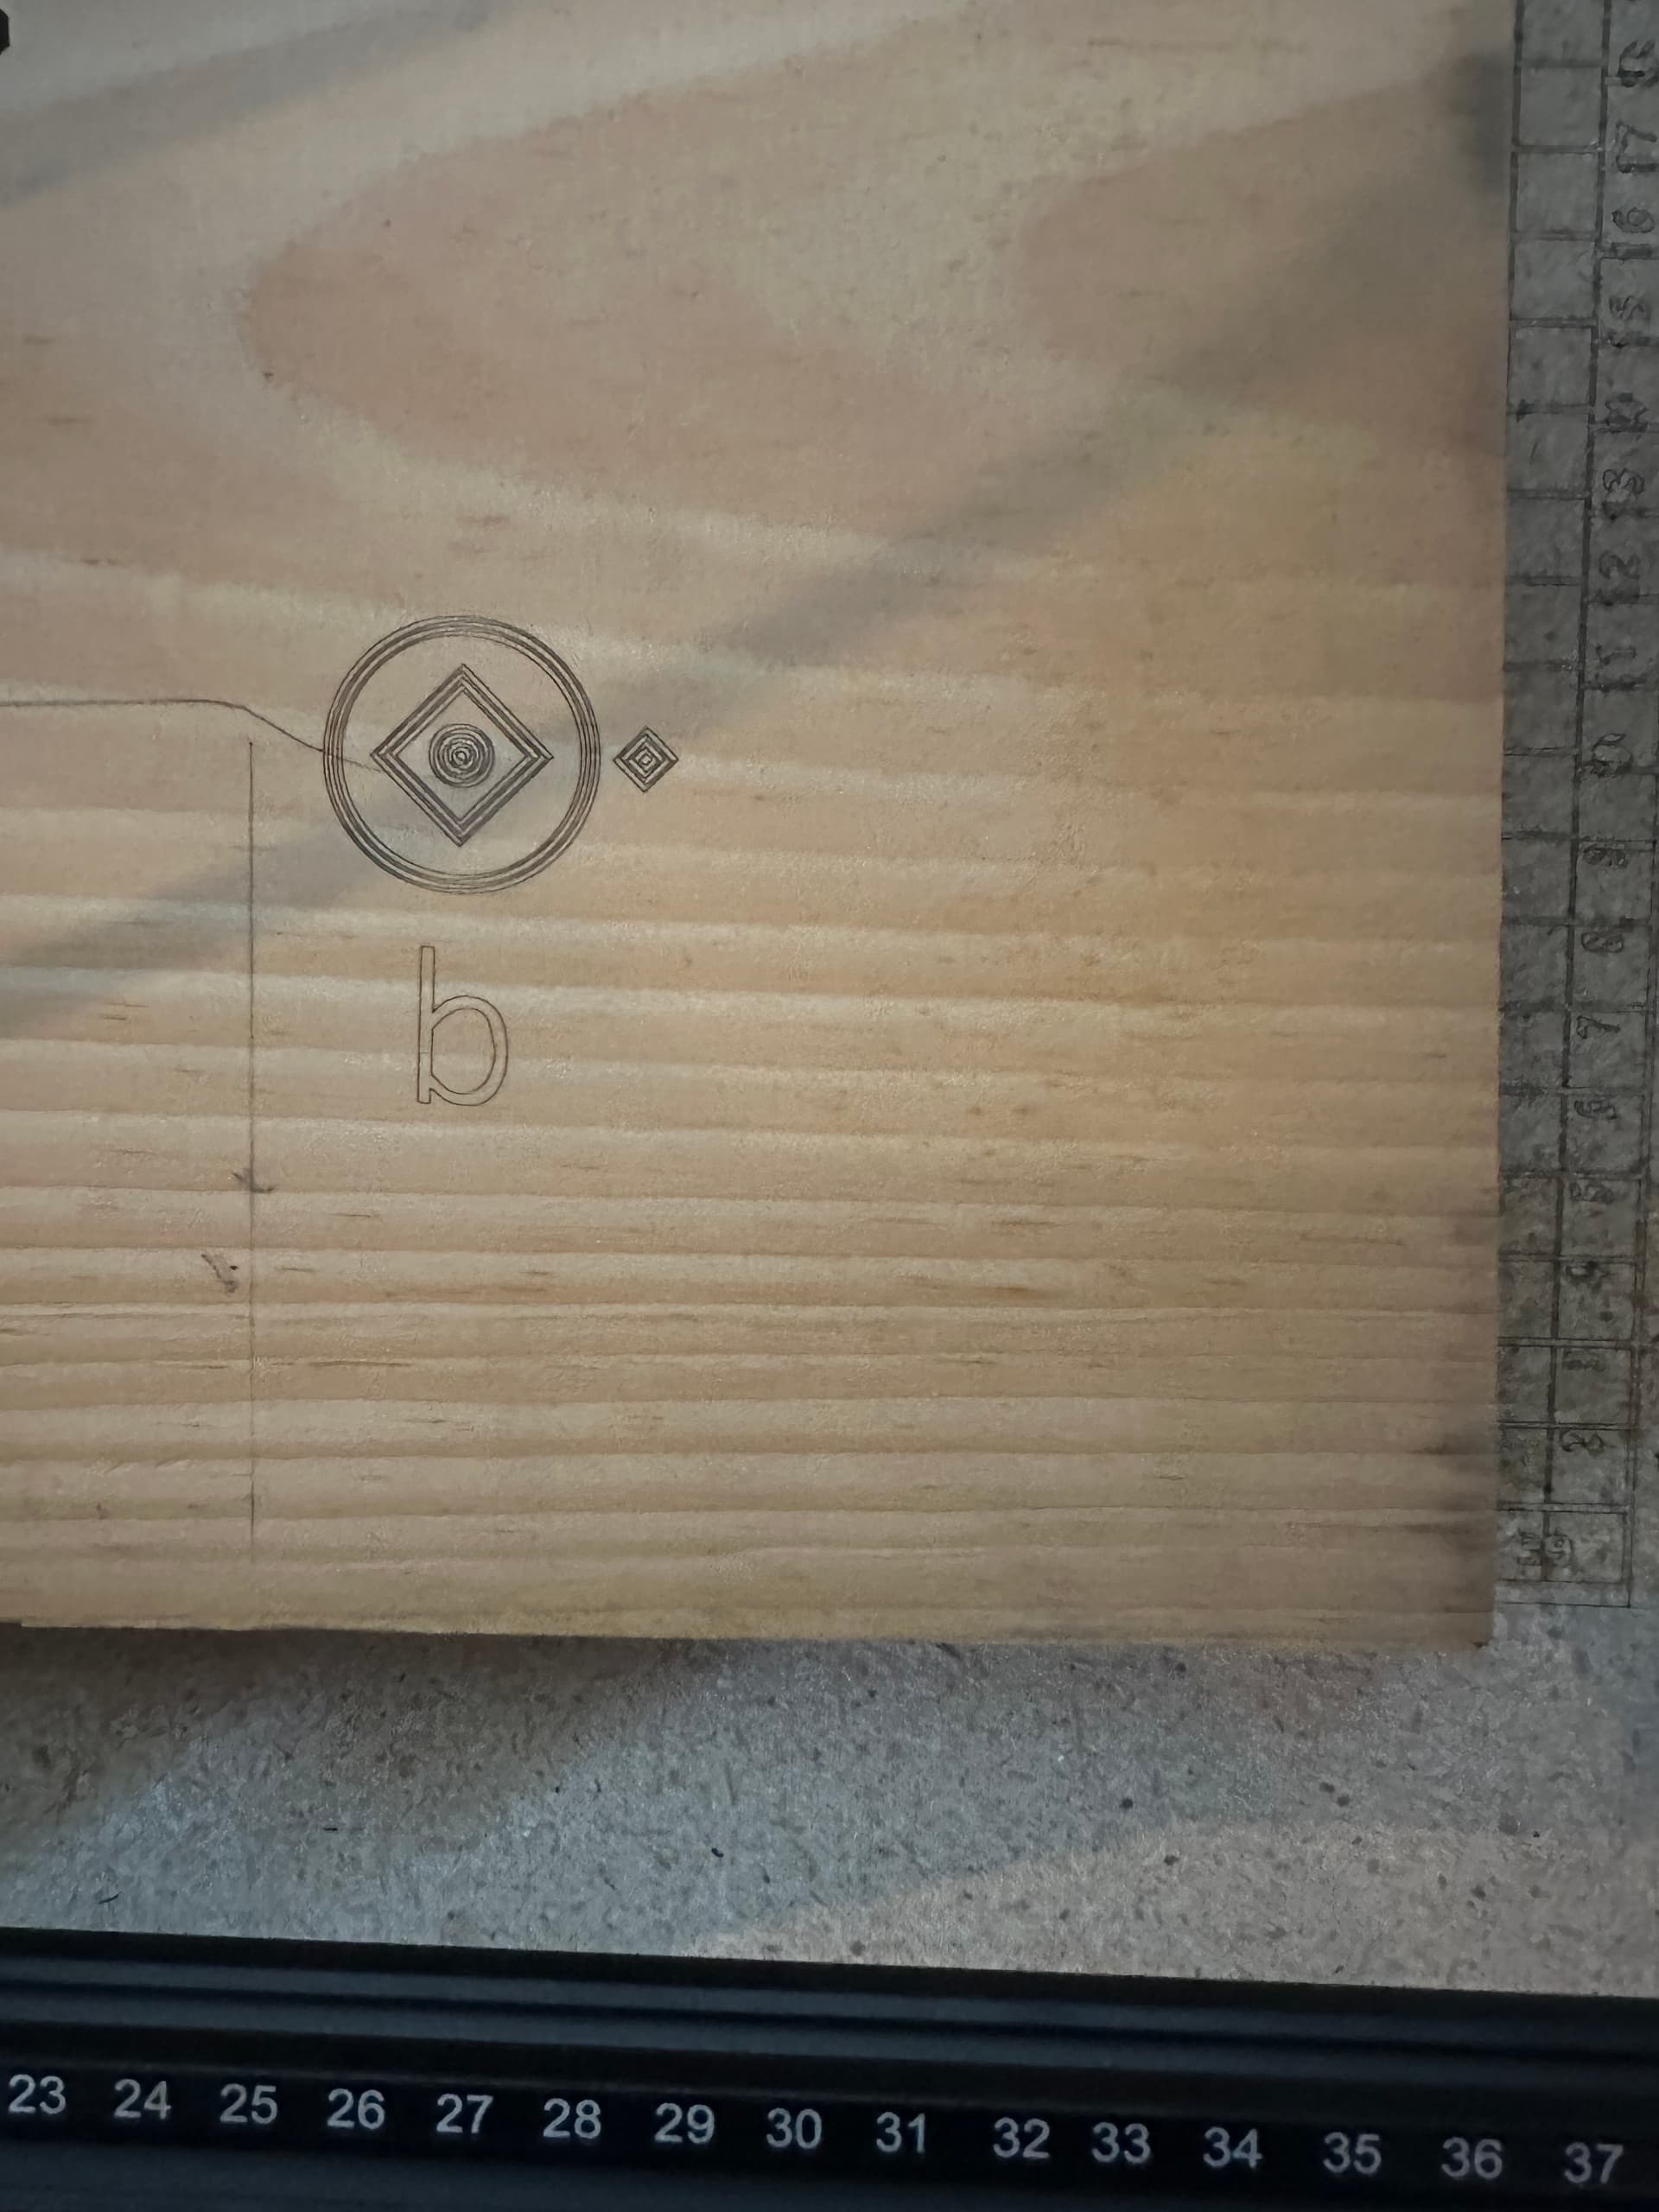
Run this test pattern for a quick check of the machine’s mechanical integrity:
Scale it uniformly to fit the platform and run it as fast as the machine will go in Line mode with optimizations turned off and power set to mark a sheet of cardboard.
Upload a photo of the results, because the differences from the design will show what needs attention.
Okay thank you! Could belt tension be a causal factor? I’ll run the test, what exactly should I be looking for to asses mechanical integrity?
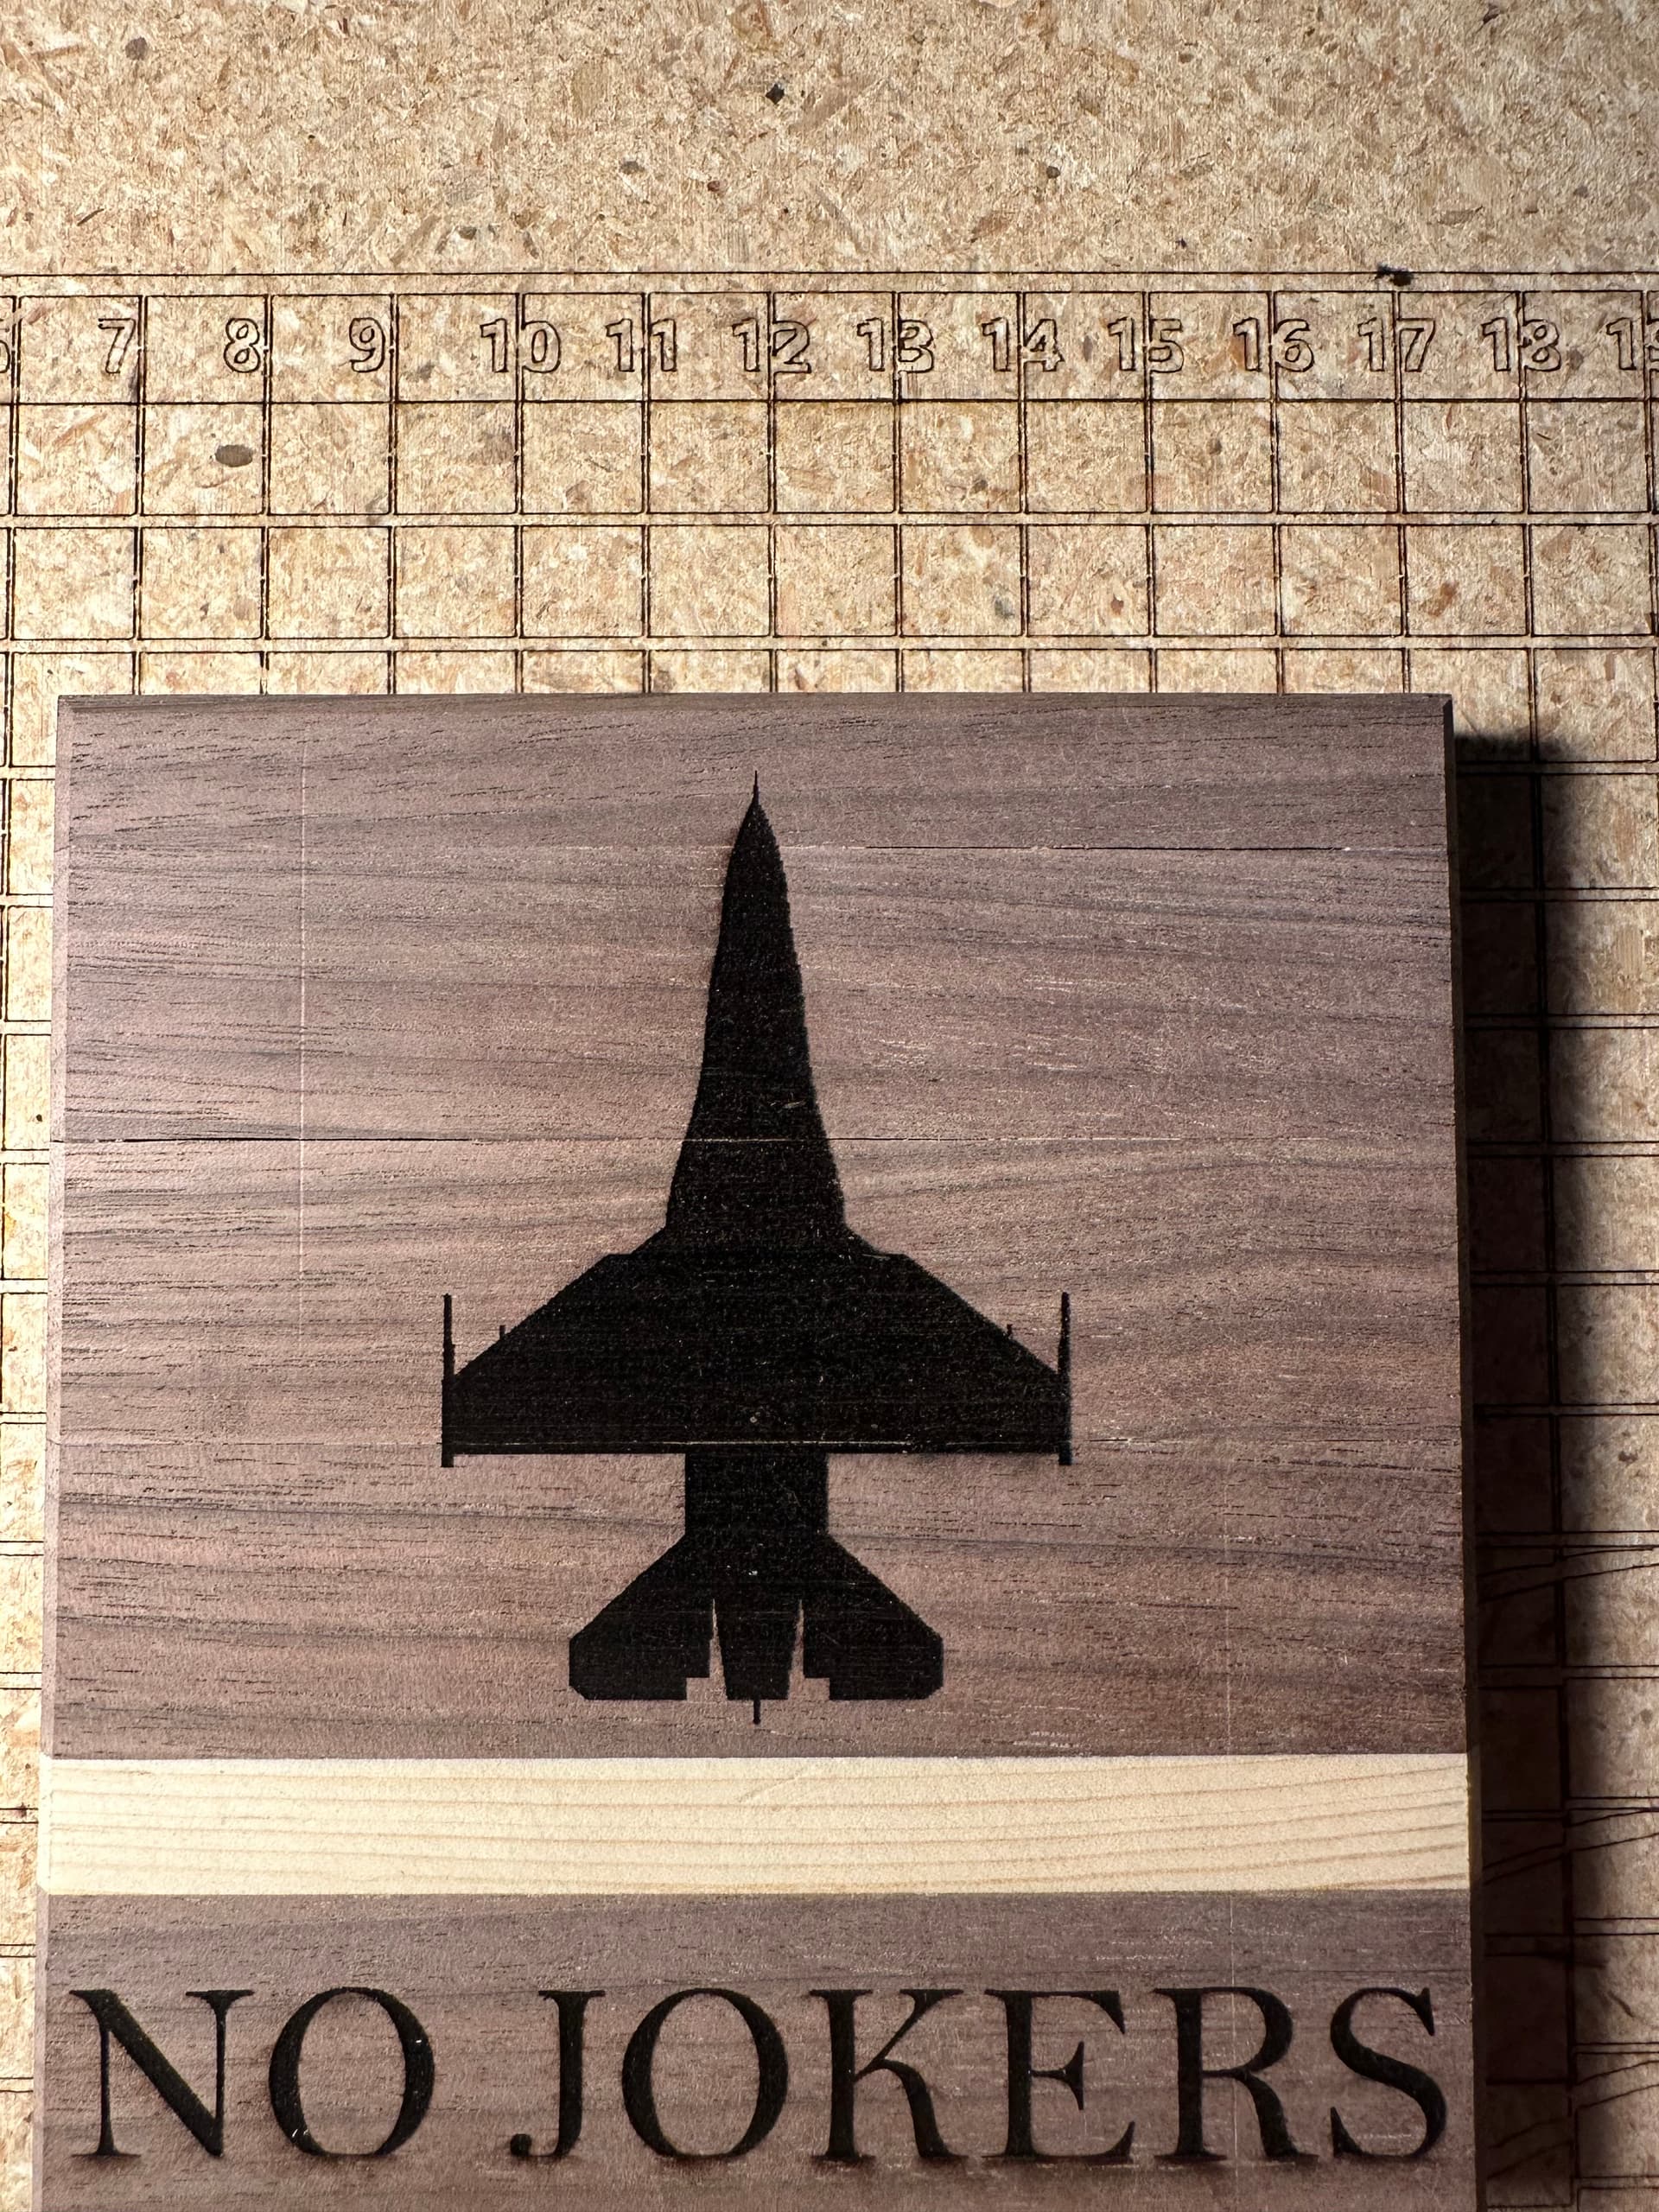
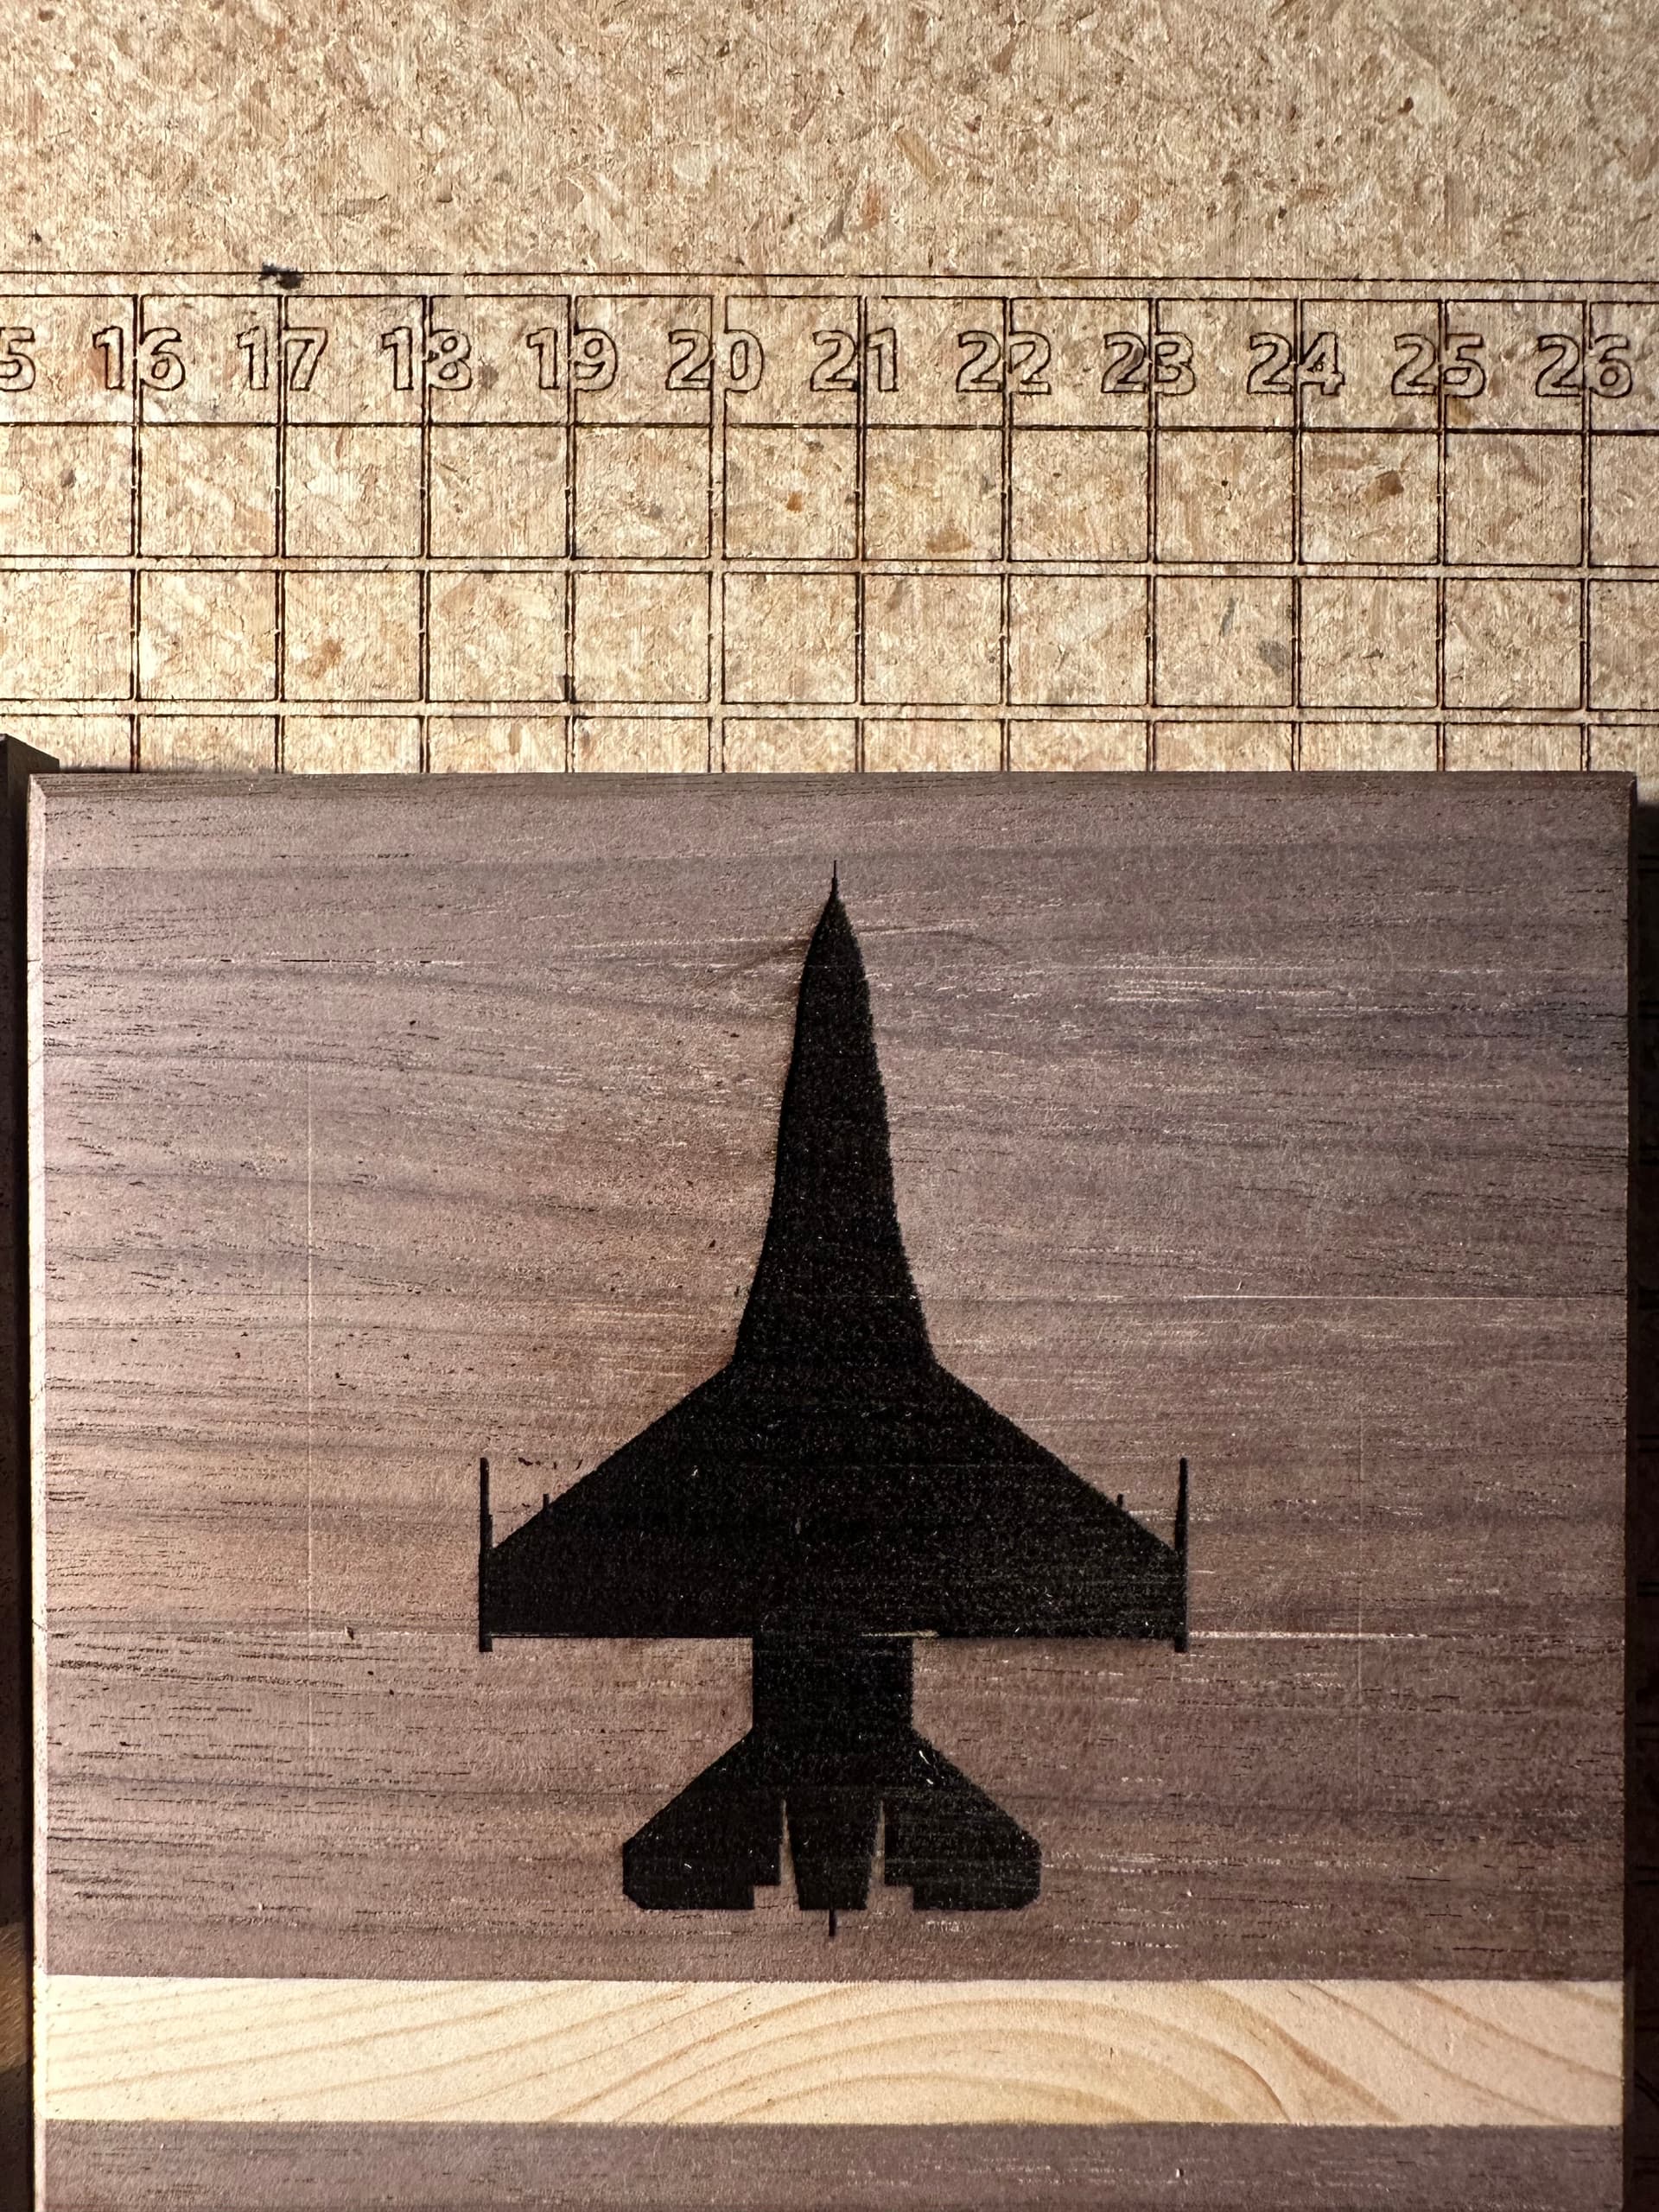
Also could the same test assess what is going on with engraving this image? It engraves incorrectly about half the time and I have no idea why. I have attached the correct and incorrect engravings. You can see the wing of the plane is “bent” which it is not supposed to be.
Perhaps, but diode lasers hide their problems in many other places.
Let’s keep it simple: run the test pattern, take a picture, let’s see what it shows.
I ran the test, it did not come out great but I relized my Y axis belts were quite loose. Tightened them up, ran it again and every time it stops mid job and I get an error.
If the first picture shows the results after the belt adjustments, then it has far more mechanical problems to be corrected.
The screen grab does not show the original problem causing the Job halted on the top line, which causes the error:9 message. When the error happens again, copy the console record from before the first error down to the end, then paste that text in your reply.
I’m guessing, but perhaps this is caused by having the pattern extend beyond the machine boundaries, which can be caused by incorrect homing or improper choice of Job Origin.
If the machine homes correctly, then use Absolute Mode to map the LightBurn workspace to the machine platform. The pattern will then appear on the platform exactly where it appears in the workspace, thus eliminating all the problems with origins.
If the machine does not home correctly or does not have homing switches, then you must manually home it every time you turn it on:
Does the machine having homing switches? If so, does it home correctly? Are you using Absolute Coordinates?
I ran it in absolute coordinates and it did the same thing. It does home properly and runs other jobs without stopping. I have the Ortur LM2 Pro S2 with homing switches. Here are the errors
Up near the top:
Apparently, the test figure shakes your machine in ways it doesn’t normally get moved, which is the whole point of the test figure.
Start by anchoring the legs to the table, so that the frame cannot move. If it’s on a large “waste board”, just screw each leg to the board.
The LM2 User Manual may have other suggestions.
After the frame is secured, run the test and see what happens next.
Please start another thread with those Snapmaker problems, as Snapmaker machines seem to open a whole 'nother can of worms.
A possible LightBurn version incompatibility on a Snapmaker has a completely different debugging process than for an Ortur LM2 with a mechanical problem.
Starting a separate discussion devoted exclusively to solving your problem keeps everybody focused in both threads.
Ok, I see what you mean. I already reported it to betasupport.
This topic was automatically closed 30 days after the last reply. New replies are no longer allowed.