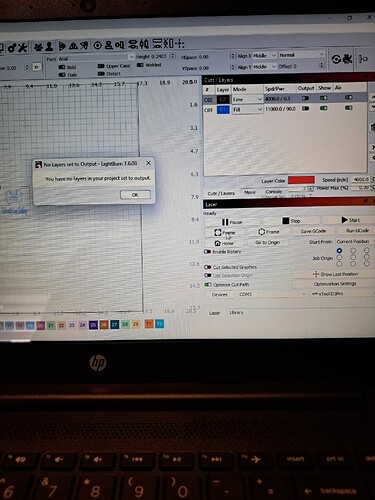
After understanding how to move the green dot now it’s giving me layer error messages. I watched a video on framing a project and tryed testing it to make sure it would run in the center as shown on the video but all I got was this error message. I shut off the output because that’s what was said to do. Please help. I’m so close to getting a project done, but not close enough. Thanks.
You have to have the output turned on for any layer that you wish to engrave. You have all outputs turned off, therefore the error message.
As @thelmuth identifies. Additionally, please share details about the following:
Where? By whom? Looking for the context of this recommendation. ![]()
Tim, Thank you. I understand what I did wrong when testing the area that I wanted framed and I got that down now. But after framing I clicked on start and it did not start the project in the selected framed area. The laser shifted out of the area and off the board to the left, I took video to show you but this system does not allow video, darn it anyhow. Being a newbe is frustrating, have you got any ideas why it won’t stay in the framed area and engrave? Thank you, Timothy
Rick,Technical Evangelist
Thank you. I understand what I did wrong when testing the area that I wanted framed and I got that down now. But after framing I clicked on start and it did not start the project in the selected framed area. The laser shifted out of the area and off the board to the left, I took video to show you but this system does not allow video, darn it anyhow. Being a newbe is frustrating, have you got any ideas why it won’t stay in the framed area and engrave? Thank you, Timothy
You can upload a video to Youtube or other hosting service (Google Drive, etc) and link to it. Please provide a screenshot of your complete Lightburn screen just before clicking start. I’m a little confused on how it can frame properly but try to burn in a different location, maybe the screenshot will provide a clue.
Hello Tim, You can view the video that I did of the problem on my youtube channel.
@timothyohara691 Click on my picture it will take you to my channel. You will see what the issue is on two videos. I will send you a screen shot this afternoon in this Lightburn portal after I set everything back up. Thanks, Timothy
Links to Timothy’s videos.
Framing
Burning
It’s clear that it’s not operating as expected. Waiting on your Lightburn screenshot to hopefully have an answer for you.
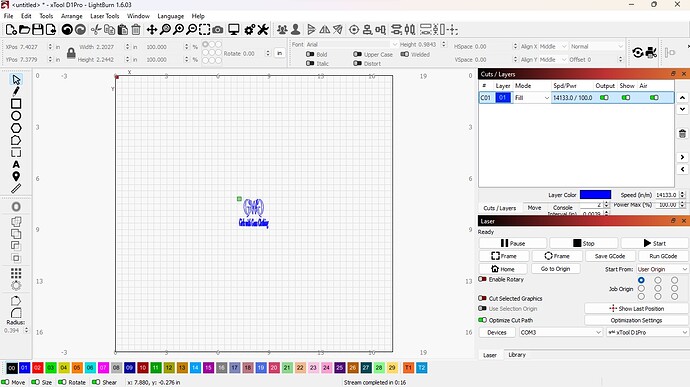
Hello Tim, So I got back into the settings and took screen shots of the settings I used yesterday. The first screen shot is the framing settings that made a perfect box run without burning a shape as you saw in the video. The second screen shot is of when I deleted the red box and the laser ran off the board as you saw in the other video, it did not fire, the laser did not start, so I put the red box settings back up and clicked start. The laser stayed running in the area of
the box but did not fire. Have you any suggestions? Thanks, Timothy
Hi Tim, Oh by the way, The laser fire button is and has been enabled.
I see a problem. You are running at 14133 in/m. That equals 359,000 mm/m, a speed that is not possible to achieve. Change to mm/m in settings (the gear icon) and choose a realistic speed.
You can still desing in inches if you choose by clicking on the mm button next to the rotate setting. That will toggle between inches and mm.

I also recommend using absolute coordinates rather than user origin, at least until you have a good handle on origins. In absolute coords, the position of the item on screen is where it will engrave on your workspace.
Also, there is no need to put a framing box around your design in most cases. Lightburn will frame to the extents of your design.
Pretty much the only time I use a framing box is if I need the design to fit in a certain sized area and then I typically use a tool layer for it.
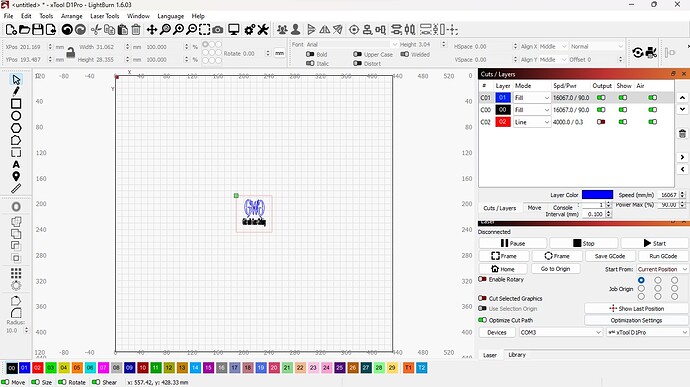
Hello Tim, I finely got the laser and lightburn communicating with one another properly. I was able to frame where I needed it go and engrave in the spot that I chose. I am using a framing box because I need it to engrave in a specific area. Tell me, what is a tool layer that you mentioned for framing? When I made several test runs on a piece of plywood the laser burned into the wood, it cut into the wood enough that you can feel it when you run your finger over the test, it’s not real deep, but it’s there. Is that normal?. I got the settings from a test pattern that one of the laser guru’s on Youtube offered. It was the lightest setting that looked correct. I have not tested on a blackened metal flask yet. I hope it won’t cut into the metal. Attached is a Screen Shot of the settings I used. Thanks for all the help. Timothy
If you look at the far right end of the color layers, you will see T1 &T2. Those are tool layers. You can use them for framing or alignment, etc., but they never output to the laser.
While you can use recommend settings from others as a starting point, you really need to do your own testing with your machine and materials. 2 identical lasers can require slightly different settings as they are not manufactured with great precision and testing and also your environment plays a part in the output of your laser. Temperature, humidity level, etc.
Yes, removing material from wood is absolutely normal.
A diode laser won’t cut metal. When you say blackened metal flask, are you talking about using a marking spray on it, or is it powder coated or otherwise painted?
Good Sunday Morning to you Tim,
I want to thank you for your helpful information that has assisted me in understanding Lightburn more. Everyone on this forum that has contributed helpful tips have been much appreciated and has made it easier to overcome the feeling of intimidation just starting out as a laserpreneur. This Old Dog can learn new tricks! You asked me a question about the blackened flask, the flask is powder coated. I will run a test grid on one today to get a sence of what speed and power setting I should use. I am sure there is more to learn about Lightburn and i’m sure I’ll have more questions and more issues to solve. This forum is a big help for newbe’s Thanks again. Timothy
Perfect.
I find powder coated to be pretty easy to achieve good results. In addition to speed/power settings, pay attention to LPI as well. Sometimes you need to increase LPI to get rid of faint lines in your engraving.
Tim, Thanks again but I don’t know what this is. [quote=“thelmuth, post:18, topic:146777”]
pay attention to LPI as well. Sometimes you need to increase LPI to get rid of faint lines in your engraving.
[/quote] Where do I find this LPI and what does it stand for?
LPI is lines per inch. That is how may times your laser scans back and forth in 1 inch. It is selected in your layer settings dialogue. Double click on the layer to bring this up. It corresponds directly to the interval setting.
Basically, the more lines per inch, the closer together the passes that your laser makes. To demonstrate, make a box on your screen and set it to fill mode. Open the layer settings and set LPI to 100 then open the preview window. It will show the scan lines fairly far apart. Close the preview and change the LPI to 300 and open the preview again. The scan lines will be very close together.
When dealing with a powder coated item if the scan lines are too far apart, there will be lines of unturned residue. You can drastically crease the LPI to get rid of the lines, but the higher the LPI, the longer the burn takes. You need to find the setting that gets rid of the lines without taking excessive time.
It seems to me that you would benefit greatly by reading some of the beginner pathway items in the docs to understand the terminology and basics of the program.


