I don’t see how that would be possible.
LightBurn Puzzle2-3-22.lbrn (180.2 KB)
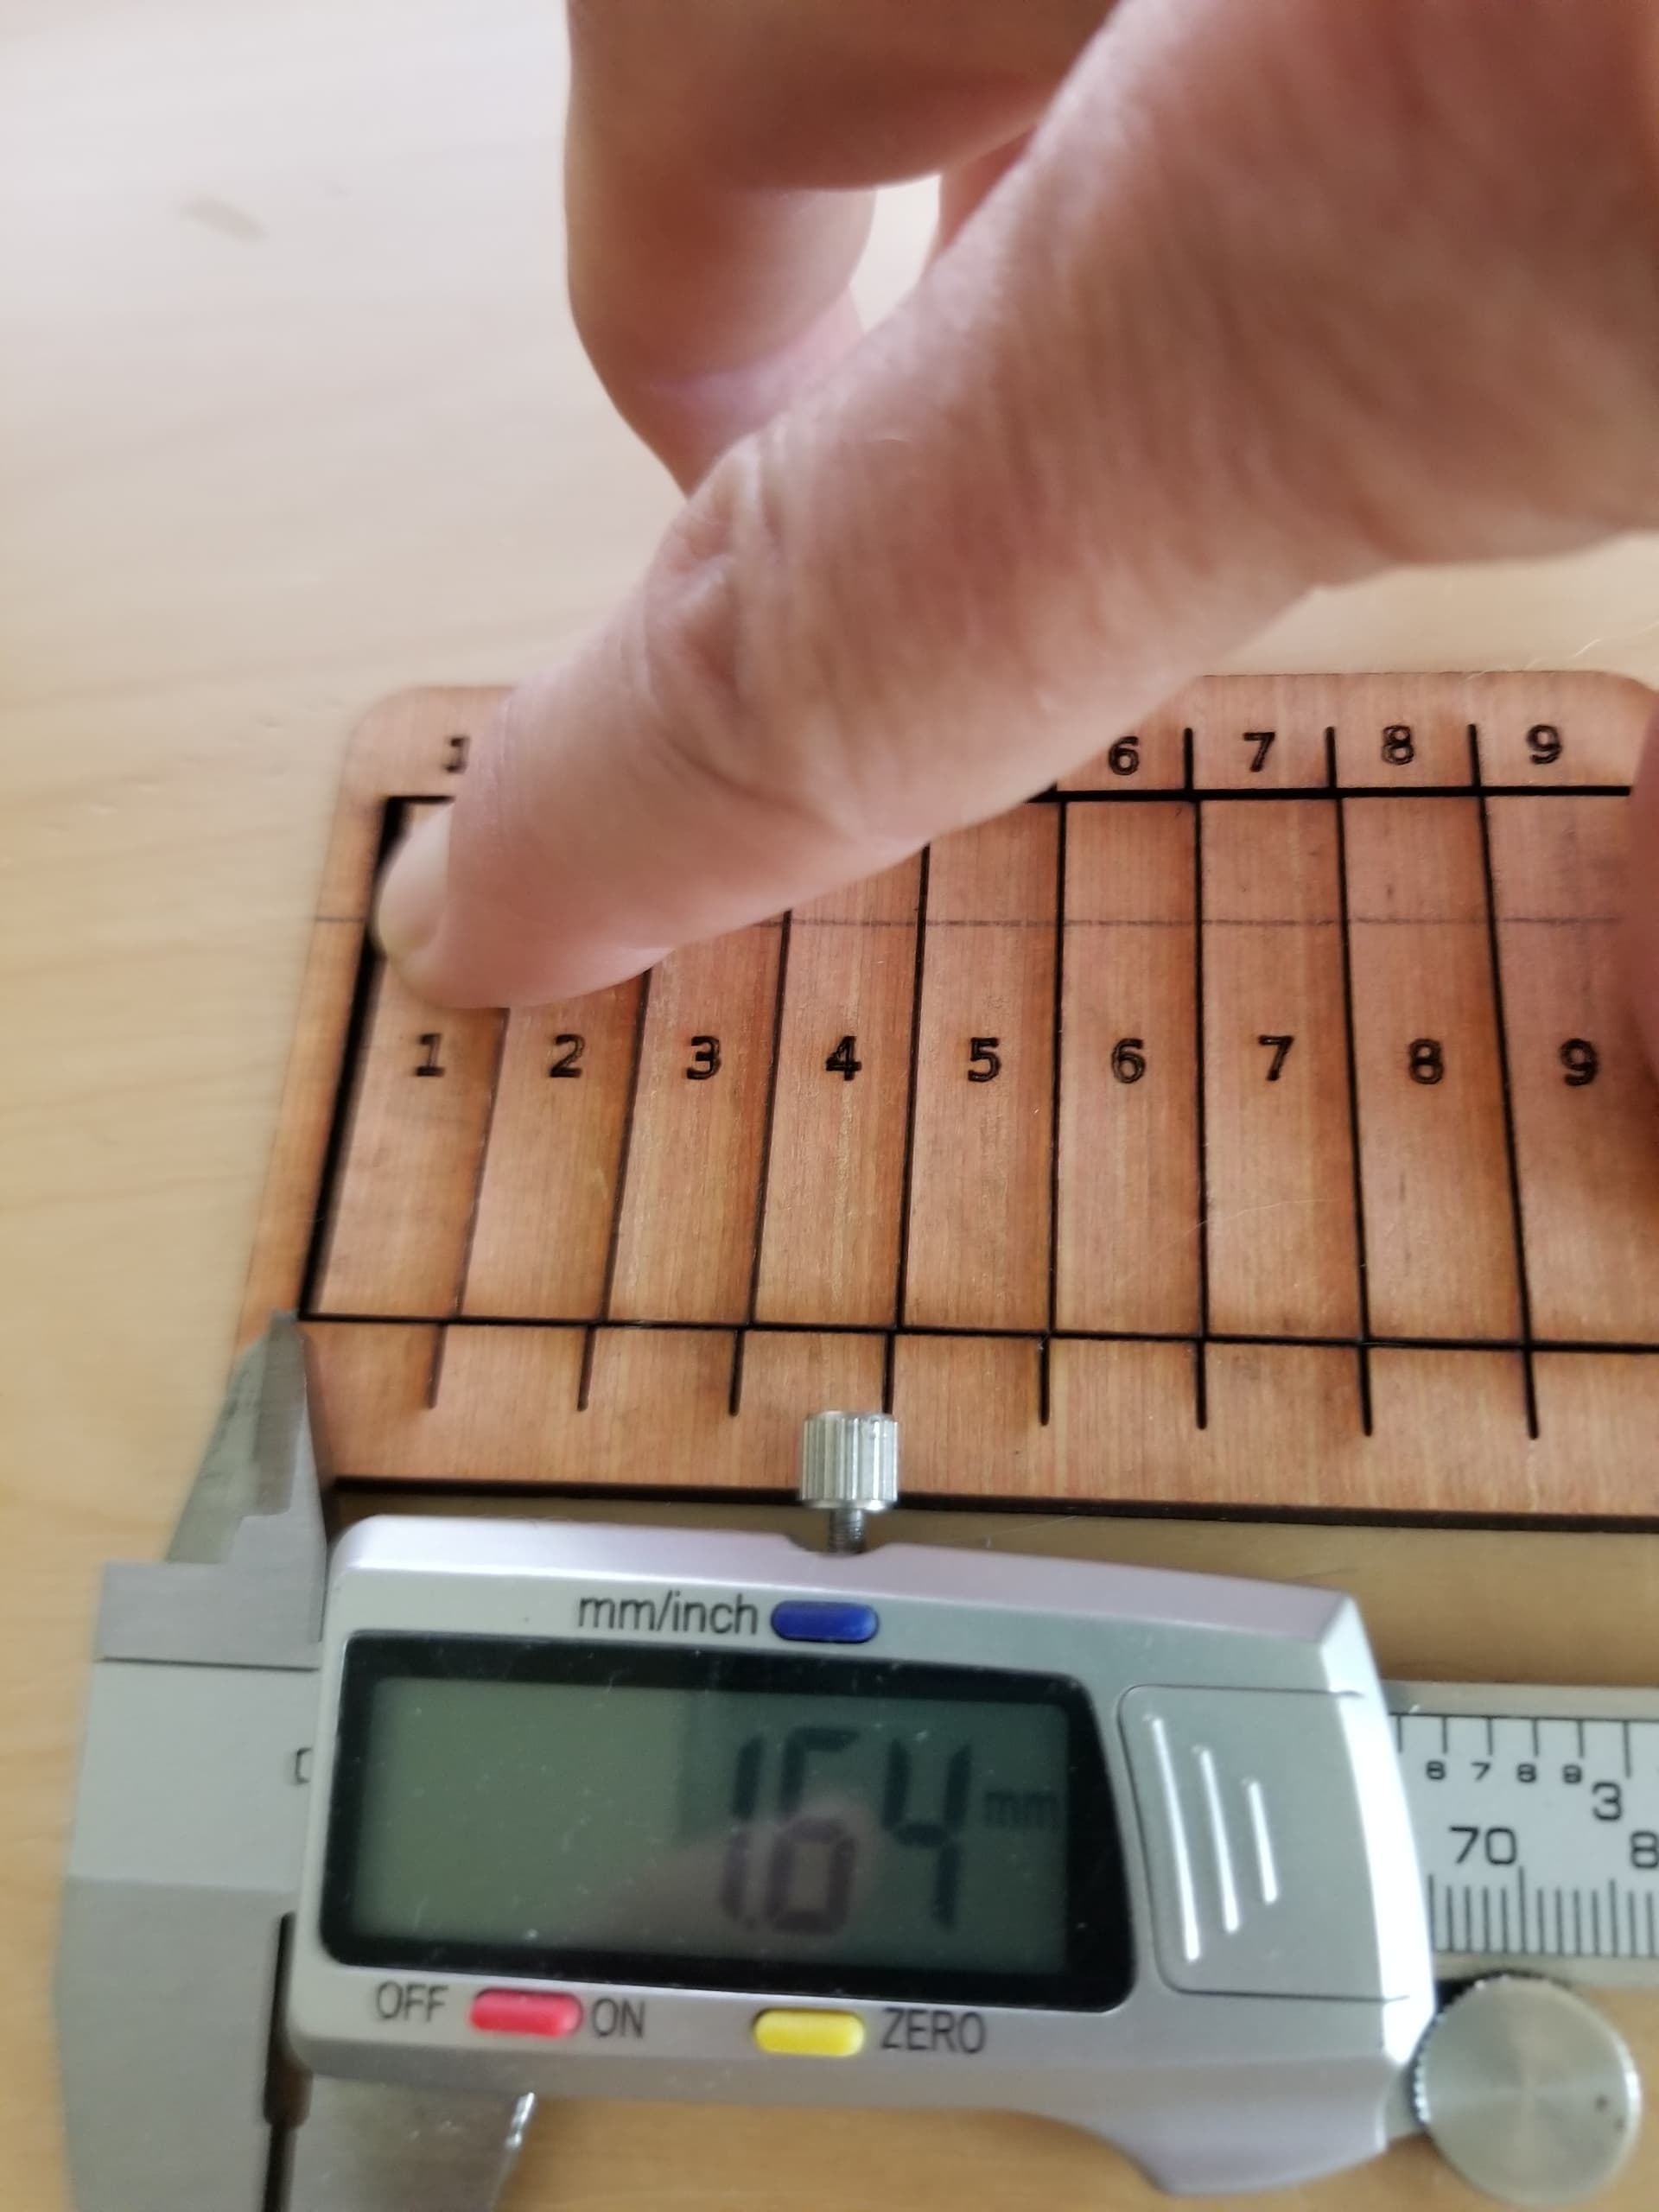
I used my calipers to measure front and back of both puzzles widthwise.
Both settings have the same difference in width, top and bottom which is .33mm
Yes and I too have done some cutting with a 1.5mm lens. Again, though I have been cutting 5mm plywood with both lenses. I get tight enough fit for me, my kids and Grand kids may have another opinion. lol I intend to have family members play with the puzzles I distribute to them. Probably interesting to see what I hear from them since they vary from Professional Graphic designer to Opera Singer.
1 Like
Okay. This is what I would expect.
Reviewed your file. It’s what I suspected.
Note that there are 3 layers: 1 for vertical lines, 1 for horizontal lines, and 1 outer border.
Only the outer border is a closed shape. The other 2 layers with lines are not closed shapes. Thus, only the outer border would be modified by the kerf setting.
And again, if your goal is to have tighter fitting puzzle pieces you are going to have to approach this entirely differently as each piece will need to be its own closed shape. And you will not be able to cut the pieces in-place. They will need to have physical separation between pieces. This will complicate the image layer as well since they will need to be aligned to each piece which is now no longer embedded in a contiguous sheet.
I am not going to make each individual piece separately and haven’t had any desire to do so. I understand the layers and why the border is a closed shape.
I feel we have provided information that maybe someone else less curious wouldn’t consider. If Ididn’t have you folks to bounce these crazy ideas off of I wouldn’t learn anything except what I personally think.
I appreciate the time all of you have devoted to my questions etc. As I replied to Patrick above the tolerance between the pieces as I am cutting now are okay with me. We shall see what the family has to say.
2 Likes
One last thought, for today. Since I am cutting these from plywood they will naturally change size albeit a small amount. If we were to cut the pieces too tight of course there would be a big problem with them fitting together at all in high humidity storage.
I’ve learned differently. The beam doesn’t seem to actually do the cutting directly after the first few mm in most materials like acrylic, plywood, and lumber. I get absolutely straight cuts in 2x4’s with that SAME 0.3mm kerf, and that’s with a 2" lens.
The same is not true of polyethylene foam, which allows me to cut only a few mm and then nothing, because the foam recedes from the cut and can no longer channel the thermal lance of hot gas to cut further.
A lesson I learned:
- Kerf of course only applies to simple closed shapes
- Non-simple closed shapes are different. In Lightburn, a bowtie of 4 vectors will break the output
- Lightburn does not currently understand kerf of nested closed shapes. For example, say you cut a 10mm square hole inside of a 30mm square, expecting a 10mm thick wall. Well, if you put them on the same layer and select a positive “outward” kerf, the inner hole will have the kerf going the wrong way. They must be on different layers, the hole needs to be a negative kerf.
- If you use the Line tool to draw a shape, even with the endpoints snapped together, they are NOT necessarily a closed shape and LB may pass them over silently and fail to kerf it.
Example: Build a square right now with the pencil. Let’s call top left corner “one”, top right “two”, bottom right “three”, bottom left “four”. Normal clickthrough would be 1,2,3,4,1. But instead do 1,2,3, stop. Then draw 1,4,3. The points snap, but LB does NOT consider this a closed shape, and “close path” will NOT close it. Only “optimize shape” does. Probably a bug
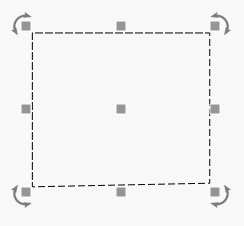
Can you elaborate on this shape? Not sure what you meant by 4 vectors. But this simple bowtie sample worked without a problem:

I tested this and did not have a problem. The key may be that you need to actively make sure the points are actively connected, not just aligned. It will be apparent because only one segment of the square will be selected when clicked. Alternatively, you can use auto-join selected shapes to force this.
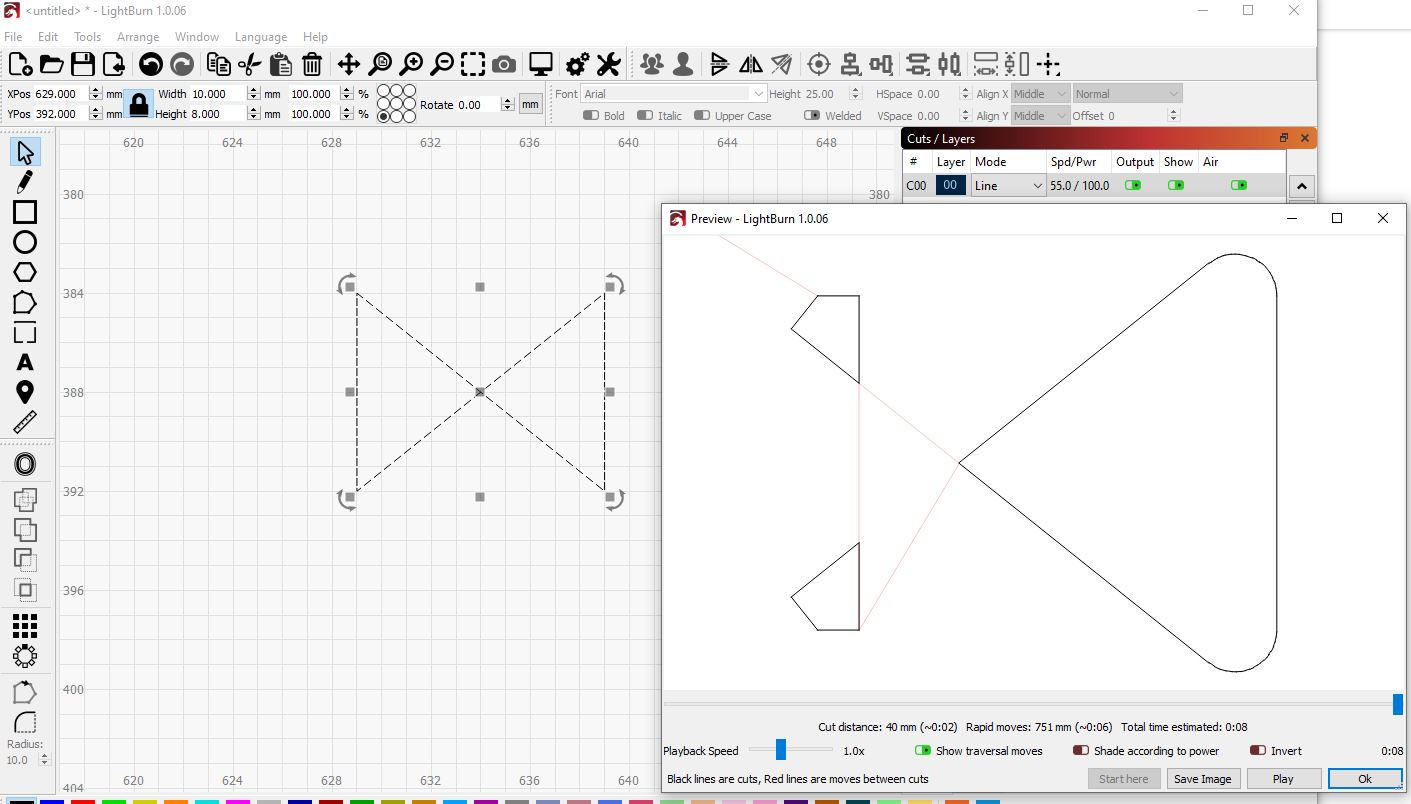
I mean an actual bowtie of 4 vertices. With a 1mm kerf to make it obvious, I get this:
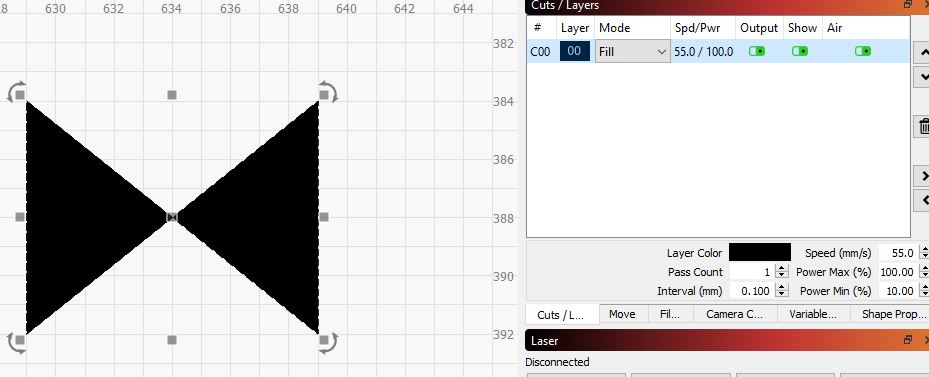
Oddly, Fill DOES know it’s closed shapes and fills it as two triangles.
I was certain that I had the crosshairs that indicate it’s snapping to a prior endpoint on the second 2 sides. It should be connected IMHO, but it’s not.
I tested, I misremembered. “Close Path” does not fix. “Optimize” does not work. “Auto Join” DOES fix it and make it a closed shape
I was looking for some sort of obvious indicator for how to determine if a path was closed or not, but came up with nothing simple. I really liked VCarve in that it has “Select All Open Paths” and “Select All Duplicate Paths” and you can see what they are. Also, from Select All Duplicate Paths, you can just hit delete and it leaves all but one so it’s an obvious way to fix it without another feature in the UI.
Ah… okay. This is because the shape rotates in on itself. The outside becomes the inside.
I believe this is because fill is only concerned with if something is closed or not. However, the direction of the vertices on one side of the ribbon are going in one direction and in the opposite direction on the other side. This can actually cause some unexpected behaviors at times. This is why you’ll see the ability to reverse path in most illustration programs.
This is more a design choice. The Draw Lines tool will never auto-join to an existing line when a new line is started. Only line segments drawn continuously will be joined. I could see the argument that these should auto-join but then what should the behavior be when you cross a line or intersect with a line at a point without a node. Should one be created?
The closest thing to this in LightBurn is Select open shapes and Select open shapes set to fill but these aren’t particularly powerful or useful from what I’ve seen.
Thanks for the puzzle file…
I have yet to understand why you are even using kerf on this project.
The shapes are open, so how is Lightburn going to know what is inside and what is outside…?
Could be that the kerf isn’t doing anything with open shapes.?
You’ve never stated how you came upon the 0.075 kerf you refer…
I measure mine, do you?

Using kerf was simply part of “seeing what would happen”.
I am done with that experiment. Had to prove it to myself.
The .075 was happenstance. I do measure but I am almost convinced it doesn’t matter when doing jigsaw puzzles.
I could see no advantage looking at the cut.
I have a pattern I make 10 cuts, and measure the difference, divide by 10…
kerf-master-00.lbrn2 (71.4 KB)
1 Like
I can’t open your kerf-master-00.lbrn
I am on a Mac with Safari. Will try with another browser when I go into office.
I downloaded it and Lightburn read it ok…
I would think it would read another ‘unix’ like machine more likely than a windows variant…
I don’t think Lightburn can apply the kerf to anything that is not a closed shape. So there would be no change in the part…
Not exactly true. Based on my years as a carpenter, the length of a piece being cross-cut depended on the use of the saw’s kerf: Inside the line, one the line and outside the line. And when cutting “identical” lengths from a longer piece, kerf needed to be accounted for during layout (though these are not really unclosed shapes).
Just a thought…
@NurseBob, I wasn’t implying that you don’t need a kerf adjustment.
What I was saying is the Lightburn can’t put a kerf on something that isn’t closed.
I can’t cut a line and ‘line’ the ‘edge’ of the laser blade to the line, like I would a table saw.
I cut boxes larger than the machine can take in one ‘part’ and have that difficulty. I can’t adjust kerf on the ‘end’ parts since they are not closed.
I make a full kerf adjustment to the individual parts that interlock.
The top and left side parts, I can apply a kerf. The ‘selected’ corner of the large piece will not allow the operation.

It’s symmetrical, so I cut each corner separately.
It would be nice if there was a way to inform Lightburn which is the ‘outside’…
@jkwilborn has I think covered it but wanted to make one clarification. Kerf as a general concept of course still applies and what you describe makes sense in that context.
How the term kerf is used in LightBurn is very really specific to the “kerf offset” context within the cut settings. For example, if I was new to LightBurn and saw the kerf offset my assumption would be that I would enter the size of the known kerf of my laser cut on that given material. However, that’s not how it works. The value you put in kerf offset would have to be half the known kerf for that material because it literally just means how much to in/out-set the cut. And again, only with closed shapes.