We’re heading back up to the Smokies soon, and we managed to snag a late cancellation opening at LeConte Lodge on top of the Mount LeConte. We’ve stayed at the Lodge many times now (and we’re booked again deep into November), and I’ve made it a personal tradition to bring some souvenirs of one kind or another to give to our friends on staff, our dinner table group, etc. It gives me an excuse to play around, and I’ve done terrain relief carvings, wooden trail map tags/zipper pulls, engraved cedar plank maps, and all sorts of other things. So, I figured this time I’d weigh down my backpack with a bunch of rocks. ![]()
Specifically, my stock shelves have a big bin of slate coasters, and I figured I’d see what I could do with the fiber laser. (I’ve previously engraved trail maps on them with my CO2 laser, but that just colors the surface. The fiber laser can actually carve into them.) I ended up with multiple layers, each with different settings:
- The main “Mount LeConte” does a deep engrave and then an additional sublayer that vitrifies the surface, giving it a slightly bubbly glassy texture inside the letters (which in addition to looking cool also greatly improves wet contrast).
- The coordinates, elevation, and trail names do a similar two-step process, but I halved the line interval and dropped the power from 70% to 50% to keep the characters crisp. If I used the large-characters settings, the smaller characters get melty-bubbly.
- The two-letter labels and their key on the bottom arc are similar to the smaller characters, but they don’t have the second sublayer. They small enough they don’t really have a “bottom” surface, so the vitrification sublayer would just melt the edges together.
- The trailhead “T” markers are close to the smaller-character two-part settings, but tweaked a bit for personal preference.
- And finally, the trails… While all the other layers are set to “Fill shapes individually” (with the settings tweaked for that), since the trails are one unit, they’re set to “Flood Fill”. That drastically reduces the time to engrave them (~30s vs ~3:30). I’m using the two-step process for aesthetic reasons, but with backed-off settings to prevent melting. Also, the first (engrave) sublayer is set to three passes with autorotation (13°), which seems to do well at preventing flood-fill edges from showing up.
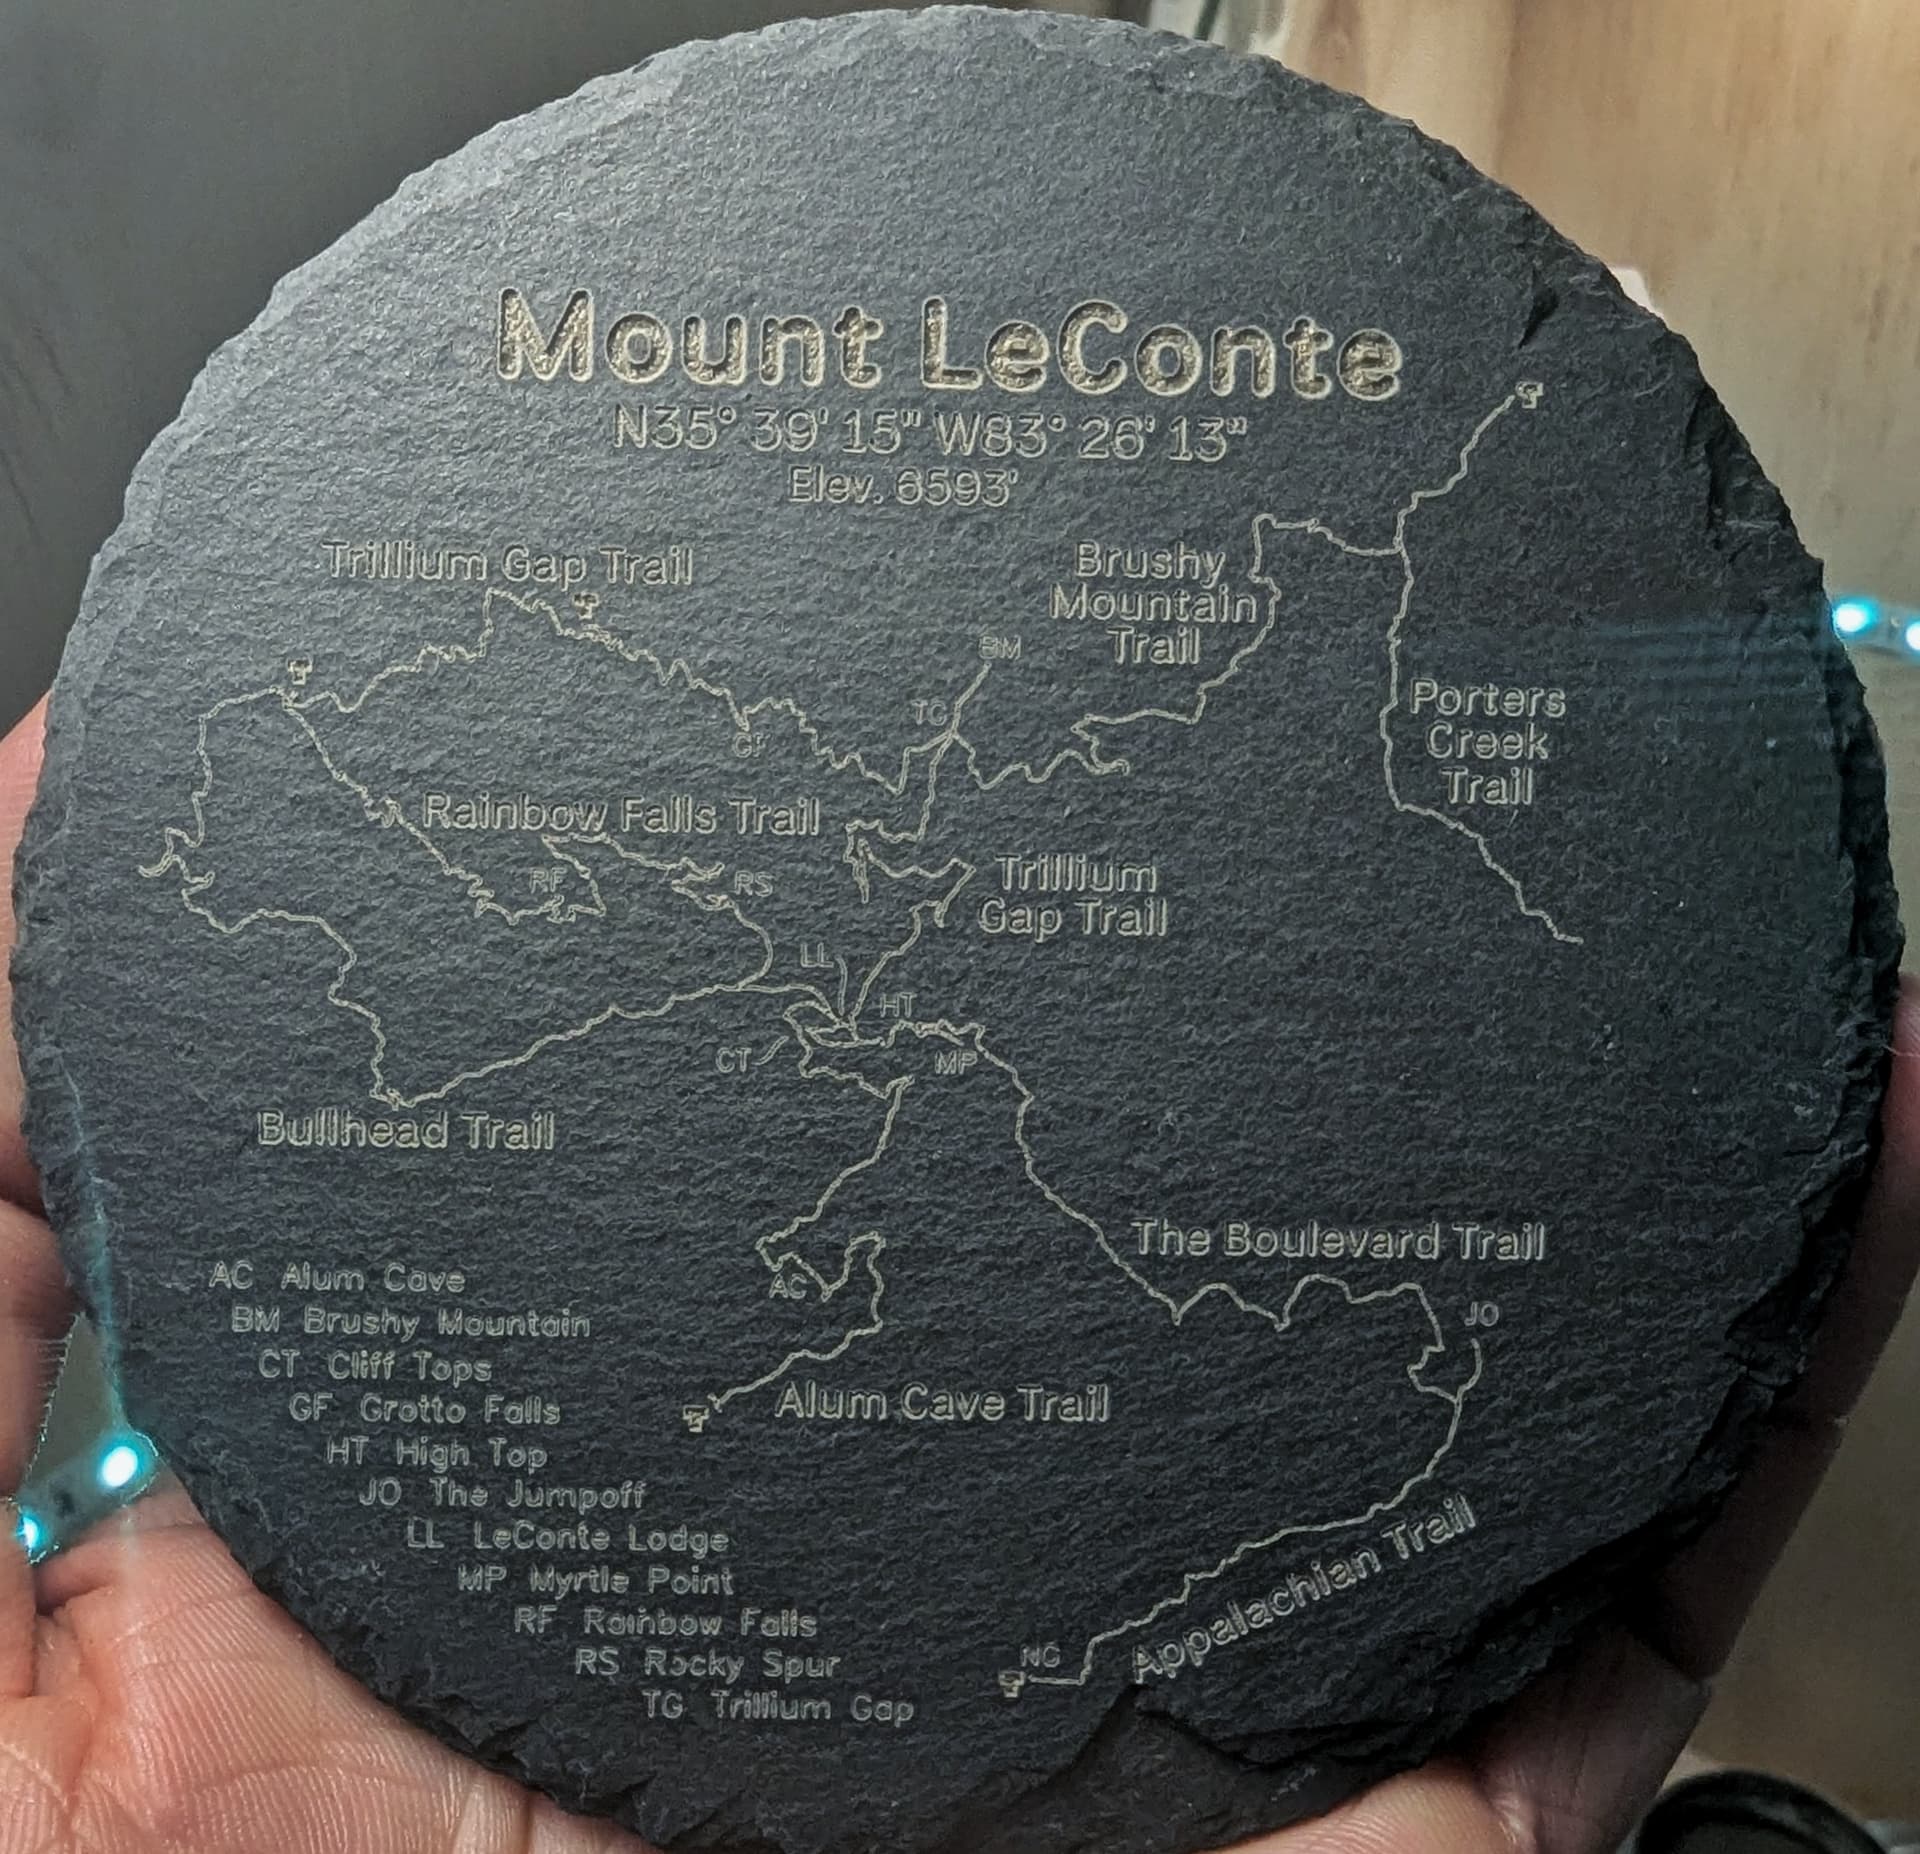
Once I had the design and settings all dialed in, I also went back and used the “Cut Order Priority” setting in the “Shape Properties” window to manually sequence the items in each layer. Each line of text, trail name, and label are grouped and assigned a priority, with the sequence basically walking around the coaster in what seemed like a decent pattern to me. This cut down the amount of random-looking travel, optimizing machine time but also making it easy to know where in a coaster’s engraving you are at any particular moment.
With the settings I ended up with, it takes 3:08 on my machine to do everything, and it sounds really cool as it goes. I recorded a quick potato-vision video (with phone-recorded ambient audio) of a full engrave. I like the four trailheads right at the end, which are almost like a notification that it’s time to open the door and swap in another coaster. ![]()

I figure I’ll make… hmm… maybe a dozen and a half to properly weigh down my backpack. Seems like a good use of a morning with far too many thunderstorms around to get my intended 42-mile bike ride in.