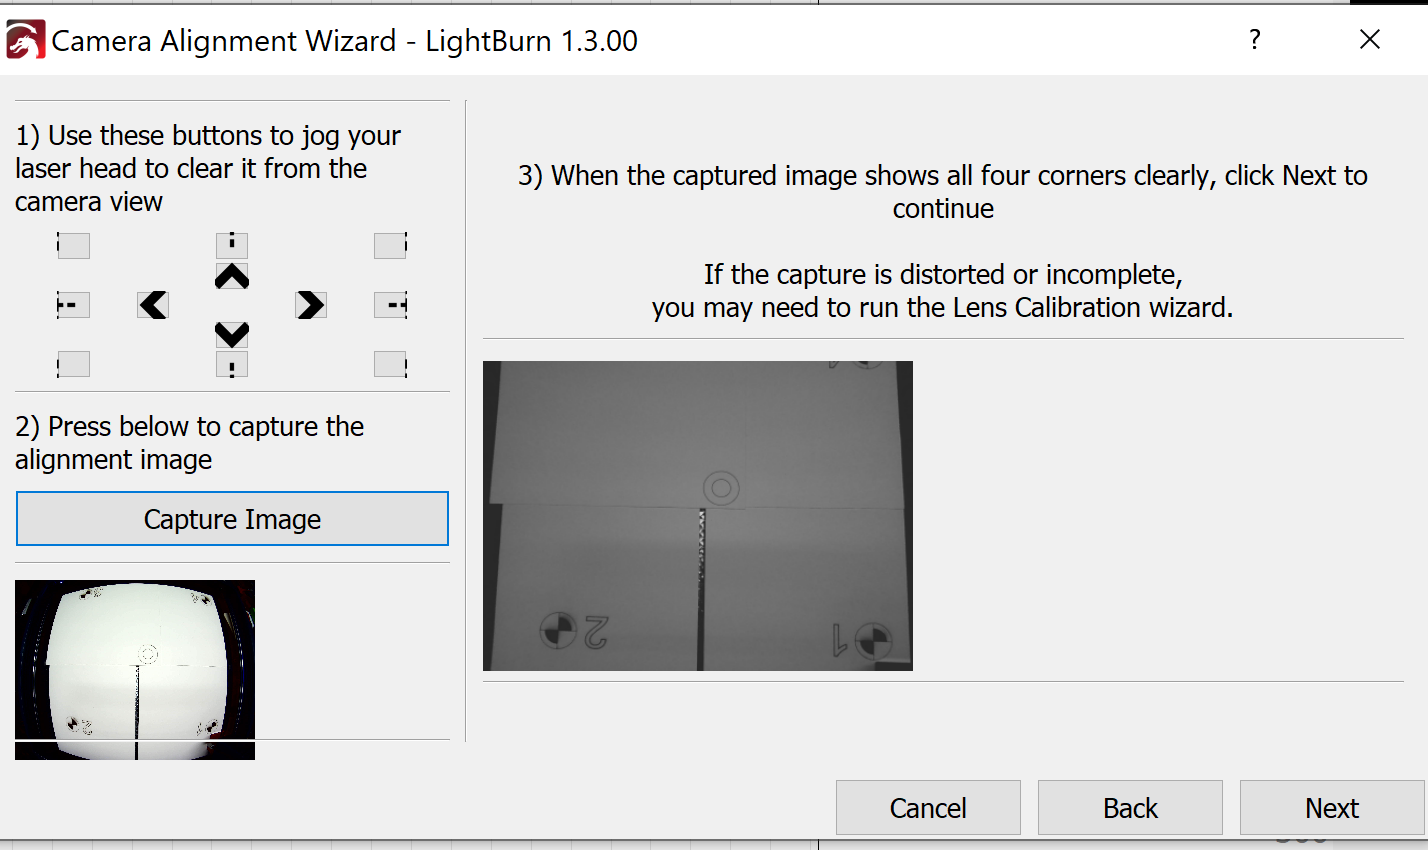
Hi all, I have run through the lens calibration process for my xTool D1 (and the camera kit from here) about 15 times now and every time I end up with the quarter of the image closest to the front of the machine cut off, despite the fact that the raw image from the camera can clearly see the whole workspace. My lens calibration scores are always below .3 and completes with no issues until I get to the alignment process in which it can’t see all of the alignment points.
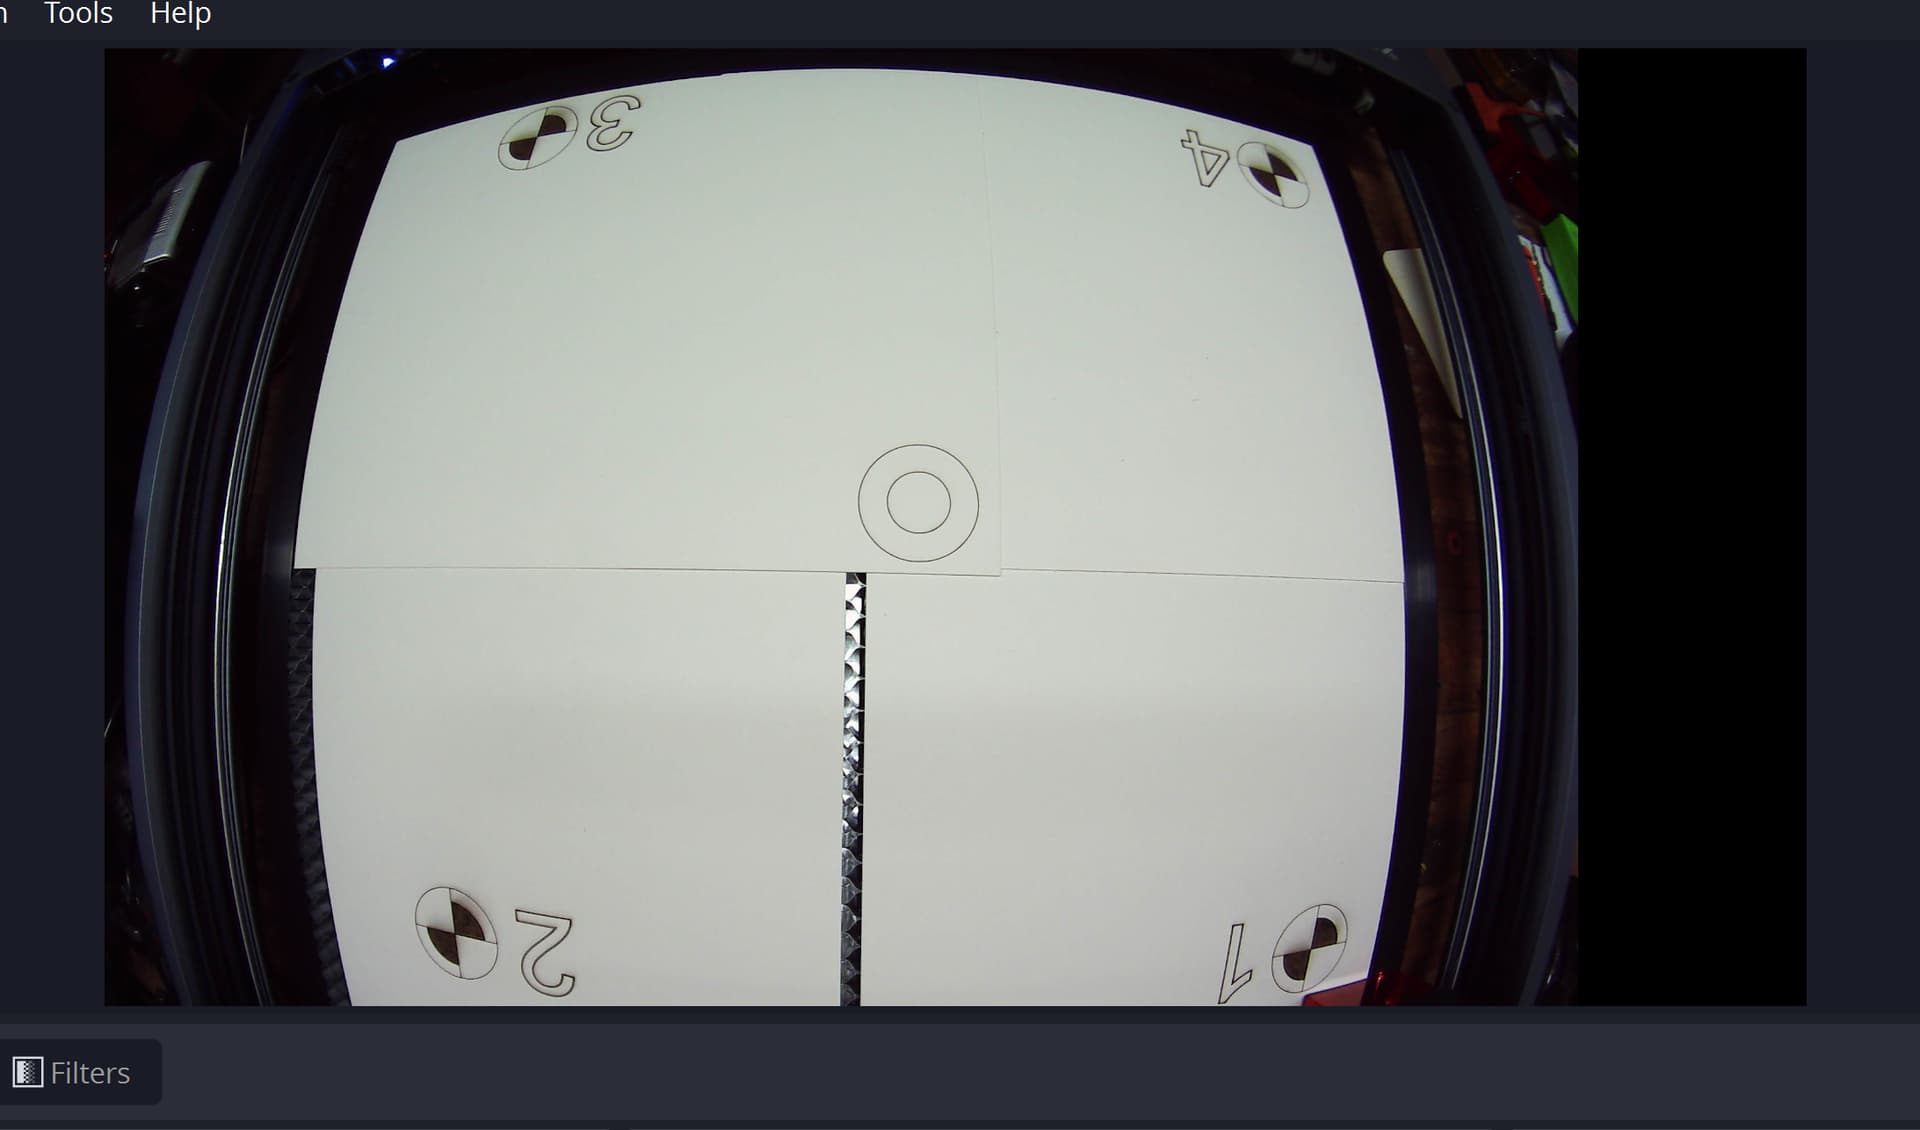
Here is the raw image:
No. It’s visible in Device Settings. However, if you imported the .lbdev file from xTool then you’re good.
In that case I’m guessing that either you still have a calibration issue or the position of the camera is making it difficult to capture.
To confirm, you made a brand new set of targets and then immediately captured this image without any movement in the targets?
If yes, you may want to reposition the camera such that the top and bottom are more even.
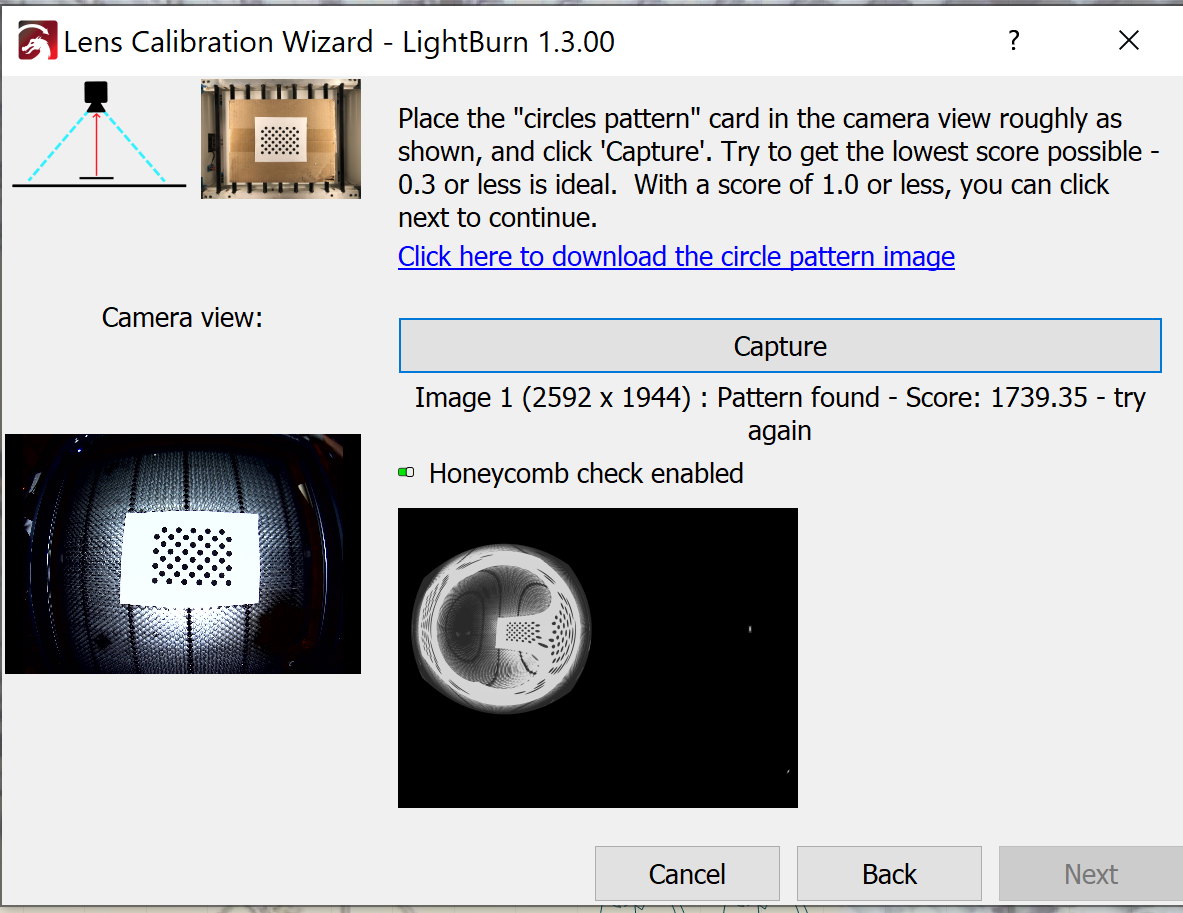
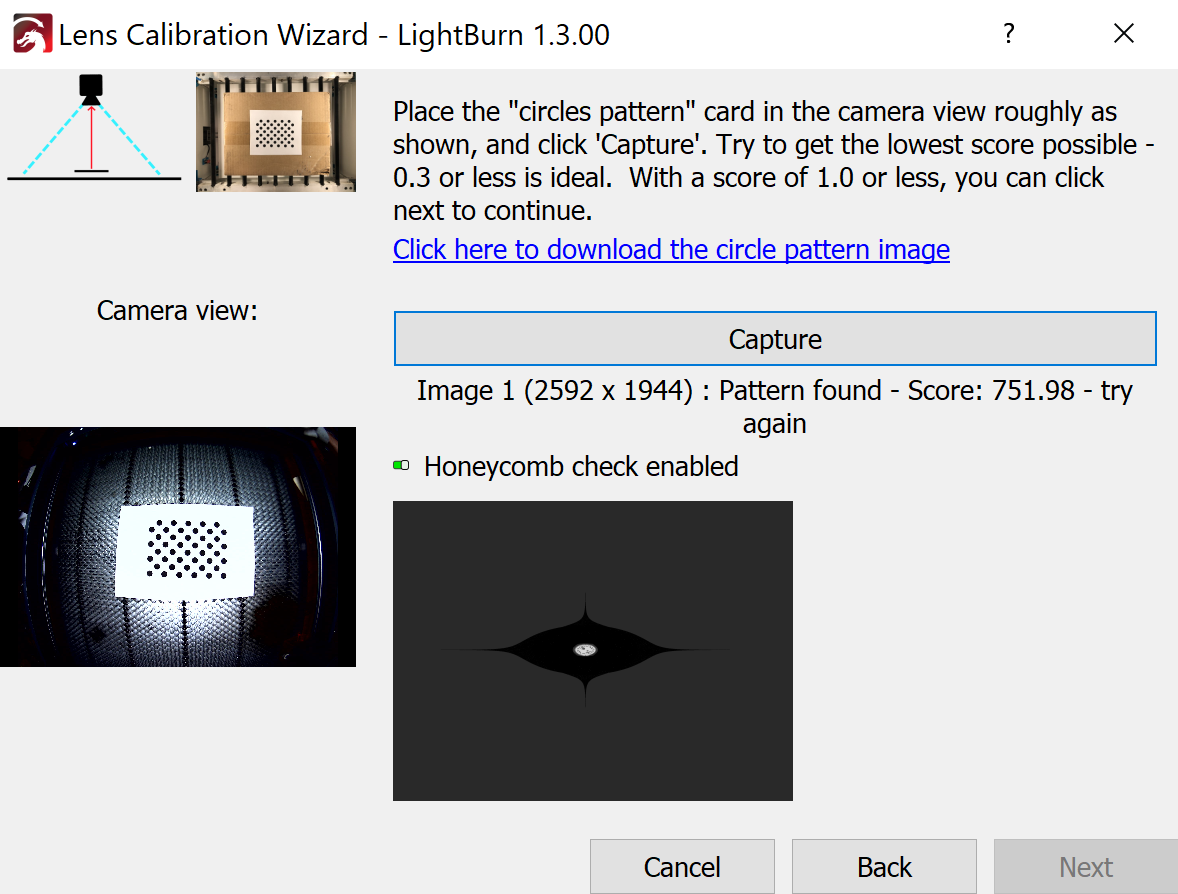
Separately, when you say that all captures during lens calibration were under .3, what types of scores were you getting? Ideally you’d get all greats or better.
Yeah, I did import the .lbdev file and confirmed the info in the Device Settings.
And yes, I made a new set of targets for the image above. I repositioned the camera a few more times and finally got it to capture all four of the targets, however, the overlay it finally produced is not a square and it’s a bit inaccurate after a little testing. I feel like something is fundamentally wrong because I’ve now watched a number of other people do this and they get it on the first try with no trouble.
And yeah, all of my scores were like ~.25 which is “Great”.
It may not be a square if it’s doing a lot of correction. So images outside of view will not be shown. But all the lines in the image should be straight, as in distortion corrected.
They’re likely only showing you the time that it worked or possibly an edited video. This can definitely be a fussy process, especially if you’re trying to dial it in.
When you’re doing calibration are you using the “fisheye” choice?
Sure, that makes sense; it seems less inaccurate in the center actually, it’s off by a mm or more in both x and y closer to the home corner.
And that’s fair, but still, the outcomes look better too. As in, they are actually able to get a square image with the same camera, mount, and cutter. And no, fisheye fails entirely for me; every time I capture in that mode I get distorted or entirely blacked out images.
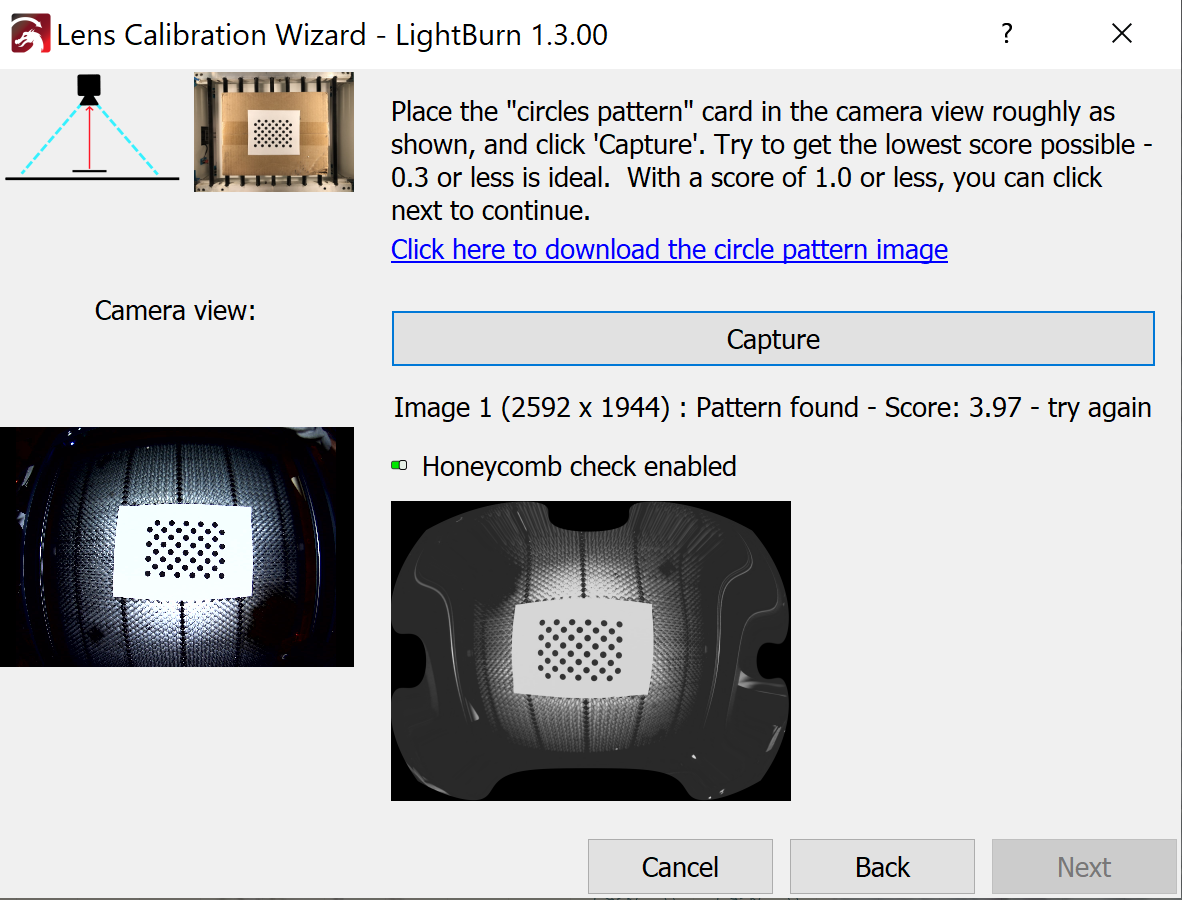
This happens. I suggest you block out the honeycomb bed as that can confuse the calibration process. If you can cover the whole bed with a consistent material that’s ideal. Also, not clear from the screenshot but I’d suggest you paste the calibration card to a known flat surface like MDF or poster board. I say paste as you want the entire surface to be evenly adhered. Tape is not ideal. You really want the card to be as flat as possible. Any distortion in the card will result in worse results.
It may be difficult since the camera is already mounted but it may be easier to do this with the camera out of the laser. Lighting goes a long way to affecting scores. Ideally you’d be in a well lit room full of diffracted light, nothing harsh or casting shadows. Try to get as close to that as possible. But again, the score is what’s important so if you’re getting great scores then that should be sufficient in terms of lighting.
Thanks; I’ll keep working through it with this in mind. I have it in a workable state, it just seemed to take far longer than it should have and it’s still not quite accurate. Thank you for your input.