I have checked in the forums but not found my exact issue (maybe it’s there and I missed it?)
What I am running into is that between LightBurn and the Laser a large portion of burn areas are being dropped out. Specifically areas that have light or medium shading or small burn dots.
I have run MANY tests trying different ways to work around this problem but nothing I have done gets me to where I feel I should be with it.
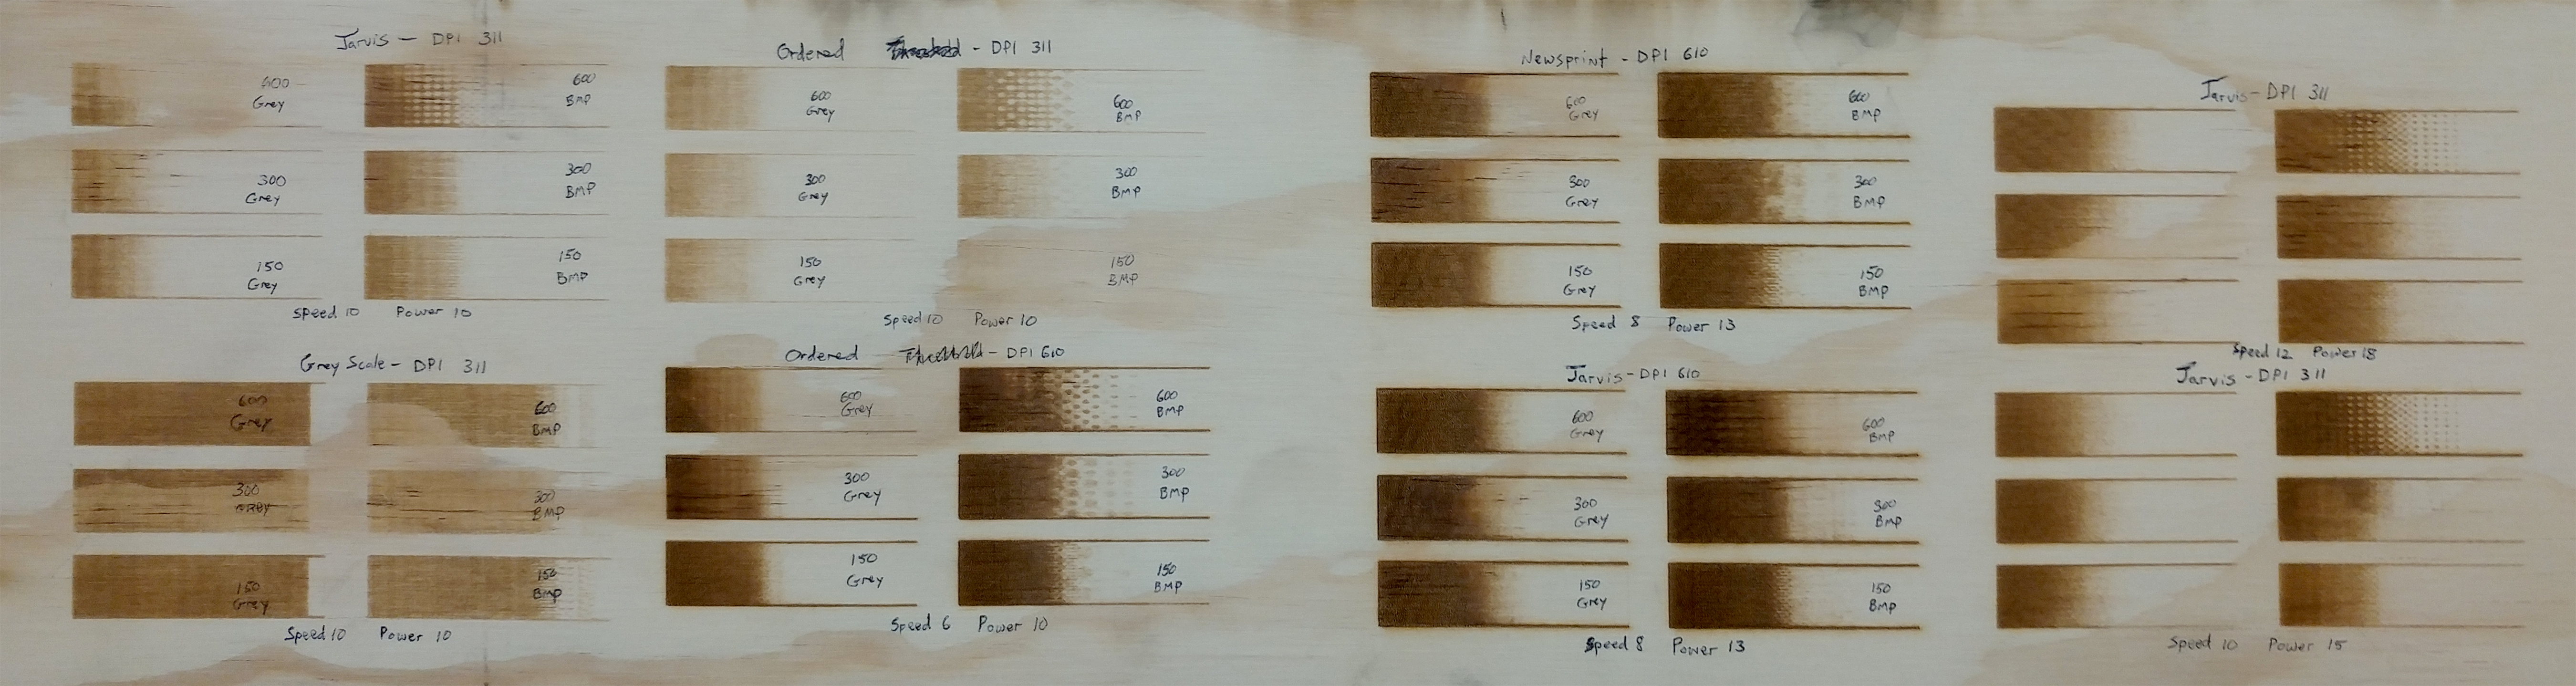
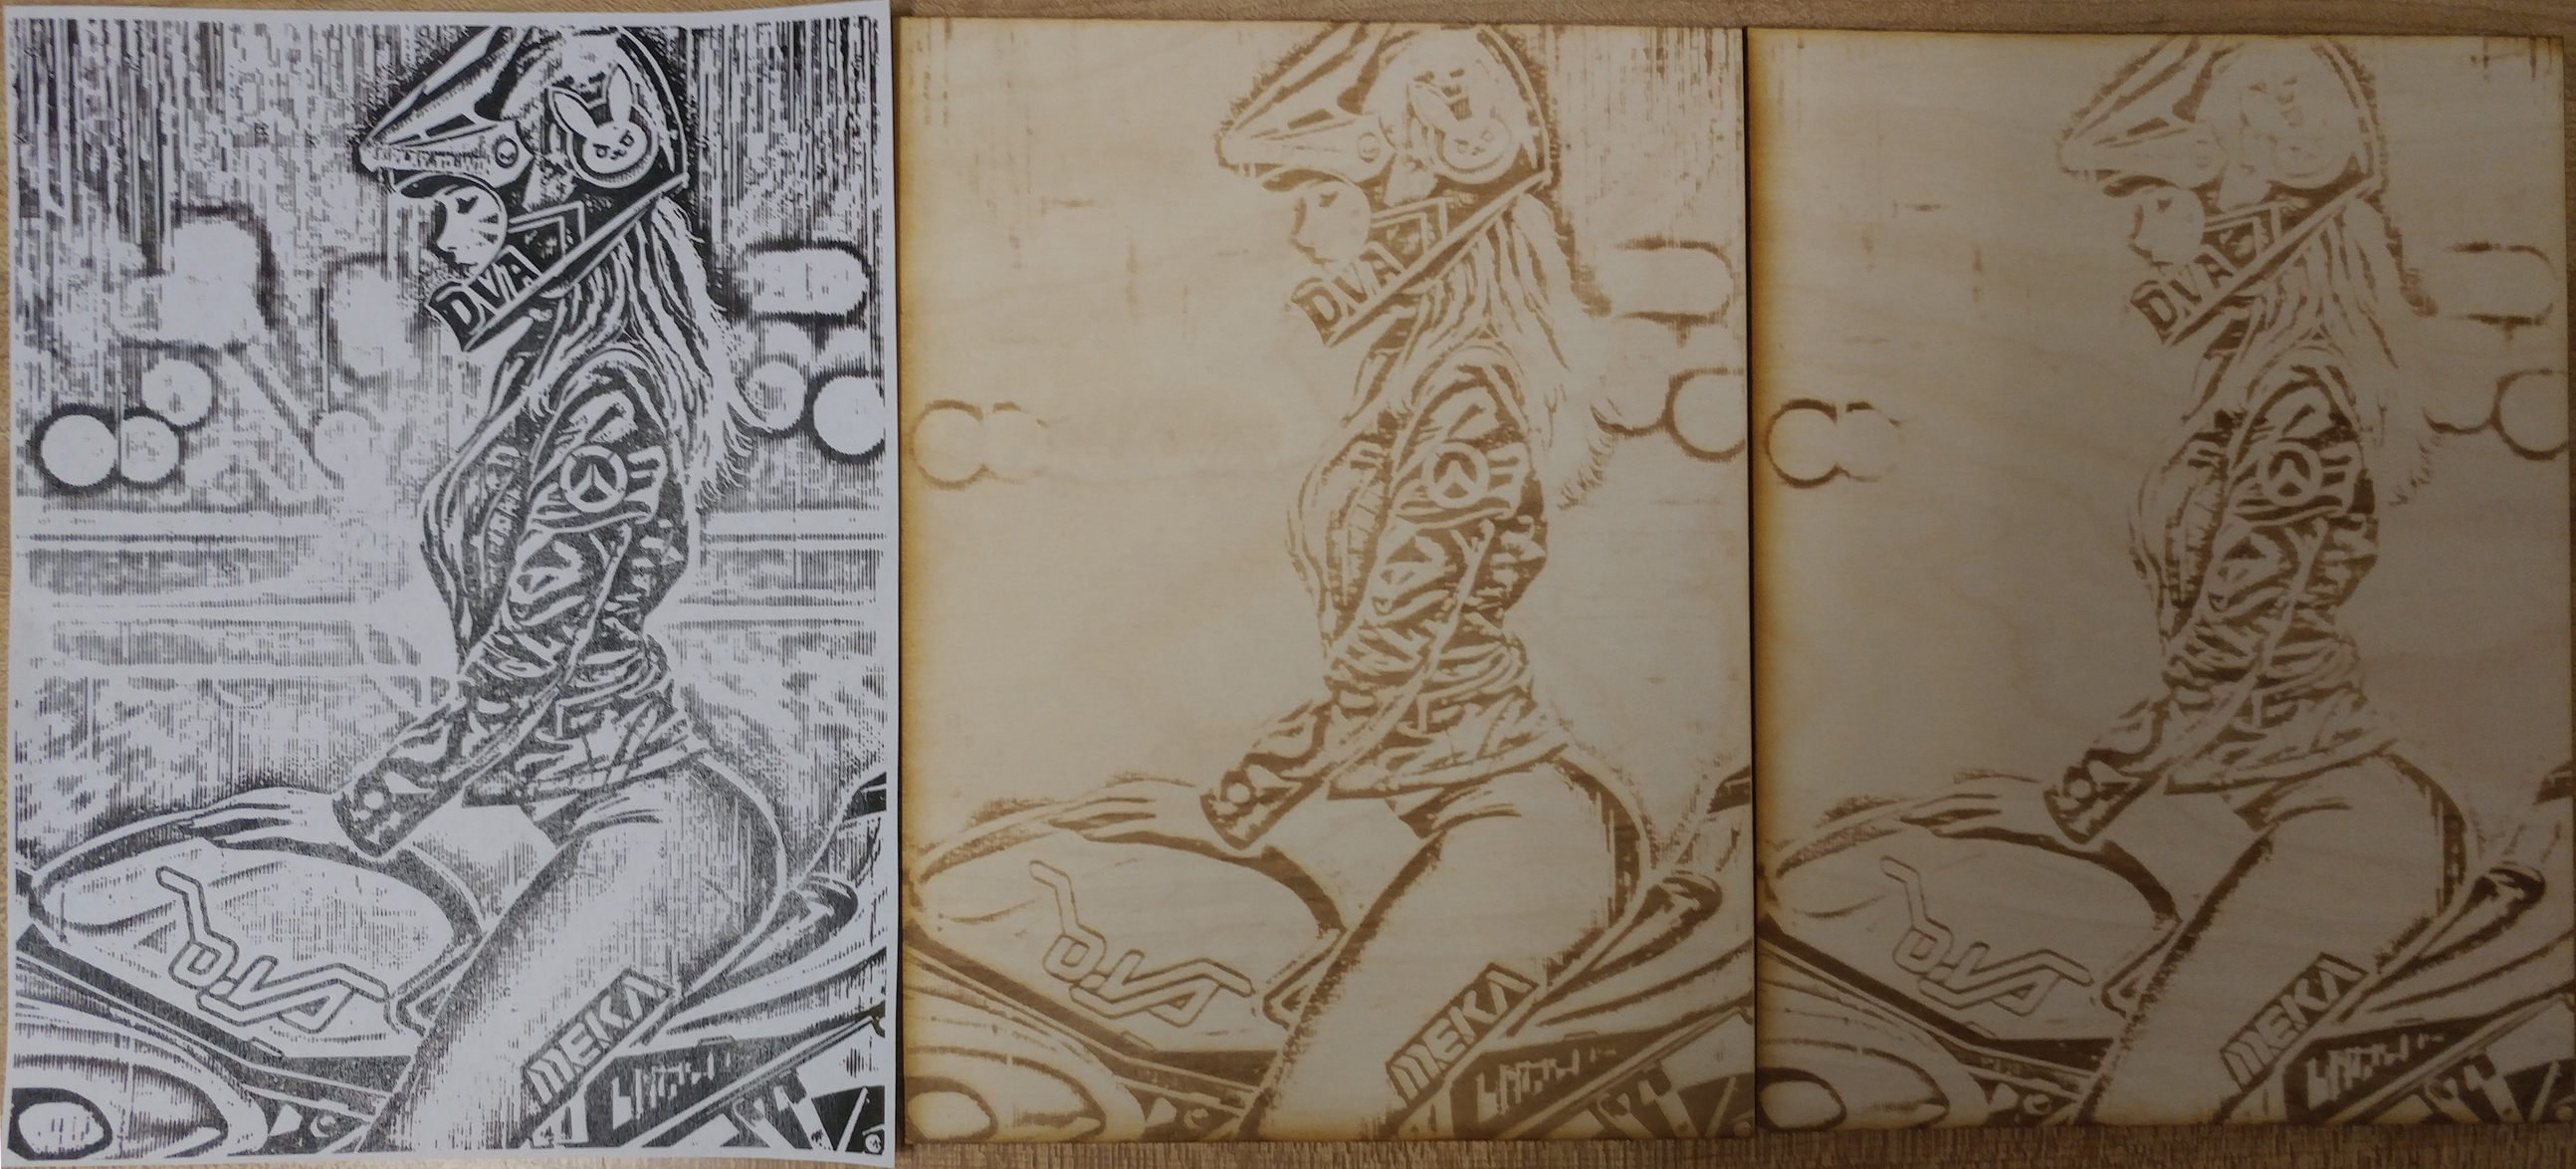
I’m attaching a test series that I ran that shows how the burn areas drop out somewhere between 30% and 70% darkness depending on the dpi and image mode options. None of them have been able to produce what I feel is a reasonable representation of the images I’m sending to the laser.
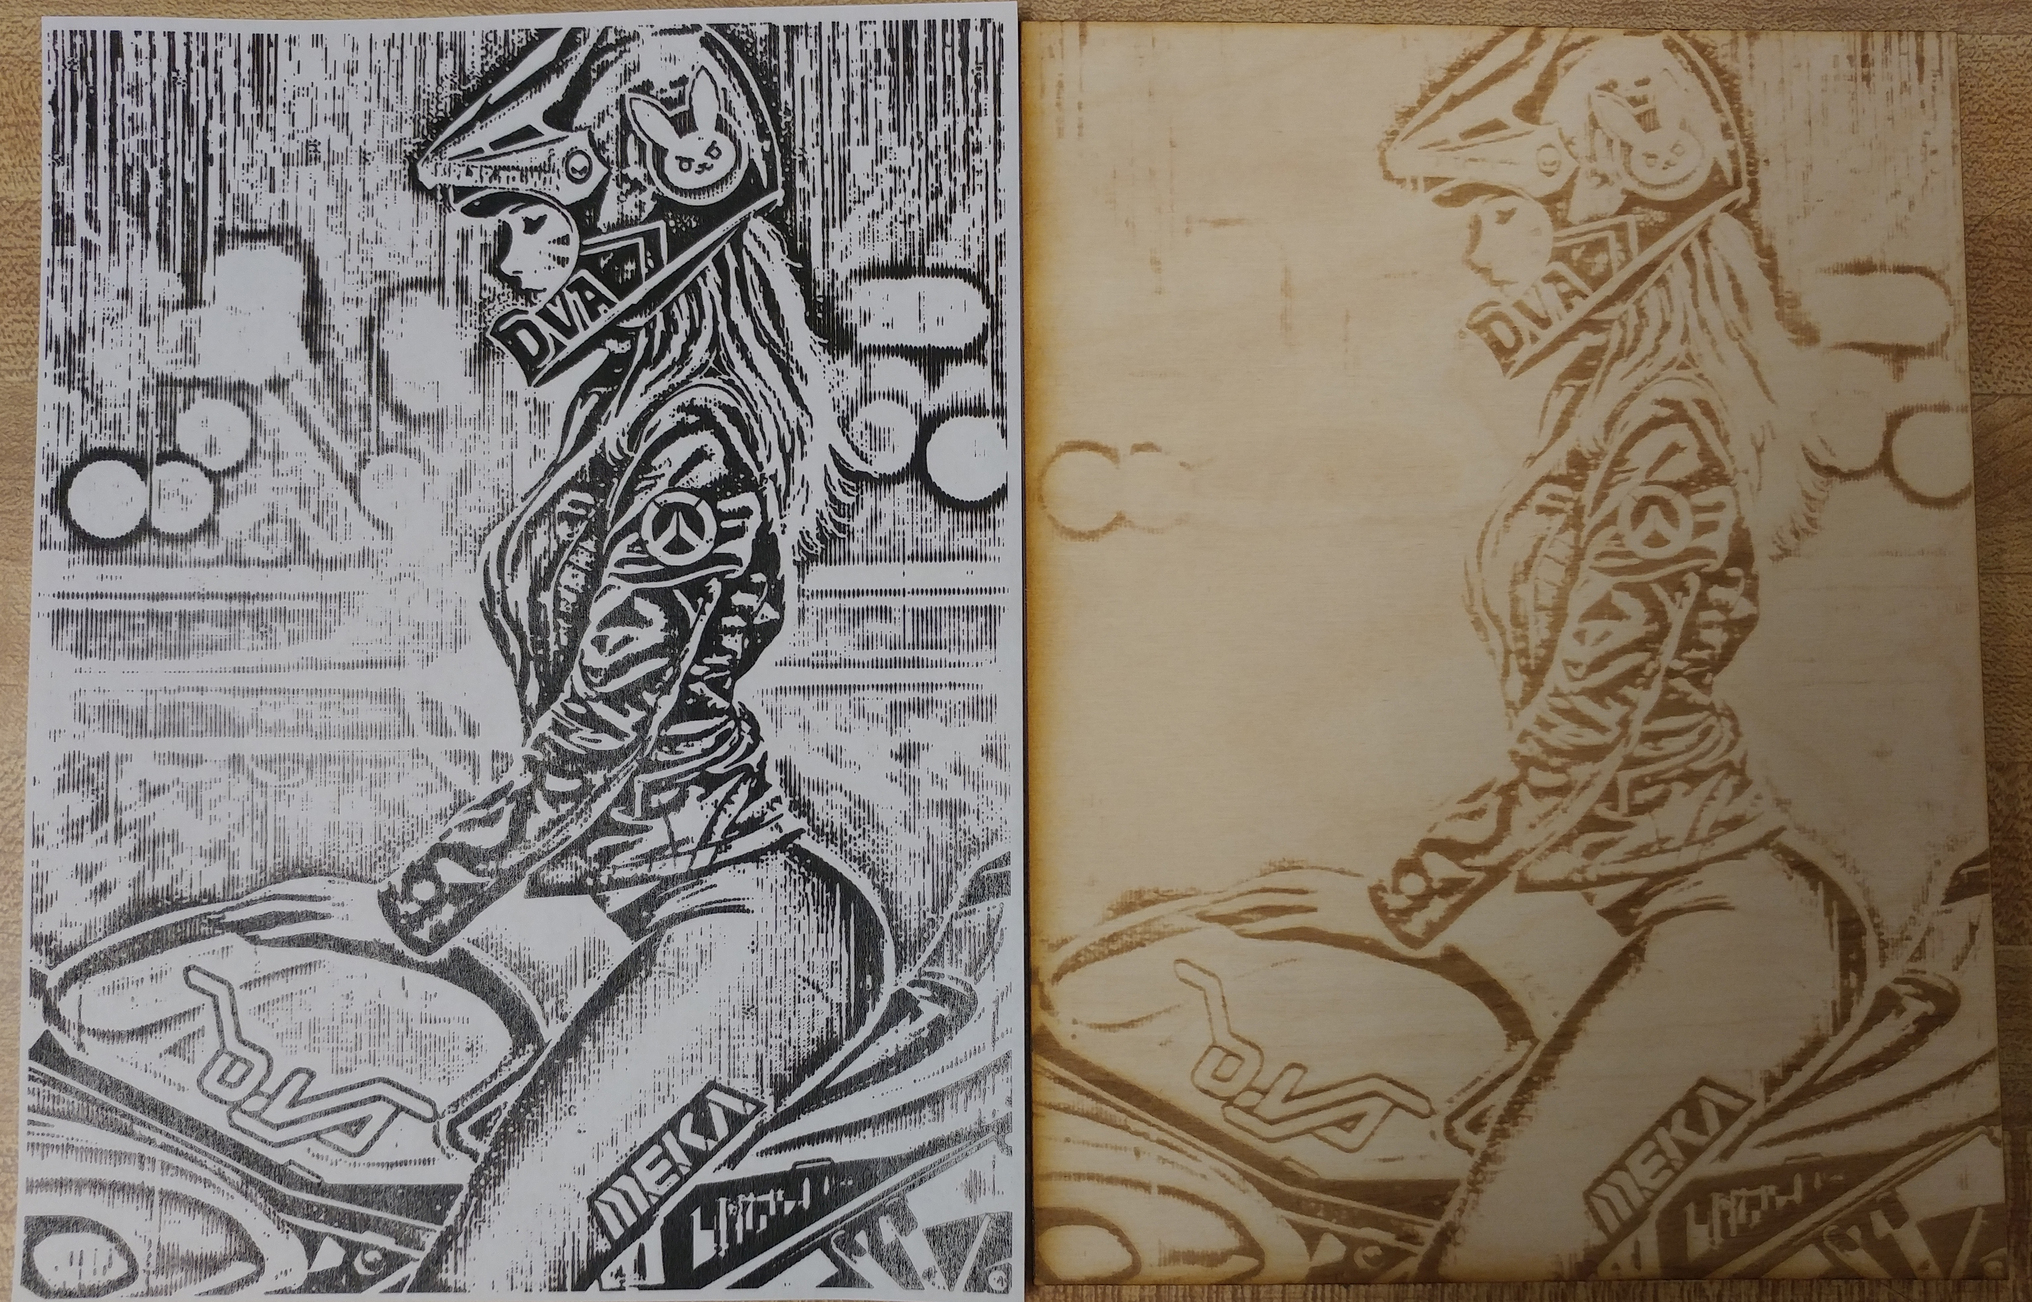
In addition I’m attaching a side by side of an image I did next to a print out of the same image to show how much loss is occurring.
This image is black and white only, no grey areas and image mode was set to threshold.
In theory it should have burned all areas where there is black but it completely skips anything that isn’t ‘thick enough’
Things I have tried:
Greyscale images, of resolutions between 600dpi, 300dpi, 150dpi, 72dpi
Half tone images, resolutions between 600dpi, 300dpi, 150dpi, 72dpi and lines per inch of 600, 300, 100, 50, 30
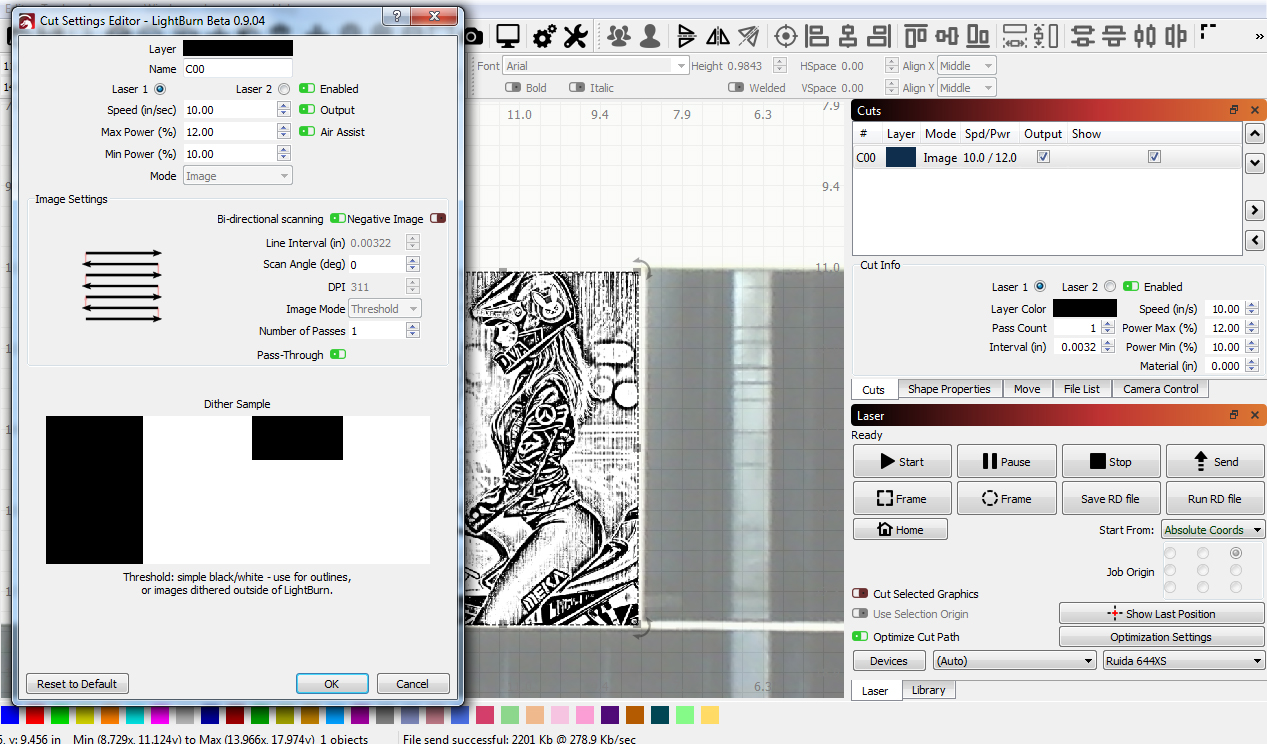
And I have tried various dpi & image modes in lightburn (jarvis, greyscale, threshold, dither, etc) of the above image types.
Nothing gets around the burn loss and all I can ever seem to produce is partial images that lack any fine detail.
I’m using a 100W Laser with a 2" lens. I have considered switching out for a 1.5" lens but I feel that it will not solve this burn loss issue, only make my dark areas crisper.
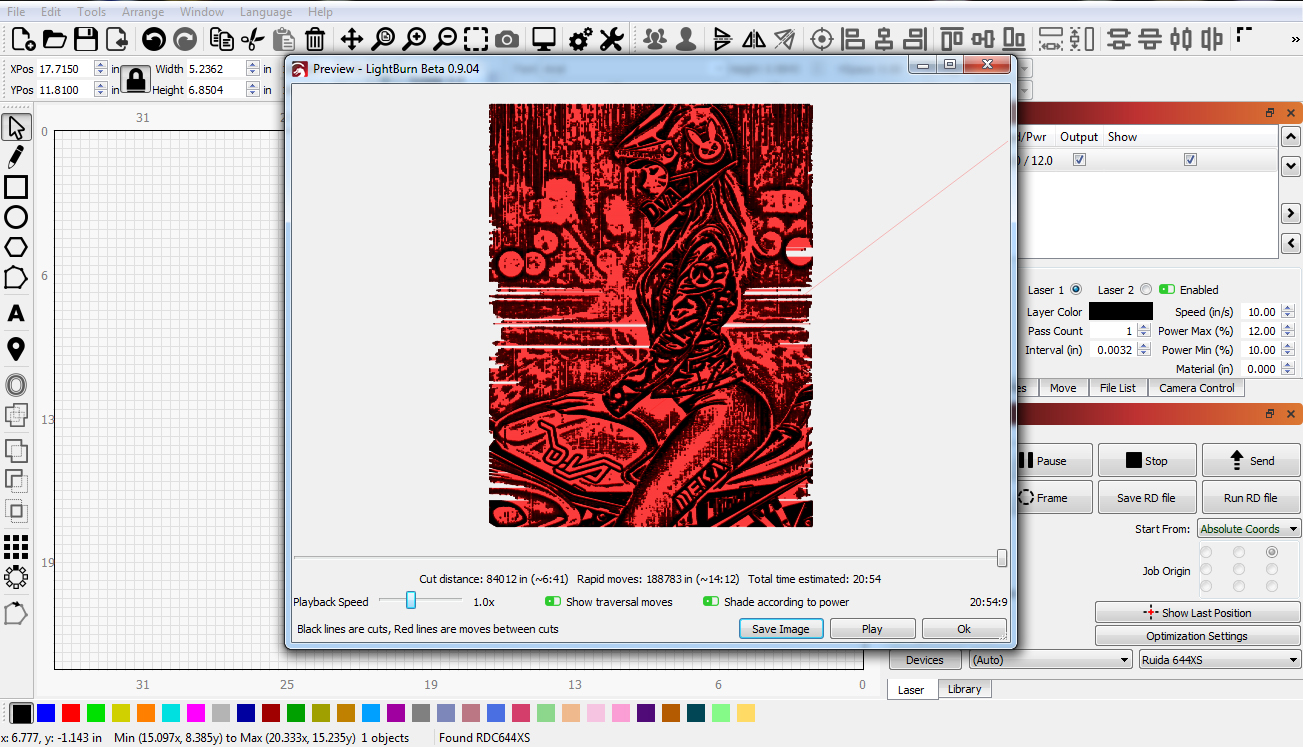
They do show in the preview.
This image has settings at 12% (But higher settings / slower speeds do not yield better results just more burn in the burn areas that already show up
If what you want is an exact, 1:1 laser dot per image dot output, enable pass-through. Then each pixel in your 1-bit image will go to the laser, exactly, unchanged.
If you use any other mode, LightBurn is internally resizing the image to match the output size/DPI combination, which is likely downsampling the image, and why you’d miss dots.
If you’re dithering the images outside of LightBurn, this is more or less required. The image you’re showing contains single-pixel details, so treat it like it’s dithered.
On the other hand, if the shading is showing up in the preview, you haven’t mentioned speed yet - your tube, being a 100w, doesn’t fire fast, so you might simply be running faster than the tube can fire. Anything over about 100mm/sec with 0.1mm dots and you’re going to start missing fine details.
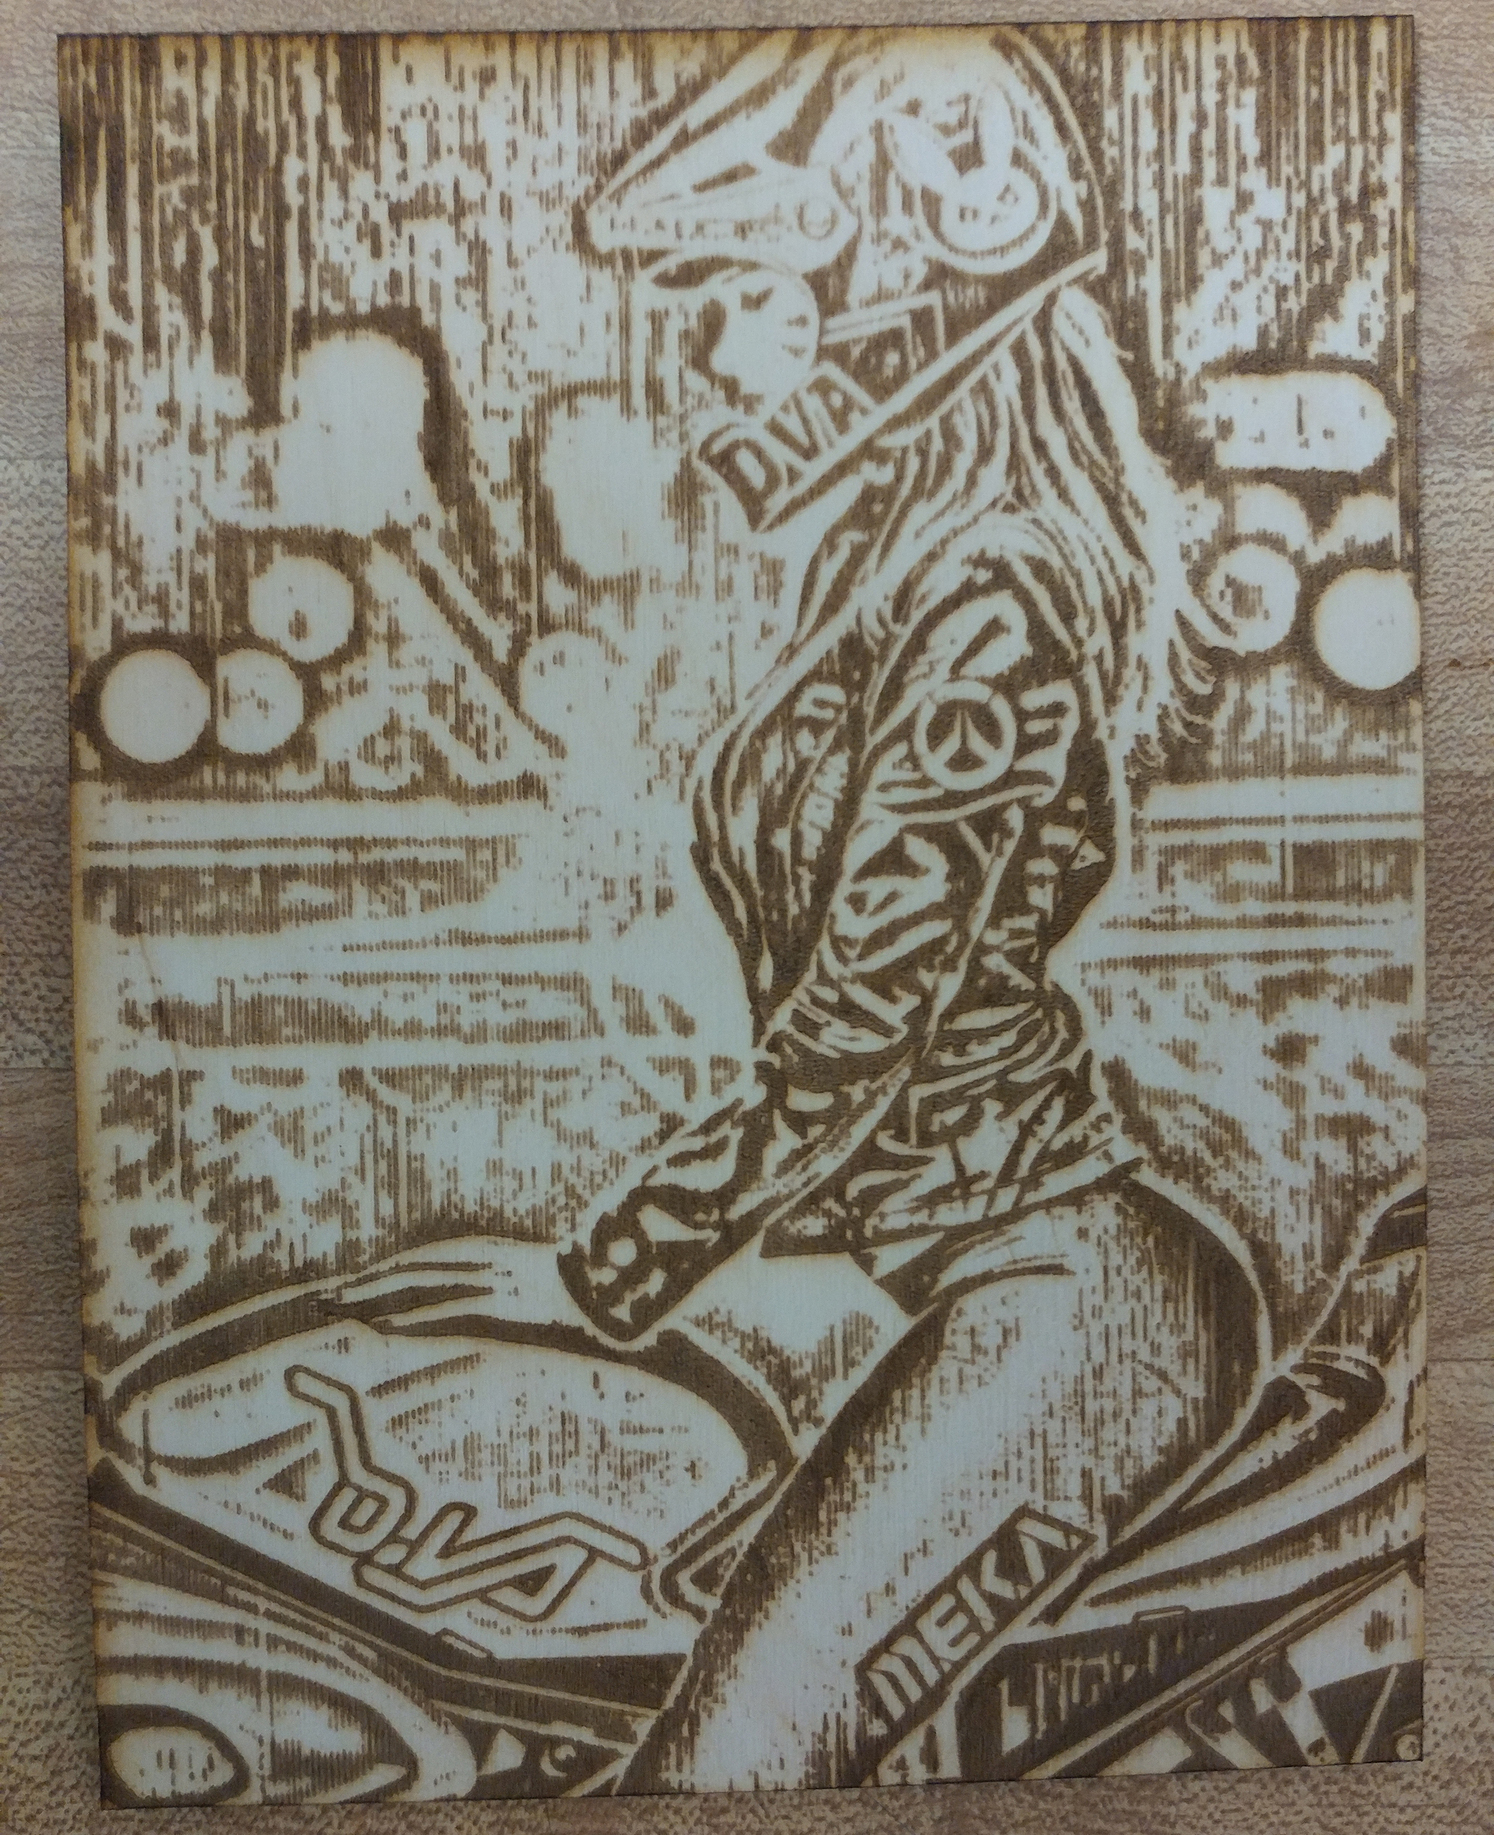
Thanks Oz for your assistance, I gave that a try.
Results of activating pass through are completion time increased from 29 minutes to 40 minutes and it looks like it also lost even more burn area.
The pics below show screen shot of settings and a new side-by-side comparison, new version with pass through on far right.
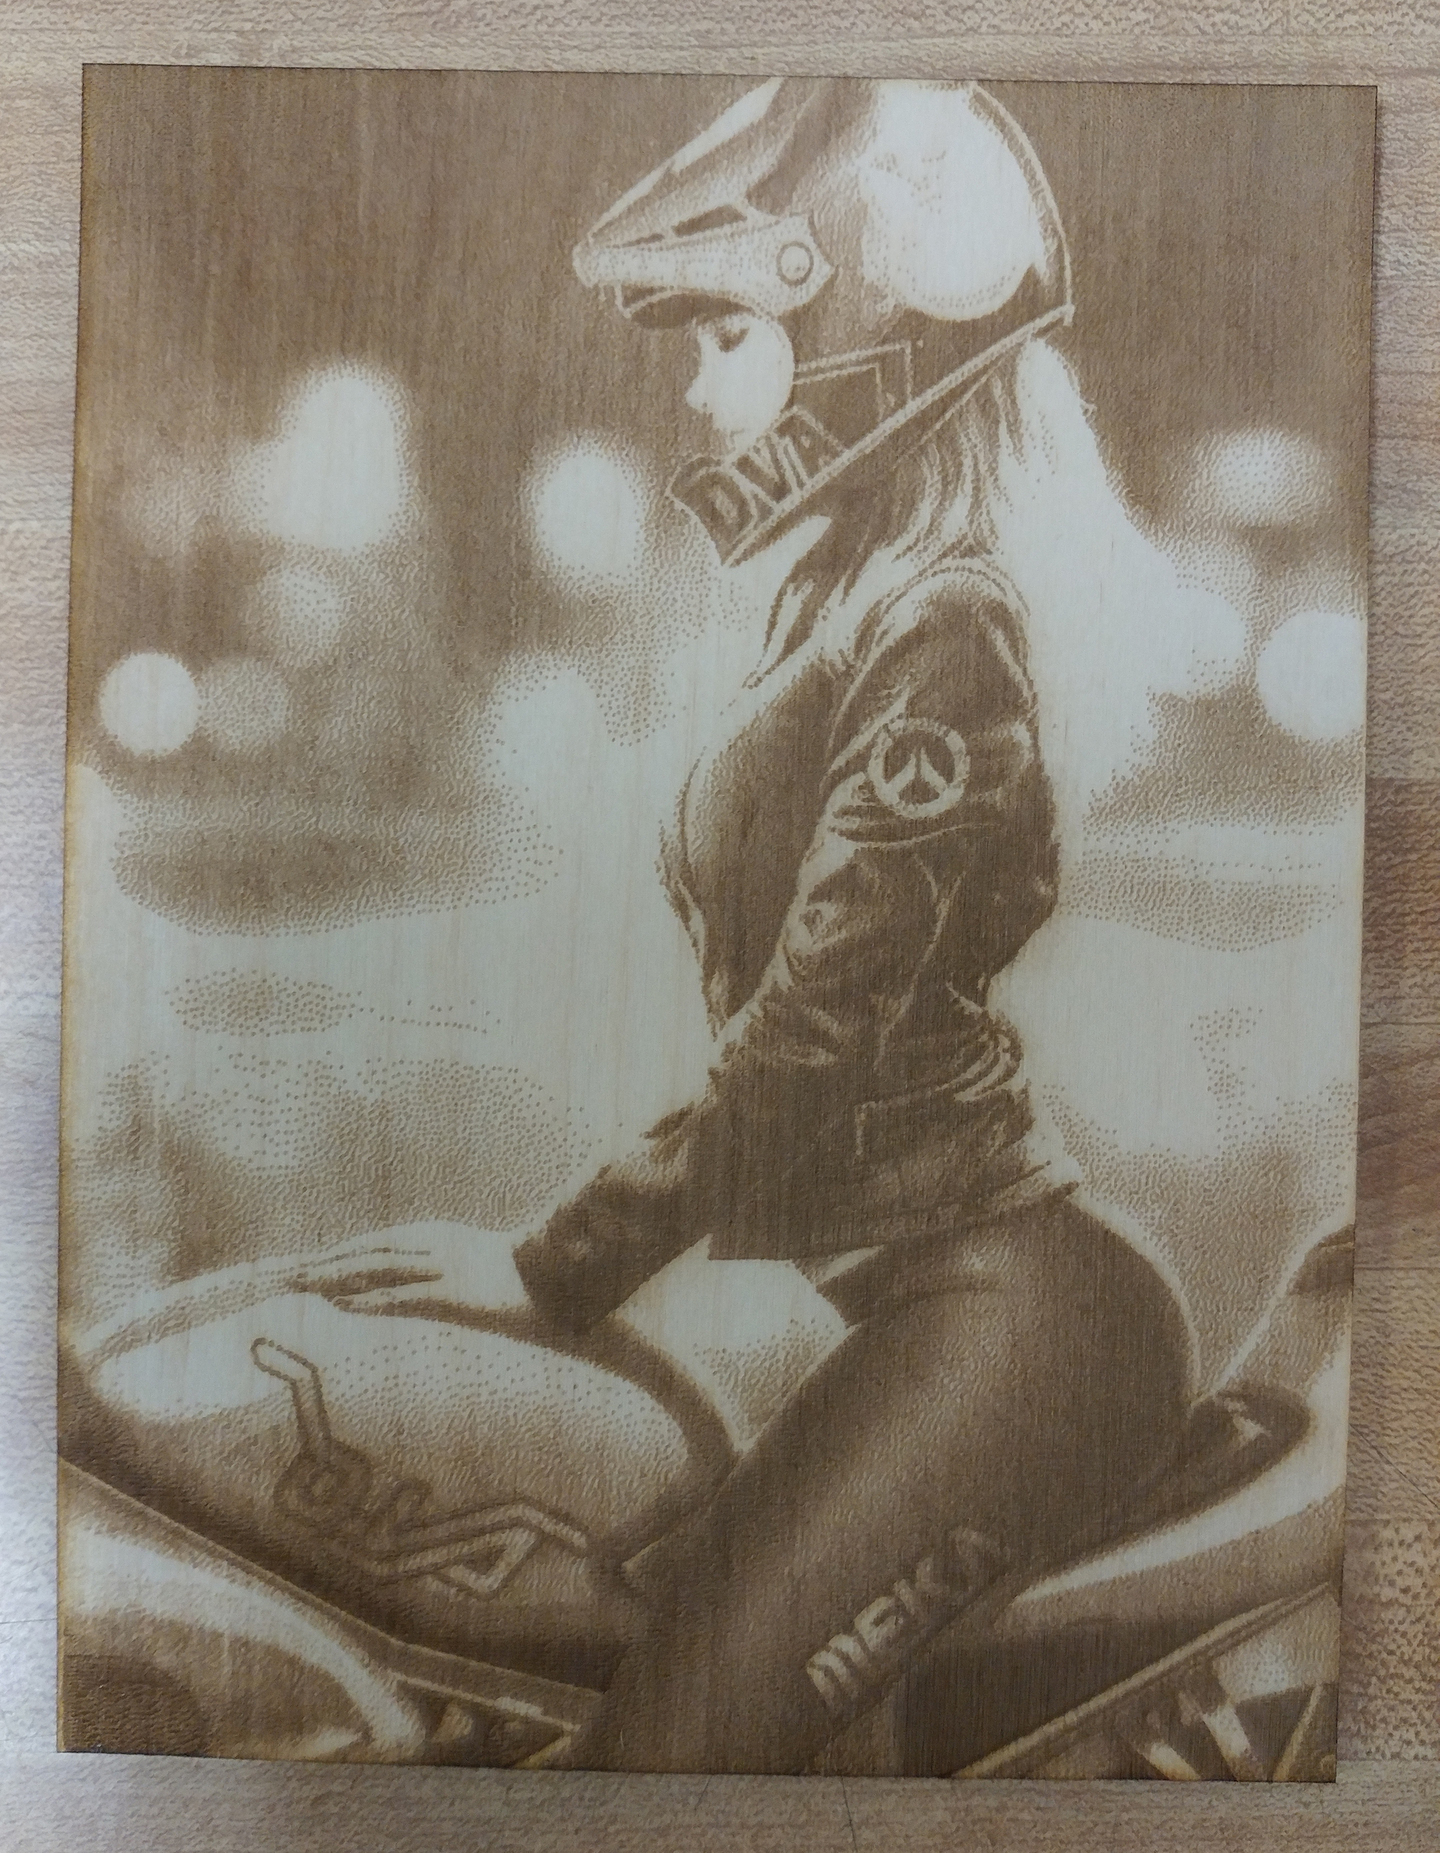
I’ll need to adjust to find the sweet spot, but at 4in/s I get no dot loss.
I originally started bumping up the speed a few months ago in an attempt to get my images to come out looking not totally dark and forgot my reasoning behind upping the speed as time went on, but knowing what I know now I think I can work out how to keep the burn light by using adjustments in the levels and halftone conversion.
Now time to open er up and really see what the laser can do!
Another thought - rotate the image 90 degrees. It appears that most of the fine detail is represented by vertical lines, alternating on & off. If you were scanning along the lines, instead of across them, you’d be much less likely to miss the details. Lasers move faster horizontally, so rotate the image 90 degrees rather than scanning vertically.
I followed the calibration instructions from Russ over at RD Works Learning Lab and found all the tweaks I needed to do to get the picture to come out right.
If I switch to a 1.5" lens I should be able to get this to look even better, but I’m finally happy with the outcome.
Here is a link to his instructions in case anybody is interested:
And here is the image after following his calibrations: