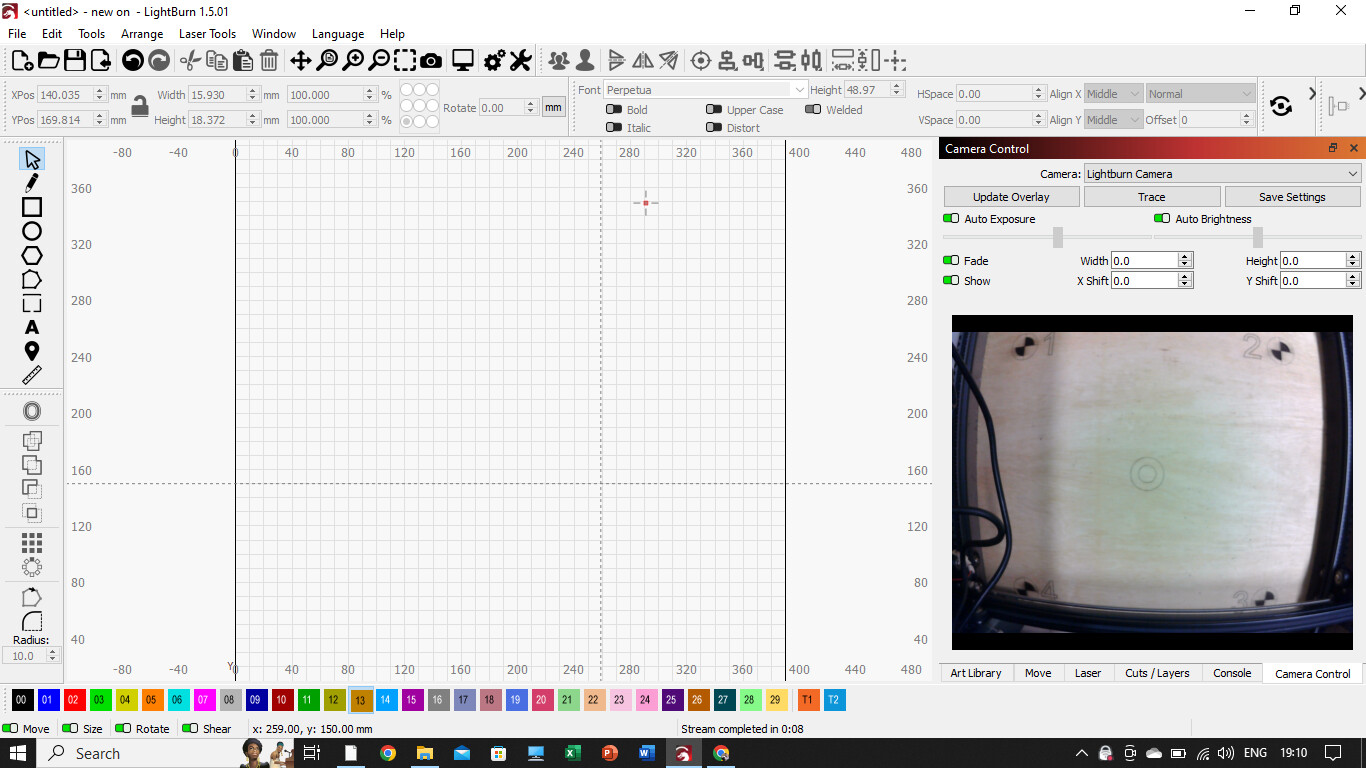
so got cam all set up but couple of things puzzling me
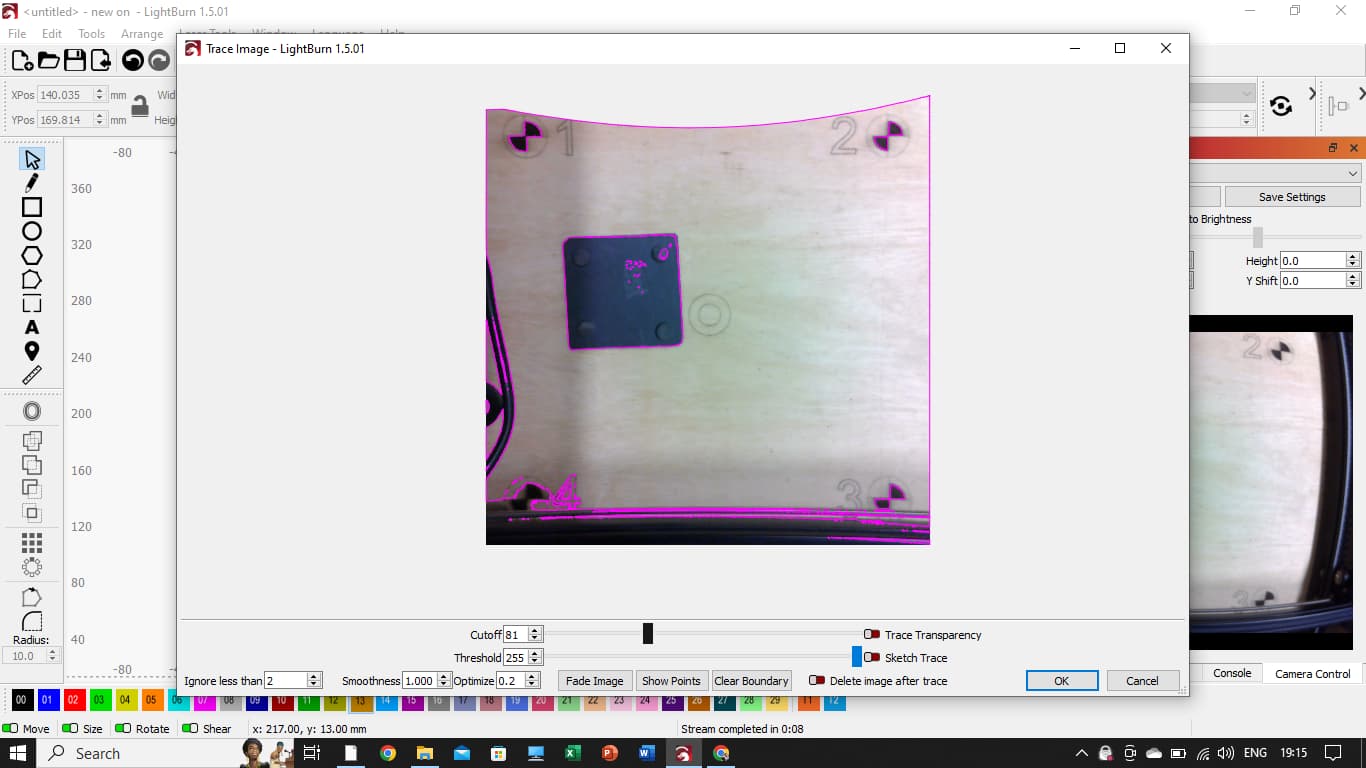
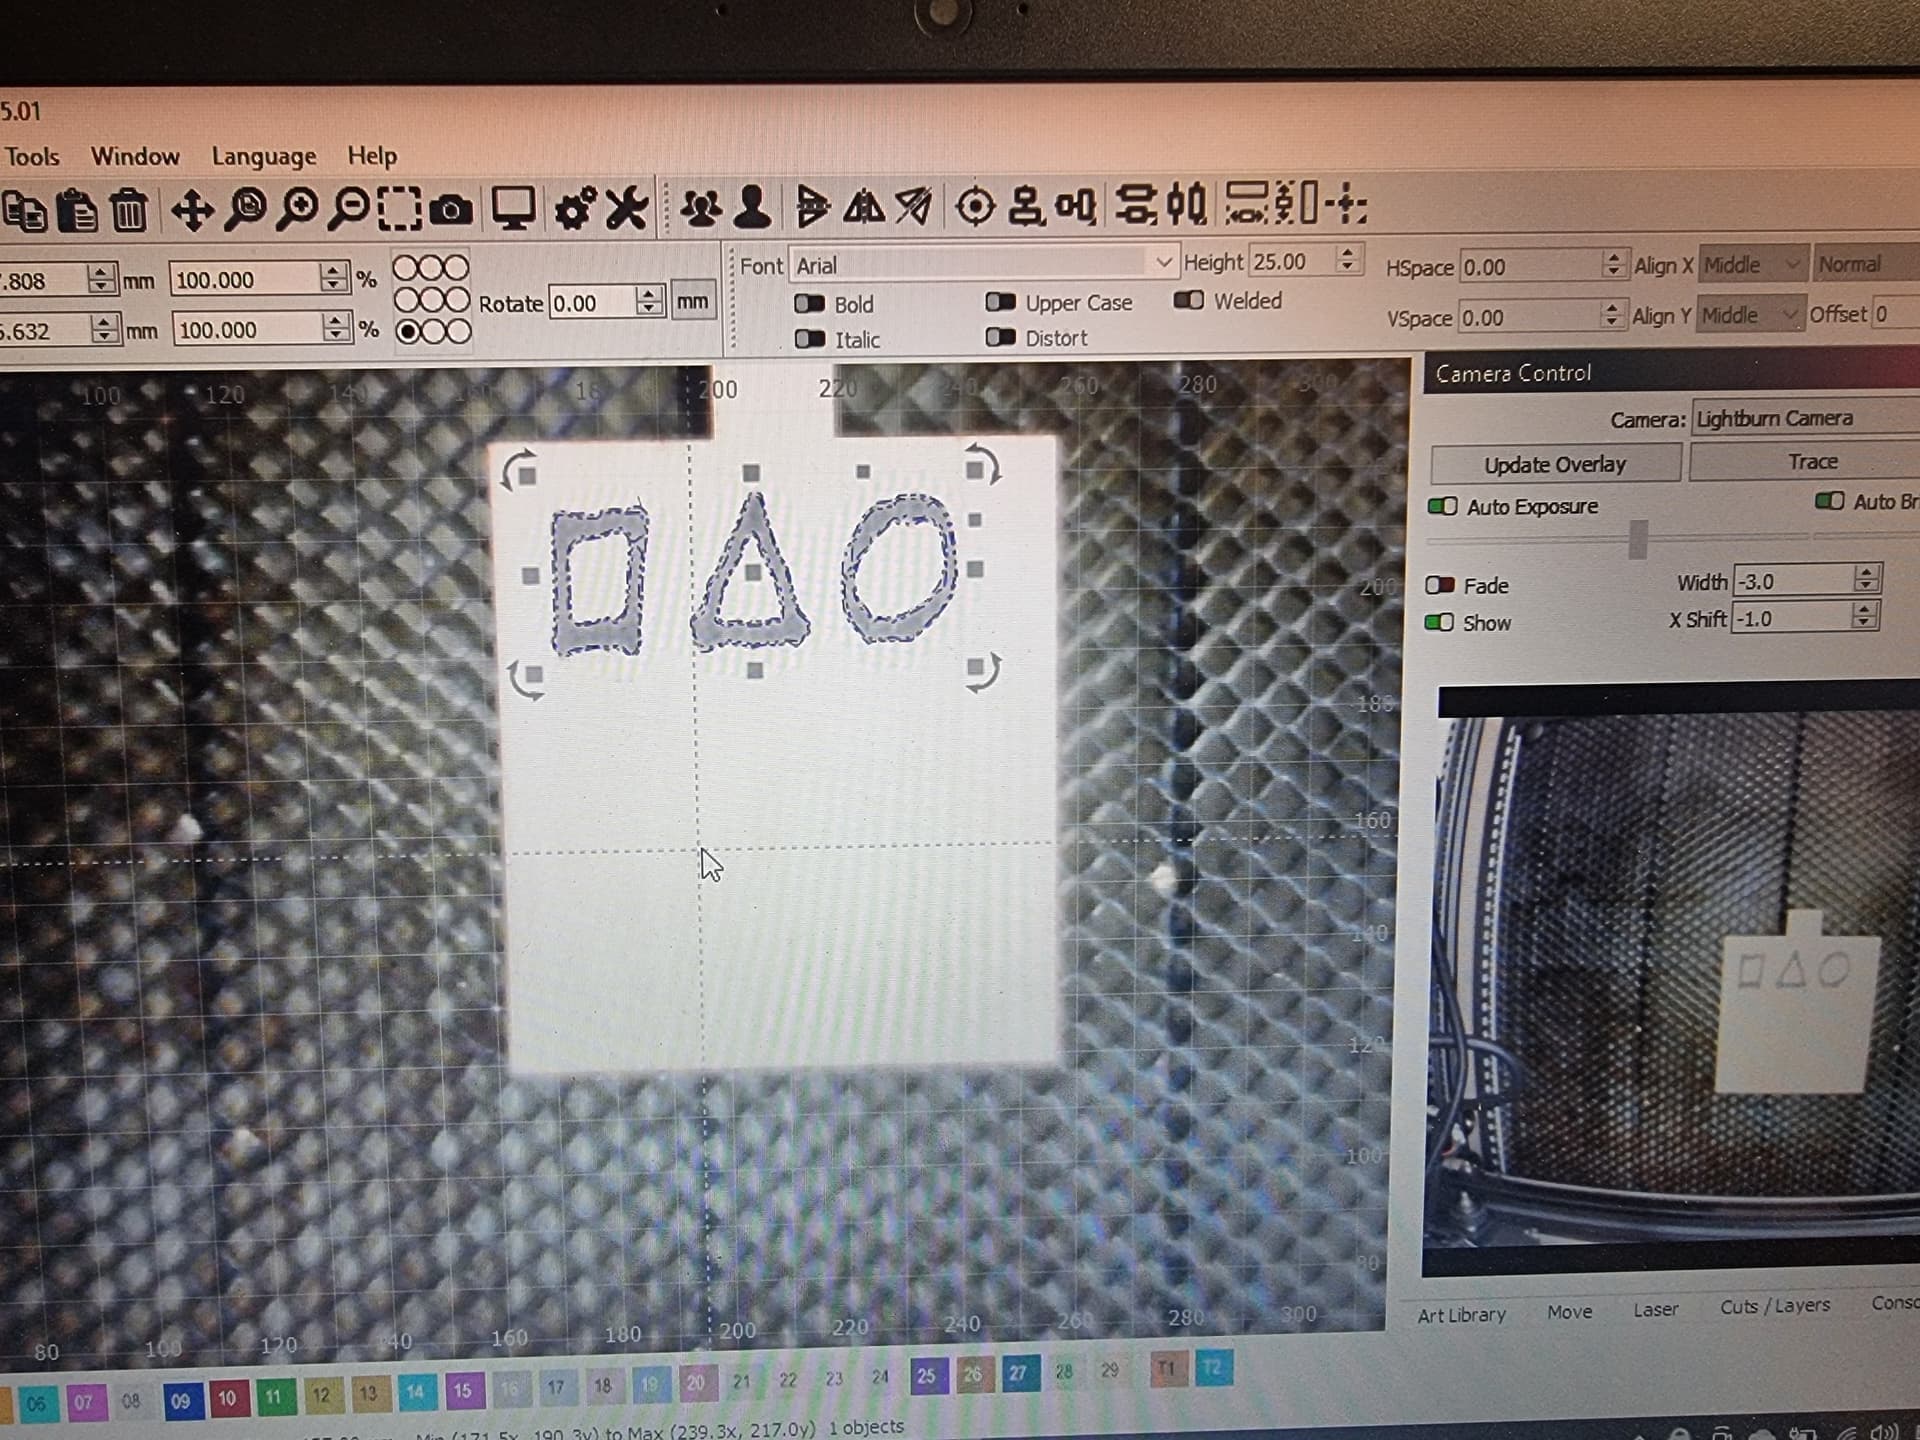
trace- so it says trace but whenever i press it the pink outline goes across everything but the material i put down say f for a coaster it will cover areas im not using like my frame and wasteboard
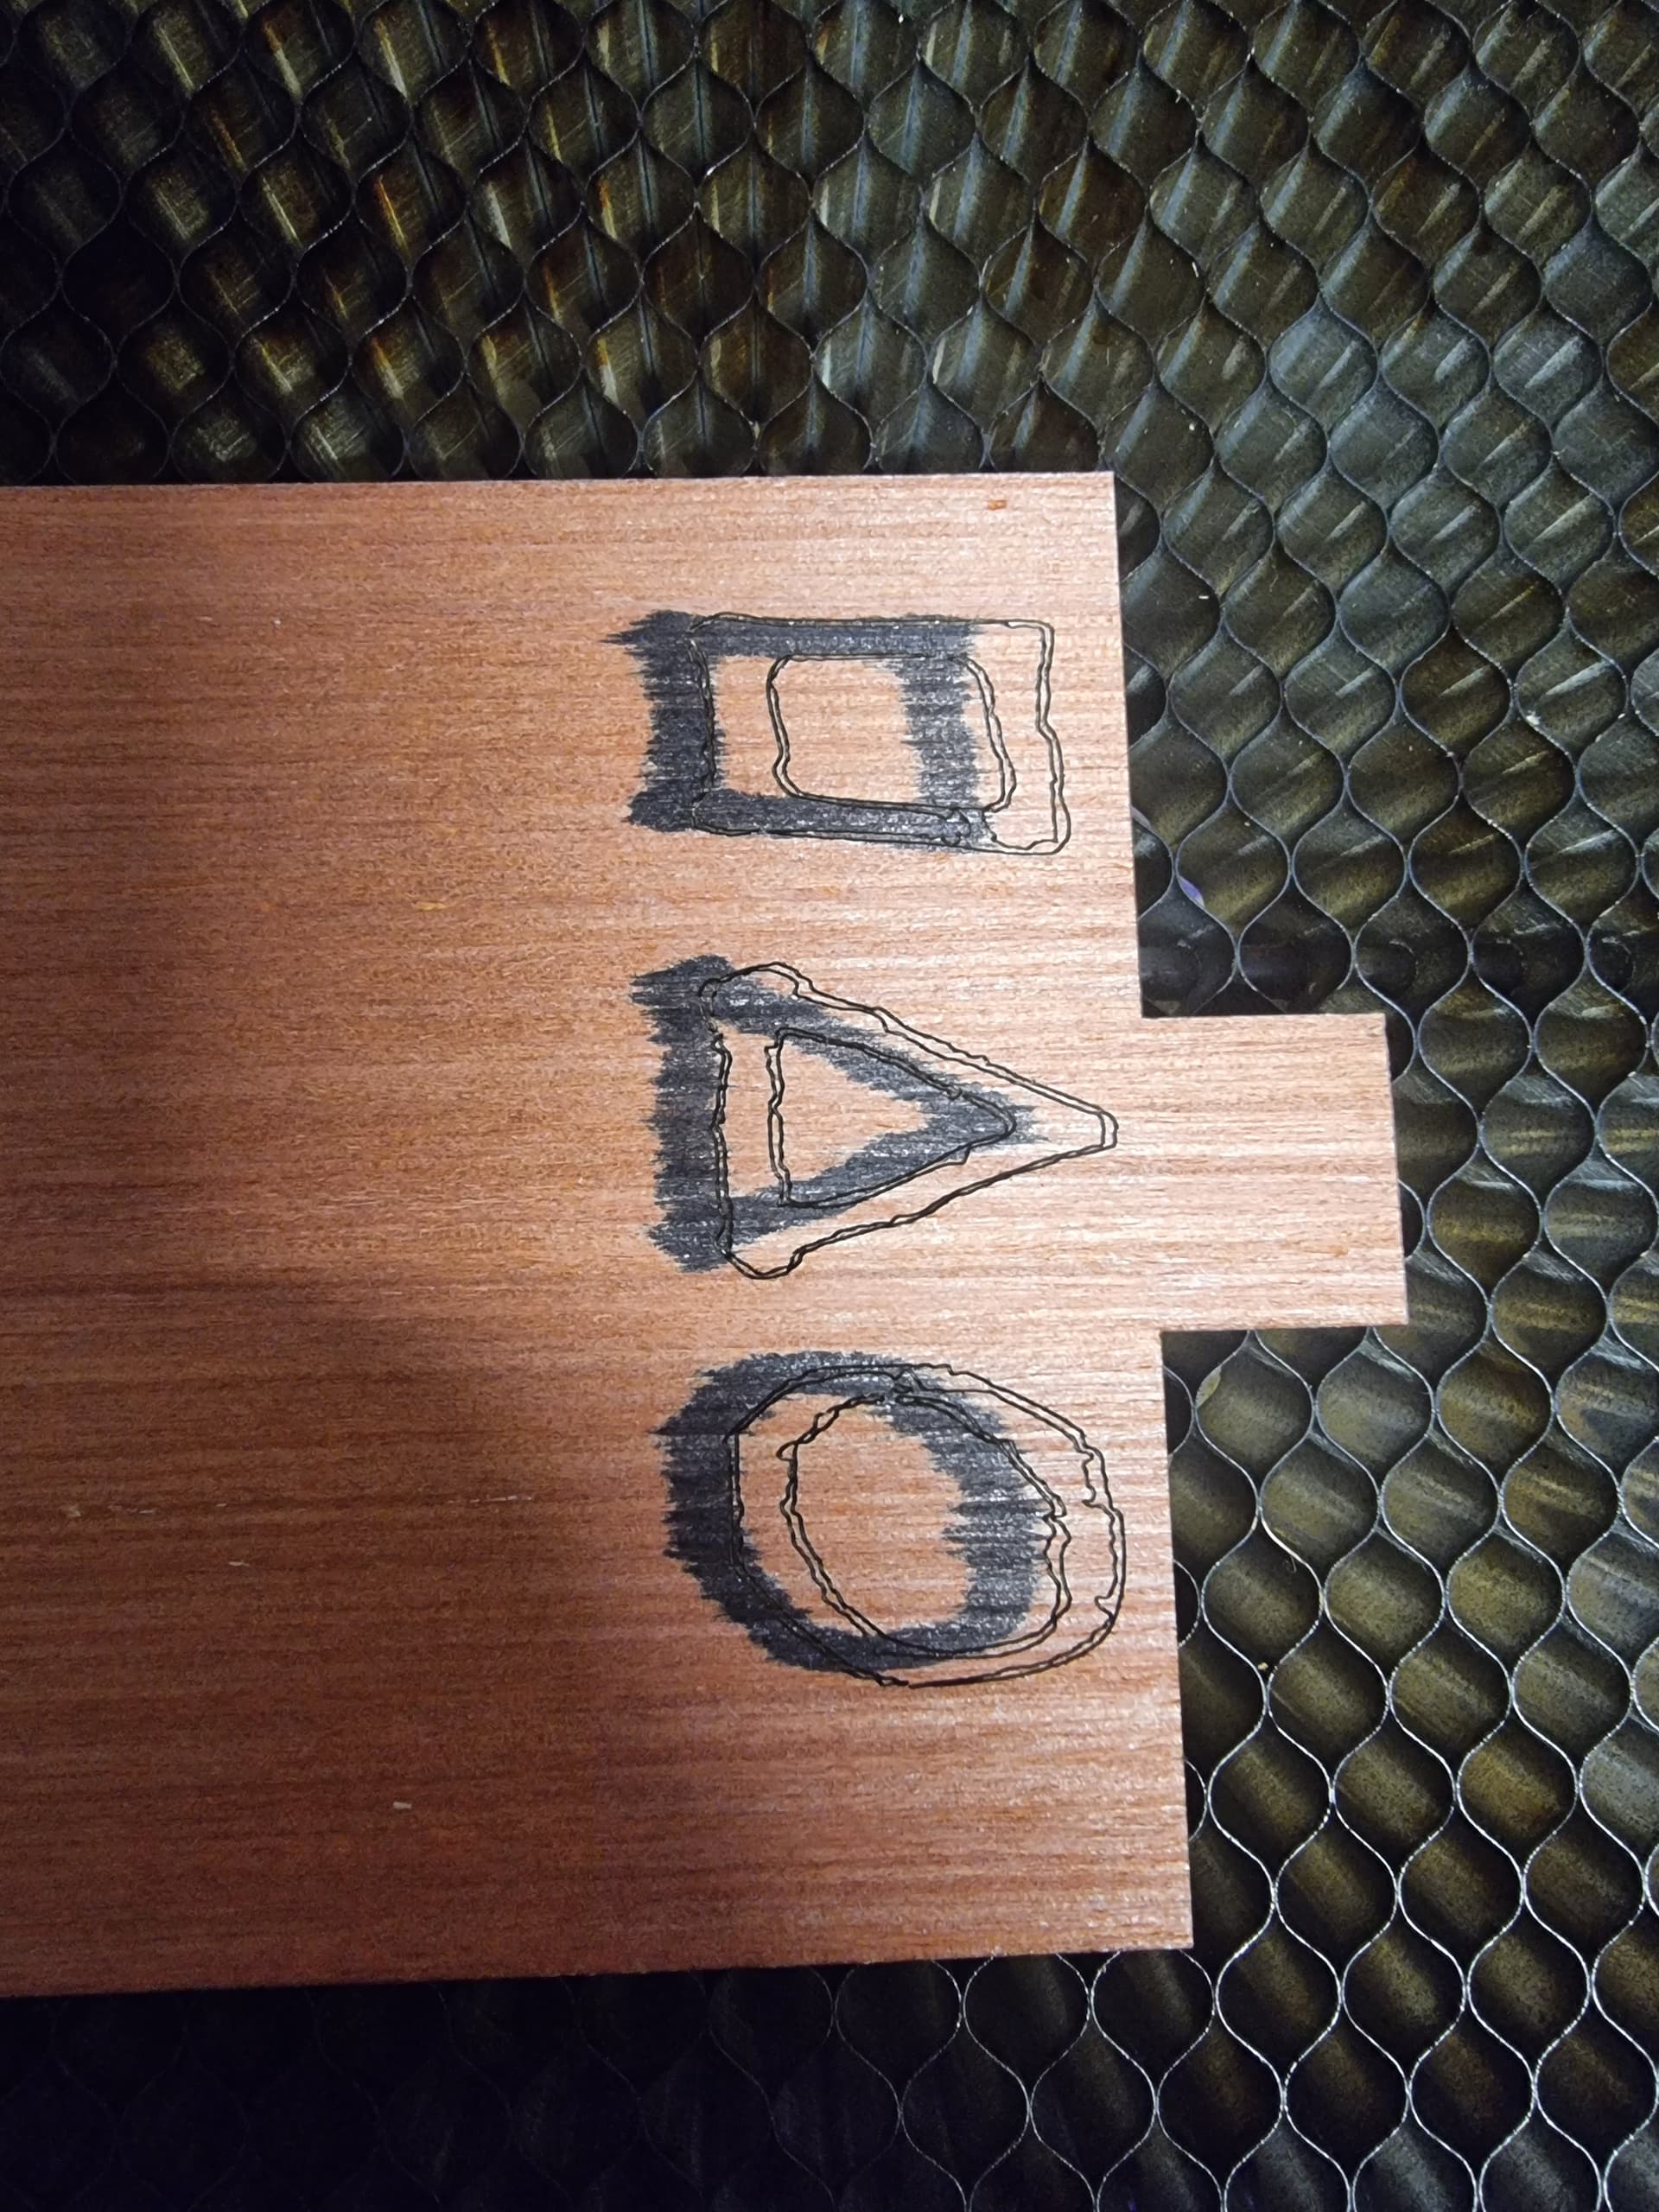
so the circles they get you to burn during set up do they need to stay there no or can i get rid of that and go back to my original wasteboard with my grid and still use it all the same?
It doesn’t look like your camera is mounted high enough of your laser to see your entire workspace. That will be a problem for aligning the overlay properly. You will need to mount it higher and re-run the camera alignment process. The target marker engraving does not need to stay in your workspace permanently, you just need to tag them once for the initial alignment.
When tracing, you can click and drag to select just the portion of the camera capture (or other image) you’d like to trace.
If you are looking to position graphics on that coaster, you probably do not need to trace it. Instead (after you have moved your camera to get the entire workspace in its field of view and re-run the alignment process), you’ll want to click “Update Overlay” to see coaster in your LightBurn workspace.
So I only ever really wanted the camera for when I put my honeycomb down
I have a grid but it gets confusing as soon as I want to Cut stuff with the honeycombe
I have a 800x400 bed but not too fussed about the other 400mm as I only need vaout 380x380 for cutting
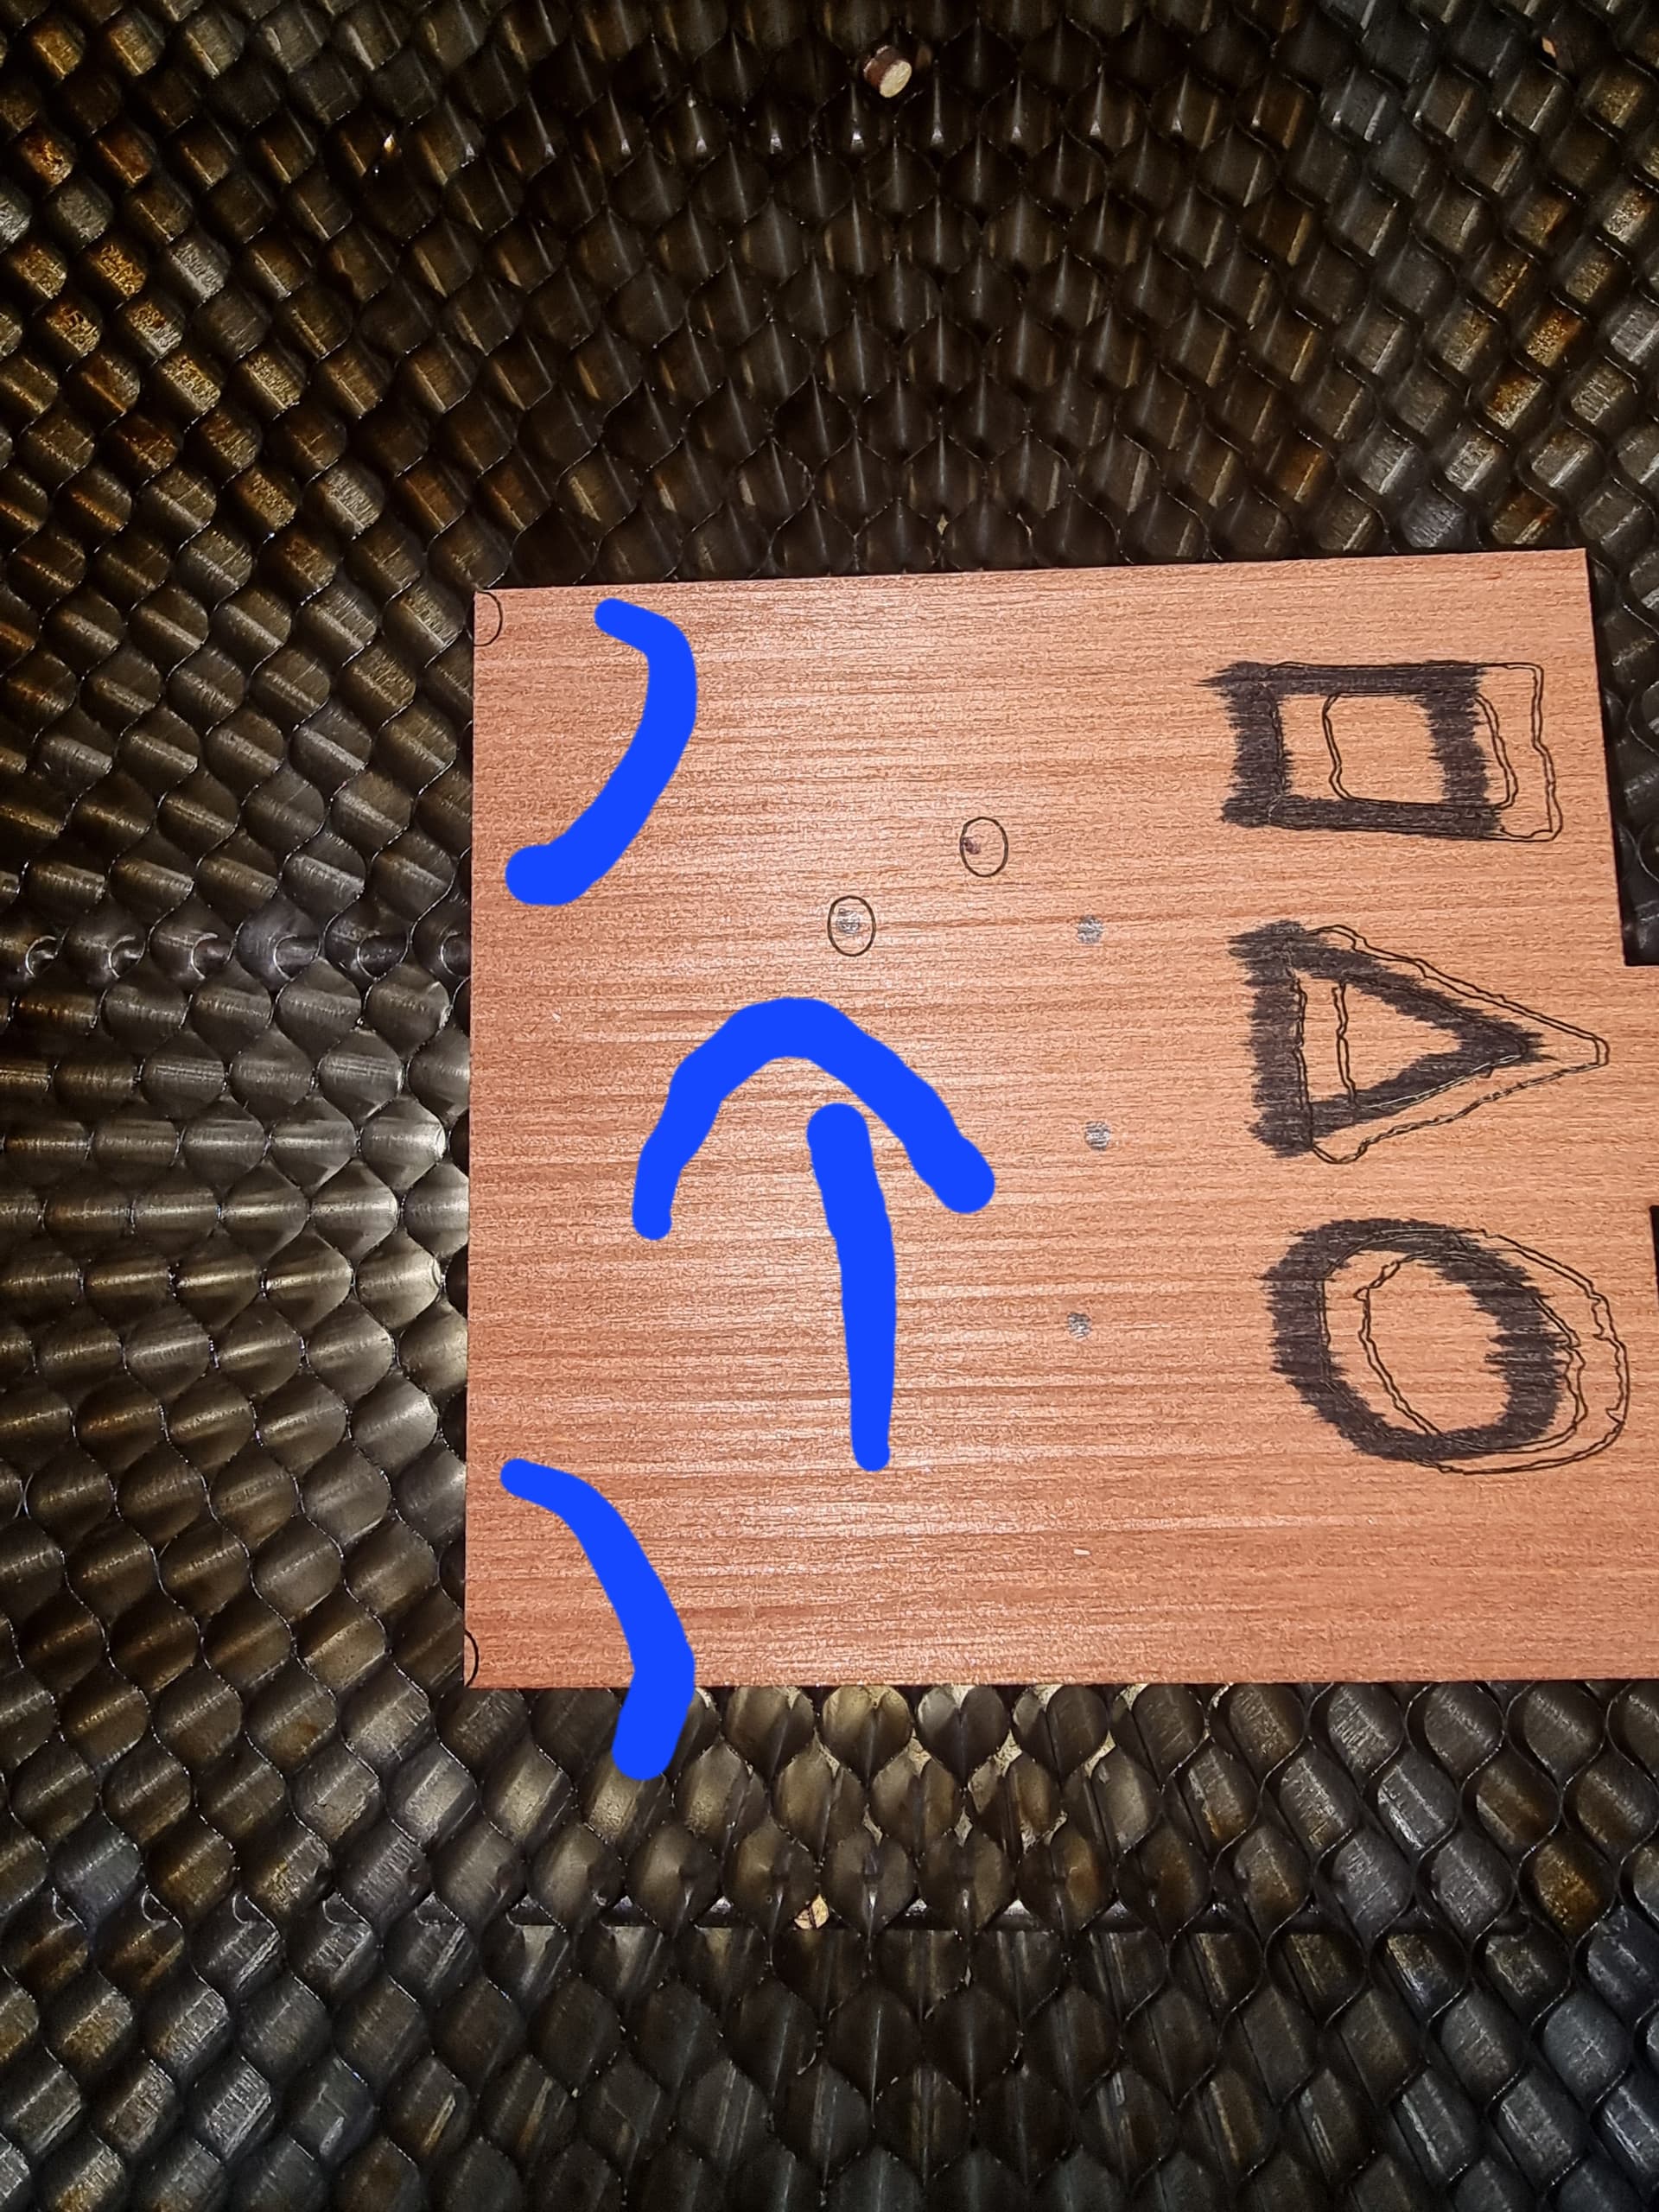
I’m in a dicey position we’re my containment is rubbish and I haven’t got alot of head room but it holds the smoke and fumes out really good so didn’t really want to get rid of it do you suggest me making it a bit taller for the camera?
For best results with the camera, yes, you’ll need to make the containment tall enough that the camera can see your entire workspace. That could be challenging if your laser is 800 x 400.
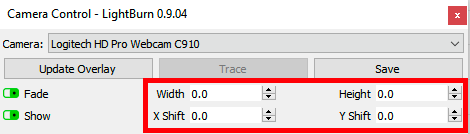
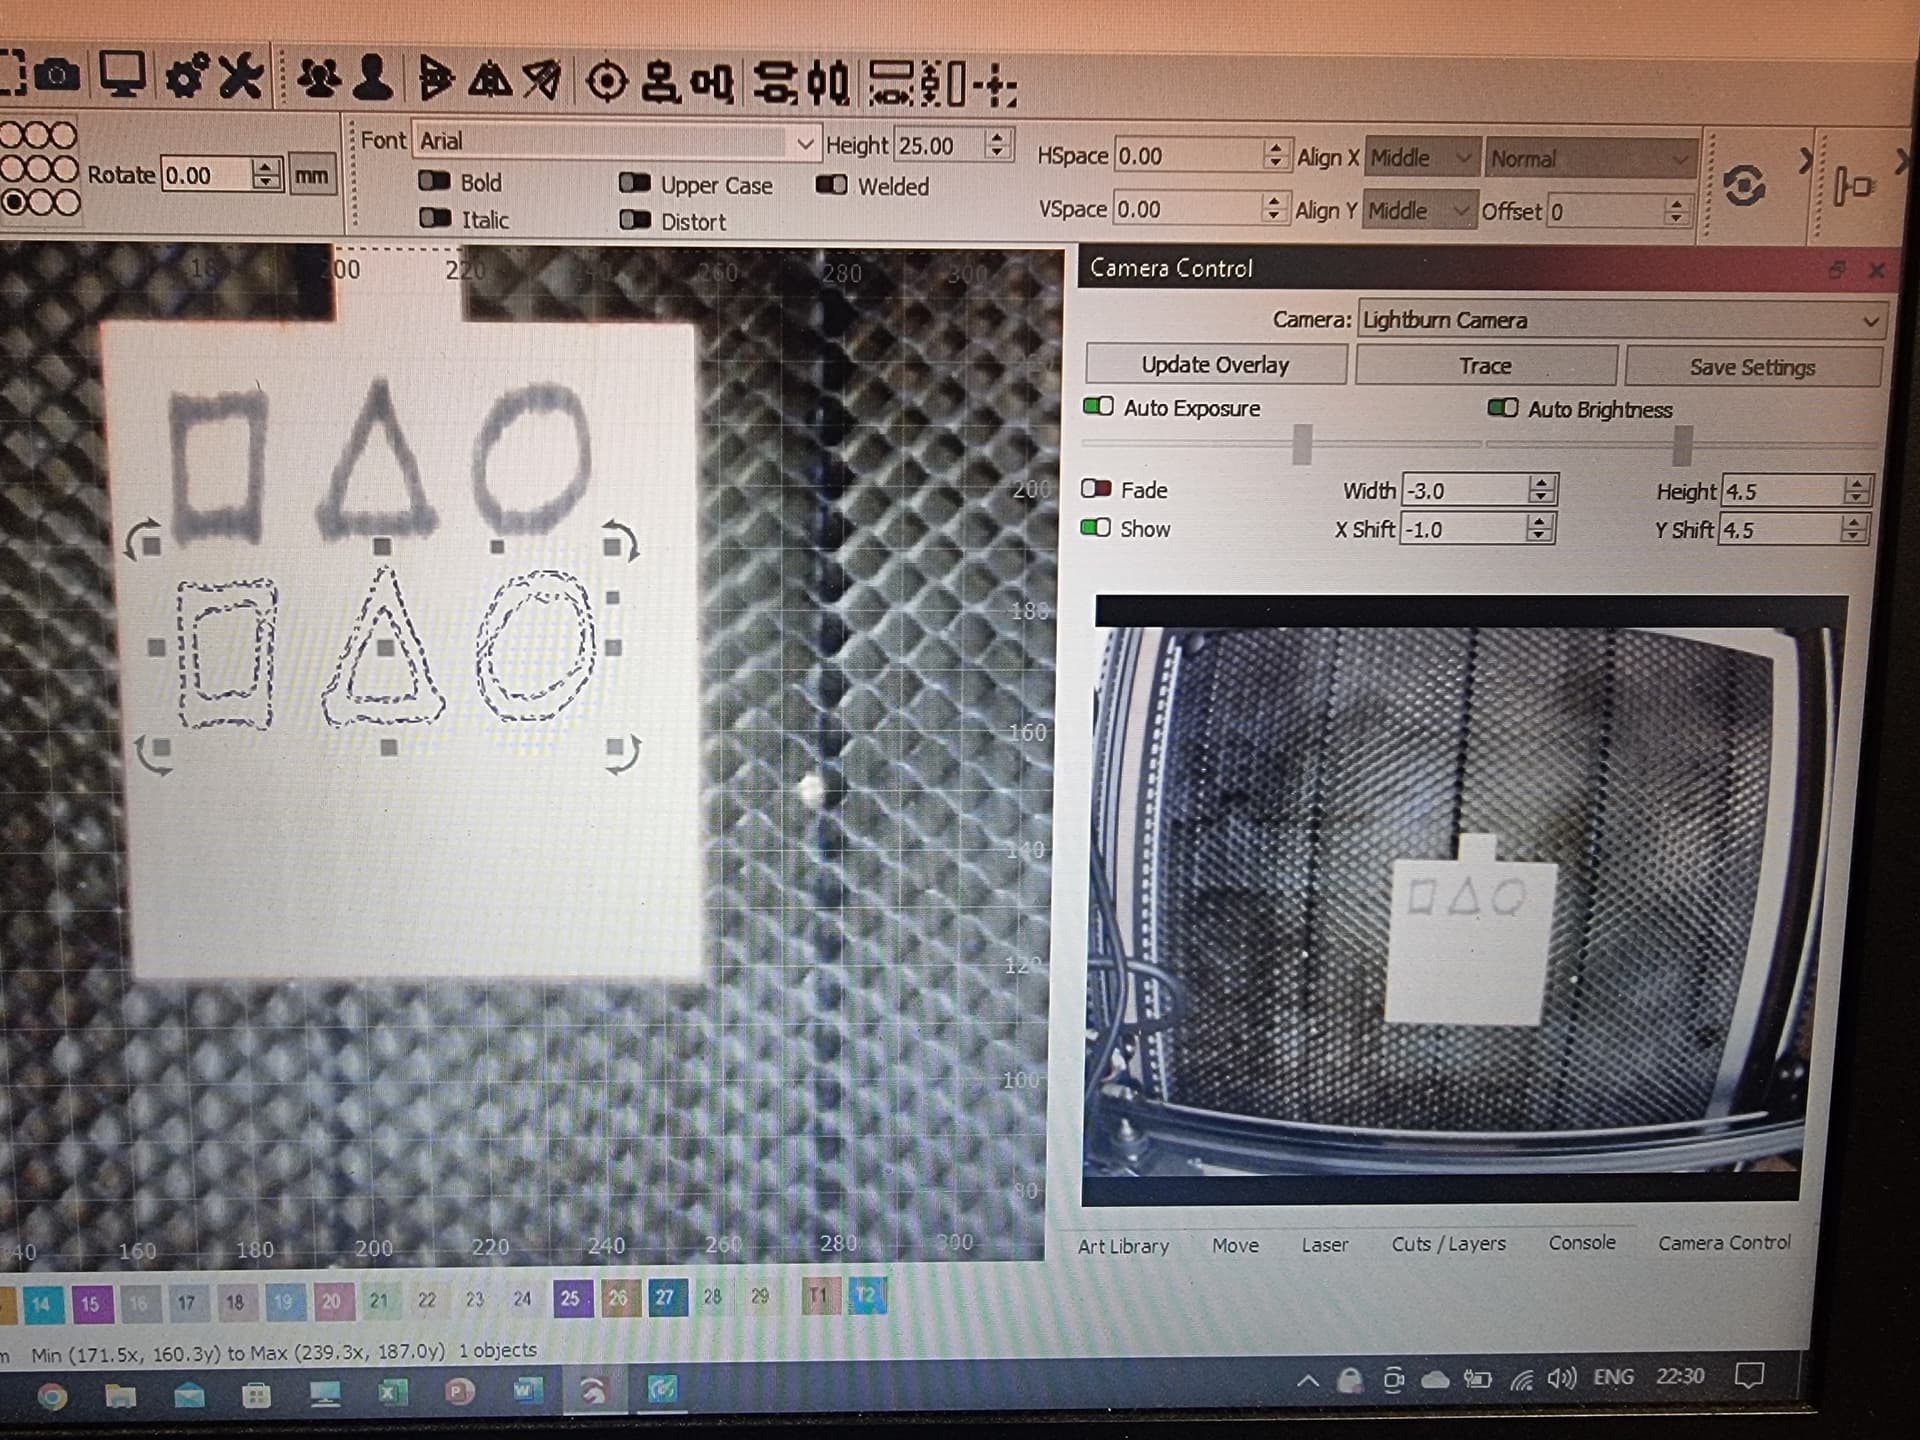
If you are sure you only care about a 380 x 380 space, you may be able to get away with doing it as you are now. When you click Update Overlay, is the alignment of your output relatively close to where it should be? If it’s reasonably close, you can use these numbers in the Camera Control window to fine tune the placement and scale:
The ‘Shift’ values move the background image around, and the ‘Width’ & ‘Height’ values adjust the size. When you have it aligned, click ‘Save’ so the values persist.
Quick update I’m only seeing this bad inconsistency when using my honeycomb so am I right in assuming the fact the honeycomb is closer to the camera then my bed is causing it?
If you performed the alignment with the honeycomb outside of the machine and then added it after, yes, that can cause a misalignment. You may need to perform the alignment process again with a piece of material placed on top of the honeycomb.
A camera alignment is only valid for a fixed distance between the camera and the alignment engraving. If the workspace moves closer to the camera (this also applies to switching to thicker or thinner materials materials), or the camera moves, the alignment will be thrown off.
If you’ll be working with many materials of different thicknesses, you can perform an alignment for a given height by engraving the alignment marks at that height. Right-click in the camera control window and select “Export Camera Settings” to save that alignment information. Then, do another at a different height, and save that one too. If you name them for the heights they were done at, you can then right click and select "Import Camera Settings for the closest height to whatever you’re engraving.