I have an Omtech USB570z 80w laser. Wifi connectivity with Lightburn Bridge fails after I select the Bridge from my available wifi connections. I prompts me to select my regular wifi & password. Then cycles through trying to connect but says it “failed to fetch”. I’ve set my ruida IP to 10.0.3.3, and have a strong wifi signal in my work area. I’ve not tried the “advanced connection” options as I’m a bit hesitant to start flashing SD cards, etc. Any other options?
Did you follow the setup here?
Sounds like you did this…
You should not need to fiddle with anything…
I just add a device, select Lightburn bridge and follow through.
You need to know the ip of the Lightburn bridge, not the Ruida.
![]()
Yes. I follow the steps down to where it says “Hi! Please choose your WiFi from the list”, choose my wifi, give it the password and it tries to find it, but after a couple of minutes, it shows the following message: “Danger. Failed to connect to the network. Failed to fetch.”
How do i find the ip of the lightburn bridge device? I can get the wizard to scan while I connect the wifi to the bridge device by selecting it directly in my laptop wifi connection setting. It will then show bridge as an addable device. I did that, and it shows up on my Devices list, but the IP address is the local 192.168.42.1 so it fails to connect and asks me if I want to rescan. If I do, it fails to find the device again.
So, by editing the bridge in the devices dialog, I can manually enter the IP address, but I don’t know how to find it.
I don’t think you need to do this. Lightburn will go out to the local network and complete the connection through the os for you. You only need to ensure that it is visible to/on your lan.
The ip address the PI gets can be an issue as it can change when it reboots or the Ethernet connection renews it’s lease on the ip address.
Don’t connect the pc to the PI, let Lightburn handle the connection.
I used a wireless bridge before the PI came out and it worked the same.
Good luck
![]()
When I attempt to get to the 192.168.42.1 page via the Lightburn Bridge wizard, where it says “To open the Lightburn Bridge page on this computer, click here.”, it times out and can’t find the page. But, if I select Lightburn Bridge on my computer via the Wifi selection, it jumps to that page with the available wifi’s list. Not sure why I can’t directly navigate to that page. Using http://192.168.42.1 directly in the browser (I’ve tried both Chrome & Edge) fails to connect. Both have been set to allow lightburn past the firewall/defender. So the only way I’ve been able to scan, is by selecting Bridge as a WiFi, then adding my credentials. However, that’s not working correctly either.
Maybe @Rick can get you going down the right path with resolving this… I don’t know the Lightburn bridge well enough to know how it handles some things.
Did you try and configure a device and see if it will connect?
Sounds like the bridge is there if you can see it in the OS, maybe it will connect… give it a try until someone more knowledgeable drops by…
![]()
Update - problem solved.
I ended up following the advanced setup instructions and made a wifi.txt file on the boot flash card of the Pi, where I defined my wifi & pw directly. That did the trick as it showed up and allowed me to configure it. I did a test, and can control my laser via wifi through the Bridge. Thanks for all the suggestions. Now on to carbonizing some wood… ![]()
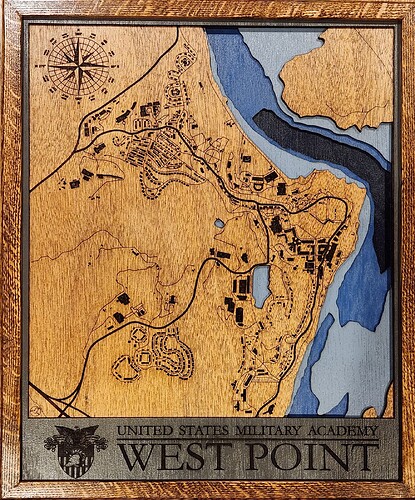
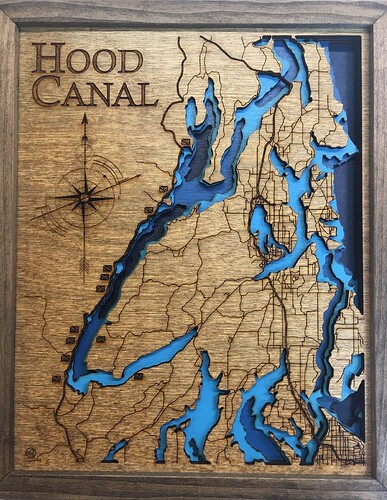
This is great news. Glad to hear you got things working as you’d like. Show us what your carbonized results are. Love to see some of your work. ![]()
Thank you for sharing. Mighty fine work. I enjoy the composite construction. Nicely executed.
Carbonization score = 2 Thumbs up! ![]()
Those look great… I’ve seen a mention of getting the artwork from site, but never can actually get the data.
If you don’t mine, how do you generate them… I’d like to do it for our little town…
![]()
I use QGIS (opensource map making app), pick the location, then filter down to the layers I want (generally 3 or 4 road types, DEM data, Bathymetry data (water depth) and generate contours from them in the app. Building footprints can be had from another free source. It takes a few days to noodling on the software to get the data right when you are first learning QGIS. Generally, you have to go out and find the DEM data (if you are using height contour lines) and the Bathymetry data from local gov. sources. Usually, its just drag & drop into your window. After I get all the data extracted, I save it off in either .svg or high resolution image format, then a trip to illustrator/inkscape to make a stacked file. Those usually will drop into lightburn without a ton of issue. Caveat - it does take a few days of watching online tutorials for QGIS (of which there are alot) to do this. There are other methods like using SnazzyMaps and extracting the layers as images (no Bathymetry) then using auto-trace in either illustrator/inkscape or in lightburn directly. I did alot of youtube searches on “Laser Maps”, “Laser Cut map building” , etc.
Thanks… I will check it out…
![]()
This topic was automatically closed 30 days after the last reply. New replies are no longer allowed.

