I have a 10W Falcon pro diode laser. I recently installed a camera from Geeks at Large and I understand that you need to align the camera for each thickness of materials you will be working with. Which seems to work well with flat sheets of material. However, I am working on a project that will be engraving a bunch of clothespins. How would I align the camera for these items? Would I place some clothespins under a thin sheet of poster board and calibrate on top of them or is there a better/easier way to do so?
Hi Dale, welcome to the forum!
For specifically the camera system, if you don’t have a movable Z axis, then yes - calibrating the camera system at the same height as the material you will be etching is the best option for camera alignment
For doing batch jobs on lots of parts with the same shape - like clothespins, I would recommend making a simple jig. It will allow you to place batches of clothespins onto the build area more quickly than manually aligning all the parts to the camera image, and will also allow you to set up the job again in the future quickly - put the jig back on the table, focus your laser, and off you go.
I grabbed a clothespin from my kitchen drawer and it measures 2.875" x 0.375" - so I drew that in LightBurn, along with a 8.5x11" square (a standard sheet of paper, as an example)

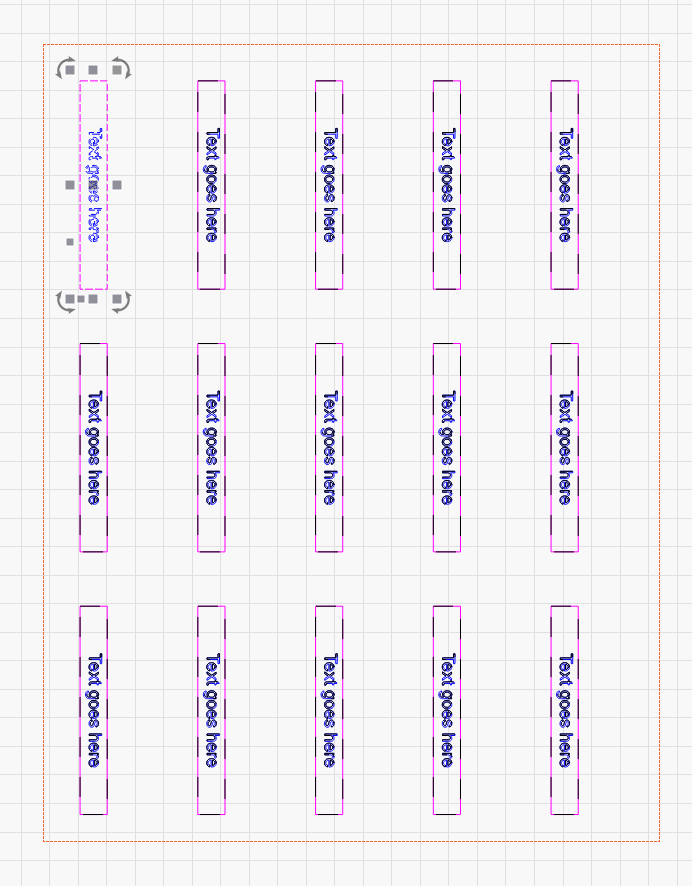
Then I used the Grid Array tool to make 15 copies of the clothespin shape

But now what if I want to array a piece of text on the same array?
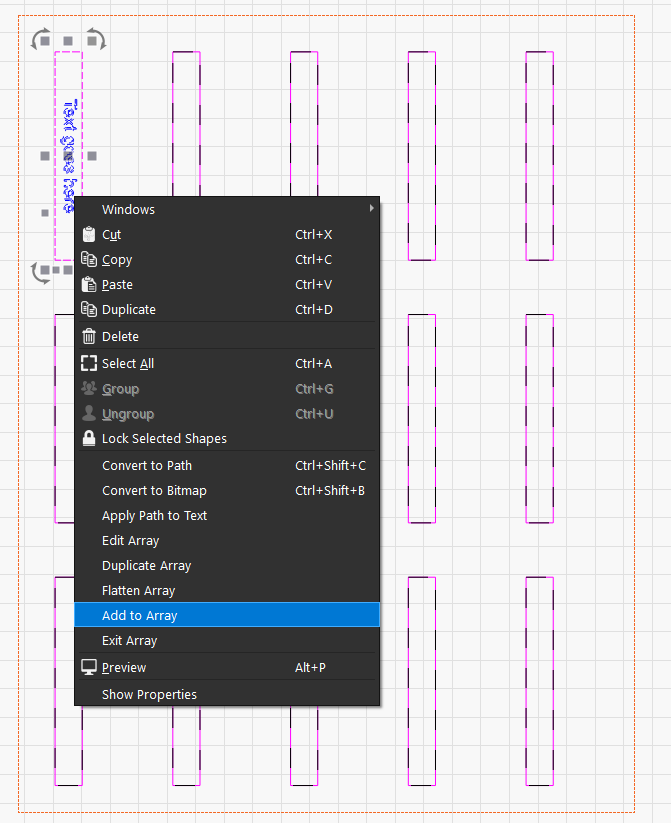
It’s very easy! Place the text on the top left clothespin, then select that clothespin and the text (hold ctrl and select both, or click and drag to window select), then right click and select ‘Add to Array’
If you wanted to get extra fancy, you could even use Variable Text to pull names, dates, etc and automatically increment the text along the array with each run. Great for personalization!
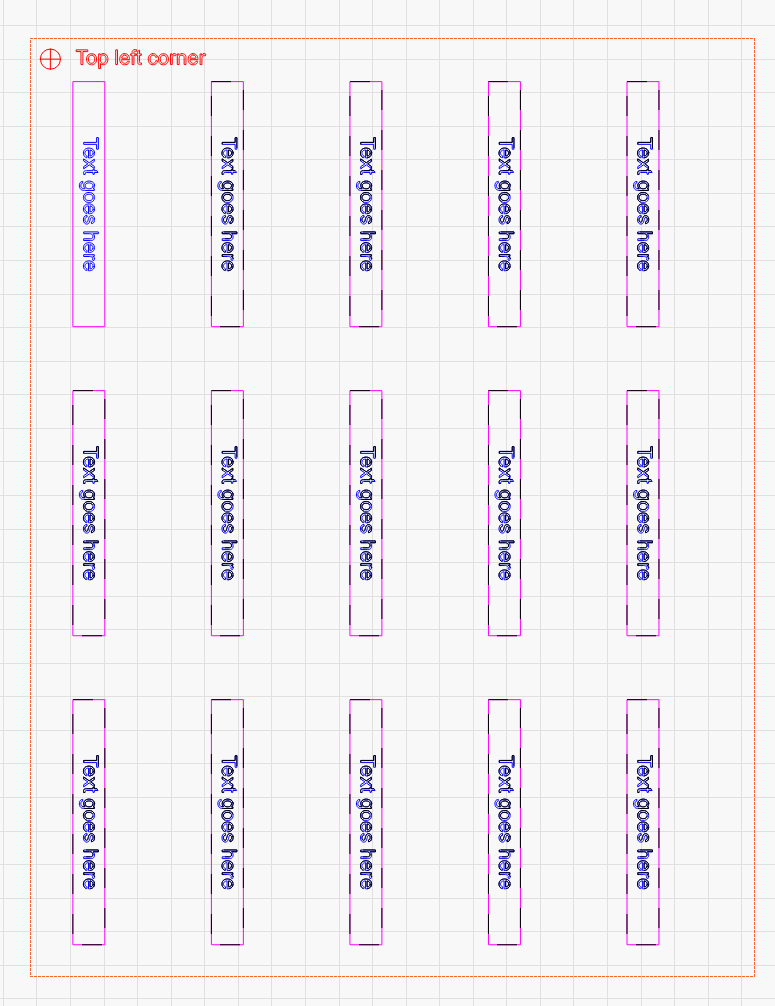
Lastly, I like to make a datum reference point on the jig, so I know which way it is oriented if I have to use it again:
I’ve attached this jig file if you want to use it. Good luck, and let us know how it goes!
Clothespin Jig.lbrn2 (41.9 KB)
3 Likes
Thanks for the great info. I’ve also done this as well, but would like to be able to use the camera for other odd shaped not easily jigged items such as certain firearm parts. Clothespins were just one of my weird projects.
1 Like
I usually recommend the jig method as well but there is also another option. Since the camera plane needs to be fixed to the laser focus, you can also align the camera to a specific height (like the bottom the laser is placed on) and then you change the height of the laser such that the distance to the laser / camera is always the same. So align the camera and the laser head, and then don’t touch the laser module z-adjustment anymore, but move the whole gantry up and down to get the workpiece into the focus of the laser beam (which is the image plane as well). This is how adjustable laser beds work. In such a case, the camera and laser head never change, but the bed is adjusted to get the workpiece onto the focus height of the laser.
My bed is fixed so can’t move it up and down. I guess I’ll experiment with putting a piece of thin material on top of the objects I’m working on and try to calibrate that way. The clothespins were probably a bad example since they are fairly easy to make a jig for since they are fairly uniform. My hope was to be able to throw unusual shaped objects, though most are similar thickness on the bed and use the camera to align the engraving on them.
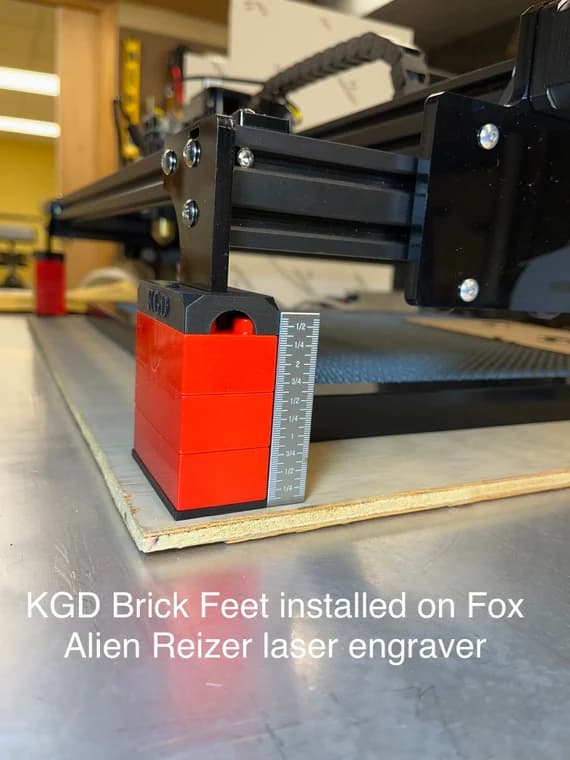
You don’t need to move your bed. You can move the laser up and down. Just use some spacers. Like you would also do when using a rotary. You can even use some stackable blocks like “Lego” pieces to adjust the height easily (image stolen from Etsy):
Small addition: if you have many different objects, different heights and shapes, the camera is not the right tool for you. It’s too complicated and error prone if you need to calibrate again and again. Use manual modes, current position, and framing to place your designs. It will be faster and more accurate.
2 Likes
This topic was automatically closed 30 days after the last reply. New replies are no longer allowed.