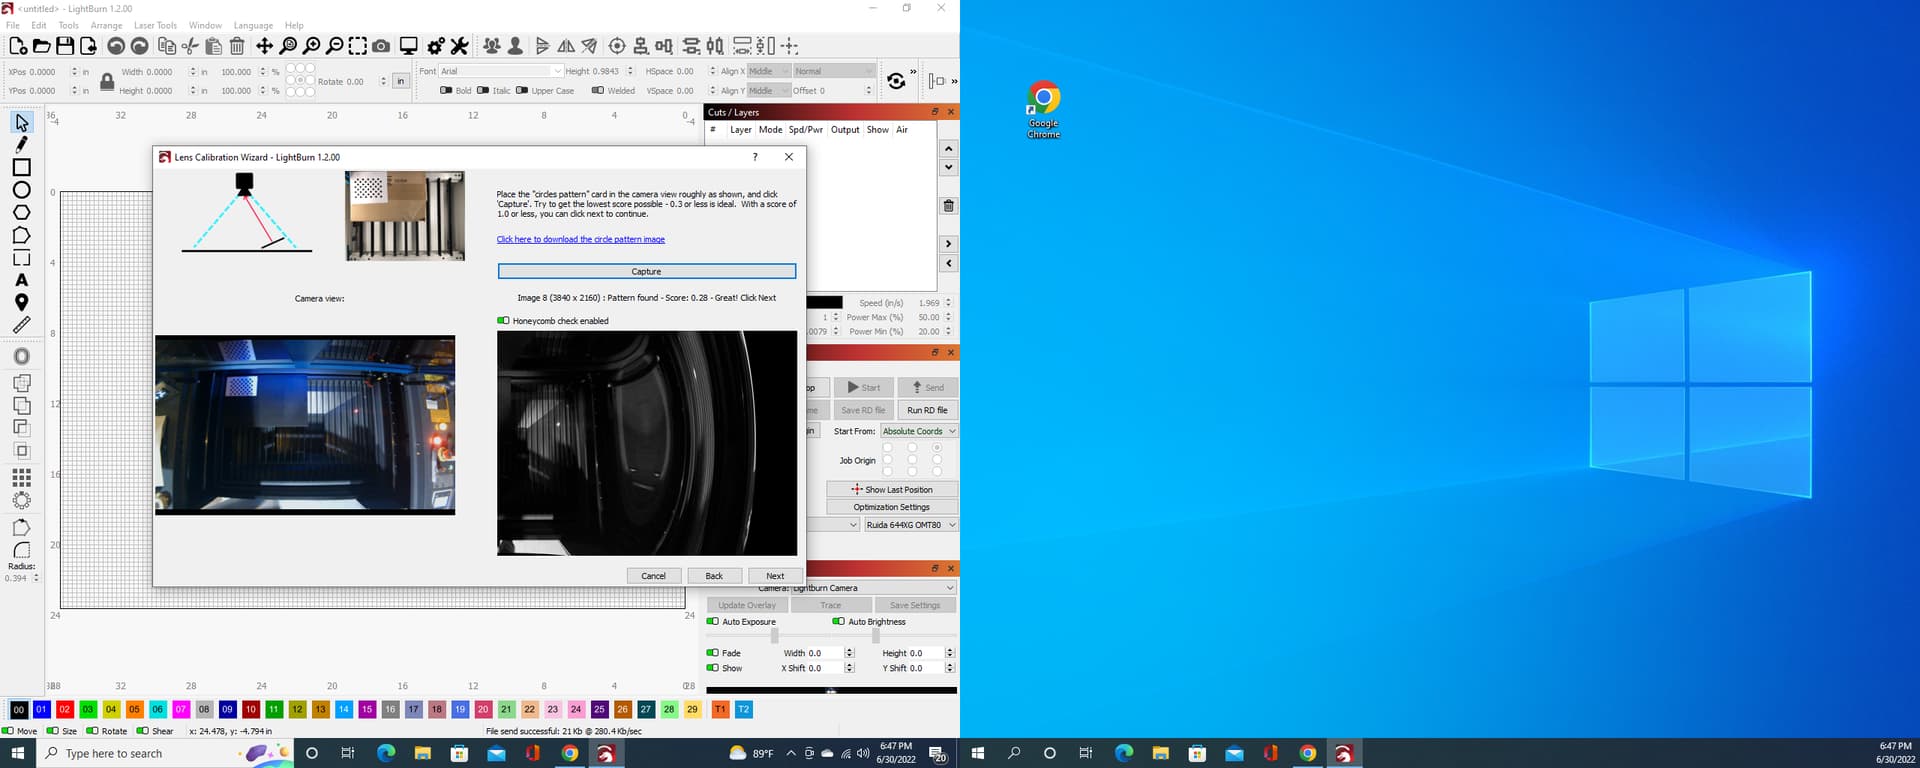
Good evening, everyone. I could use a bit of advice here. I just did the new update, and everything seemed fine. I decided to try and recalibrate my lens and do the camera alignment. Things are not working out. I got decent scores under .30 on the alignment, but the images are like a bad acid trip. I don’t remember this happening when I did this the first and only time I did it before. I have an 80w omtech, the bed is decent size 900x600. The camera is one of the Lightburn 8mp but not sure which as the order doesn’t state and neither did the cam. I rolled with the decent results and then tried to do the calibrate camera alignment as prompted. The frame doesn’t come out right at all. the laser tracks 2/3rds along the middle back, cuts the corner short of full-length travel, heads to the front of the machine crossing my piece to mark, repeats the 2/3rds travel turns short and crosses my piece to mark then stops back at the rear middle of the machine. My board is large 14x24 and centered on the bed. I hit start and it tries engraving off the board,
then crosses my board and tries engraving on the other side off the board. I see no way to make any adjustments and I have to believe it has something to do with either the update or the acid trip calibrate lens images. Anyone have any ideas? Kind of dead in the water right now.
You needn’t be concerned about odd looking images as the calibration occurs. You only need to focus on the score being good. However, images should start to look better toward the final captures. Even then, don’t concern yourself as long as the scores are good.
Have you adjusted scale appropriately to fill a good size portion of the bed?
Can you take a screenshot of what you’re seeing?
If none of this works, you may be able to revert back to your old settings in File->Load Prefs Backup.
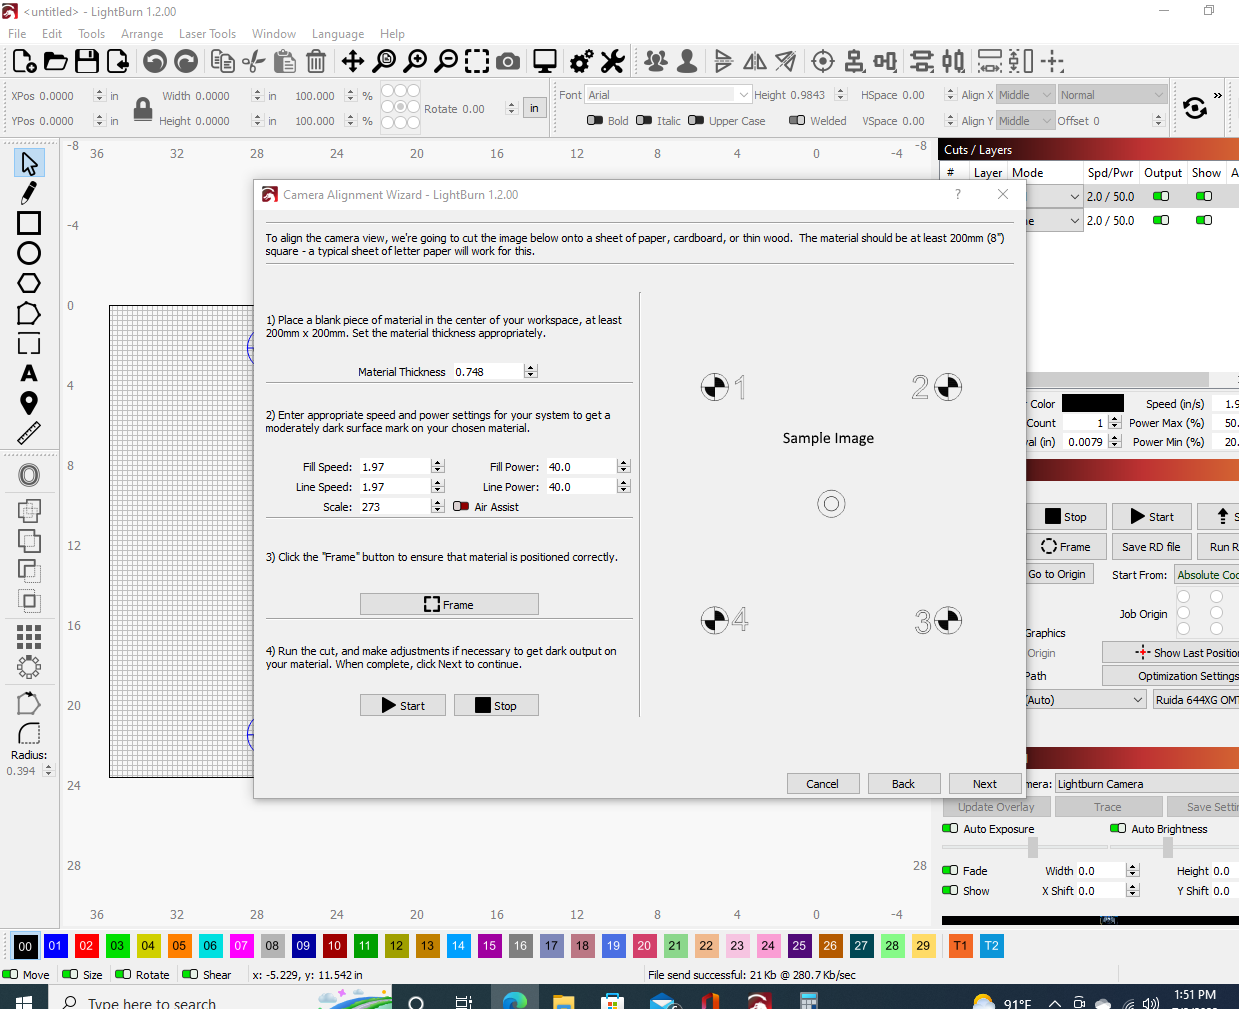
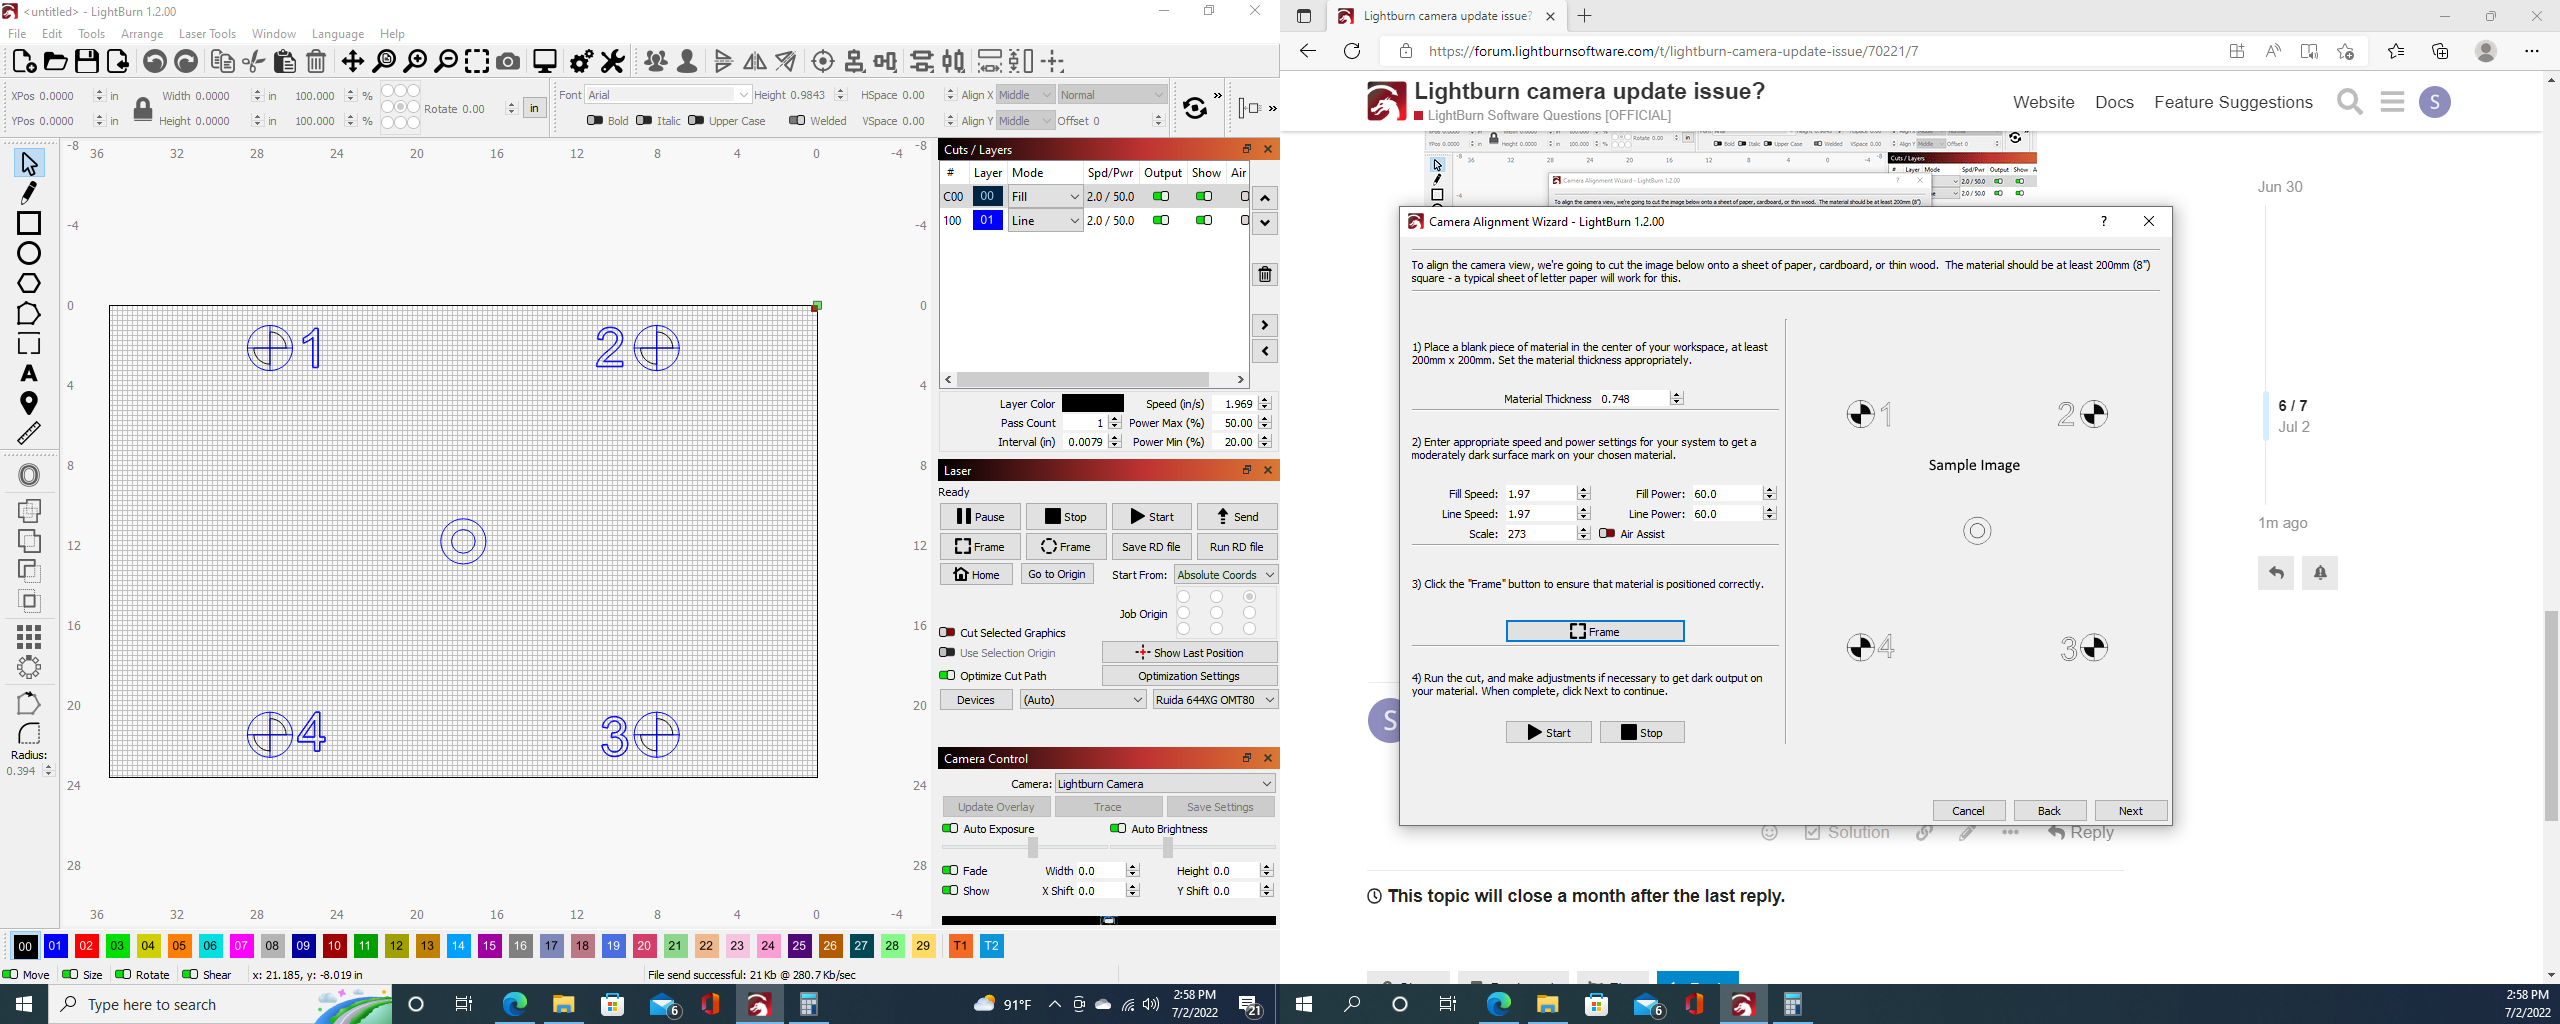
I think this image may be more of what your looking for. As you can see the layout shows to be about 20"x20". Can I reduce that size and if yes how? I mean the instructions say this can be done on an 8" sqaure so thats not possible with the current layout. The last time I did this I used a 10"x10" piece of wood.
In section 2) there is a field called scale. You can use that to scale up and down the size of the 4 target pattern.
Can you try adjusting those until the frame area matches a good portion of the workspace. The current sizing doesn’t look bad. Is there a reason why you can’t use that?
Thanks, i did figure out the scale deal. I just didn’t need to use it before. I was trying to get the layout smaller because that layout was 20"x20" and i didn’t have any scrap pieces that big.