Lightburn doesnt detect 3018 cnc

Im sorry…got a bit excited…wanna burn something! :slight_smile:

$$
$0=10
$1=25
$2=0
$3=6
$4=0
$5=0
$6=0
$10=1
$11=1.000
$12=0.002
$13=0
$20=0
$21=1
$22=1
$23=7
$24=25.000
$25=500.000
$26=250
$27=2.000
$30=1000
$31=0
$32=0
$100=800.000
$101=800.000
$102=800.000
$110=2000.000
$111=2000.000
$112=100.000
$120=20.000
$121=20.000
$122=20.000
$130=500.000
$131=500.000
$132=200.000
ok

OK, so there are several things I can see that will need to be addressed. Did you get any instructions from the manufacturer of this hardware? In particular, the recommended firmware settings for this hardware?

Here is a list of each of the grbl settings and how they are used and defined. https://github.com/gnea/grbl/wiki/Grbl-v1.1-Configuration

You will need to set $32=1 (laser mode ON). You will want to set up a macro in LightBurn to be able to flip between Laser Mode and CNC, but we can address that later.

$130, $131 and $132 are your settings for the dimensions of your physical work area and are currently set to X = 500mm, Y = 500mm and Z = 200mm of Max Travel. This needs to change to what you actually have as well.

Once you have that, repost the $$ results again for review.

Ok here is my device setup:
only 1 picture per post for new users

I set it up to 300 x 200 because I dunno actually because the platform does measure 300 sideways, but front to back it measures 180 actually…so ill fix that…

ok I changed the origin as well, to rear right, so it matches the job origin in the lightburn window as shown on the far right of that screenshot.

oh wait…so my motor that is connected to the threaded rod on the bottom, which moves the platform itself, is connected to the Y terminal on the board. Is that right? I kinda thought that should be X

No that does not sound correct as most always the Z axis is used to move the bed up or down. But this is now getting way outside the LightBrun support area. Your wiring is not something I can help you with.

Have a read here for overview of common setups for gcode/grbl in LightBurn: https://github.com/LightBurnSoftware/Documentation/blob/master/CommonGrblSetups.md#common-grbl-setups

No, the wiring is right. I just checked. X moves left to right and Y moves front to back. Im good. So now what? I set x = 180 and y=300 in the max travel right?

$$

$0=10

$1=25

$2=0

$3=6

$4=0

$5=0

$6=0

$10=1

$11=1.000

$12=0.002

$13=0

$20=0

$21=1

$22=1

$23=7

$24=25.000

$25=500.000

$26=250

$27=2.000

$30=1000

$31=0

$32=1

$100=800.000

$101=800.000

$102=800.000

$110=2000.000

$111=2000.000

$112=100.000

$120=20.000

$121=20.000

$122=20.000

$130=180.000

$131=300.000

$132=200.000

ok

If those are the correct measurements, then yes.

This is worth a review and let us know if you are still having issues. You should also check out our YouTube channel for some additional videos.

Yes thanks, Ive seen those. So Im trying to put it all together though:

  1. I moved my device origin to be front-left (or bottom left as in the video)
  2. Ive made the size match the size of my platform, 300x and 180y & in the console as well
  3. Ive manually moved my laser to the bottom left corner and clicked on Get Position and got this:

Should I set this as my origin by clicking on the Set Origin button in that window?

Im sorry, I saw the videos but you dont really take the user thru the steps of setting up the machine. What the video does is explain what machine origin is and how its often confusing with home and what happens if you flip them. To me, it was just a video that confused me further. Sorry, didnt mean to be rude. Im just trying to understand step by step by setting up my machine.

If you don’t have limit switches, you will need to manually set the zero point (the origin) manually each time you power up in order to be able to use Absolute positioning, or the click-to-jog feature - both of those require the use of absolute positions, which require starting from a known zero point.

The ‘Set Origin’ button you’re asking about above doesn’t set the machine origin, but the ‘Job Origin’ used by LightBurn as the starting point of a job when you run in User Origin mode (the terminology is confusing for CNC users unfortunately, but because big DSP lasers use it this way I can’t really change it).

Not taken as rude. We are aware everyone could benefit from more and better videos. For now, we are focused on the software development as the priority, trying to manage the production of educational content as we can. Some of the current content was produced by our user community. We know this needs attention.

Have you read the document I provided above? I draw your attention to this section:

In the console window, type

G0 X0 Y0

then hit enter. Your machine will head toward its origin position. This isn’t always the same as where the home position is. Usually, the home position is in one of the corners. Most often it will be the rear-right or front-left of the machine. In some cases, it might be the center of the work area. If your machine does this, skip ahead to ’ Center Origin Machines ’ below.

After it stops moving, type

G0 X10 Y10

then hit enter. If your machine moves 10mm into the work area on both axis that’s good - it means your machine uses positive workspace coordinates. You simply set the origin in LightBurn to match the machine origin discovered above. If your machine bumped the rails, it uses negative coordinates.

Please do this and please report back.

Ok Im just worried when the machine overruns a limit and my motors make terrible noises.

Ok so machine origin is something that can be changed by me, the user, to wherever I want it to be, right? Or no?

In this picture, are all those (in red) talking about the same origin?

Because according to the top Get Position, even though my machine is at bottom left, it says the current position is x-270 and y+30. So im afraid if I enter G0 X0 Y0, itll go off somewhere…

The ‘origin at front left’ in the Devices window is talking about the physical origin of your machine, IE, where your laser system believes X0, Y0 is.

The Home button you highlighted tells your laser to run its homing cycle (if enabled) to seek out the limit switches that it uses to determine its location. These are often at the origin, but not required to be. The common K40, for example, has the limit switches at the rear-left of the machine, but the origin is front-left. It knows how big the working area is, so after finding the rear-left, it knows “oh - I’m at X0 Y200, so X0 Y0 is 200 mm down”.

The “Go to Origin” and “Set Origin” buttons are referring to the user/job origin, not the machine origin. This is where I meant that the CNC and laser terminology get confusing. The Job Origin / User Origin is where the laser head position is relative to your design when the job starts, and we cover that here: https://github.com/LightBurnSoftware/Documentation/blob/master/CoordinatesOrigin.md#coordinates-and-job-origin

With your machine at the bottom left, if you type:

G92 X0 Y0

In the console and press enter, it should reset the current position of the machine to 0,0, so the Get Positions button now reports the correct values.

You should also set:

$10=0

The $10 setting controls the way coordinates are reported by your machine to LightBurn.

Most of these are covered here: https://github.com/LightBurnSoftware/Documentation/blob/master/CommonGrblSetups.md#common-grbl-setups

Ok,

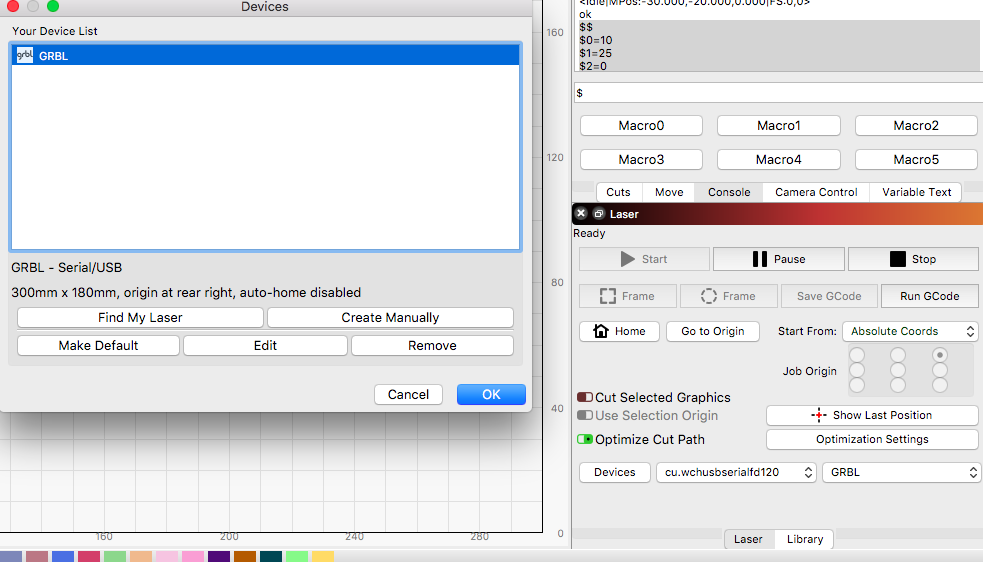
I powered everything up and when I click on Get Position, it tells me x0 y0. The machine is currently at what I believe to be the laser position farthest back left.

So you say enter G92 x0 y0…i got ok. and if i click Get Position I still get 0,0. So im guess the button Get Position on lightburn and g92 x0y0 do the same thing in this case.

You said set $10=0…i got ok again.

So i decided to use the location jog button and click in the center of the canvas…one of the motors made a loud noise, the x axis motor moved to what looks to be the middle, but the y axis motor didnt move at all, i think that was the one making the loud noise.

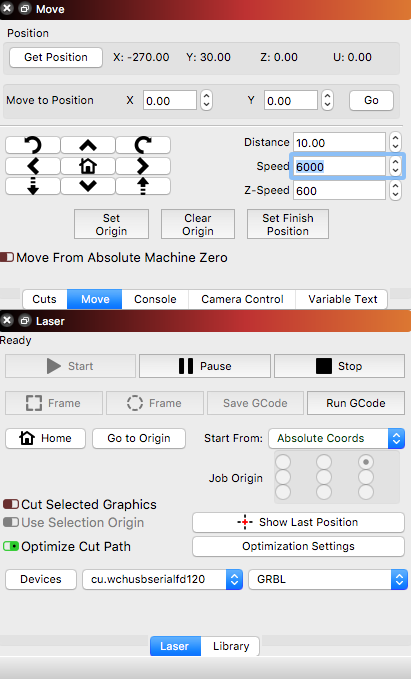
Without having to click on it, Position seems to be x150 y90. And if I click on Get Position it gives me that same point. But something happened with the y motor.

I went to the individual move buttons and clicked on
X- and got spindle moving left & Get Position is x140 & y90
X+ back to x150 and y90
Y- bed moved towards me x150 & y80
Y+ bed moved back into place, x150 y80.

Clicked on Canvas 40,40 and the laser is now pointing at back left corner almost, Get Position 40,40

Clicked on Canvas 140,40 and the bed ran over the limit…so i have an issue with the y axis still. The Get Position reads x40, y140.

$$ gives me $130=180 & $131=300.

Clicked on Canvas 40,40 and it moved to the back left again and Get Position is 40,40.

Clicked on Canvas 40,240 and it moved across to the right side, Get Position x240, 40.

Clicked on Canvas 240,100 and it moved backwards w/o overrun, Get Position x240, y101.

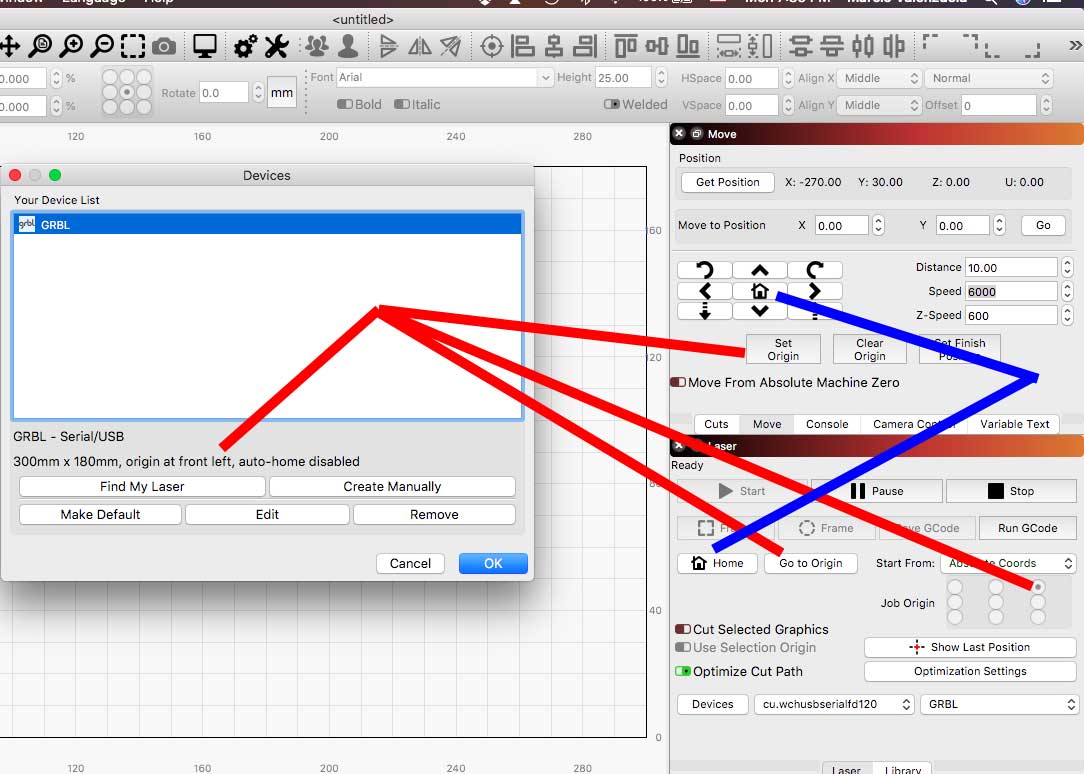
So Im guessing I need to reset my 0,0 closer to the edge of the platform? I just eye-balled it the first time plus a few mms for caution.

How should I make sure where I want to set 0,0 as machine origin is exactly the corner of my platform?

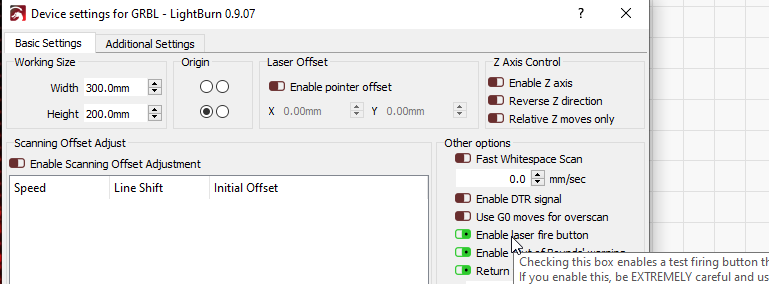
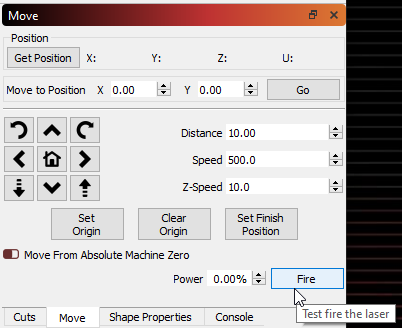
I decided to type G0 x0 y0 as the doc referenced above says…and it went to the back left, but it doesnt seem to be where I set it. Oh, how do I turn on the laser from lightburn? I didnt find it in those docs. I mean turn it on but just a bit so i can see where on the platform its actually pointing at.

At present, after g0x0y0, it moved to what looks about 10mm from the left edge and 30mm from the back edge.

Ive modified my $30=255, and the S value in Device Settings to 255 as well and activated the Enable Fire button which i found in a video was used for positioning the laser. Its supposed to activate a button no the panels in lightburn for activating the laser but I dont see it happen, i dont see the button.

Here is my

$$

$0=10

$1=25

$2=0

$3=6

$4=0

$5=0

$6=0

$10=0

$11=1.000

$12=0.002

$13=0

$20=0

$21=1

$22=1

$23=7

$24=25.000

$25=500.000

$26=250

$27=2.000

$30=255

$31=0

$32=1

$100=800.000

$101=800.000

$102=800.000

$110=2000.000

$111=2000.000

$112=100.000

$120=20.000

$121=20.000

$122=20.000

$130=180.000

$131=300.000

$132=200.000

ok

For the Fire Laser button you need to enable the switch, then quit and restart. The button will show up in the Move panel in LightBurn.

Ok I did and I get the button, I set it to 1% and 4% but when I hit fire nothing happens. The button lights blue but the laser doesnt light.

G92 X0 Y0 tells your laser “Where you are right now is X0 Y0” - if you jog the laser somewhere, like the front left for example, and enter that command, that will become the new X0 Y0.

To use the Click to Jog button, your laser needs to use positive coordinates to jog into the work area, and the origin has to match the corner you’ve told LightBurn your origin is. If either of those isn’t true, it won’t work, and lots of CNC systems, including the 3018, use negative workspace values for some weird historic reason, where dedicated laser systems don’t.

For turning on the laser to see where it’s positioned, go the Edit > Device Settings, and enable the Laser Fire button, shown here:

Restart LightBurn, and in the Move window you’ll see a button with a power value that lets you turn on the beam:

image

What % is safe to turn on and see it in order to align?

OK I tried and 20% is as high as it goes and still no laser. :confounded:

I got it!!!

Why didn’t anyone tell me the laser has a small button up top which turns it on?! When I plugged in the controller I heard the laser fan turn on so I figured the actual laser was also on. But no, I had to press the button FOOL!

1 Like

Hey, @marciokoko…Press the button fool! :wink:

Seriously, glad to hear you got sorted.

1 Like