I’m interested in learning more about the DPI setting in Lightburn and how it affects output. I’ve noticed (through trial and error) that setting the DPI too high can result in wavy engravings that look terrible. I started at 500 DPI and worked back down to around 190 DPI which seems to work well. I believe the Lightburn default is 254 DPI.
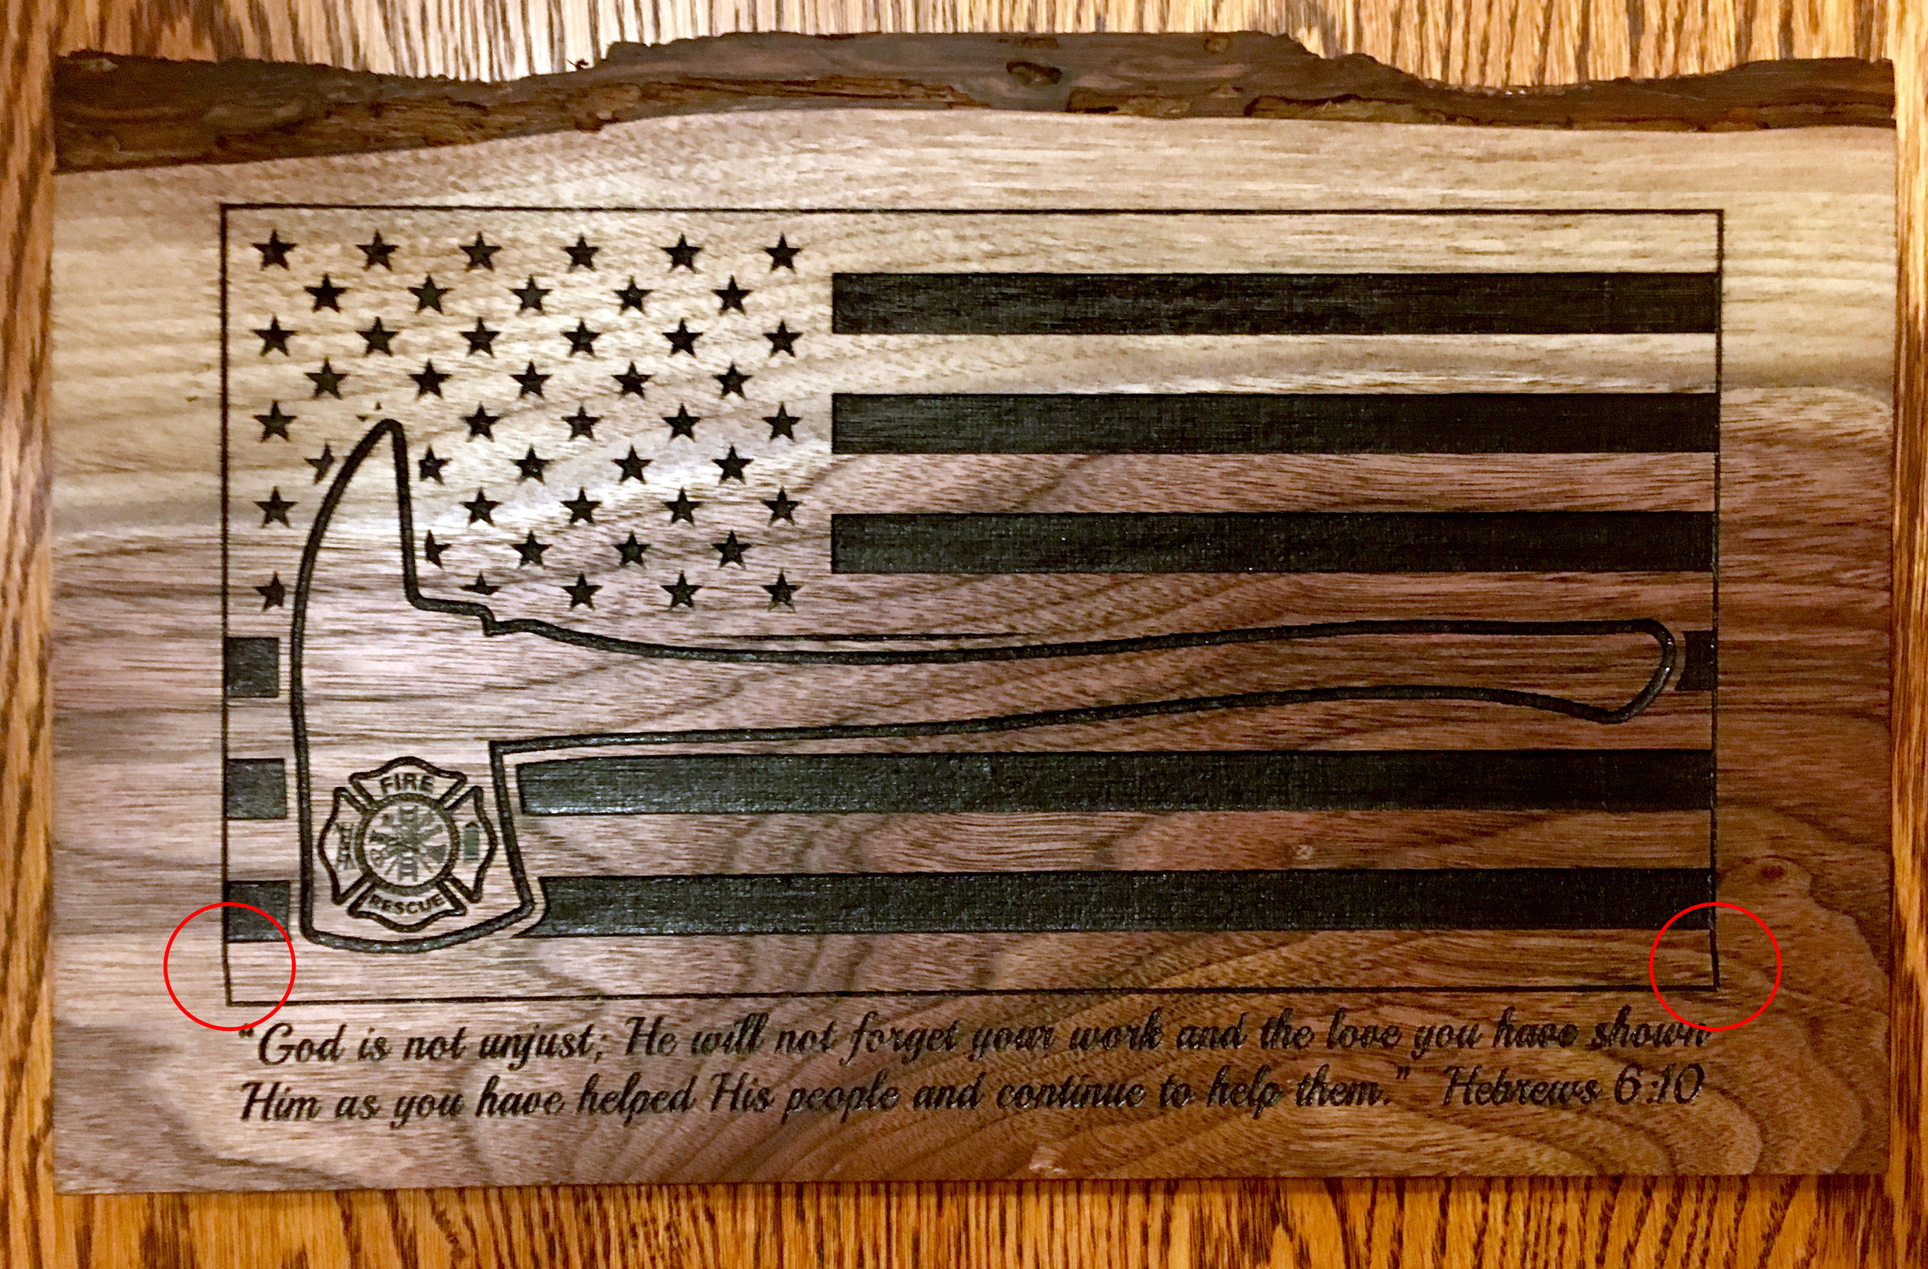
That said, I still will often see portions of my job shift along the X axis during engraving (happens most of the time, not all of the time). Below is an image of a gift that I recently made for a friend. I engraved this at 80 mm/s, 60% power, and 190 DPI…and I believe the image (a .JPG file) was saved at 300 DPI. Note how the entire job shifted to the left (see the red circles) at the bottom of the flag. All of my hardware is right and tight and I can make this issue more pronounced by increasing DPI.
So the question is, is the DPI setting in Lightburn a set it and forget it thing…or should it be adjusted relative to the size and DPI of the image being engraved? Is there a process for determining what the precise setting for this should be? Is there something else I should be looking at? I’m running a K40 with C3D board…let me know if I can provide more detail. TIA.
DPI isn’t going to directly do that. But increasing the DPI is going to increase your passes back and forth, making your mechanical issue more pronounced. Maybe check your rails for dirt and debris. Something is the issue, and it’s not LightBurns DPI settings.
I respectfully disagree. I can load up a job and change nothing but the DPI settings and go from a decent engrave to a terrible (wavy) engrave. Perhaps it’s something in the controller or elsewhere in the electronics, but changing the setting in Lightburn most certainly does have an effect on the output.
What I mean though, is that it’s just emphasizing your real issue. DPI itself doesn’t make lines wavy.
Does the issue always happen in the same spot? Use the flag for example. If you ran 3 of those at the same high DPI settings, will the error always be on the bottom of the flag, like it is in your picture?
Good question. No, it does not always happen in the same spot. I actually ran that flag a couple of times and had the issue happen at varying places. The time before this one, the wavy lines were at the top of the flag.
That said, I have had other jobs where the wavy lines DID appear at the same location…which (at the time) led me to believe that I had some corruption in that file. But I’ve switched files and had the issue pop up on all designs/files. It’s very strange.
I suspect that the issue is the firmware. Since you haven’t said which one you’re using, I’m assuming Smoothieware.
The reason your engravings get wavy is that Smoothieware can’t keep up with the GCode throughput required to run an image at the higher DPI / speed combinations, and it starts to lose steps if you push too hard. This is most commonly seen in grayscale or dithering - you haven’t said what image settings you used, so I can’t tell you for sure if that’s what is happening here.
If you used threshold for the image I wouldn’t expect it to show up, because threshold produces fairly simple GCode.
The Smoothieware issue is this: It can’t process more than about 800 gcode instructions per second. If you produce a file where the combination of speed and graphic density ends up producing more than 800 instructions in a second you run the risk of skipping steps, because it starts to stutter.
The text at the bottom of the image and the logo in the axe are the only two places I’d expect to see this, but again, hard to say without seeing the image settings. If this was grayscale or dithered you could have lots of small shading dots everywhere that would be hard to see on the end result, but would produce a ton more instructions sent to the machine.
The new C3D Smoothie firmware with clustering will help reduce this (and you have to turn on the corresponding flag in LightBurn). I wrote it to improve the throughput for Smoothieware because this keeps tripping people up.
This is helpful, thanks. I’ll try to provide a bit more info…
Yes, I’m running Smoothie. I’m on a C3D controller, but it’s from their first batch which requires older firmware (I believe they call it their “batch 3” firmware). I do wonder if that’s part of my problem, and if I should upgrade to a more recent version of their controller.
That said, my typical design workflow is to create everything in black and white (text & images) in Photoshop (because I’m comfortable using it) and then output a JPG from there. Per my first post, I’ve typically created my images at 300 DPI. I’m not sure if there are other “image settings” that you’d like to know…if so, let me know and I’ll try to provide more info. More importantly, can you recommend appropriate output settings or a change to my workflow that would be helpful?
JPG is a lossy format, and will almost certainly end up with shades of gray in it. You’re better off exporting as PNG, which is lossless, so it’ll be cleaner. You should also set the image mode to Threshold instead of Dither.
When you’re in PhotoShop, even if you’re working in black & white, you’re likely not working in 1-bit color (on/off) - so you’ll end up with shading around the edges of your shapes. That shading will get translated into patterns of dots when sending to the laser, instead of a clean edge.
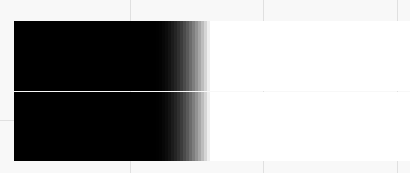
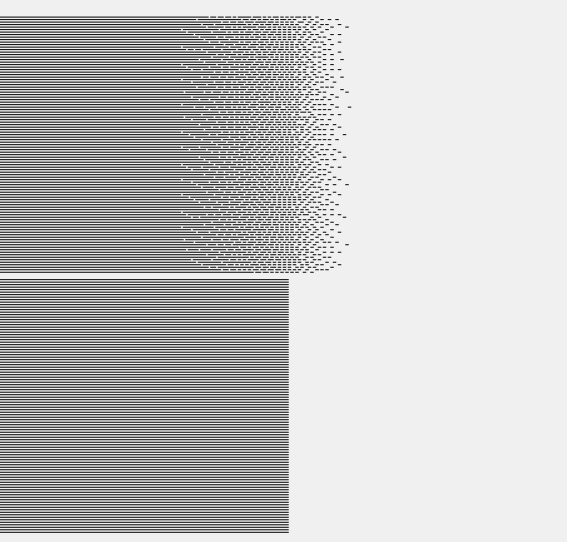
This is exaggerated to illustrate the difference, but look at this pic - I’ve made a black and white strip with a shaded edge. The top one is dithered and the bottom one is threshold:
If you have text or images with antialiased edges (IE smoothed) you’ll get output that’s more like the top picture than the bottom one, though not as bad. All the extra dots mean more output to the board, and if it’s too much, you can choke it. Again, more of an issue with Smoothieware, not an issue with GRBL-LPC or the new clustering firmware.
Excellent. This is most helpful. How would a .BMP compare to PNG? In the case of the flag image, it’d be easy to convert to greyscale, then convert to bitmap, then output at 50% threshold…which should basically output a monochrome bitmap. That might cut down on the “choking” too?
BMP is also lossless, but they tend to be bigger. Running it with the Threshold image mode in LightBurn should improve things a bit. No need to do all the conversions first - just set it to threshold and that should be all you need.
Waviness, as I see it, is like moire in the screen printing we did.
It’s an interference pattern the result of two different frequencies occasionally hitting the same values, and then slowly moving away, then merging again etc.
You can hear it in guitar tuning when two strings are not quite in tune, but are plucked together, there is a waaw interference pattern sound.
If you have an original file at 300 ppi, and you laser it at 600, or at 150 ppi - direct multiples of the original, you’ll seldom get those issues.
If you chose to laser it at 254 ppi, which is 10 dots per millimetre, you’re going to get an interference pattern because 254/300 is not a neat integer (whole number).
However, that won’t be why the bottom of your file is shifting out of kilter.