Hello, I bought a Chinese laser 60W JPT MOPA M7, BSL. After connecting the USB, it shows me SEA-LASER. What do I need to get it running? They gave me the cypress FX2LP driver and the bslapp simple program. After running lightburn and importing the bslcad.cfd configuration, the laser connects. The selected graphic is surrounded by red light but it doesn’t want to cut at all. What could be wrong? Is it broken?
Hello Michael,
Do you mean no output at all to not enough power to cut through? Which settings did you use in the layer?
You may need to import the LmcPar.cfg instead!
Sometimes, the BslCad.cfg does not hold the necessary settings and the defaults are used.
If you import the correct one, you should see a summary similar to this:

If you attach both config files here and send us a screenshot of your “Edit > Device Settings” we can investigate.
Where can I find a working settings file? Can you send it to me?
Your manufacturer should have it. It’s usually sent on a USB stick in the BSLsimple / SeaLaser app folder. Look for a “config” subfolder. It should be in the same location as the BslCad.cfg you used before.
2 Likes
The supplier sent it to me but when I import it, it doesn’t load the parameters like the one in your picture. It’s probably damaged and the communication with the supplier is terrible. Can I download it somewhere else? I have a 150x150 lens.
Did you try with both config files? If you send them here, we can have a look.
On that note: Some of the BSL software ships with defaults baked into the application itself, instead of having the values persisted in a config file. If you open the BSL app and change anything, then quit, it saves all the values out and THEN they can be imported.
If you can, please send us a .zip file of this application folder.
Which laser - Brand and model is it exactly?
I downloaded the bsl app that I found somewhere on the net and uploaded the configuration from it and it started working. I adjusted the values for my lens and it works quite nicely. Is it possible that the configuration will not be ideal? I can send you what I downloaded so you can check it if necessary. Anyway, thanks for the help, you have guided me in the right direction. Many thanks.
PS: I don’t know the model, here is a photo and test results
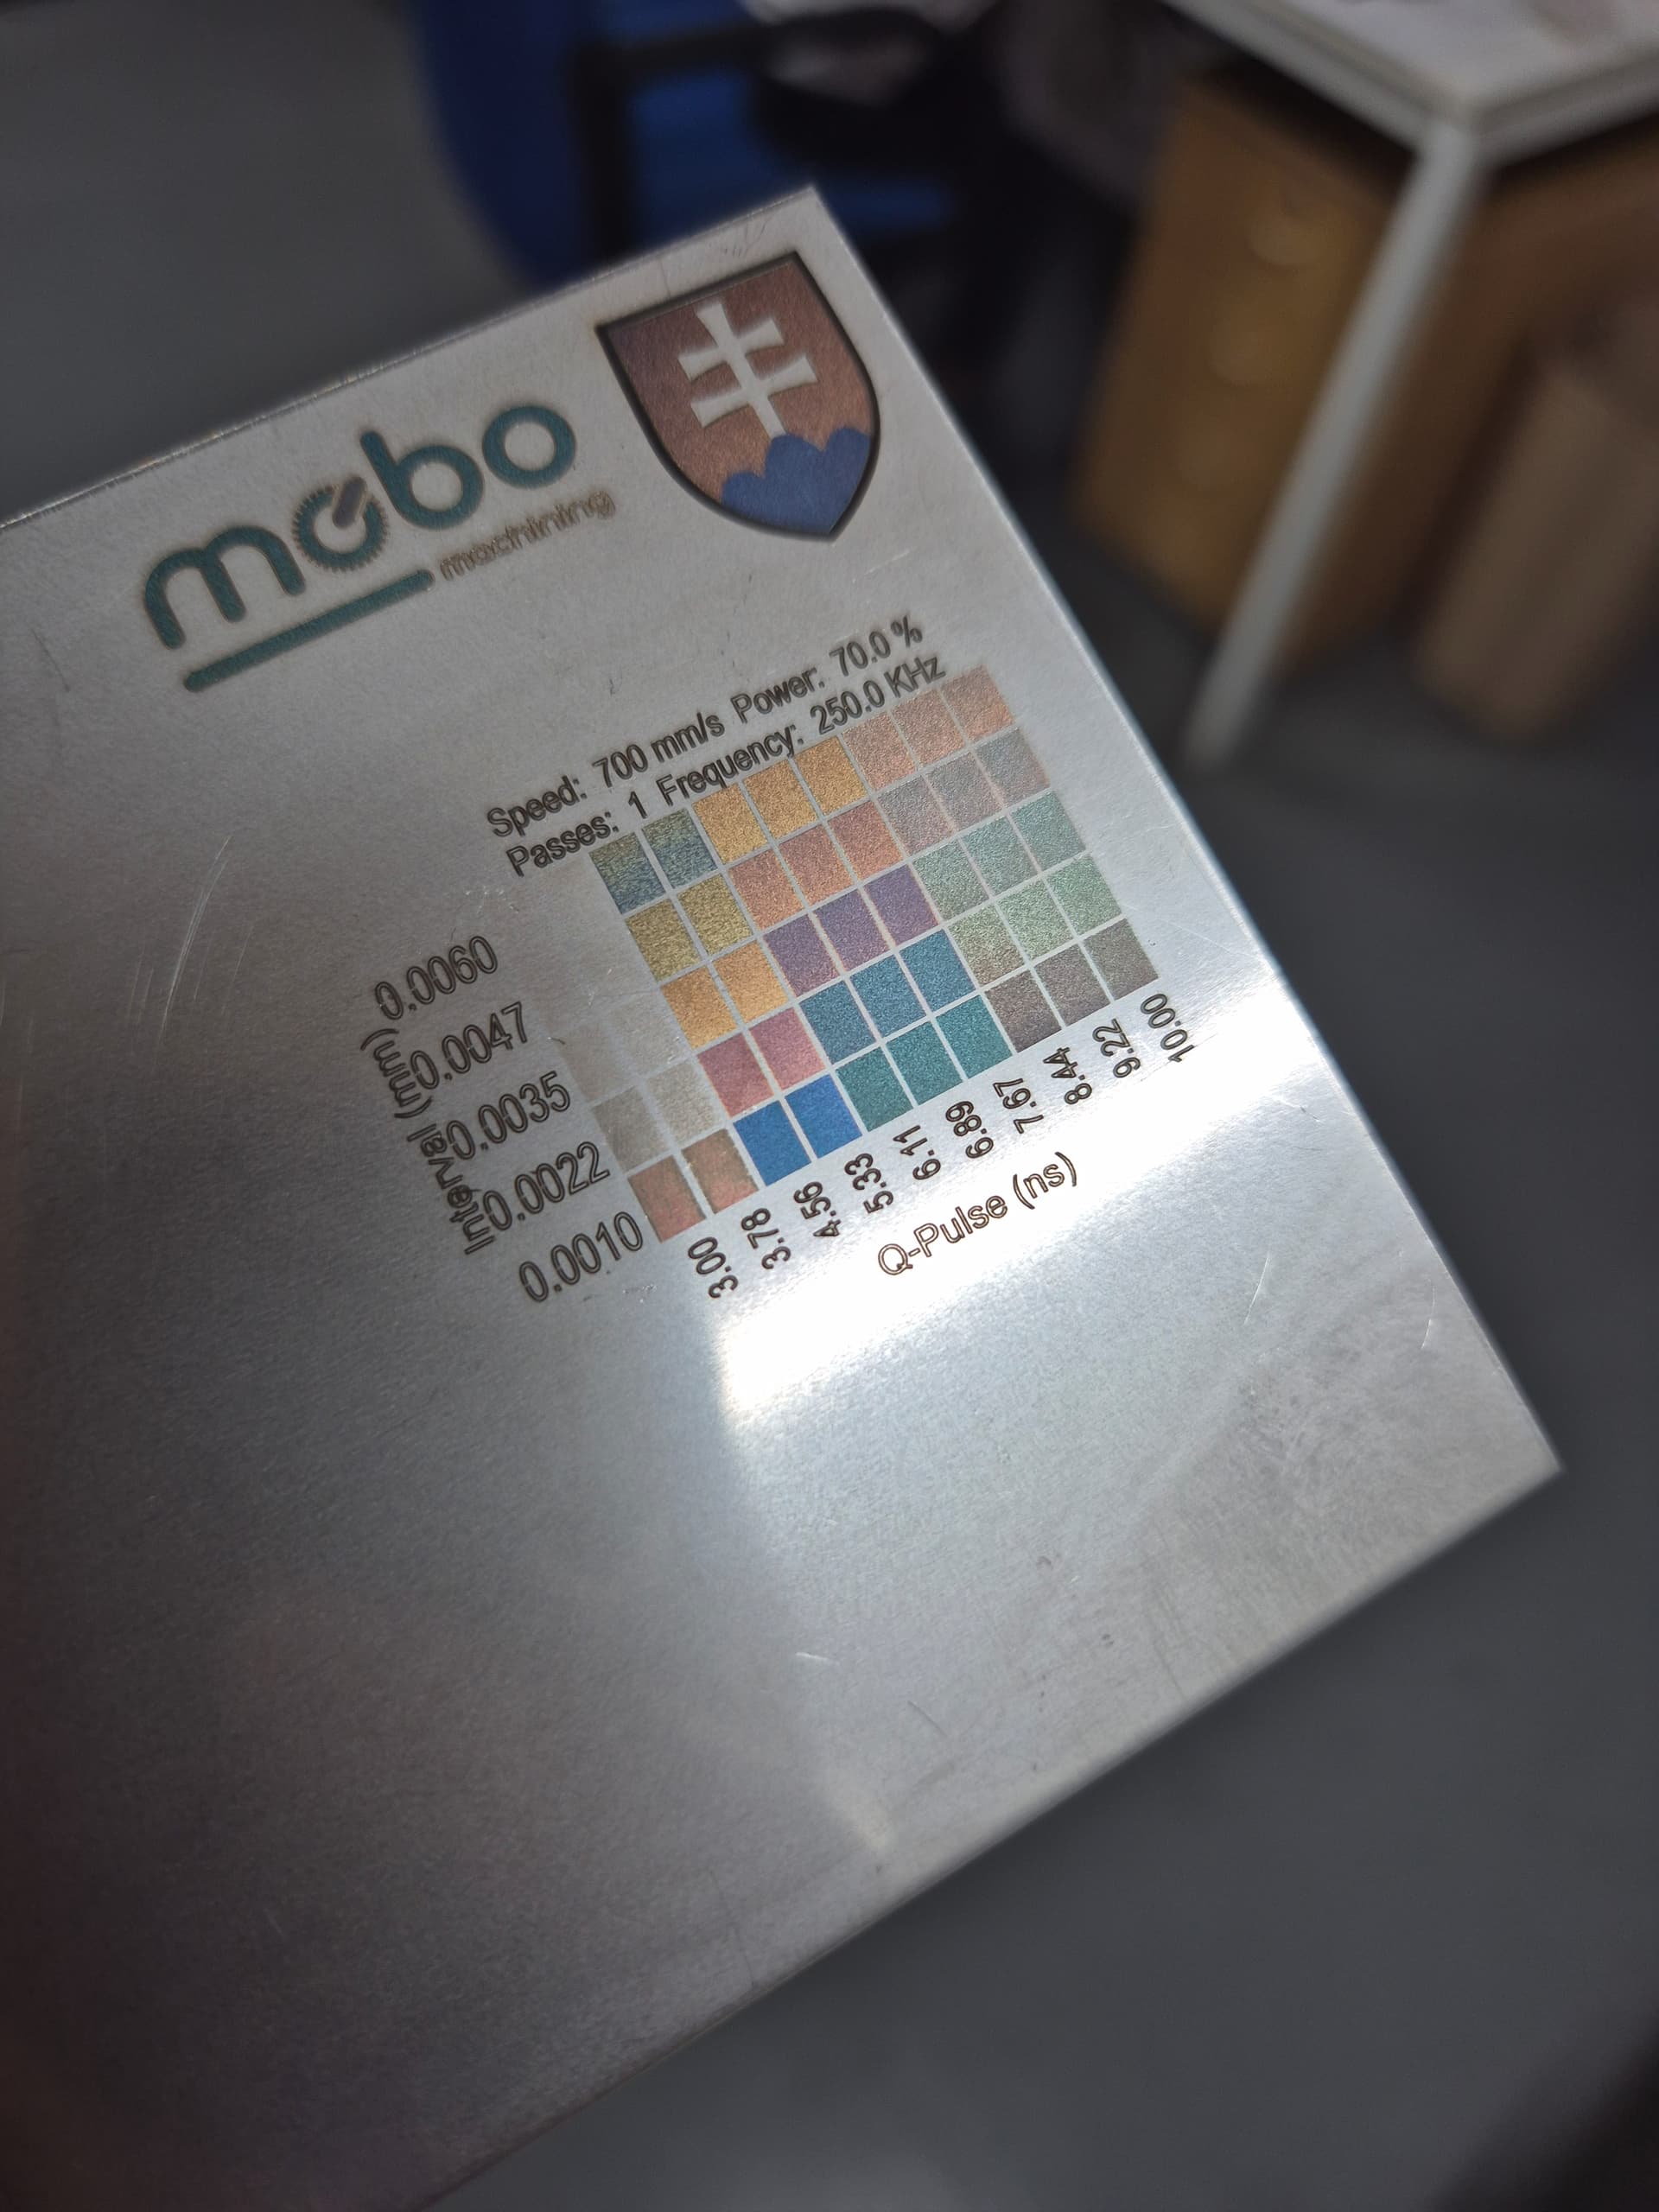
:

It’s rather coincidental that a random config file worked for you, but looking at the Material Test, it looks like it did.
If you send screenshots of both tabs in the Device Settings and a link to the exact laser you bought, we can see if your settings are suitable.
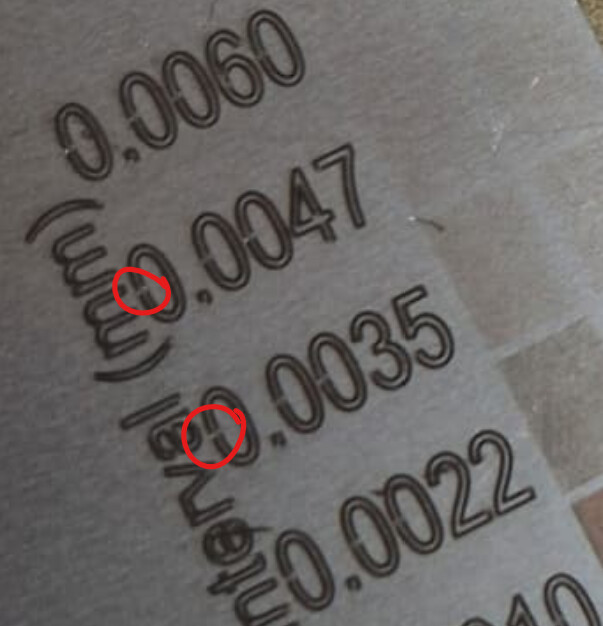
In any case, you can improve the quality by adjusting the Timing Settings. Presumably, the values are all set to 100 µs. This is the default value and rarely perfect.
I can see either a burn-in or a gap at the start of the letters here:
I recommend this video to help you set them perfectly: https://www.youtube.com/watch?v=NdFr70yoRyA

Thank you. Please also send a screenshot of the second tab of the Device Settings “Ports and Laser Settings”

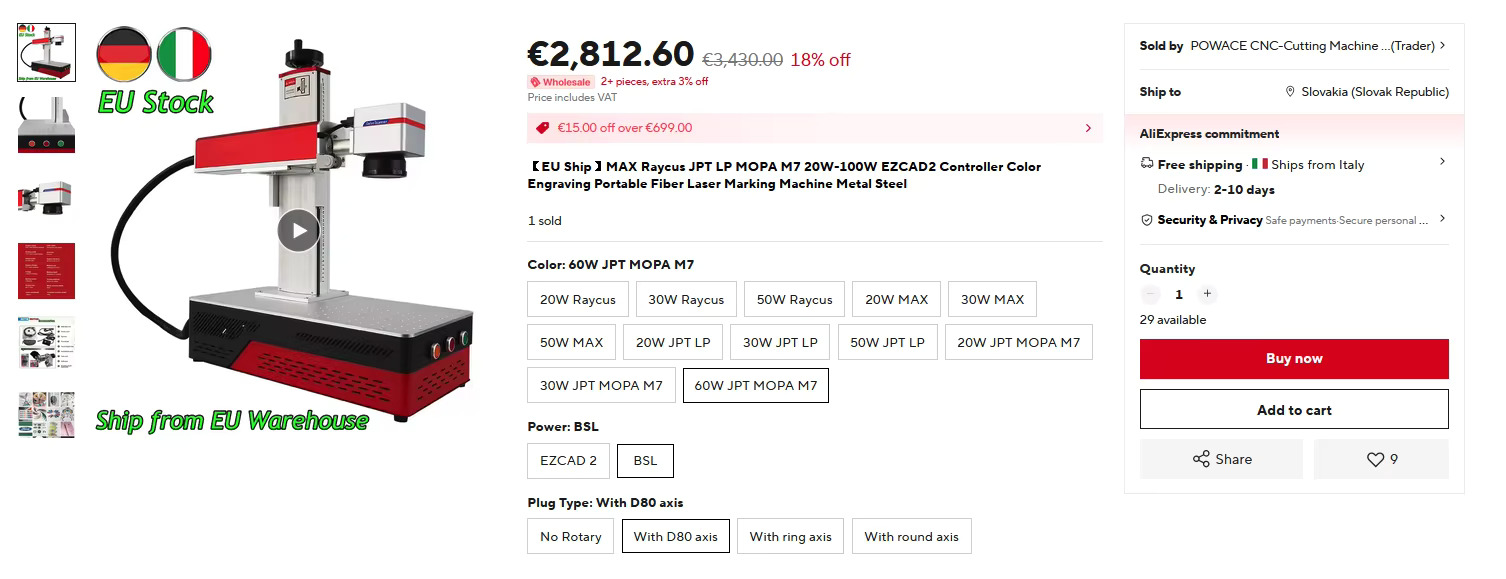
I couldn’t find this exact offer page on Ali but your machine is using a 60W JPT MOPA M7 laser source and the Min /Max Freq setting of 1-4000KHz is correct.
Your Galvo head may or may not be capable of reaching higher Max Speed than the 7000mm/sec you set it at. In your previous picture there appears to be a QR-code or a model number on the right side of the scanning head. - Try to find a datasheet of this or send us a close-up picture of it.
The base has these green, red and orange status lights, which probably don’t do what’s written on them because most of the ports are set to “None”. To use them, the correct port must be set in LightBurn: Device Settings: Ports and Laser Settings (Galvo) - LightBurn Documentation
Again, you’ll improve the quality if you find the perfect timing settings with the video I sent earlier.
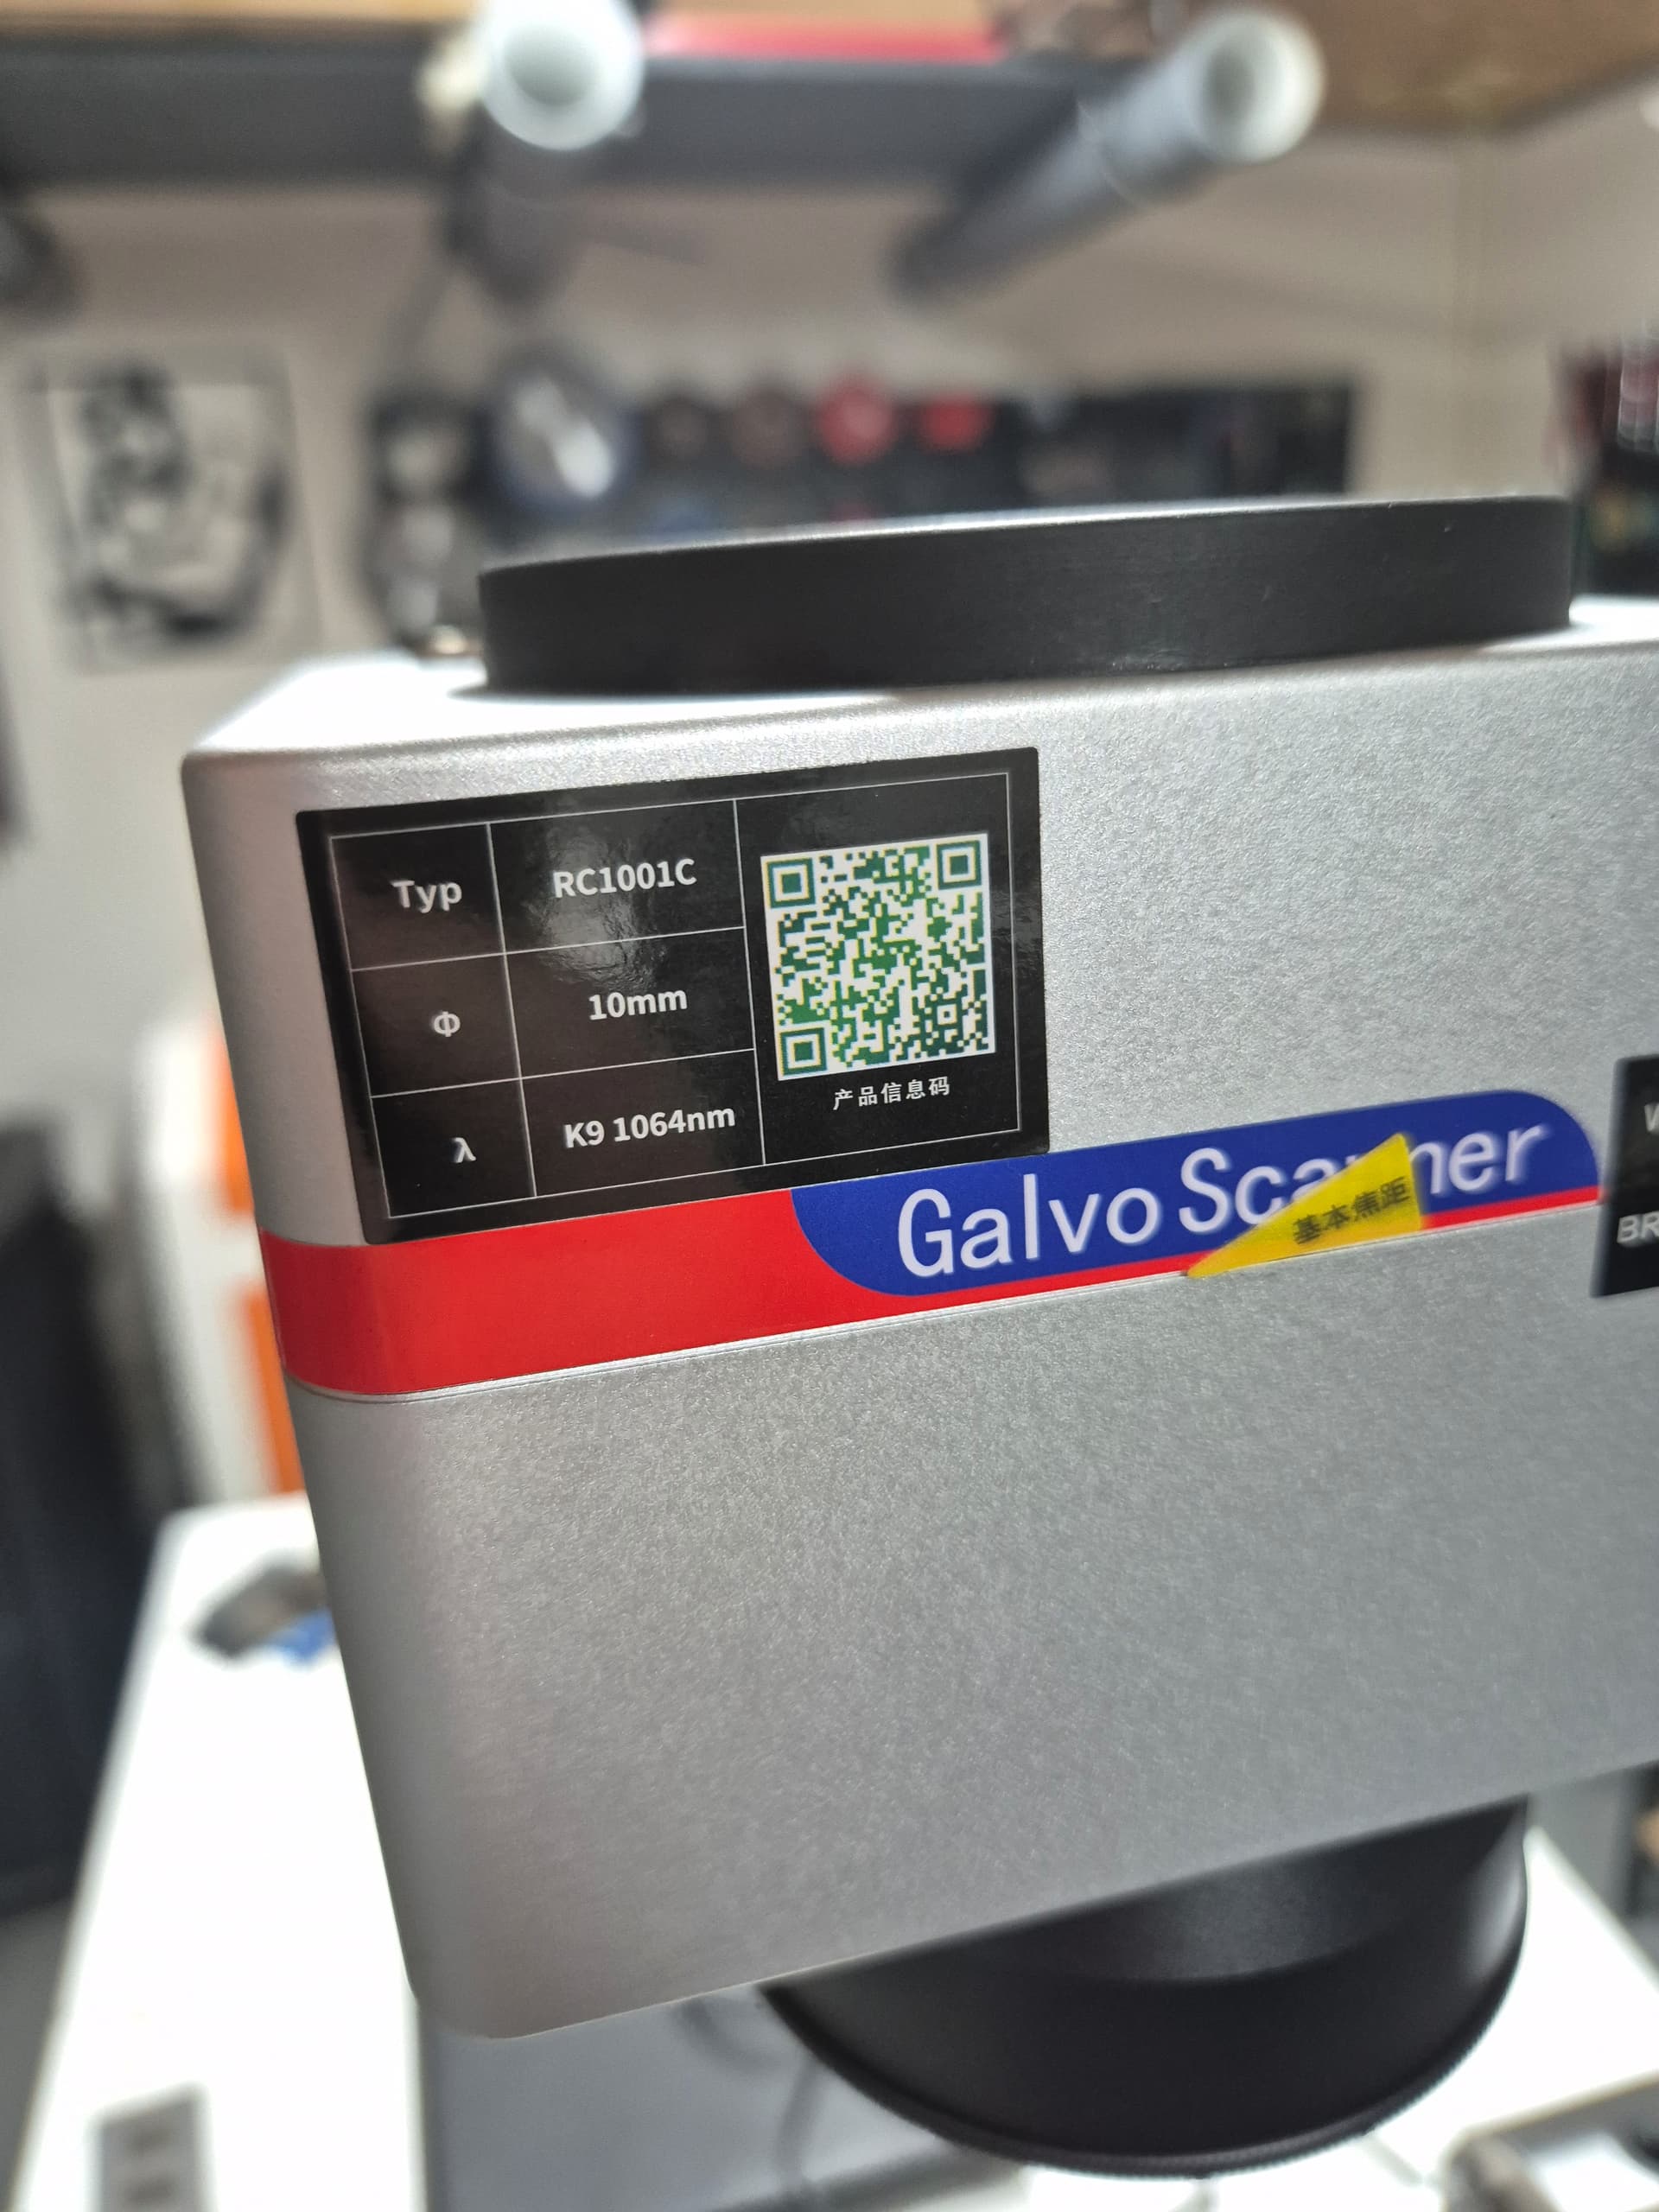
That would be this one: Cloudray RC1001 Input Aperture 10mm Galvo Scanner Head – Cloudray Laser
Looking at the specs of the Galvo head, you can probably increase the “Jump Speed” to 10000mm/s and the “Max Speed” to 8000mm/s without any visible disadvantages.
The “Setting Time” of ≤ 4ms are the “Jump Settings” in LightBurn. - So you are good with the 200-400 us Jump Delays.
As far as I can verify with the data, the settings are suitable to work with.
1 Like
This topic was automatically closed 30 days after the last reply. New replies are no longer allowed.