I just completed my first project; success! About to run the second one and the first time I tried to frame it, the laser moved to the upper right hand corner, crashed the pails and stopped, I re-homed the laser and tried it again, same result. Then I got a notice in the console, ALARM:2
G-code motion target exceeds machine travel. Machine position safely retained. Alarm may be unlocked. (Right-click the ‘Devices’ button to reset the connection)
On or near line 5:
Stream completed in 0:00
Now, it won’t connect to the port. I tried a different port, same result. The object I was trying to burn is located near the home location. My OS is Windows 11.
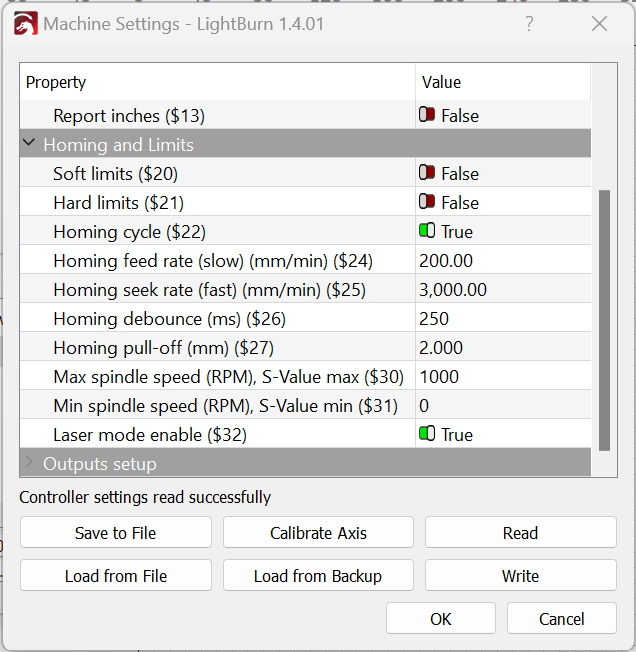
I was reading through some other posts and found part of the answer. I disabled $20, and it seems to work, sort of.
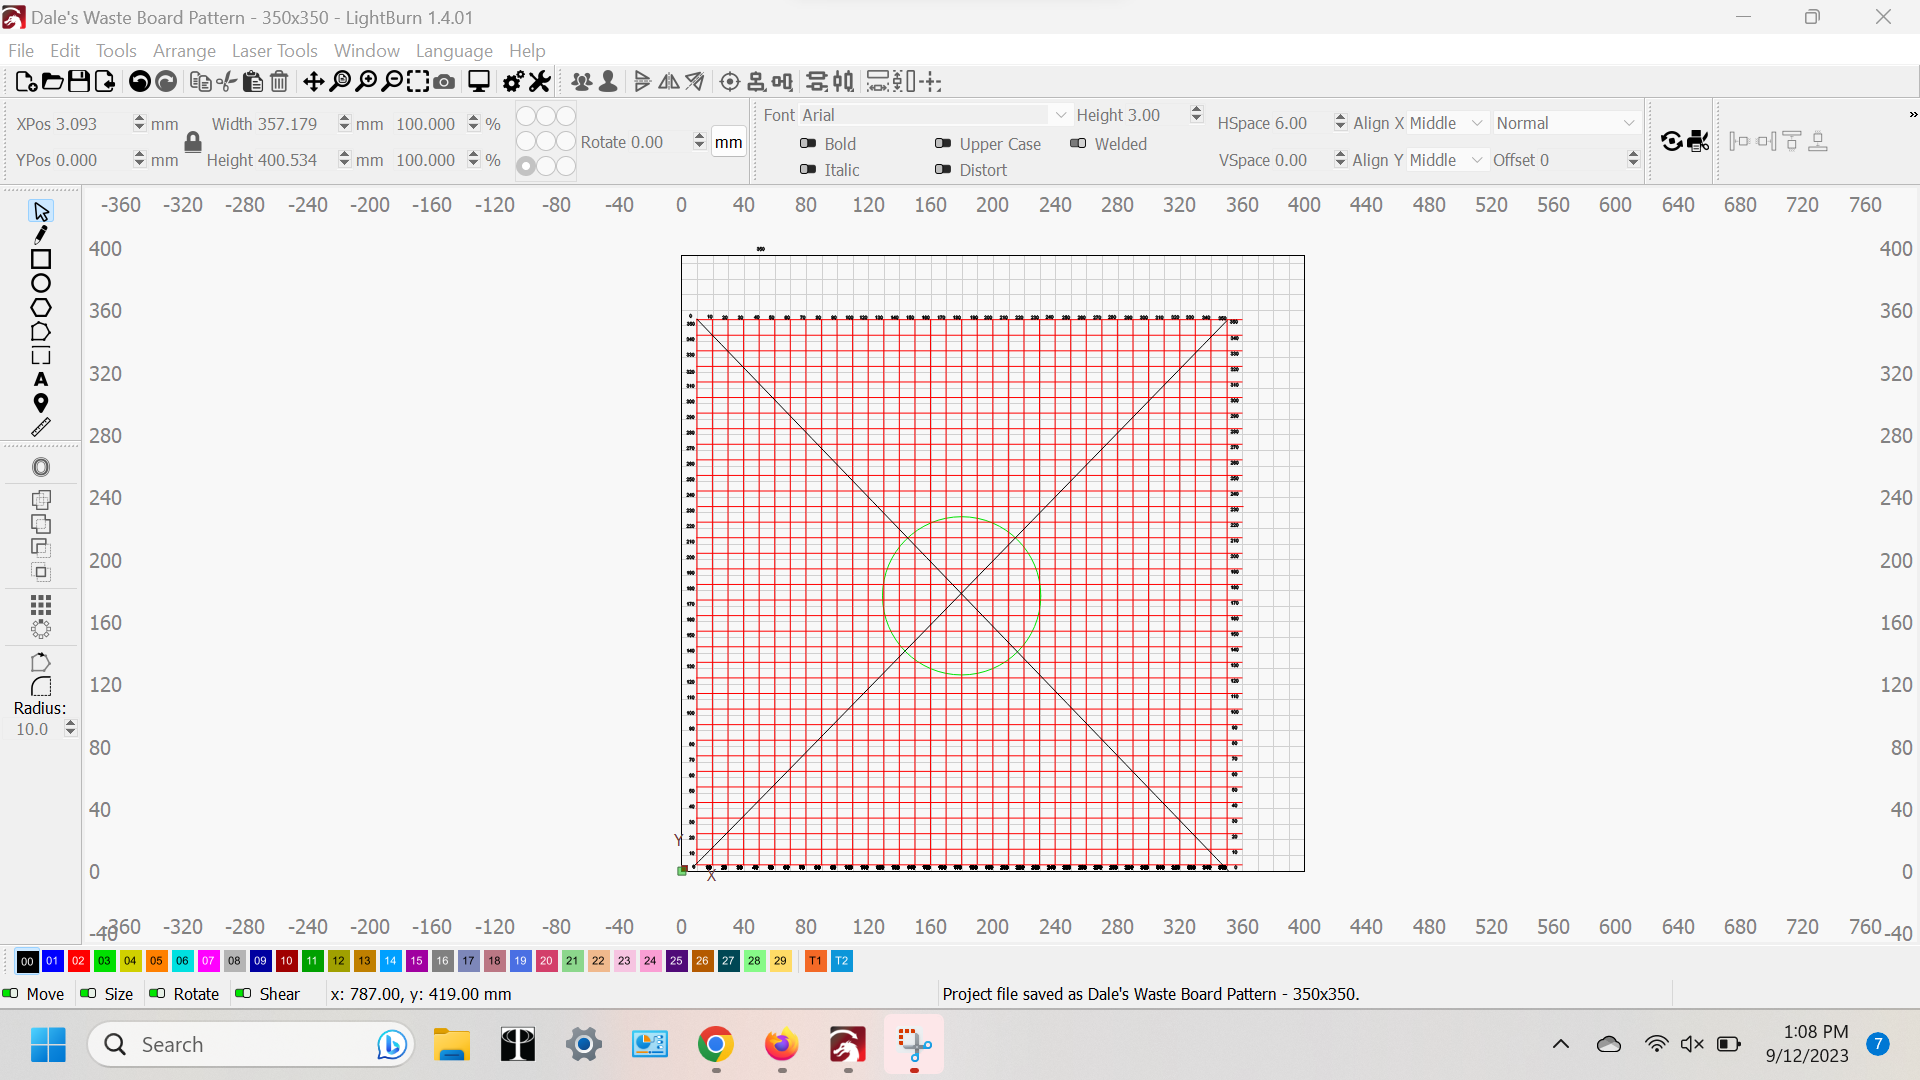
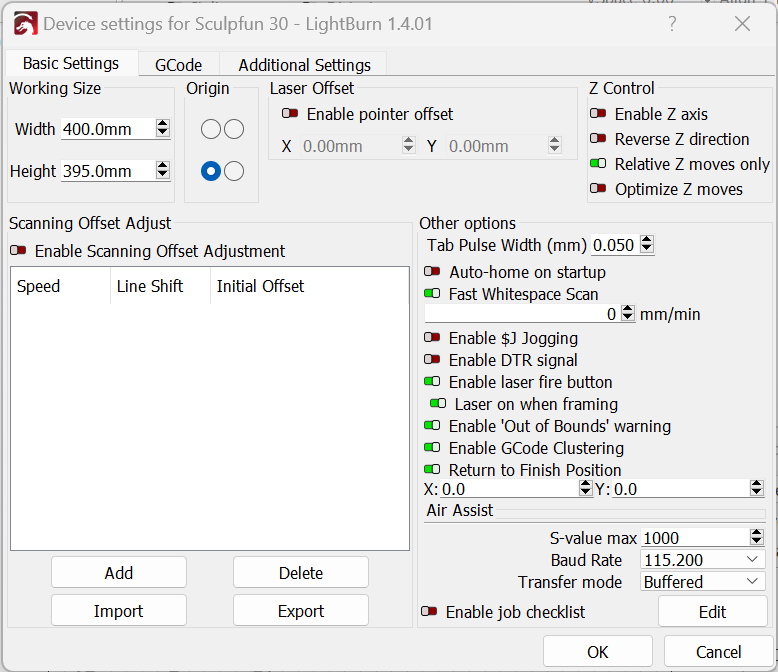
My project is to engrave a grid on my waste board. I set this up to a workspace area one of your experts for my Sculpfun 30 (410 X 400) revised to 368 X 358, When I frame the project from home, the laser travels to the right across the front, moves to the back and “grunts” briefly when it reaches the back. It then moves to the left and when it gets to the upper right corner, it “grunts” then stops (stalls out). I noticed when this happens that the laser did not travel far enough to hit the limit switch. I then hit home and the laser returns to the position, both limit switches are contacted.
So, homing does work but you can’t make use of the full workspace?
I suggest you first home. Then check the position in the move window (click “get position”). Should be either 0,0 or 2,2. Then, use the arrow buttons to move the laser head to the right as far as it gets without touching the frame (you can first send it 350mm and then go mm-wise). Stop if you hit the frame. This position (minus 1 mm) is your maximum x value. Repeat this step going to the back to determine the y-axis length. Which values do you get? You should set these values both in firmware as in the LightBurn workspace.
Thank you. I did as suggested and looks like the 368 X 358 works to the farthest corners, using the Move window controls. But, when I try to frame a 350 X 350 grid pattern the laser stalls briefly in upper right corner and stalls completely in the upper left, or shortly after it starts traveling back to 00.
Please disregard the first screen shot of my grid. I was playing around with work space sizes per your first response, and thought it might work; it didn’t Attached is the way I had it, 368 X 358. Still won’t frame.
you set the start to absolute coordinates, but your grid doesn’t start at 0,0 (you have the text as well that is outside your grid)
what’t the size of the grid if you select everything (ctrl+a)? It’s still smaller than the workspace size?
I recommend:
move the text inside the grid and not outside
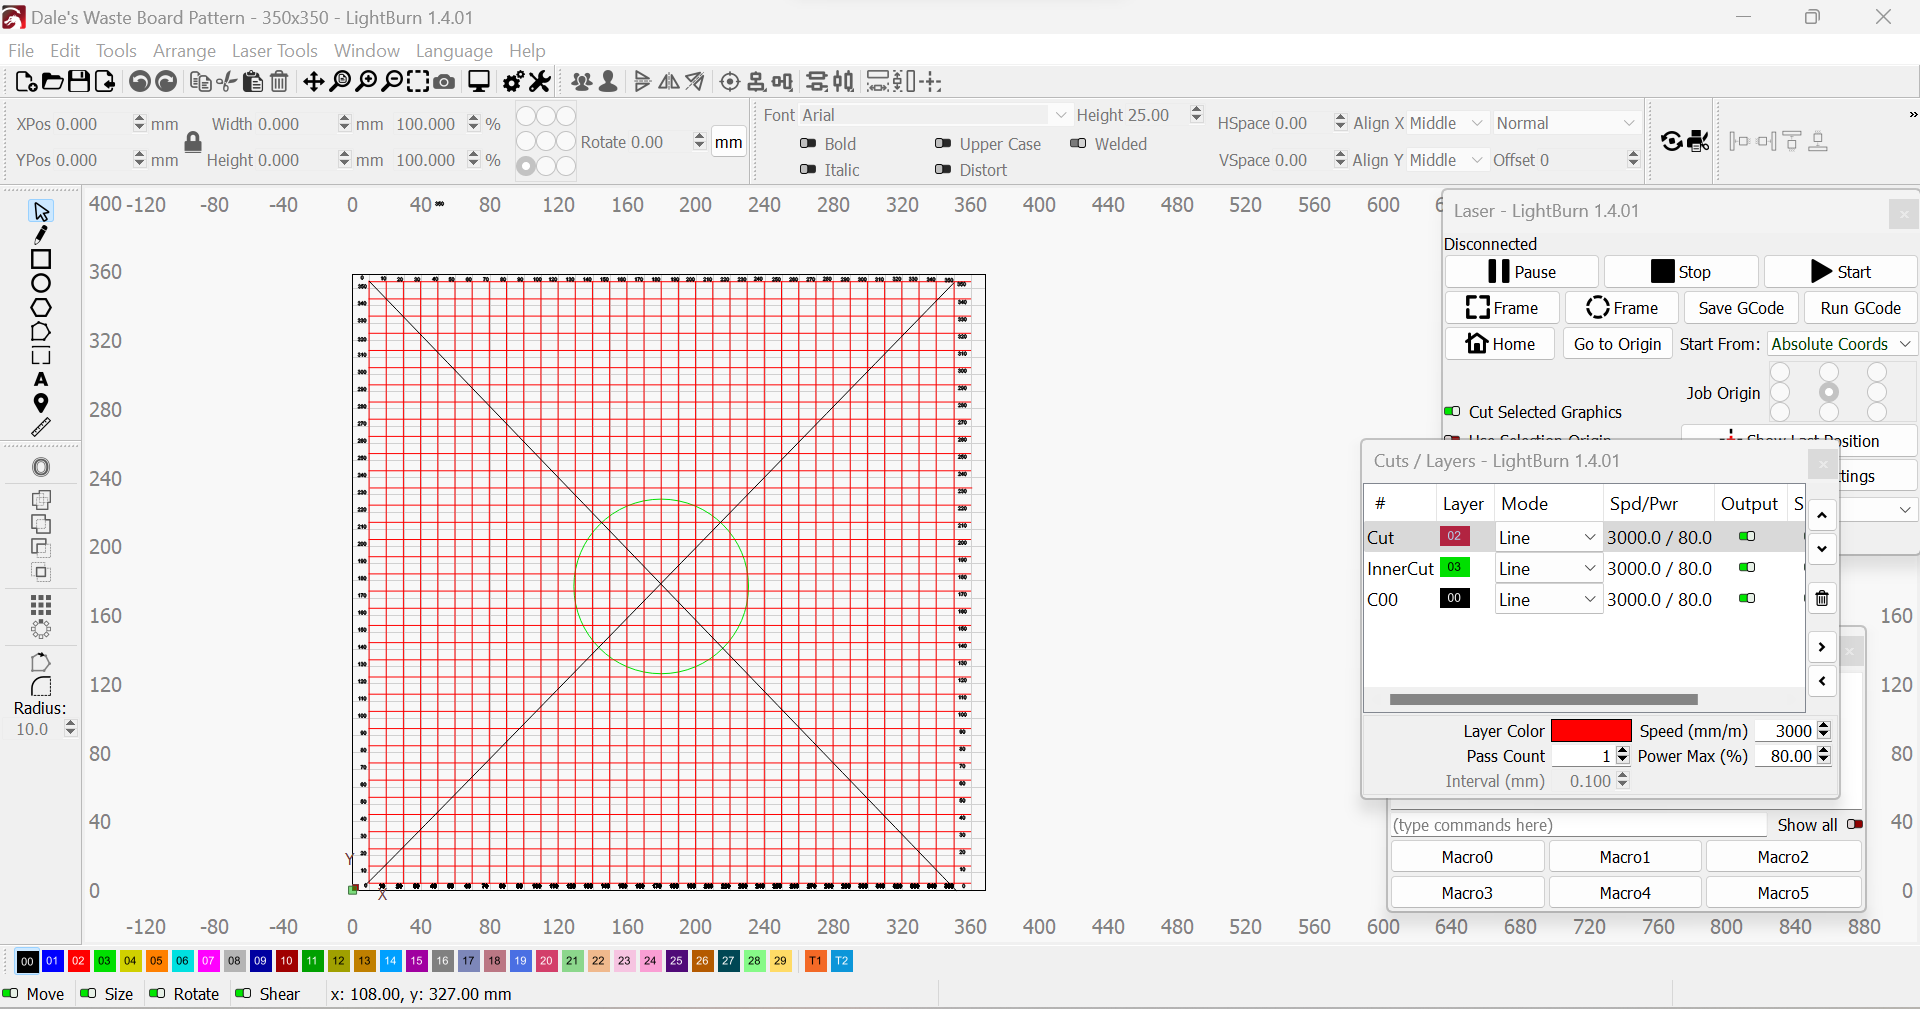
set the start from setting to “current position”
set the job origin to bottom left
select the grid and also enable “use selection origin” beneath “cut selected graphics”
home
then send the job if you made sure that it completely fits into the area (you should have selected all that is available and see the size in the top menu bar)
The text is inside the 368 X 358 space The grid is 350 X 350, so the text should be inside the work surface area. When I preview, everything shows as it should with a coupe of MM to spare… The problem I had was that the X size of the laser is set at 368. But, after selecting all, and framing, the laser travels beyond my specified work area (X 350) and crashes the Y rail. Same thing along the max X 350,Y 350 limits, same thing at X,0 and Y,350. At this point it stalls completely and stops.
If I count correctly, your grid is 350x350, but the text is outside and this adds another ~20mm in each direction. Or don’t you send the text to the laser?
Anyway, since you want the laser to frame its maximum area, the text needs to be put inside if you still want to have it. Otherwise, only select the grid and not the text. Set coordinates to current position (because the workspace in LightBurn is not of interest, you want the laser to start at the current position (the homing position). Then print the grid. Afterward, you can use the grid on the waste board, which relates to the grid lines in LightBurn.
I did exactly as you suggested. Still, when laser goes to X ,355, Y, 0, it’s OK. When it goes to X,355, Y,355, the laser grunts and pauses momentarily. But when it goes to X,0, Y,355. It grunts longer the shuts down. Then, I click Home and it travels part way and I have to click Home again to return it to the correct position.
Actually, it’s basically working. It’s more than a little frustrating that a manufacturer would advertise a machine at 410X400, and find out later that the actual workspace is significantly less! I don’t know if others besides Sculpfun do this, but I’m guessing they do. Same as advertising input wattage instead of the laser’s actual output.
I started to run the project and all seemed fine. Then the X lines started to etch and the lines were being made in less than 10 mm spaces. Big mistake! While I did look at the preview, I didn’t play it. I learned a lesson the hard way. About a third of the way through the X lines, I was looking at my laptop screen, and the lines looked like a shadow behind the lines I drew. Actually, I drew 1 line each for X and Y then used the array tool to put in 35 rows and columns. But what I saw once I zoomed way in was the 10 mm lines on the Lightburn screen and the lines from the array tool were not exactly on top of each other. I looked at the small height window in the toolbar and after the first 8-10 X lines, the height went from 0 to .406. unbelievable! I checked the spacings in the array settings and it said 10mm. I learned a long time ago in woodworking, you measure twice and cut once. I should have known better.
I did play the preview after making the X height adjustments, and it looks good. Not a big deal, I just need to flip the waste board and do it again.
I really appreciate you holding my hand on this! You guys probably get some good laughs from some of the stupid mistakes we rookies make. I’ll send you the $$ screen shot tomorrow.
No problem. There are many lessons to learn, and every professional user will learn something new each time. Lasering is about 10% knowledge and 90% experience At every forum, you usually see beautiful results of projects, but nobody shows the story behind them… “hello world, see this beautiful picture that I lasered after failing twenty times, crashing my laser two times, buying new material because the old one was crap”
Most of them do. In this case, this was quite a major mistake by Sculpfun because they didn’t calculate the workspace size using the bigger modules. Using the S30 frame with a 5W or 10W S30 module and removing the limit switches, you get 410x400. But limit switches reduce the workspace a tiny bit, and the 20W module is nearly four times the volume of the smaller modules. They didn’t take this into account… Though, they learned from it and corrected the workspace sizes for the newer models
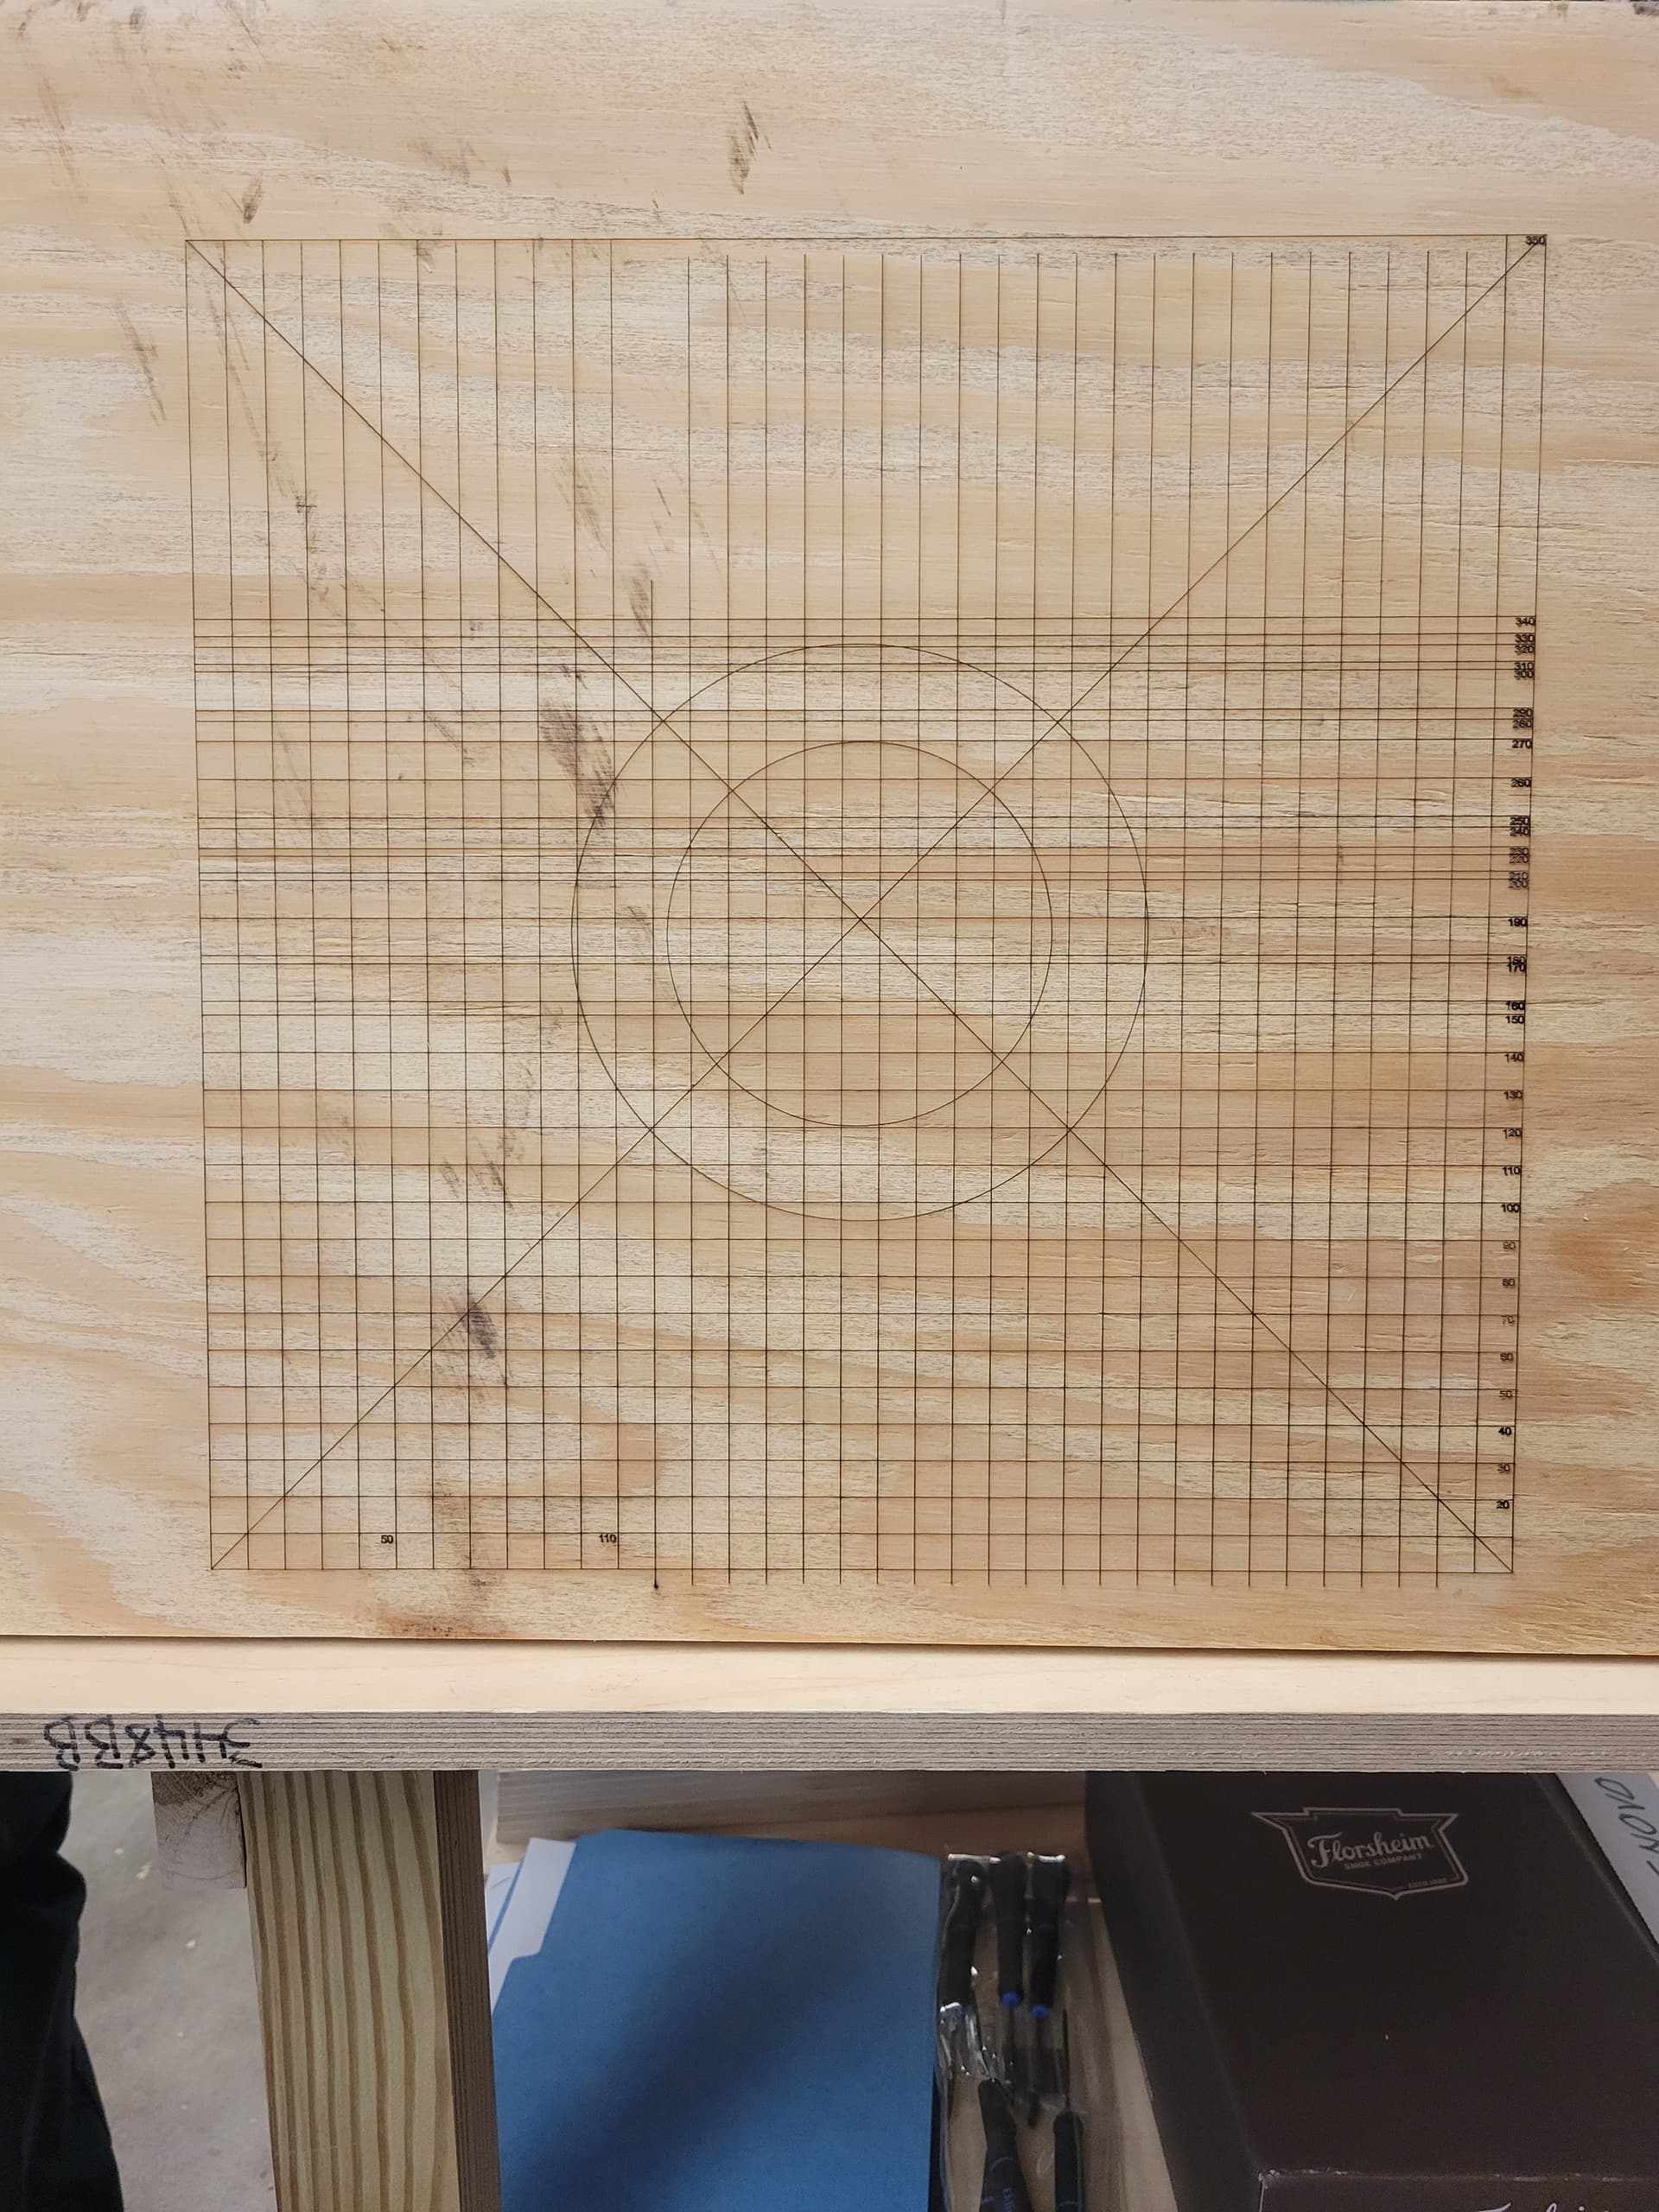
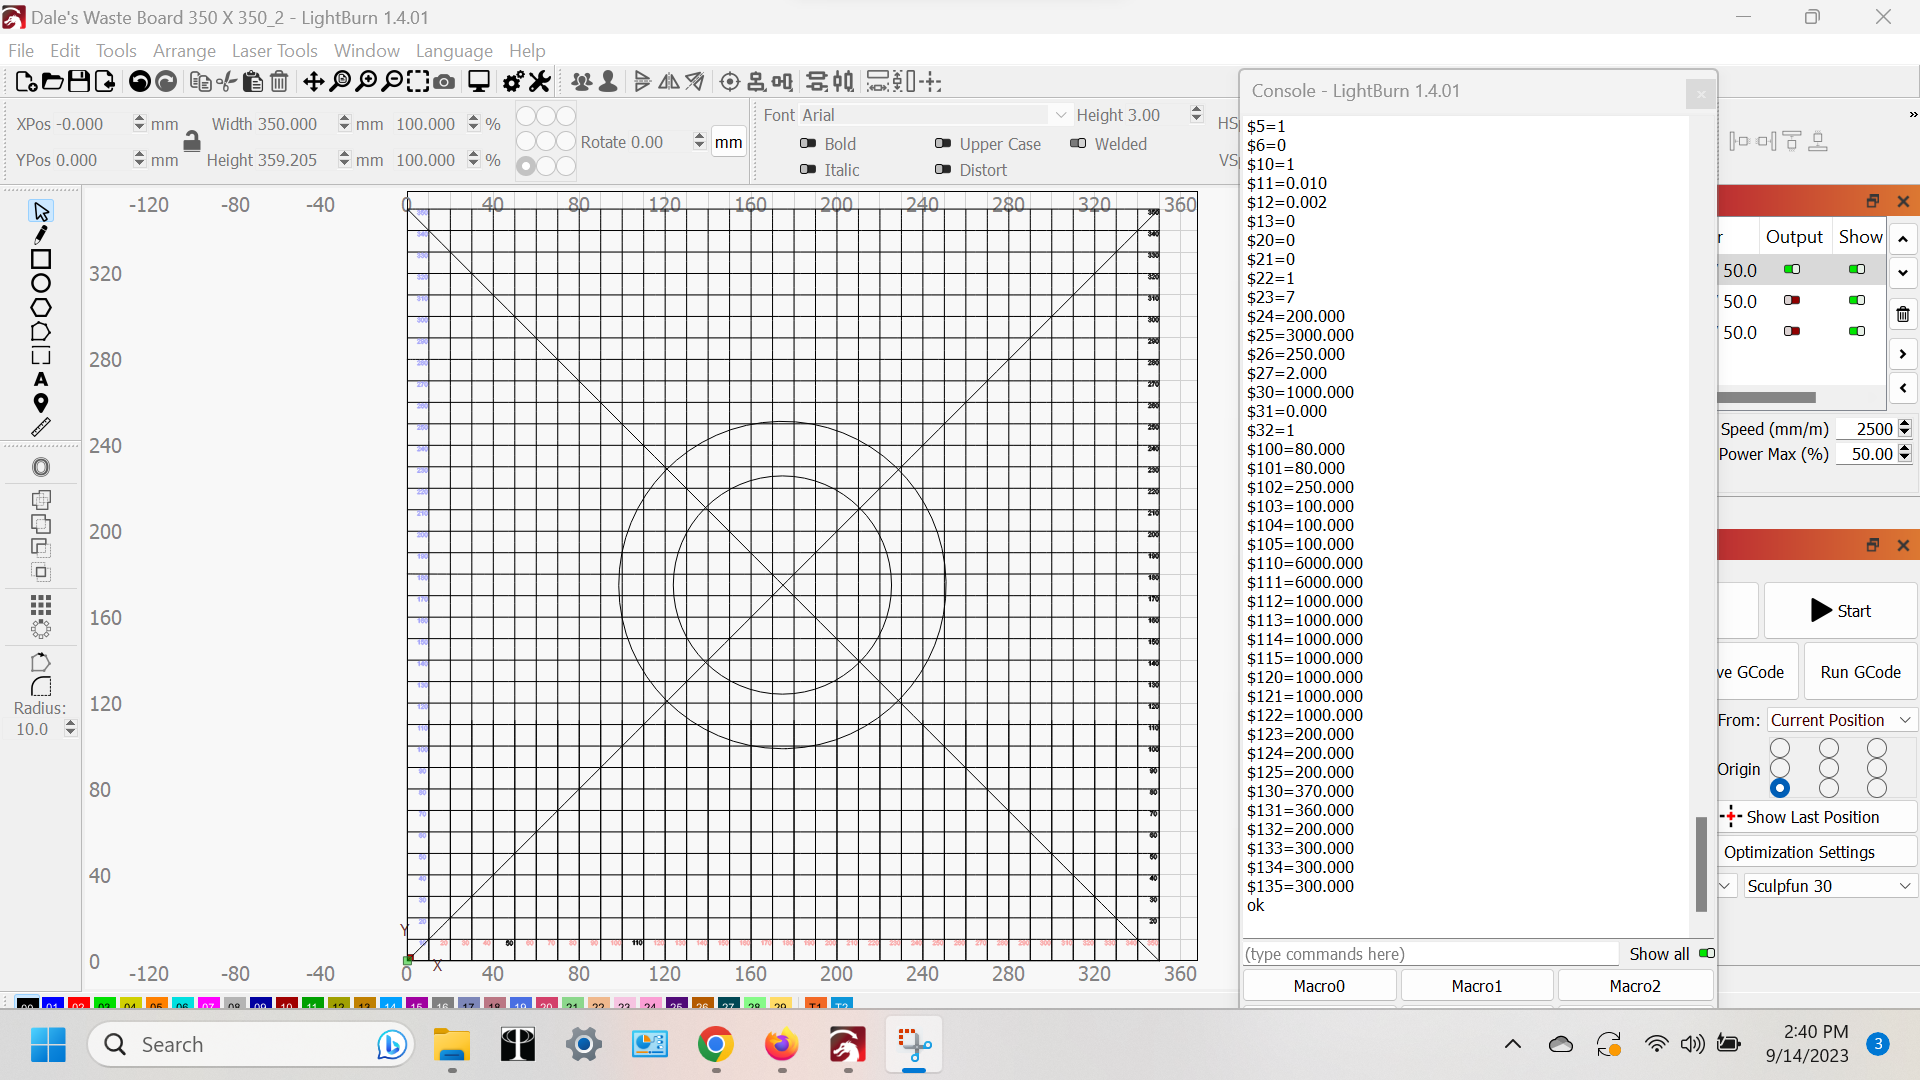
I’m back! At least I’m getting smarter, I tried to engrave the grid again, this time on a piece of scrap. But, as you can see, it did not engrave as previewed. I went back to my design layout, zoomed way in, and selected each individual row for location errors, that is to make sure they matched the Lightburn screen grid. For whatever reason, and I’m hoping you can tell me, the Y axis grid lines are not etching at 10mm spacing. Attached is a screen shot of the grid with Console $$. I also attached a photo of the project.
Also, while I have you. I decided to add text to the right Y axis after I completed the initial layout. I can’t figure out to assign to an existing layer.
Your firmware settings look fine. It’s not a configuration issue.
It looks like you have a mechanical problem, the y-axis is not running as it should. Follow the recommendations on this page to check for errors:
First, check the little grub screws securing the pulleys and rod of the y-axis drive mechanism. It seems there is a major production issue with the Sculpfun devices that those are not fixed properly (reported by many users).
I’d be curious to compare the preview to see what order it ran those in. Looks like you were going good and it lost some steps somewhere. Maybe something loose, maybe a crash, maybe an acceleration that’s right on the edge…
Good to go. I rechecked belt tensions. While the carriage did seem to travel smoothly when tilting the machine, it still took several tweaks to get it just right.
Wow! This has been nearly as difficult as mating elephants!
I checked all the grub screws again and they were all tight. The belts were centered appropriately, so that left the belts. Since I had no "errors on the X axis I left it alone, I looked to the Y belts. When tilted at 45 degrees, the carriage seemed to slide smoothly. But, I started to tweak the. First a little tighter, still slid but slower, ran a test and had to loosen a bit. Ran another test, band I found the sweet spot.
My grid came out perfect, thanks to all of your help!