First Timer setting up new CO2 laser (60 watt delivered)

We have two of these red and black “60 watt” machines.
Both are auto focus power Z axis. The Z axis is “u” on the control, and the control is a kt332.

These machines are not 60 watt. the tube amplifier only outputs 21milliamp guaranteed. we have one that puts out 22. If you want 60 watts you will have to buy another tube amp that goes to 30 milliamps and tune accordingly.

I tuned the amp so that when the control is calling for 99% power the amp is putting out its max 22milliamp.
from the factory when the control power hits 80% there is not change in laser power going up since at control power 80% you are at 21 milliamp.

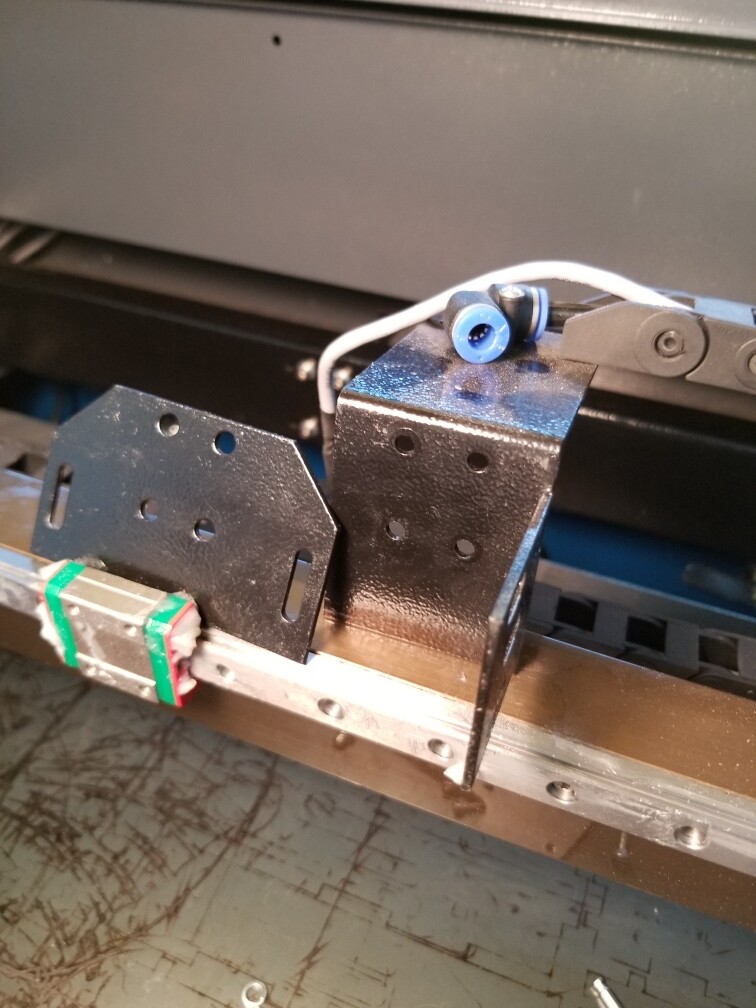
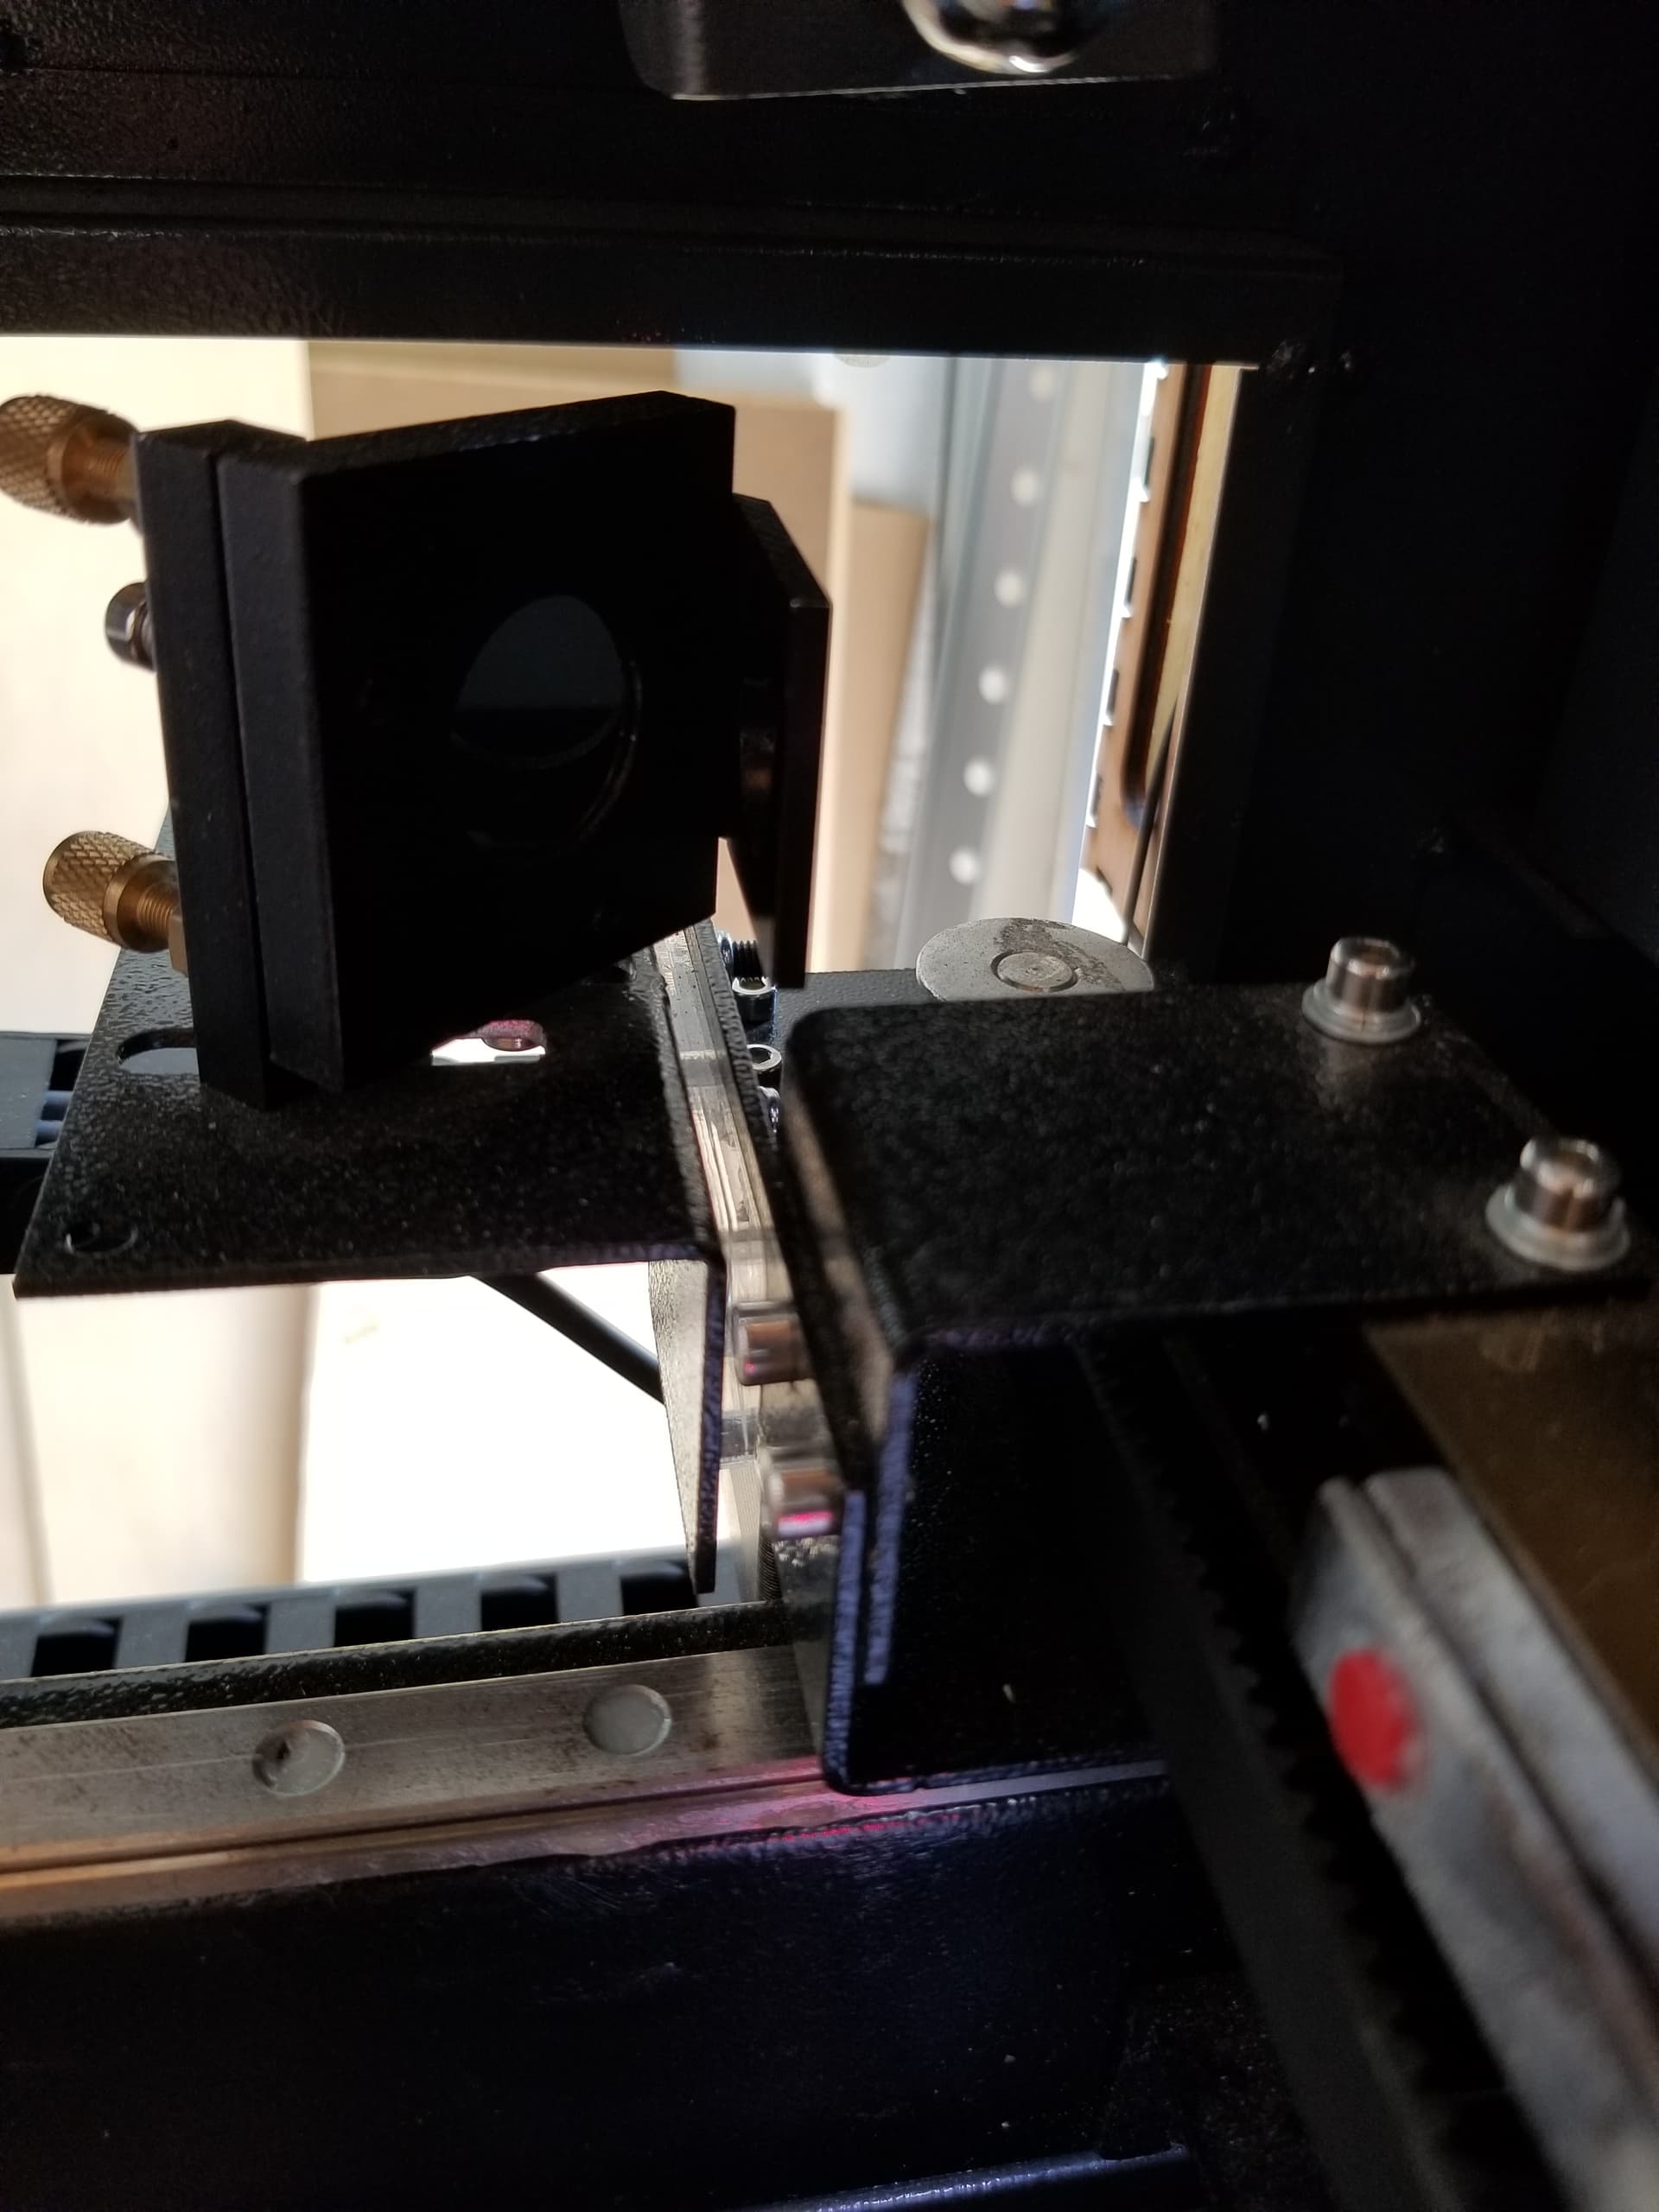
Next the red indicator for laser position is going to have to be replaced. We replaced ours with a kit that included the beam combiner, gold mirror, laser and mount. This required some mods and takes about 4 hours. I also put this on a toggle switch so the red indicator only runs when I need or want it.

For production and ease of setup, we added a grid setup plate with setup positions every one inch in x and Y. The cutting honey comb lays in on this for cutting jobs.

We added two srips of led lights, the back strip on a tilt switch so it goes off when you open the door and don’t blind you.

The included pond cooling system worked fine, but you have to enclose the water supply or it grows all kinds of nasty things. ultimately we got the two machine chiller.

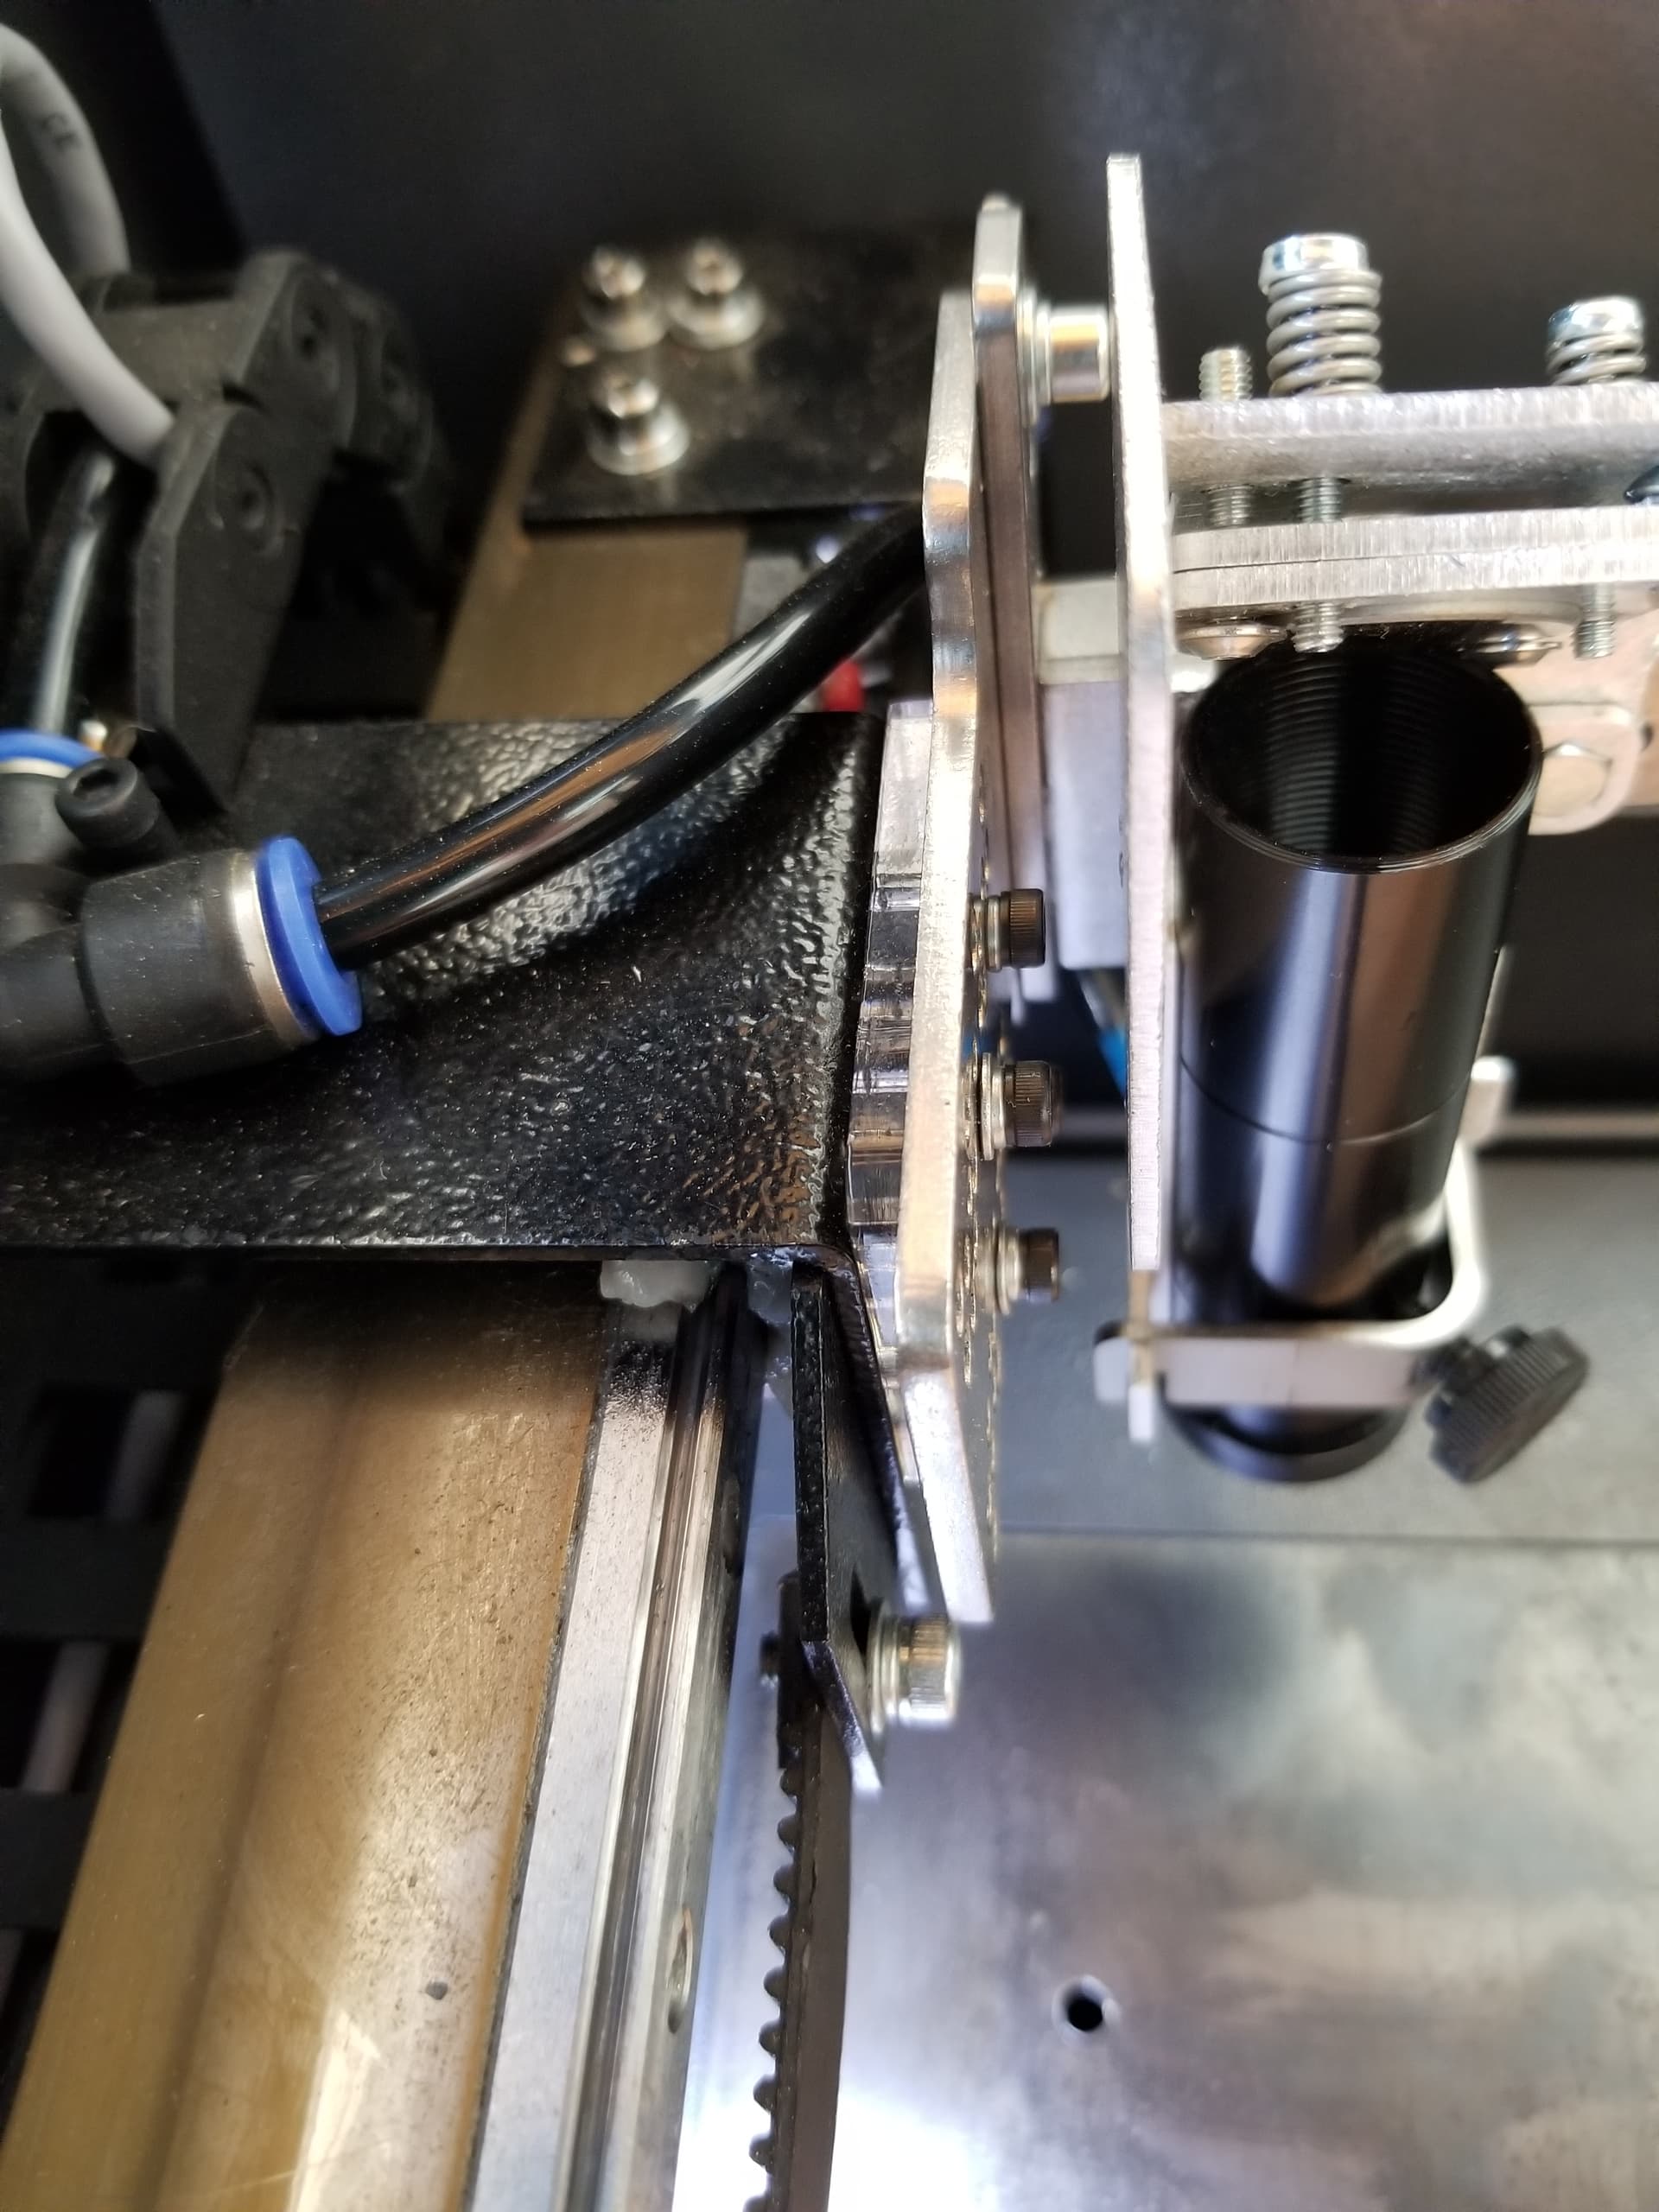
You are going to have to fix the air assist. Order the $12 vlave from amazon and install using a needle valve. See above for more ideas. you will want to install a T on the cutting head and put a small amount of air to the mirror side of the head to keep the mirror from getting smoked.

Head alignment… You are going to bump the head when you bump the head its going to be two hours of hell getting the head back right. I put magnetic breakaways on both machines… it saves tens of hours every week. just pick the head up off the table and snap back in place.

Lenses… just order 2.5" and 3" focal length meniscus lenses and some orings. the longer the focal lengh the more resonance you get, but the less focus variance.

exhaust… the more the better.

One of our machines is 12uM per step and one is 24uM per step… both work fine.

Leave the controls in metric… if you switch from metric to inches and then use light burn to change parameters There is no telling what kind of corrupted mess you are about to make. Just put the control in metric and leave it. put light burn in inches and when you change parameters completely shut the machine down and restart, you should be fine.

One machine came calibrated out of the box, one was off .125" in 8"

check bolts… bolts i frame assy of both machines were loose.

One day lightburn might run the “u” axis, but till then you have to manual your different z heights.

One water flow/pressure switch leaked… we had to take it out and tighten screws. Replace all the interior ziptie clamps before they leak.

clean and rust protect the rails every few days or you will have sqiggly lines.

These machines work great. The low end power is touchy and takes about 30-45 minutes warmup to stabilize.

3 Likes

Thank you for the detailed info!

Jack Wilborn: Did you take CNC Russ Sadler files to a metal fabricator, or did you buy the head from Cloudray? Was there much trouble mounting it to the Blue/White’s gantry? Thanks for all your details and photos.

Here is the price list from Russ. At least a few months ago.

It also has links to the videos, although I’ve never used those links. Cost me $109.44 USD. Most of it was shipping :frowning: Got the most of the other stuff, like the tubes and a few lenses from Cloudray.

As with any ‘remodeling’ there’s always challenges.

Part with the green bands is the bearing that slides along the X axes. Behind it is the plate the mounts to the bearing and the ends of the belt that moves that axes. The last one is the bracket that holds the head itself and is connected to the drag chain.

The first plate mounts against the bearing and the mount for the head on top of that. On other machines that first plate has it’s ‘ears’ bent where the belt mounts to the plate. This gives clearance for the bolt heads from the head bracket. There was no clearance on mine. You can see the silver bolt head for the belt connection in the picture. It is bent back on older models.

The head mount that comes towards you in the picture, has to be cut off as it interferes with the new head. Fortunately I didn’t start hacking on it until I figure out how to mount it.

I had to put it back together and cut out a couple 4mm plexiglass spacers to move the new head out a bit for clearance.

Since I moved the head along with the mirror 4mm towards me, I had to move mirror 2, 4mm towards me. My machine has access via the left side where mirror 2 lives, and allows more of a backlight shot that shows the acrylic spacer.

The only issue I have now is to shim the head a little more to get the Z axes exactly perfect. It’s the machine, not the head. Same problem with the original head, but it was severely lacking in adjustability. Not to mention the head mirror was 1.5mm off center on both entry and exit points.

It’s been up and with multiple lenses, I’m really getting to do some things now. A bit of a learning curve :slight_smile:

2 Likes

Thanks for the extra detail on the head. I am in the midst of a warranty claim with OMTech about the head. It had 2 of 3 cap screws screwed into the head at an angle when I got it- I never touched them, as I considered the whole head/mount unstable. One day, while replacing the lens after cleaning, the head moved and one cap screw fell out! So now, the head is held in place, vertical by 2 cap screws. The hole left by the fallen cap screw looks like the assembler tried several times with a power tool tool to get the cap screw in- and buggered up the threads trying. So I hope to get a new head under warranty. If not, I am looking at alternatives. No replacement under warranty- no trust in the sales/import company despite advertising 2 year warranty.

1 Like

You are going to be changing it out anyway it looks like. That stuff from China is functional, but poorly designed. I’m sure it’s designed for cheap production.

If you’re up to changing stuff around, I’d recommend it. I have a set of lens, in tubes, so it only takes a second to swap them out. The head is a perfect example of “Keep It Simple Stupid” study, light weight and Y, Z adjustments that are not available on the stock head.

I believe I have the same animal as you.

You might read this thread Laser Head Upgrade - Is it worth it?:slight_smile:

There’s a long story to that heads development you can watch the video if you’re interested.

RDWorks Learning Lab 185 Lightweight head update

The laser head upgrade link has a link to Russ’ video resources. I suggest you try a few…

Take care, good luck. If you need help sing out… :slight_smile:

1 Like

I’m sure by the time I’m done only the shell will be left and even that will have “upgrades”. Still better to be able to do some production work now and upgrade as the money comes in than spend $11k upfront IMO.

1 Like

I think you hit on it! That’s why we all buy this stuff and pour money into it :slight_smile:

Out for a couple of days, but thought of this about Auto Focus Frustration. Thought it would help you with the autofocus system.

2 Likes

Oddly I did find a decent source on Etsy for 1/8 inch….I will have to go look who it was. As for 1/4 inch I have tried from multiple places but all have had too many glue pockets for me to use reliably.
Possible the seller on Etsy who I purchased the 1/8 from has better 1/4 but I gave up and went back to 1/4 luan from Lowe’s as it was more reliable and cheaper.

1 Like

So far I have found my local Home Depot/Lowes to have inconsistent suppliers of anything at all. What I buy at one is not available next week so I’ll try another store and get a bad product. I find this across all stores and types of wood. I guess this is part of the “artisanal” portion of laser cutting and engraving that everyone talks about!

I found a place online where shipping is not too cost prohibitive. Once I’m setup etc and have tested the product, I’ll link out to it.

Thanks for the reply!

Unfortunately the seller is not the one who does the actual delivery of the product. That is up to whoever gets the contract in your area. When mine was delivered, the delivery company was very good about communicating when they would show up and what it is they were responsible for.

As for the unit coming from China instead of California, thank the covid disaster for that. Everything that used to be commonly shipped and stored is not getting the TLC it once did.

Stay positive! If you want to see a real disaster on shipping a laser from China, check the thread from Sasquatch. He paid a lot for his and got very little satisfaction!

Once you have all your headaches resolved, you’ll have a lot of fun with your new laser.

1 Like

I think it makes a real nice addition to your living room. :slight_smile:

Sorry to hear about the delivery problems. I purchased mine from OMTech, got hung up in customs for a week or so. They did call and make arrangements for delivery. It was UPS that handled it, put it right where I wanted it. Of course, not a second story apartment.

I doubt that anyone even looked at the box. I don’t think you could buy plywood that cheap in the US and I don’t think you could have uncreated, tested and returned it to it’s create without the pieces falling apart.

However it did work, unlike my 5202. I was inside mine and there’s not much to them. So wouldn’t sweat the dent. You should fire it up and ensure it is working. I run distilled water in mine with 1 drop of aquarium algaecide. You can hook you 5202 up to your machine and ditch that cheap water flow detector they have, I wired mine right into the existing wires from the switch. It’s in one of the pictures I posted on this thread.

Does the lps have a digital current meter on it?

1 Like

To me, either way is that they confirmed multiple times that they would in fact schedule a delivery and it would not be delivered before contact. I had to literally race home from 200 miles away to see this thing sitting in the rain. I’m fairly sure they know about the carrier. Either way this part of my thread is to let potential people know the reality.

Also, all support went through their main channels and was clearly handled by Chinese support. They couldn’t even answer basic questions. I knew it might be that way so I’m not mad, it’s just a warning to those that think it’ll be handled by US support and have actual answers.

To be fair, final decision was my SO’s. I warned her of the size of the upgraded unit vs the other and she freaked out a bit even though I mocked it up in carboard for a visual before purchase. She wants to turn our bedroom into an office/laser room. We don’t get many visitors so we decided to earn extra money with this in order to save and buy a house (wish me luck).

I’ve seen better worksmanship from 2 drunks guys in an alley. It’s not like I was expecting some decent wood to practice with, especially after reading reviews/stories etc, but it was dinged as heck, screws snapped off from the shipping etc. At least the unit itself wasn’t damaged as far as I can tell.

What is this? I have a lot of sorting and creating to do before I even dare plug it in. Waiting on some HEPA filters before I create the fume extractor etc.

1 Like

Mine came with a power supply with a digital ma meter on it. You have to open the electronics bay to read it :frowning:

30 ma meters are cheap and easy to put in…

I didn’t order mine from UPS, but they dropped it off…

I’m sure you’ll have a great time with it…

Take care :slight_smile:

1 Like

I have an Ammeter on the way. Going to take my time on setup and have limited time as is. Will share docs for Fume box etc.

Thanks for the help and encouragement!

All of us are behind you… :slight_smile:

2 Likes

I was honestly unaware that this was a legit support forum. I am used to a more social platform. The support and tips are topnotch here and I for one really appreciate it. Almost as much as I appreciate the google indexing of this site as well as the forum “regulars”. I am currently working around 70 hours a week but we’ve hired a few so hopefully will be able to learn and help on the forum for newcomers.

I hate the concept, idea and fact that there are “Karens” and I feel like one. Omtech reached out with the complaint and initially offered $60 but has now upped it to $150.

In any business, you under promise and overdeliver. I have been let down at every step of the way so far. If they do not meet expectations, please be honest and let them know. In the end if it inconveniences you? You should be compensated for promises they make but don’t deliver on. If I don’t deliver then I don’t get paid. It’ll be the same when I ship products.

What I am saying is that it’s worth the effort.

Sounds like OMTech can be a nightmare to deal with. Makes me feel better about spending more for a Thunder Laser Nova laser as I experienced almost no problems at all and the few that I did have were easy to deal with.

BTW, Occooch Hardwoods in Wiscons sells decent quality BB plywood and various hardwood plywoods. If you need bigger sheets or closer sources try Googling for “baltic birch plywood near me” or “hardwood near me” and sift through the hits for quality dealers.

That’s a nice looking mid level laser.

I’ve been there and done that. I still go to them and inspect the wood. Still getting Home Depot level quality from most.