I recently started laser engraving as a hobby. I got a Gweike G2 max (50W fibre laser). I saw these cool 3D engraved stones online and I am trying to do the same. However, I can’t for the life of me figure out how to do it properly.
I assume I am either using the wrong settings or messing up with the PNG generation process. I don’t think the issue is with the type of stones I am trying to engrave, just filling some icons are no problem.
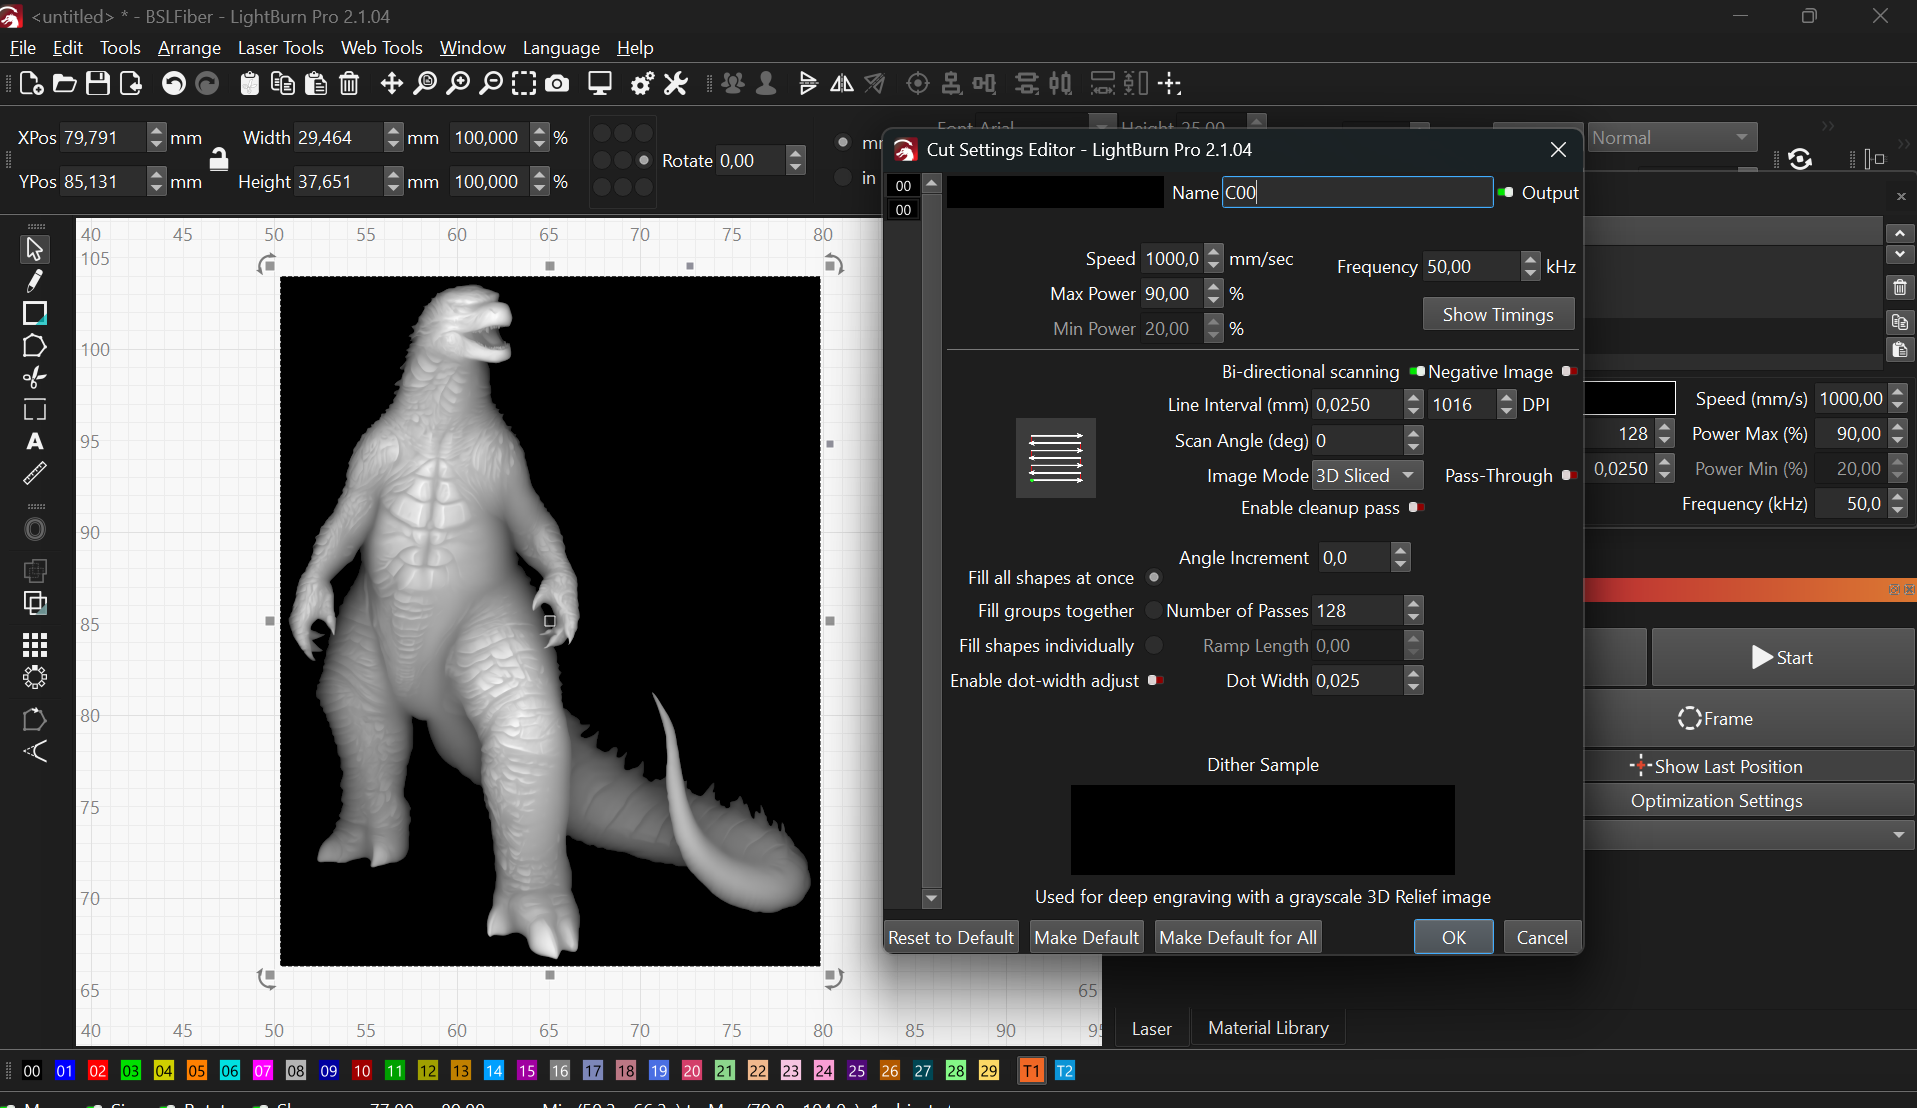
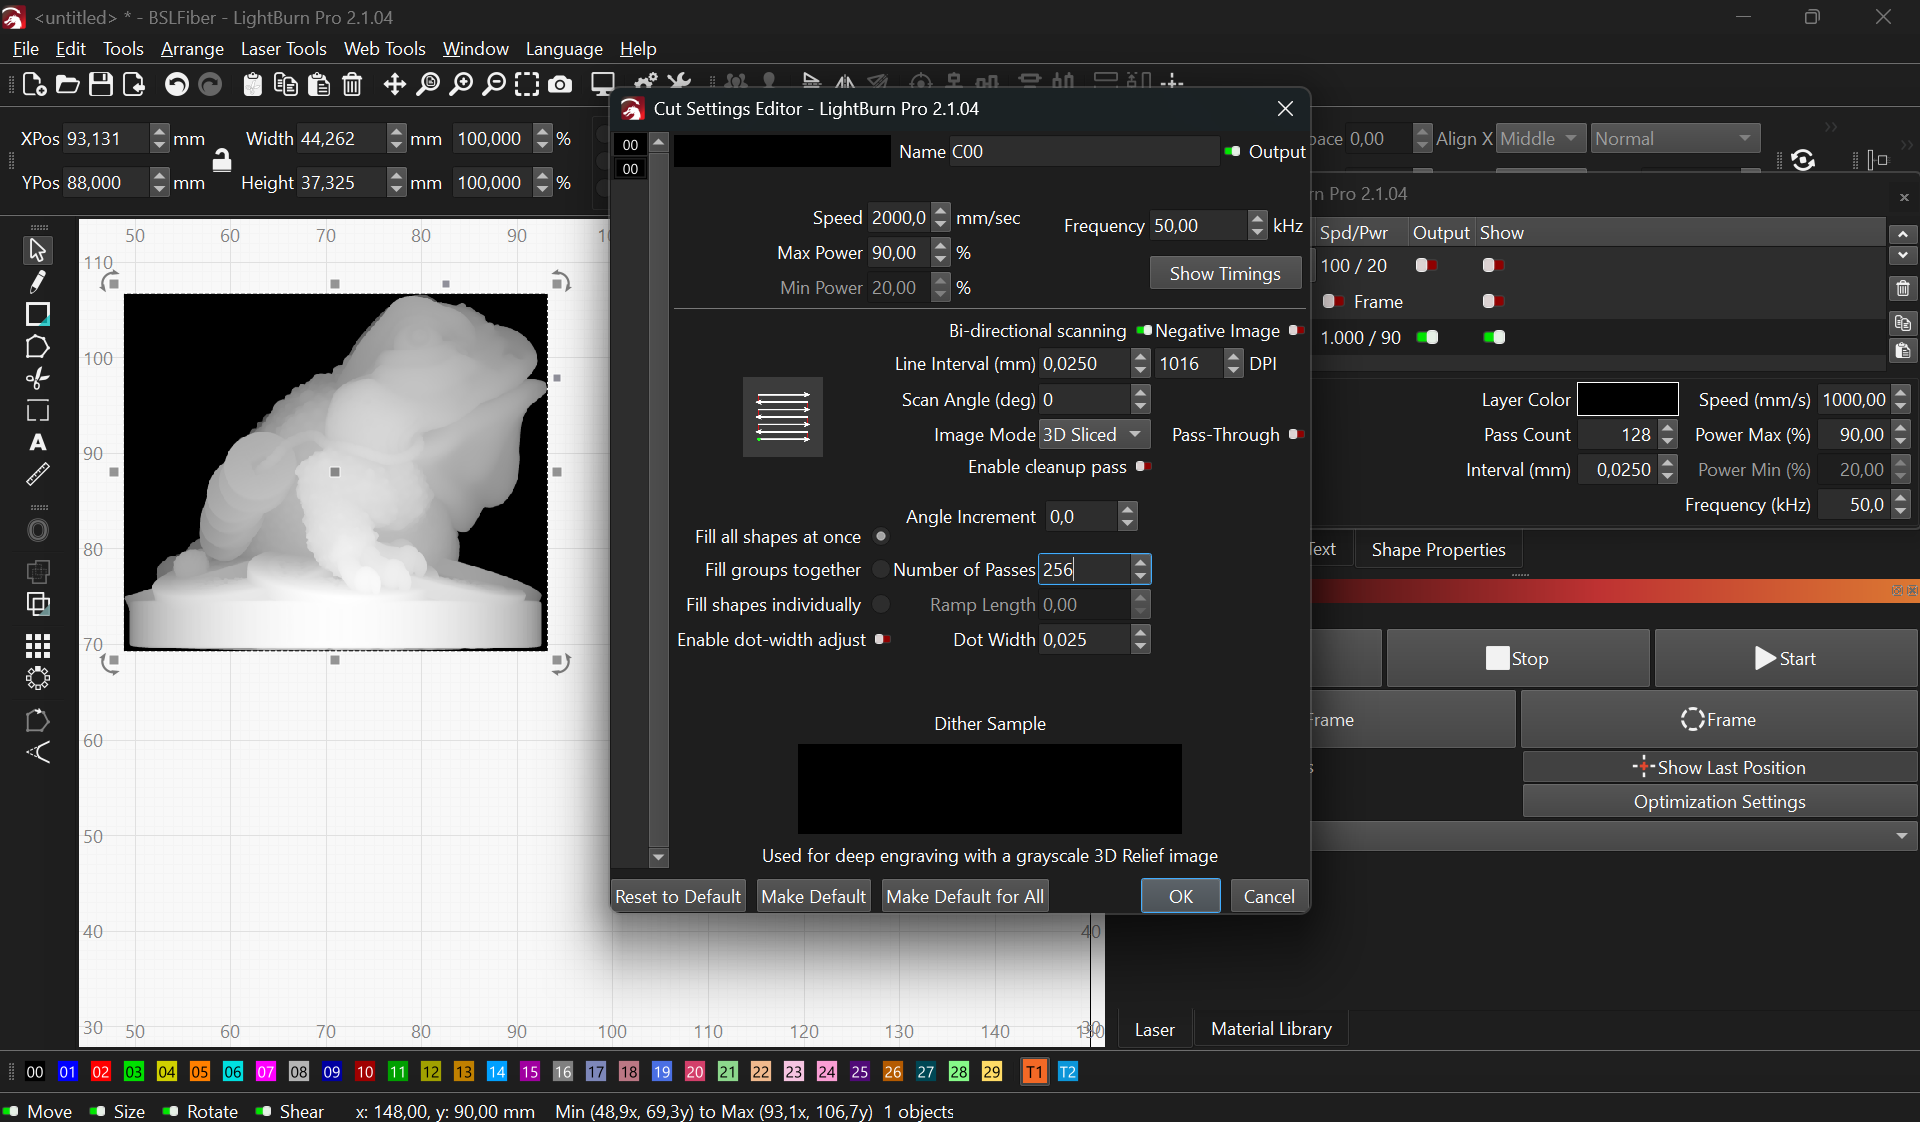
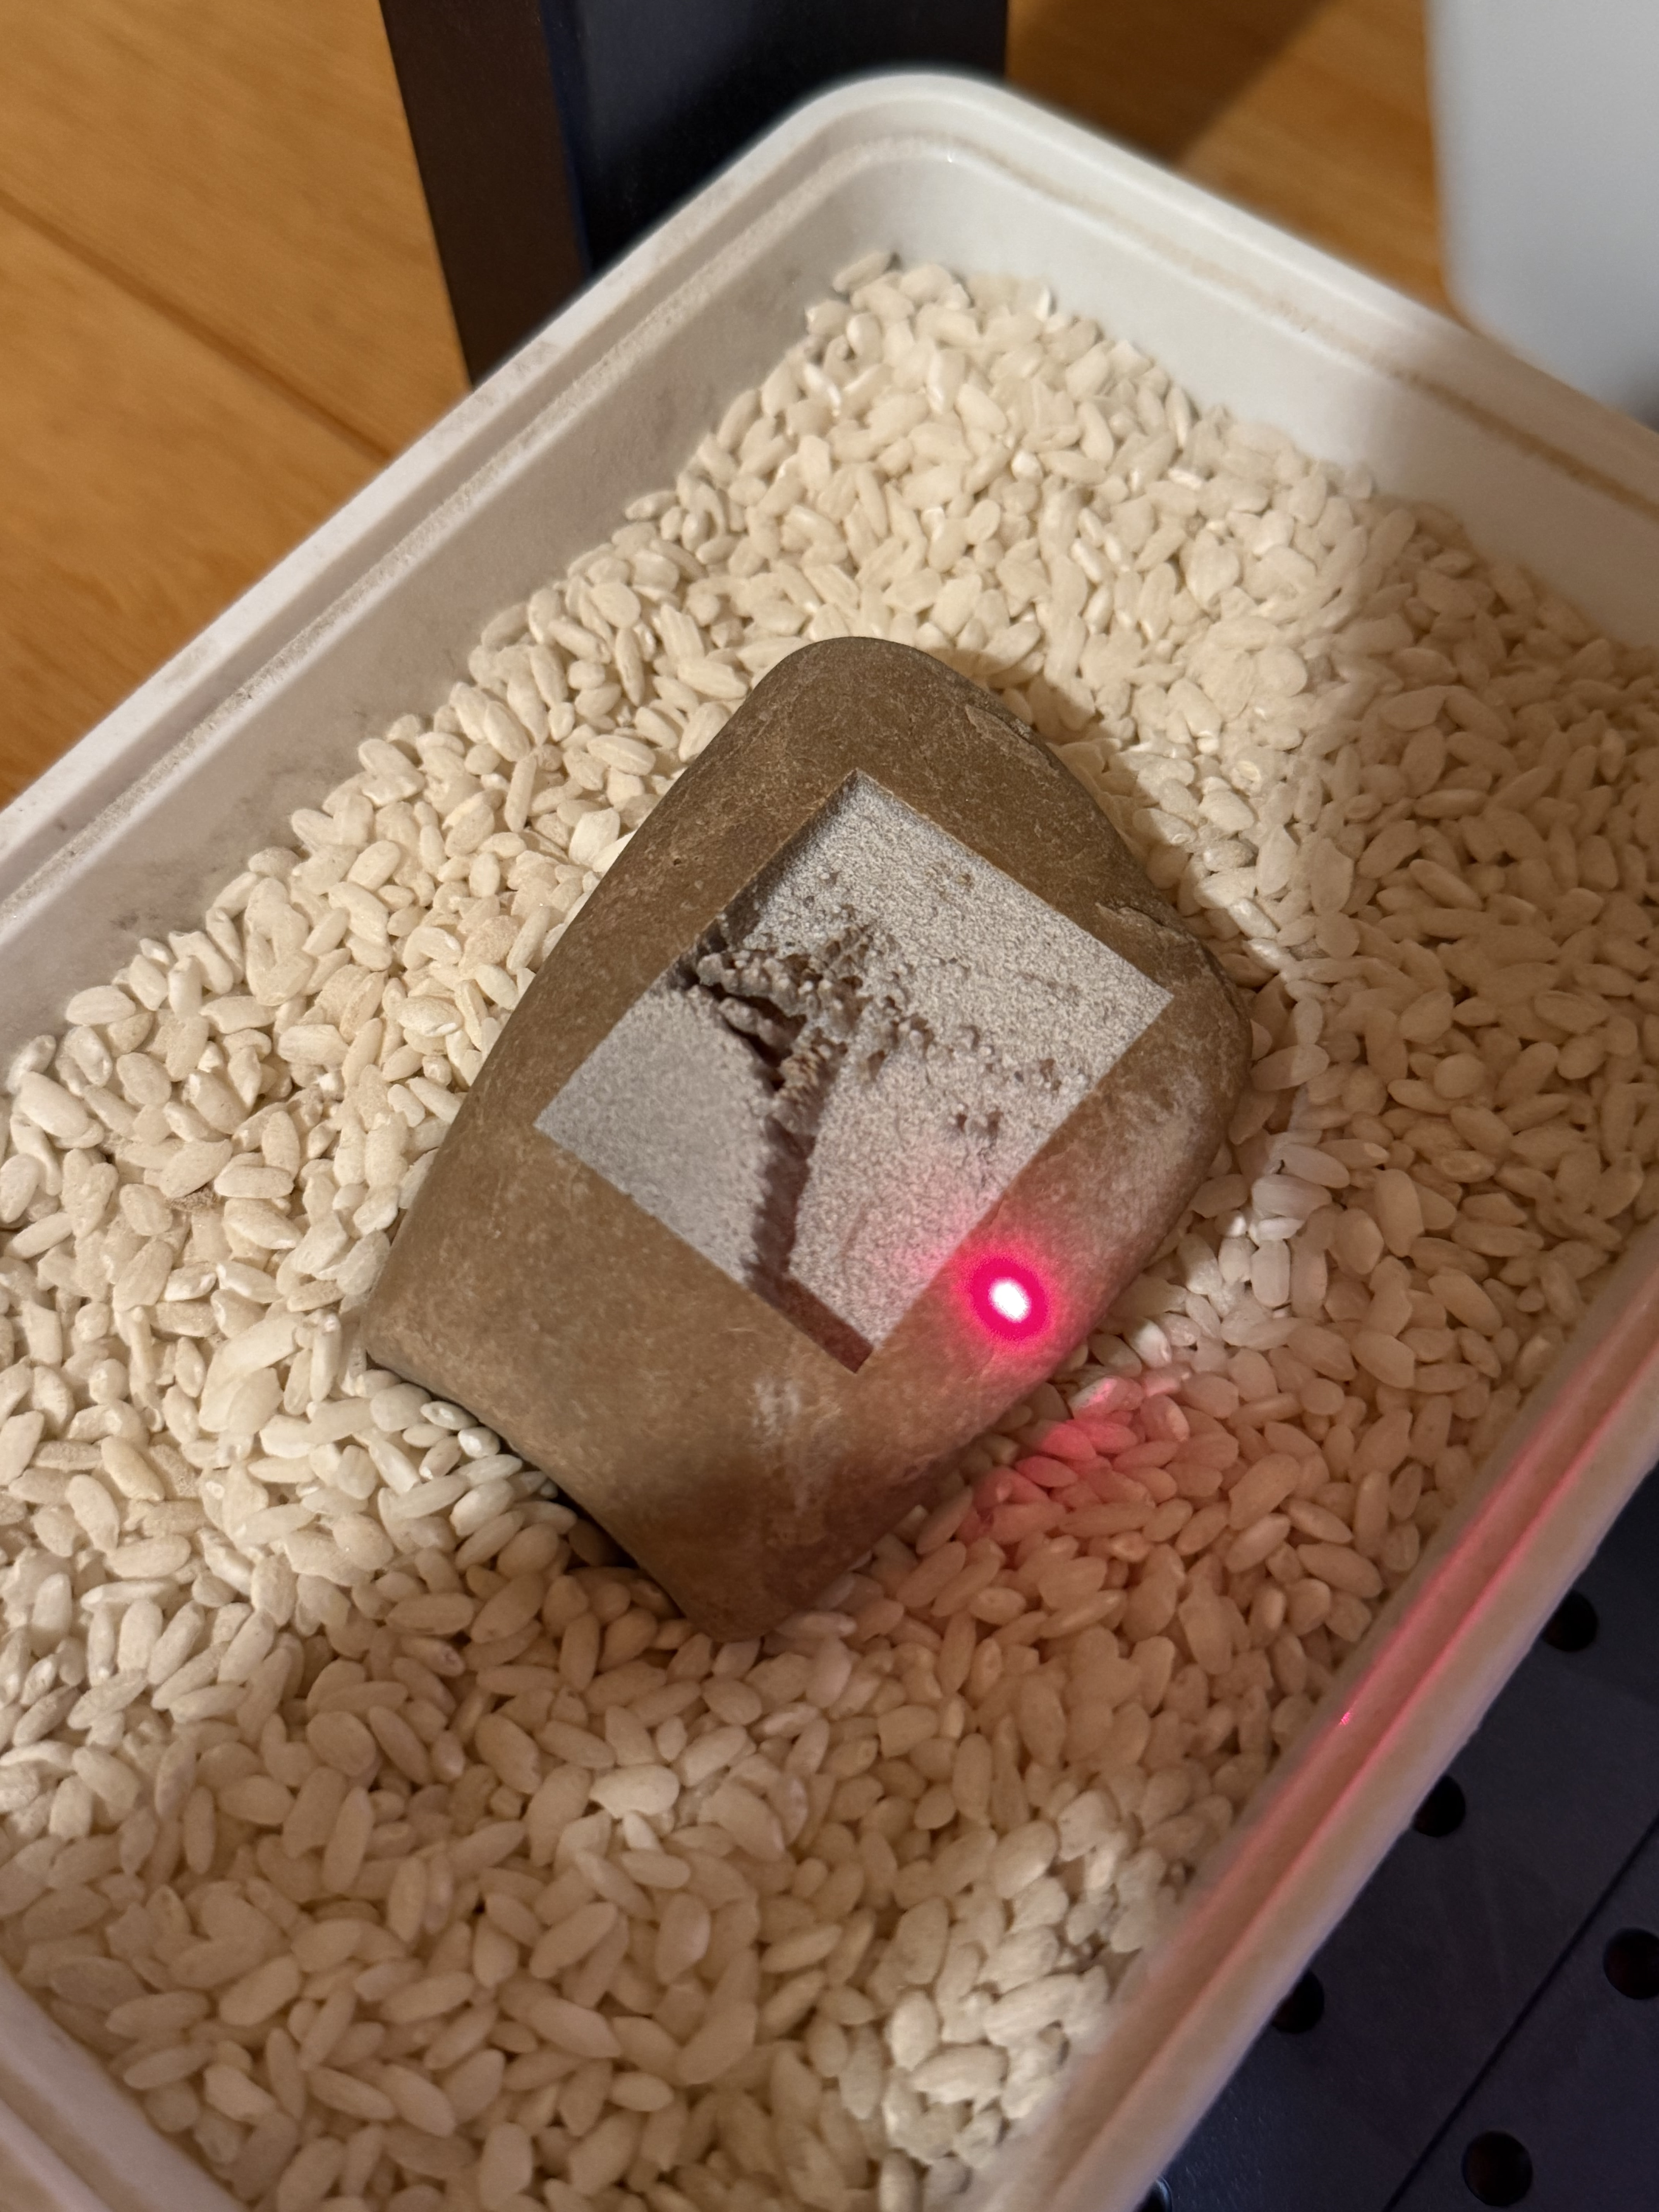
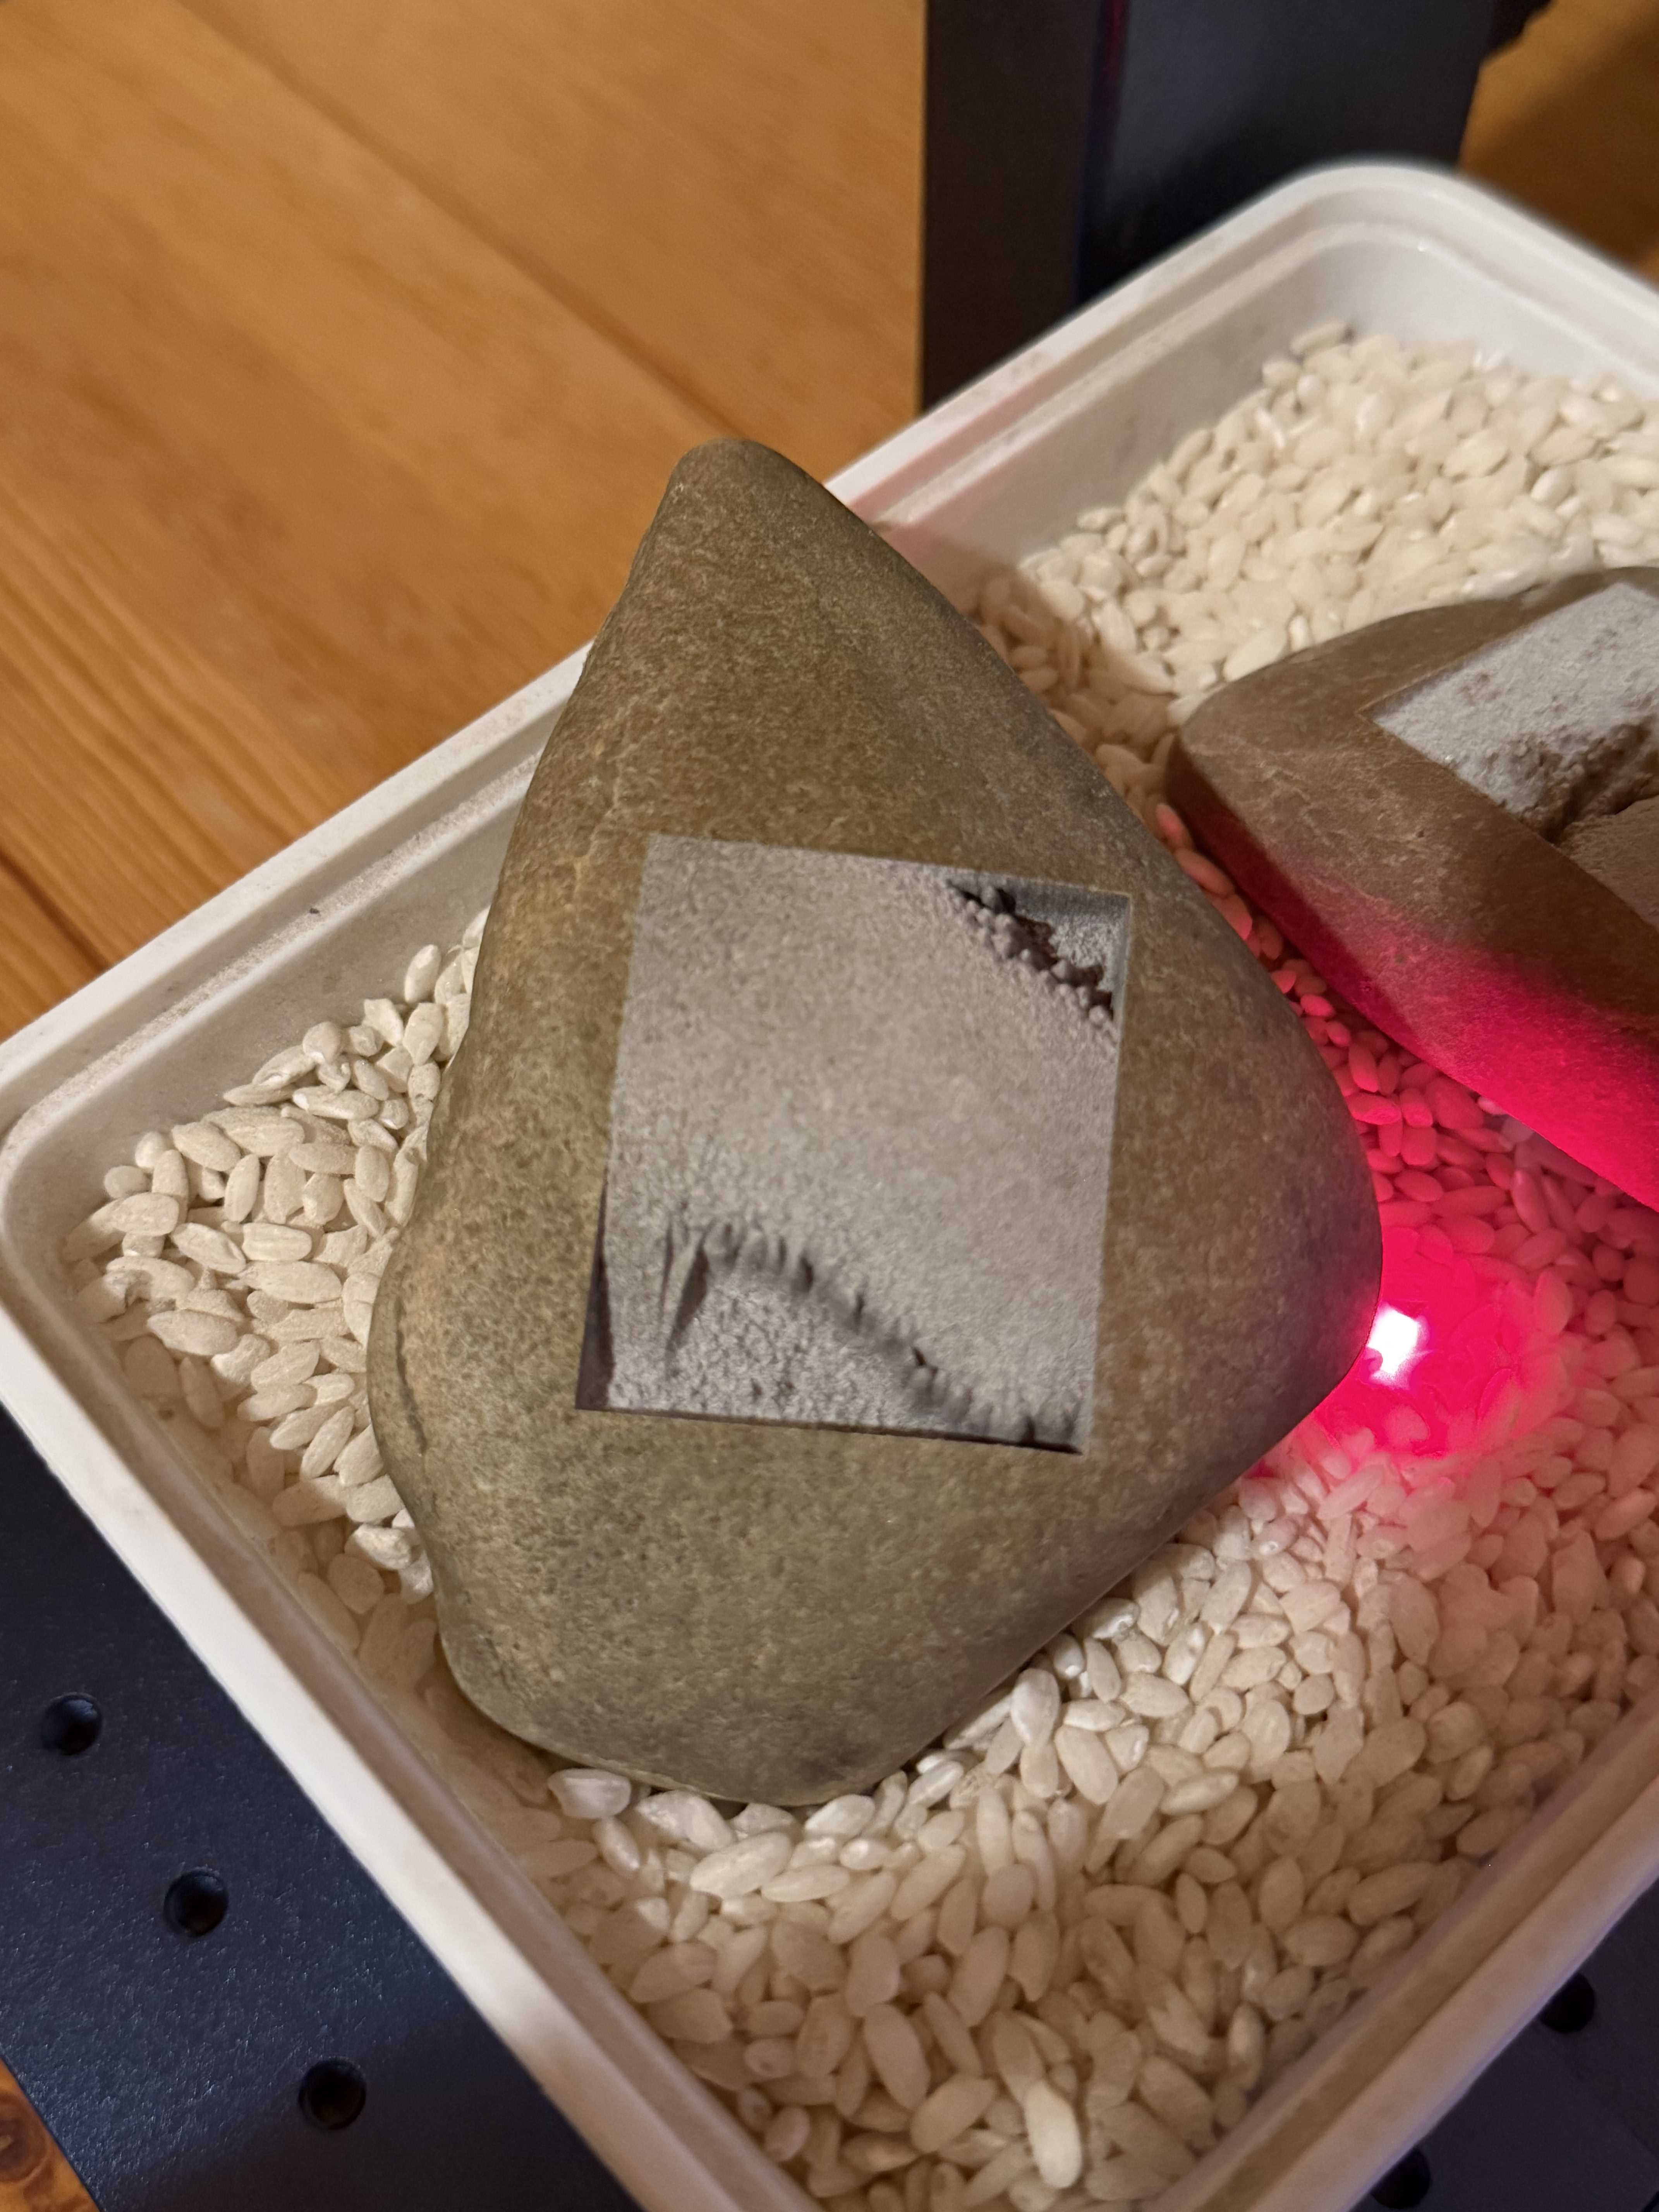
Current process is downloading the STL file online and then using the STL2PNG converter website. Attached is how my stones look after 128-256 passes. Also included pictures of the settings and the PNGs I am using.
Hoping for some guidance on how to improve so I can laser some cool things on stones.
Understandable. It would be nice for you to include the link so we can see what you’re actually trying to do.
That may or may not be the case, as I don’t know. Your resolution (interval) is set to 1016 dpi (interval of 0.0250mm).
Resolution is not only spot size but also what material you’re using. If you had a laser with a 1 inch spot size, you can’t expect any resolution greater than 1 dpi.
If you look at stone, in general, it’s usually not capable of retaining this 1016 dpi. If a 50 micron (0.050mm) beam strikes an object and it does 100 microns (0.100mm) worth of damage, then this is the greatest dpi you can expect, irrelevant as to what spot size your machine produces. Most of the rocks I use are an interval of 100 microns because that’s the common damage. When you’ve done this a bunch of times, you’ll likely be able, from touch, what kind of resolution you can expect.
If the resultant damage is 100 microns and you use and interval of 25 microns, that’s 100/25 = 4 passes over the same area.
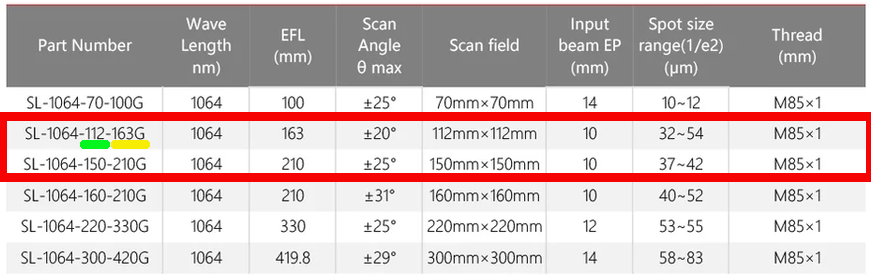
This is from Cloudray and indicates the difference between scan area and focal length. The red box seems to cover what your Gweike comes with, I don’t know which one you have.
Green is the coverage area and yellow is the actual focal length. If you want to use any of the on-line calculators to compute anything about your lenses, you must use the focal length.
Your interval is relatively high for using a rock, but you need to check and see what kind of resolution you can get. If you pass over the same area multiple times you could be doing more damage than you think.
Effective use of the 3dslice option requires you understand how it work. This is what Oz advised on how it works. Thanks to the Lightburn staff for moving this somewhere anyone can get to it instead of only beta testers.
If you want 8 bits, you have to use 256 steps to use all the information in the image for each byte. If you can use a 16 bit image and want to use 9 bits, it takes 512 steps, or 10 bits 1024 passes. You can see how this can be time consuming. Your engraving is pretty deep and if you don’t correlate power/interval/ frequency then they can be tough to duplicate.
I’m sure I’ve missed something, so if you have questions, there’s plenty of people who know what they are doing, so ask .. I’ve probably beat you up enough for one post.
The settings look fine for 3d engraving, if a little aggressive. When you say “just filling some icons”, what do you mean? and can you post those results? If you mean that a simple surface engraving works, but the deep engraving fails, I suspect it is, in fact, the type of stone that’s the problem. As a test, on the same stone, try engraving a non 3d sliced image (ideally a vector) with the same settings, i.e. 128 passes of the lightburn logo at the same 50khz/2000mm/s etc. and post the results.