Hello
I am a totally n00b at lasers, so please be gentle with me ![]()
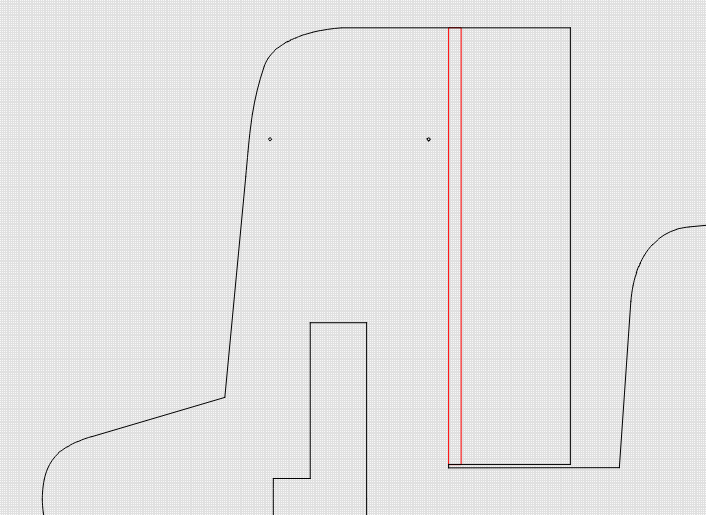
I am about to cut out a RC modelplane i 6 mm black epp, and the cut is dialed in.
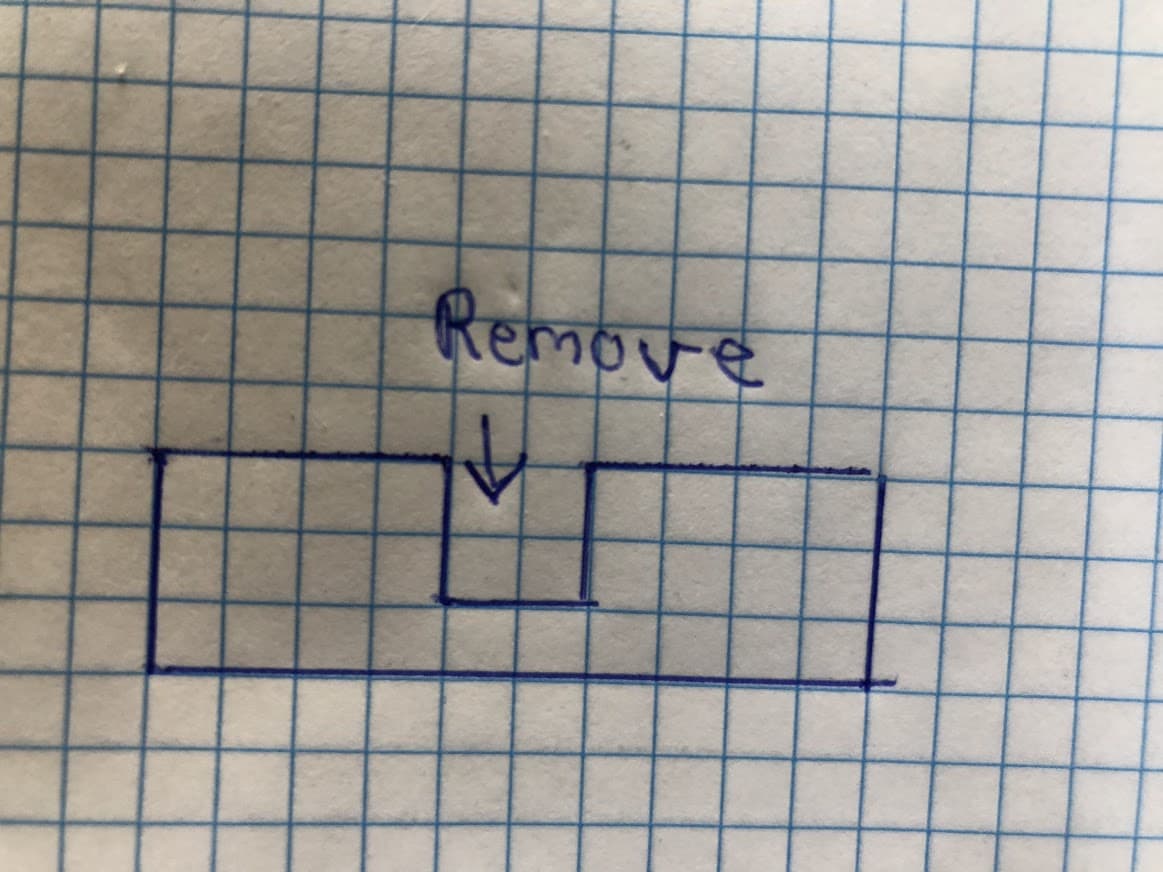
My problem is that I want to make a hinge in the wing, by removing 80 to 90 % of the epp within the red lines (not cut through)
How do I do that?
Your success for this will depend on a bunch of factors:
- consistency of material in terms of density and thickness
- flatness of material
- laser power modulation precision
What you’ll need to do is dial in a cut setting with either reduced power or increased speed that gets you a partial cut. It may be difficult to get this quite reproducible enough but with experimentation you should be able to get to a setting where this works well enough. Part of the problem is that if there is any variation in the material like even packaging mark on the material can affect the burn due to the nature of this type of material. Don’t know the exact type of material you are using but try to cut on the side that’s most consistent in color and surface.
I do a lot of cutting of XPS which I imagine behaves similarly to EPP. Some additional considerations:
- If it’s important for the cut to be a single smooth surface that you’ll have to get the cut in one pass. If it’s fine for the cut to have “ridges” then it will be a lot more predictable to run multiple lighter passes so you get a series of shallower cuts getting you to final depth. Light cuts will get you the least “pull-away” at the bottom surface of the cut but will leave you with what looks like a serrated cutting edge.
- I suggest you run a test pattern of a series of cuts both vertically and horizontally at different speed/power ranges to see how the material reacts. Your cutting tests that you did earlier could factor in here. Then add # of passes to the mix. Depending on the shape of your focus beam vertical vs horizontal cuts could come out differently.
- Using air-assist can reduce uncontrolled melting especially at the bottom of the cut. This is more important the deeper the cut.
- For my work surface finish is the most important thing so I focus at the top surface of the material. I have it dialed in well enough where the cut quality near the bottom of the cut is adequate but it doesn’t nearly match the top. I’ve experimented with deeper focus and haven’t found it to dramatically improve cut quality and sacrifices surface quality.
Thanks alot m8
I will give it a go.
Do i set the red layer as Fill?
For your purpose no, you’d want a line. You’re basically doing an incomplete cut. You’d only want fill if you were trying to engrave some sort of lettering or pattern onto the surface of the material.
Hmmm if I choose line, then it wont remove the material between the red lines or am i wrong?
What I would like to do is to remove 80-90 % of the material in the red area.
Sorry if I am being a pain…
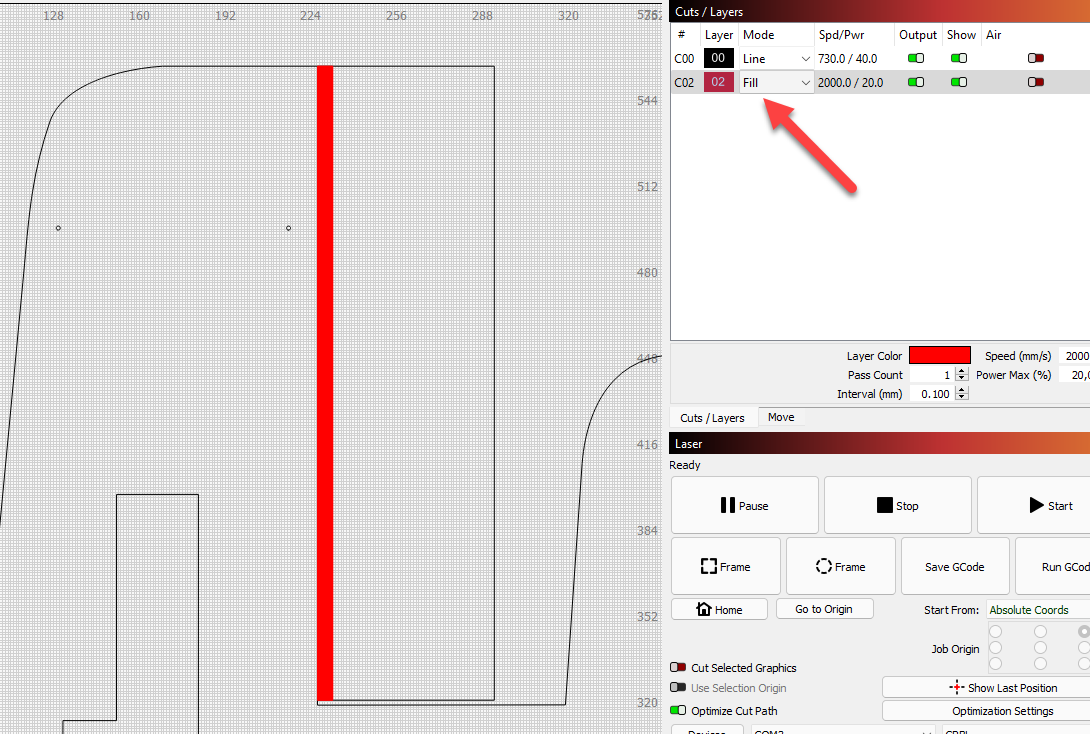
Ah. Ok. Very different. And yes, you probably want to try this with fill.
This changes or at least modified what I said earlier. Certainly will require experimentation. Depending on your need you may need to do this multi-pass to get the surface finish you want. I’ve found these types of operations extremely finnicky to get very precise depths.
I’ve not tried to get such a deep engraving on such a wide area. Give it a go and report back on results.
Also, you may want to experiment with scan angle in the cut settings.
@berainlb - What you write fits in nicely with my experience of “depth engraving”. However, I have only used it for acrylic. Here it is important to evaporate and not to melt the material. Depending on how deep it gets, it requires many passes because only relatively little energy can be used. I like to use crosshatch 45 degree for that with a single turn line for sharpening the edges at the end. For the first part of the task I use a relatively large line spacing but for the last mm approx. 0.1mm. That said, the most important thing, in my opinion, is to avoid melting the acrylic, how it works with EPP I can unfortunately not say.
I suspect it will be similar but even more sensitive to melting. This will depend much on how precise @Highboy’s needs are. He may be able to tolerate more melting for this application than you would otherwise want for a normal engraving.
In my experimentation with lettering on XPS it was extremely difficult to control a consistent depth of cut due to melting. Even if it was fine for the middle sections the starting areas would be inconsistent I assume due to acceleration. I’m confident that with enough tinkering this could get dialed in fairy well. This is one of those situations where a lower power laser might be at an advantage.
Don’t know how big that area is, but look up ‘living hinges’… maybe it’s applicable.
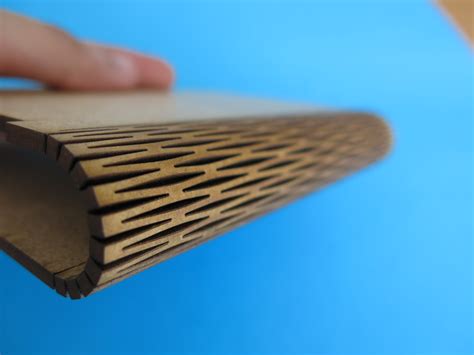
Maybe if you have room…
Good luck
![]()
1 Like
Thanks alot for all your answers…
I will go home and do some tests tonight, and remport back. (Unless i have set the house on fire…)
This topic was automatically closed 30 days after the last reply. New replies are no longer allowed.