I have a few physical reminders (cut marks / scars) from failing at this task. Don’t ask how using the Xacto-knife or utility blade turned out. I will just snap! I do still have all the digits though, so not too bad…
LOL, yeah, I’ve still got all of my fingers but I’ve got a lot of scars on them. And there’s been a few times where I was just damned lucky and stepped back ad stared at my hand all big eyed and thought “well, that was mighty close!”.
It seems a whole lot safer to draw gaskets on the computer and just pick them “ready to go” out of the laser.
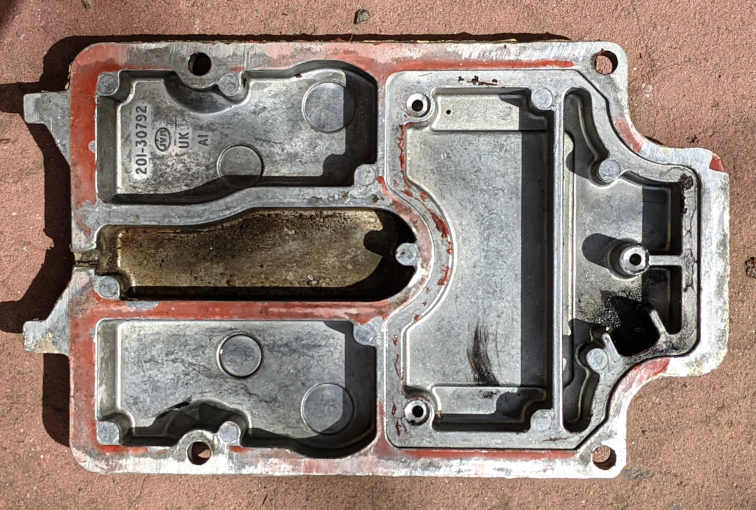
Take a photo of the part to be gasketed, drag it in to Lightburn and scale it to size.
Manually trace all the good stuff and send it off to the laser.
If you have a flatbed scanner, you can put it on that and make a scan. Alternatively, put the gasket on a white sheet of paper with even indirect lighting (to minimize shadows) and take a picture with your camera as parallel as possible (iphone tip: turn on the grid and then align the plus signs). Go into your image editing program, increase the contrast radically and convert to black and white (not grayscale). That should get you pretty close. Use the trace function in Lightburn to create the vector version.
Oh yes indeed! I still have an old flatbed scanner that has scanned lots more hardware than documents, and I’ve also done time with my tallest tripod, a plum bob, and fancy lighting to get a nice clean shot of stuff.
But often the auto-trace results still take a ton of clean up work, and castings often have lots of little rough bumpy stuff along the edges that doesn’t need to be reflected in the gasket shape.
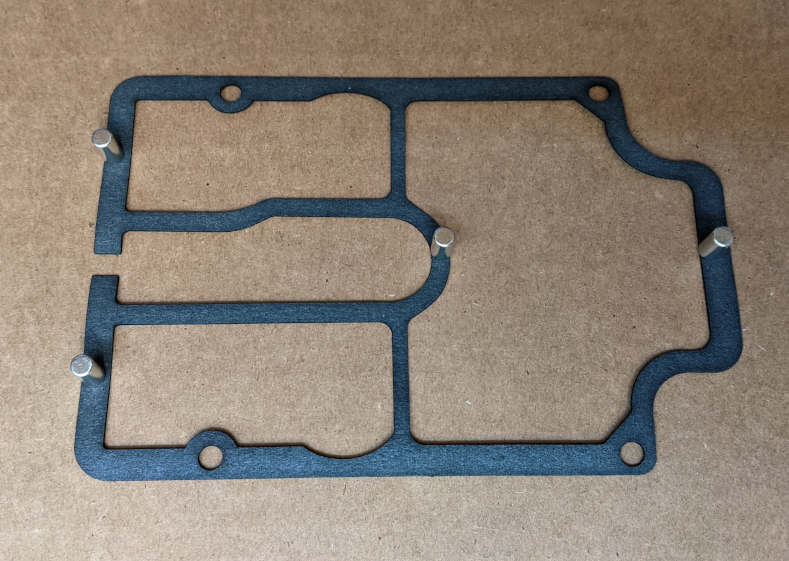
This job was quite easy to draw by hand. It’s mostly a collection of circles, rectangles with radiused corners, and good use of the boolean functions to stick it all together.
I think in this particular instance auto-trace would have been the harder way to go.
You can get butyl rubber in sheet form and a variety of thicknesses and this cuts well with a laser, by-product is pretty much carbon. So, that leaves the edges messy, but very nice gaskets, and not toxic.
had the same problem. My solution was to place the gasket on (very) white butcher paper, have 360 degree lighting to eliminate shadows, take a direct over-head picture with cell phone at high quality.
bring that picture in light burn, trace image and remove picture.
once in lightburn, measure the diameter of your gasket bolt hole as a scale reference. the entire sketch will be within 1-2mm accurate.
…or a ball-peen hammer lol
I had thought of this a couple of years ago, and scanned in some 2-stroke gaskets with a flat bed scanner. The process might be easier with the camera in LightBurn, but the scanner did a great job, as long as the gasket was within the scanner size.
Charlie
Have also done this with cork gaskets. WAY easier than cutting by hand, or drag knife plotter. In cork, it’s super clean. In rubber, there are no stretch artifacts from the knife, direction changes. As mentioned, the hardest part is getting the material flat. The tape-CA-tape method works really well & peels clean when done.
I use a flatbed scanner and import into Lightburn, then use the trace function. After that, I use the offset shapes command (external .1) to smooth it out than do the opposite (internal .1) to get it back to the correct size.
I do this sort of thing all the time, not using the Laser but vinyl cutting.
I use a long rule and mark every 100mm along 2 lines at 90 degrees to each other for scaling, I don’t bother getting the 90 degrees perfect as it’s just a scale ref in 2 axis.
You can also use the same technique for scanning large patterns, you use the line and measurements to get the scans aligned.
I don’t have much success with photo’s unless they’re taken with a zoom lens from a large distance, the lens distorts the image enough that the edges are never quite right.


 Stop triggering me!