I’ve been back to playing with grayscale engraving and thought I’d try a mask to get more 3D detail out of an image. The process isn’t dialed in yet but I ran into a problem when using a mask.
I start by doing a grayscale pass of the full image.
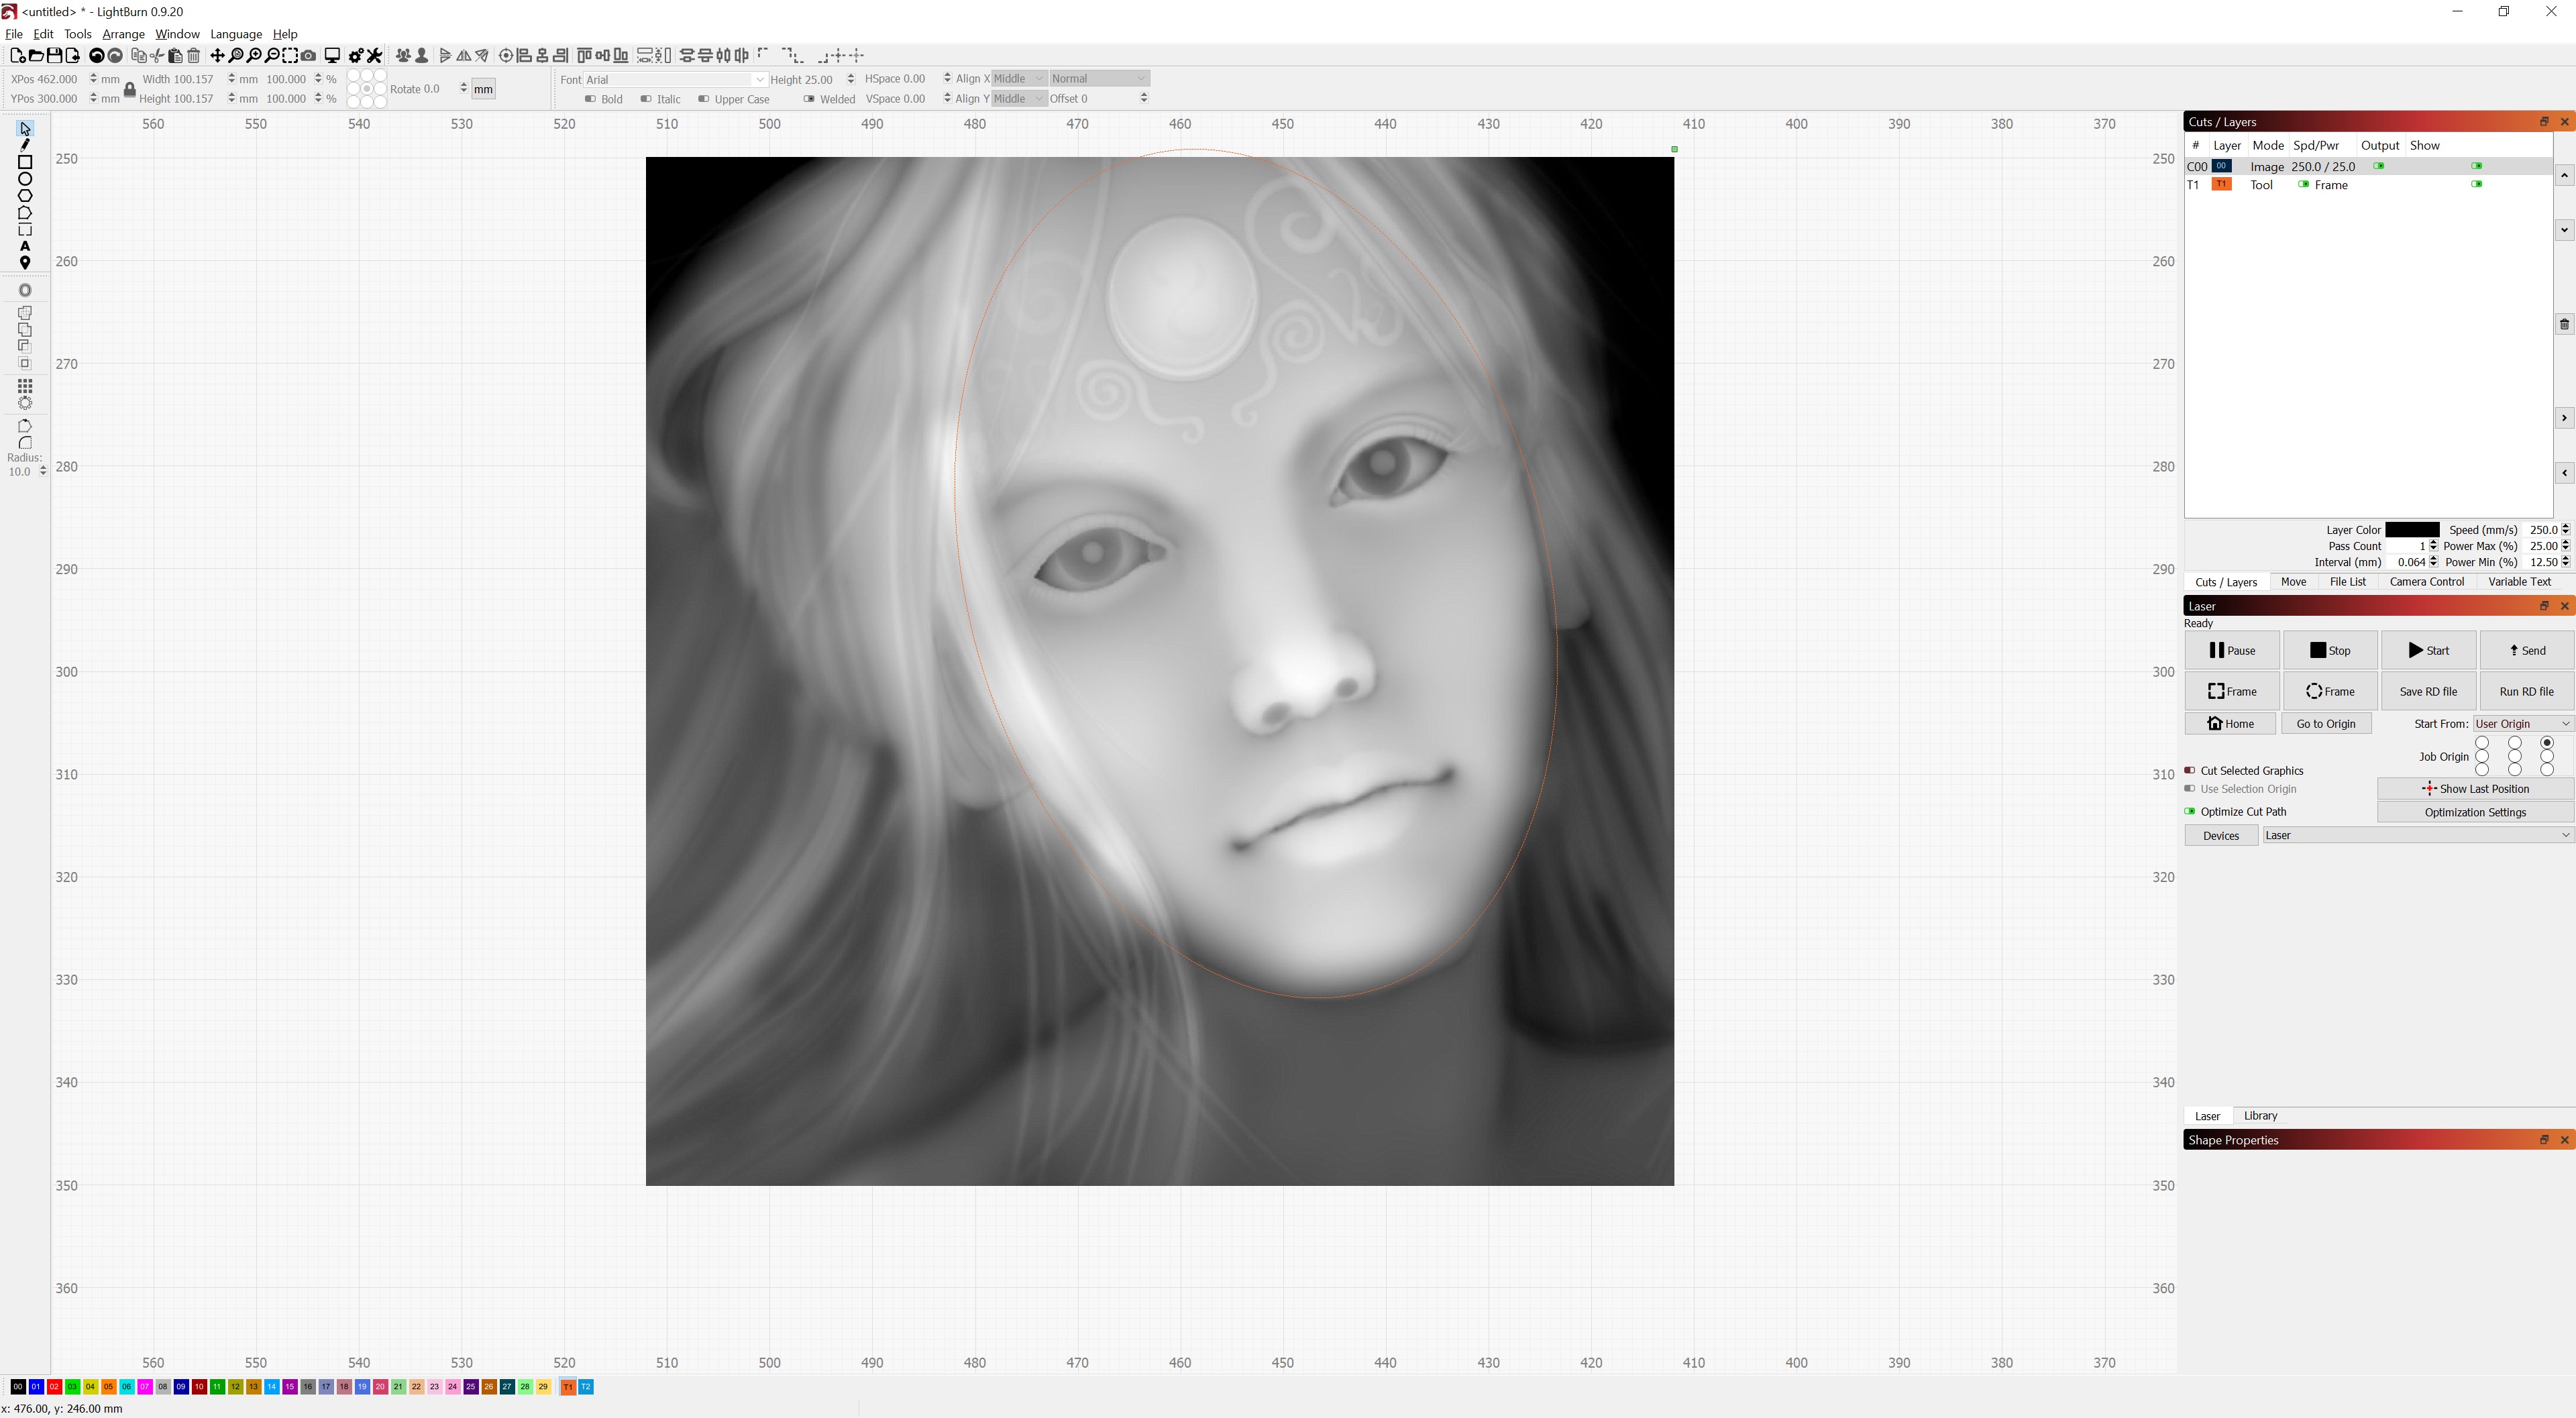
I then drew an oval on T1 rotated it and placed it over the face.
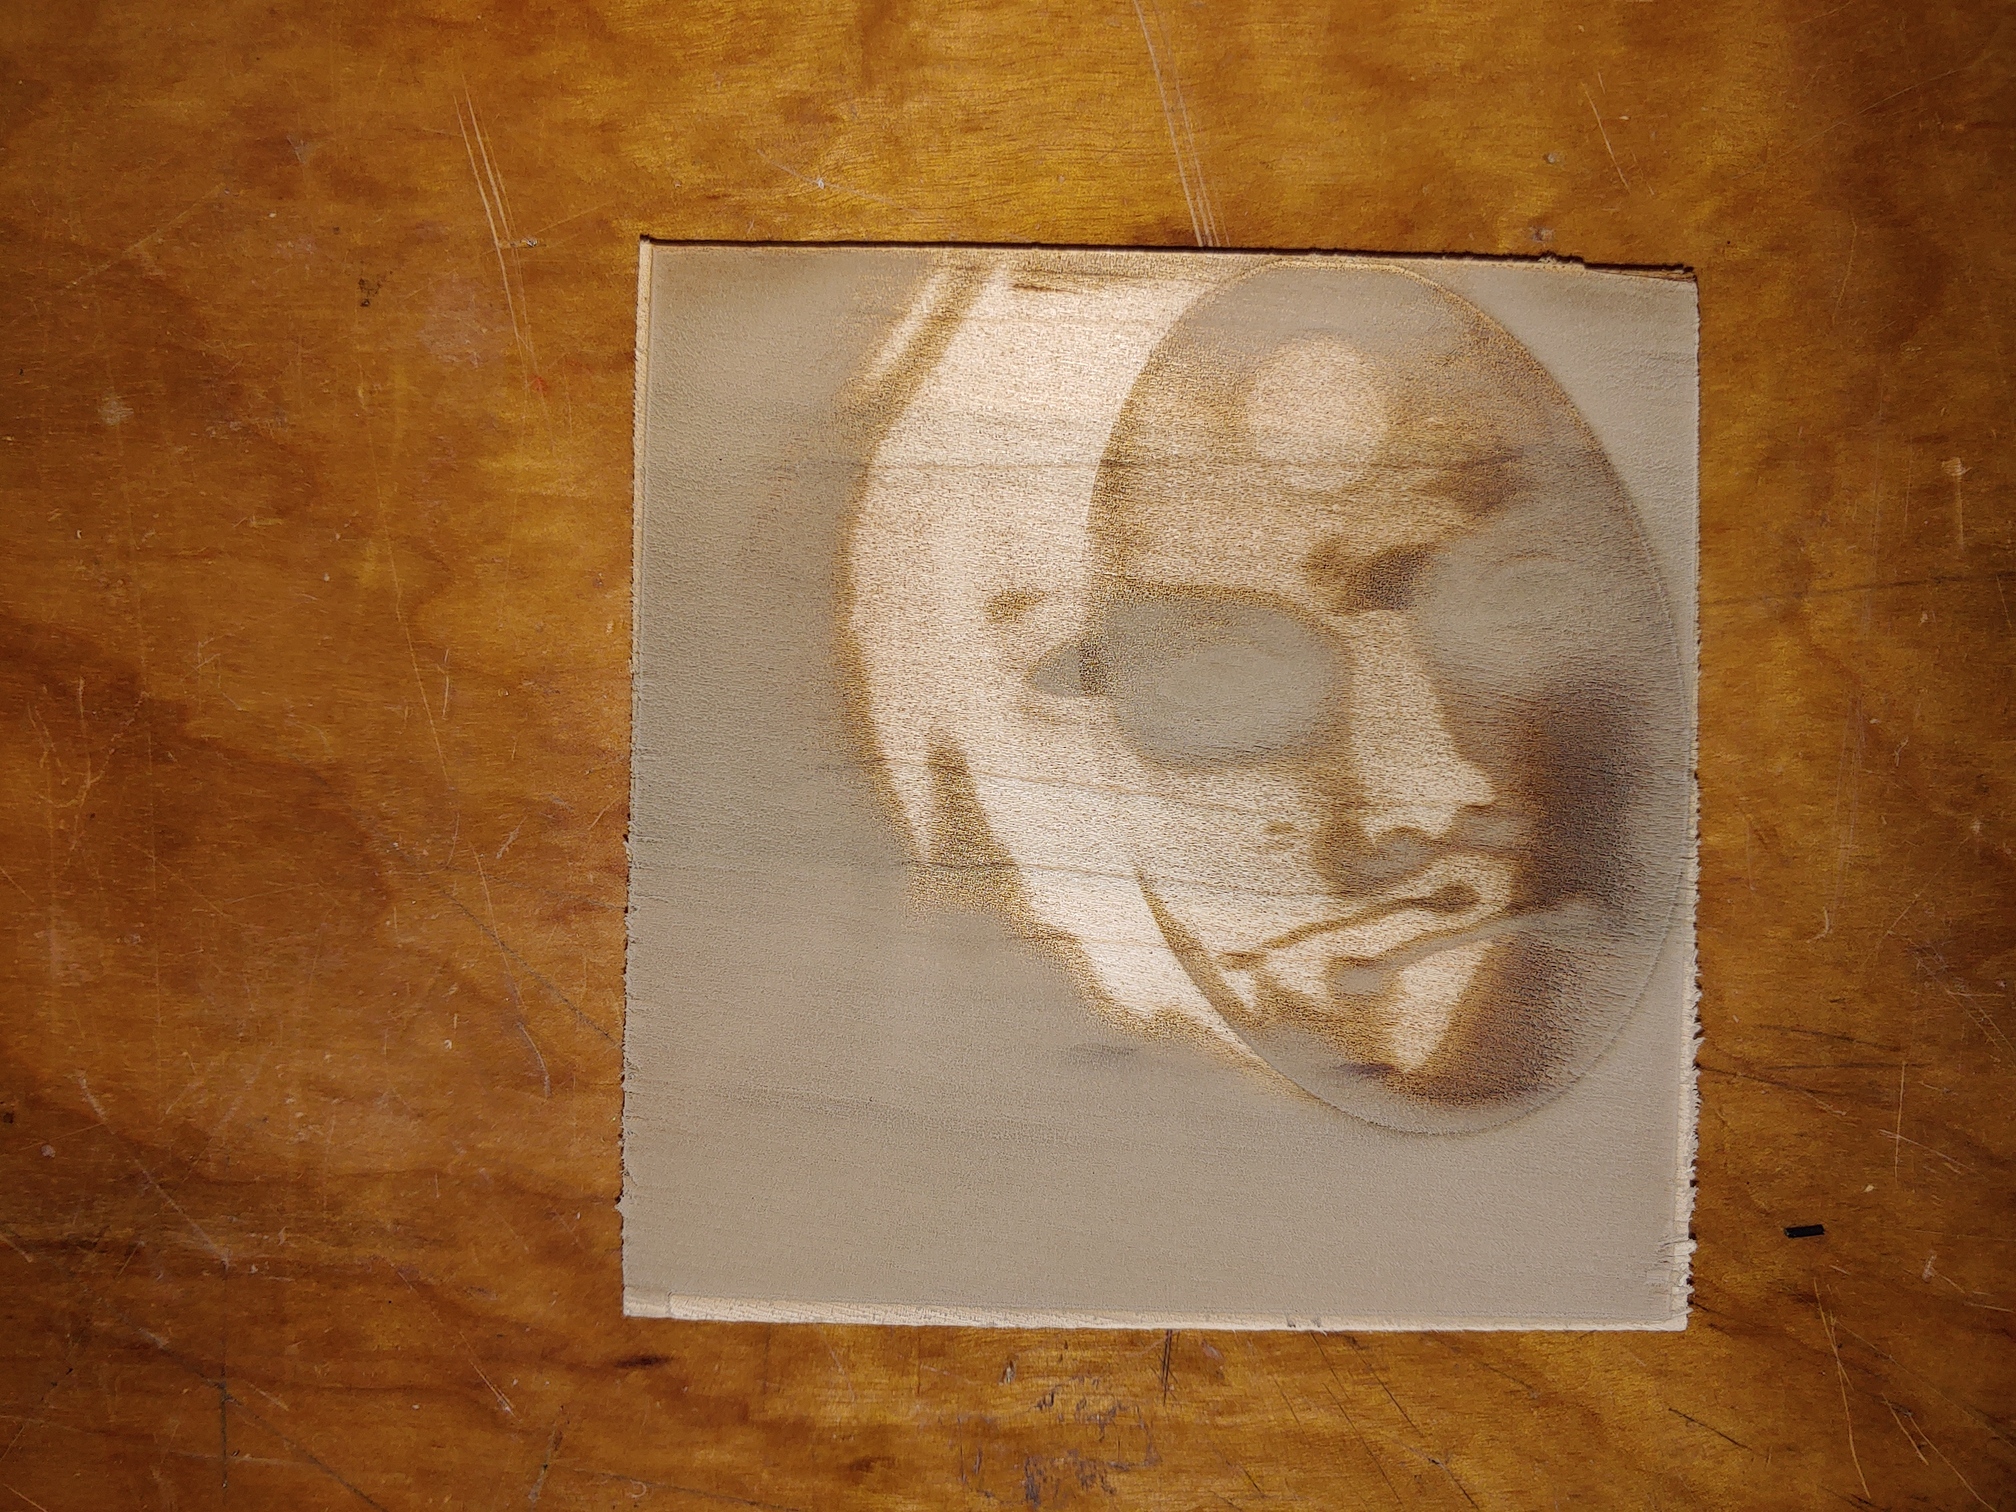
I apply the mask and the preview looks right.
When I did the second pass with the mask, the mask is severely shifted.
This is not an issue with my laser. I can make multiple passes of the same image without the mask and it lines up perfectly every time.
Would you mind uploading the project file here? That’s a really weird issue and sometimes these things are just sort of a perfect storm of variables that I can’t readily replicate locally. So your project file would be helpful.
I played with this a bit and it seems that LB is placing an origin on the mask bounding box that is separate from the image origin, then starting the mask job shifting the mask origin to my user origin for the laser.
If you look at the first two images, the first one, you see the green origin box at the upper right corner, this is where the laser starts.
In the second image, you now see the origin box in the upper right corner of the mask. When I start this job the mask gets shifted to the right to where the original job origin is.
Seems the mask should not have its own origin and should just be a window into the original image area.
Ah - ok. That explains it all then - you must be using either “User Origin” or “Current Position” for job origin, instead of “Absolute Position”.
But yes - the job origin when using a masked image is based on the size of the image mask and not on the full original image size. We debated about how to handle that and in the end decided that it would be more confusing to most people if something that they could no longer see was affecting the job origin.
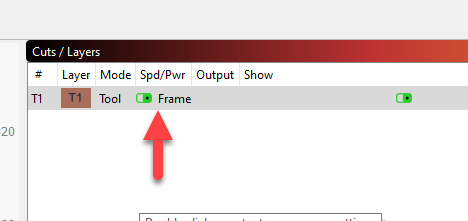
So the reason the issue is showing up for you is that you are running it as two separate jobs instead of one with everything. Right now the only real solution is to use absolute position mode or to add a rectangle on a tool layer (T1 or T2) around the second job that makes the bounding area the same as the original - Then make sure the “Frame” option is enabled on that layer:
That option will force the job to consider the tool layer in the bounding box and therefore origin calculations.
I tried absolute position and ran into a different issue.
The way I work,
I place the work piece on the laser table, usually as close to the center as I can eyeball.
I move the laser to the upper right corner of the work piece and hit origin on the controller.
Now, if I do frame, the laser moves off the work piece and returns to a place that is not the origin I set.
Is there a way to run this all as one job, print the full image, then the mask?
Please rethink how to do this. Maybe change handling based on origin type selection. I understand the original concern.
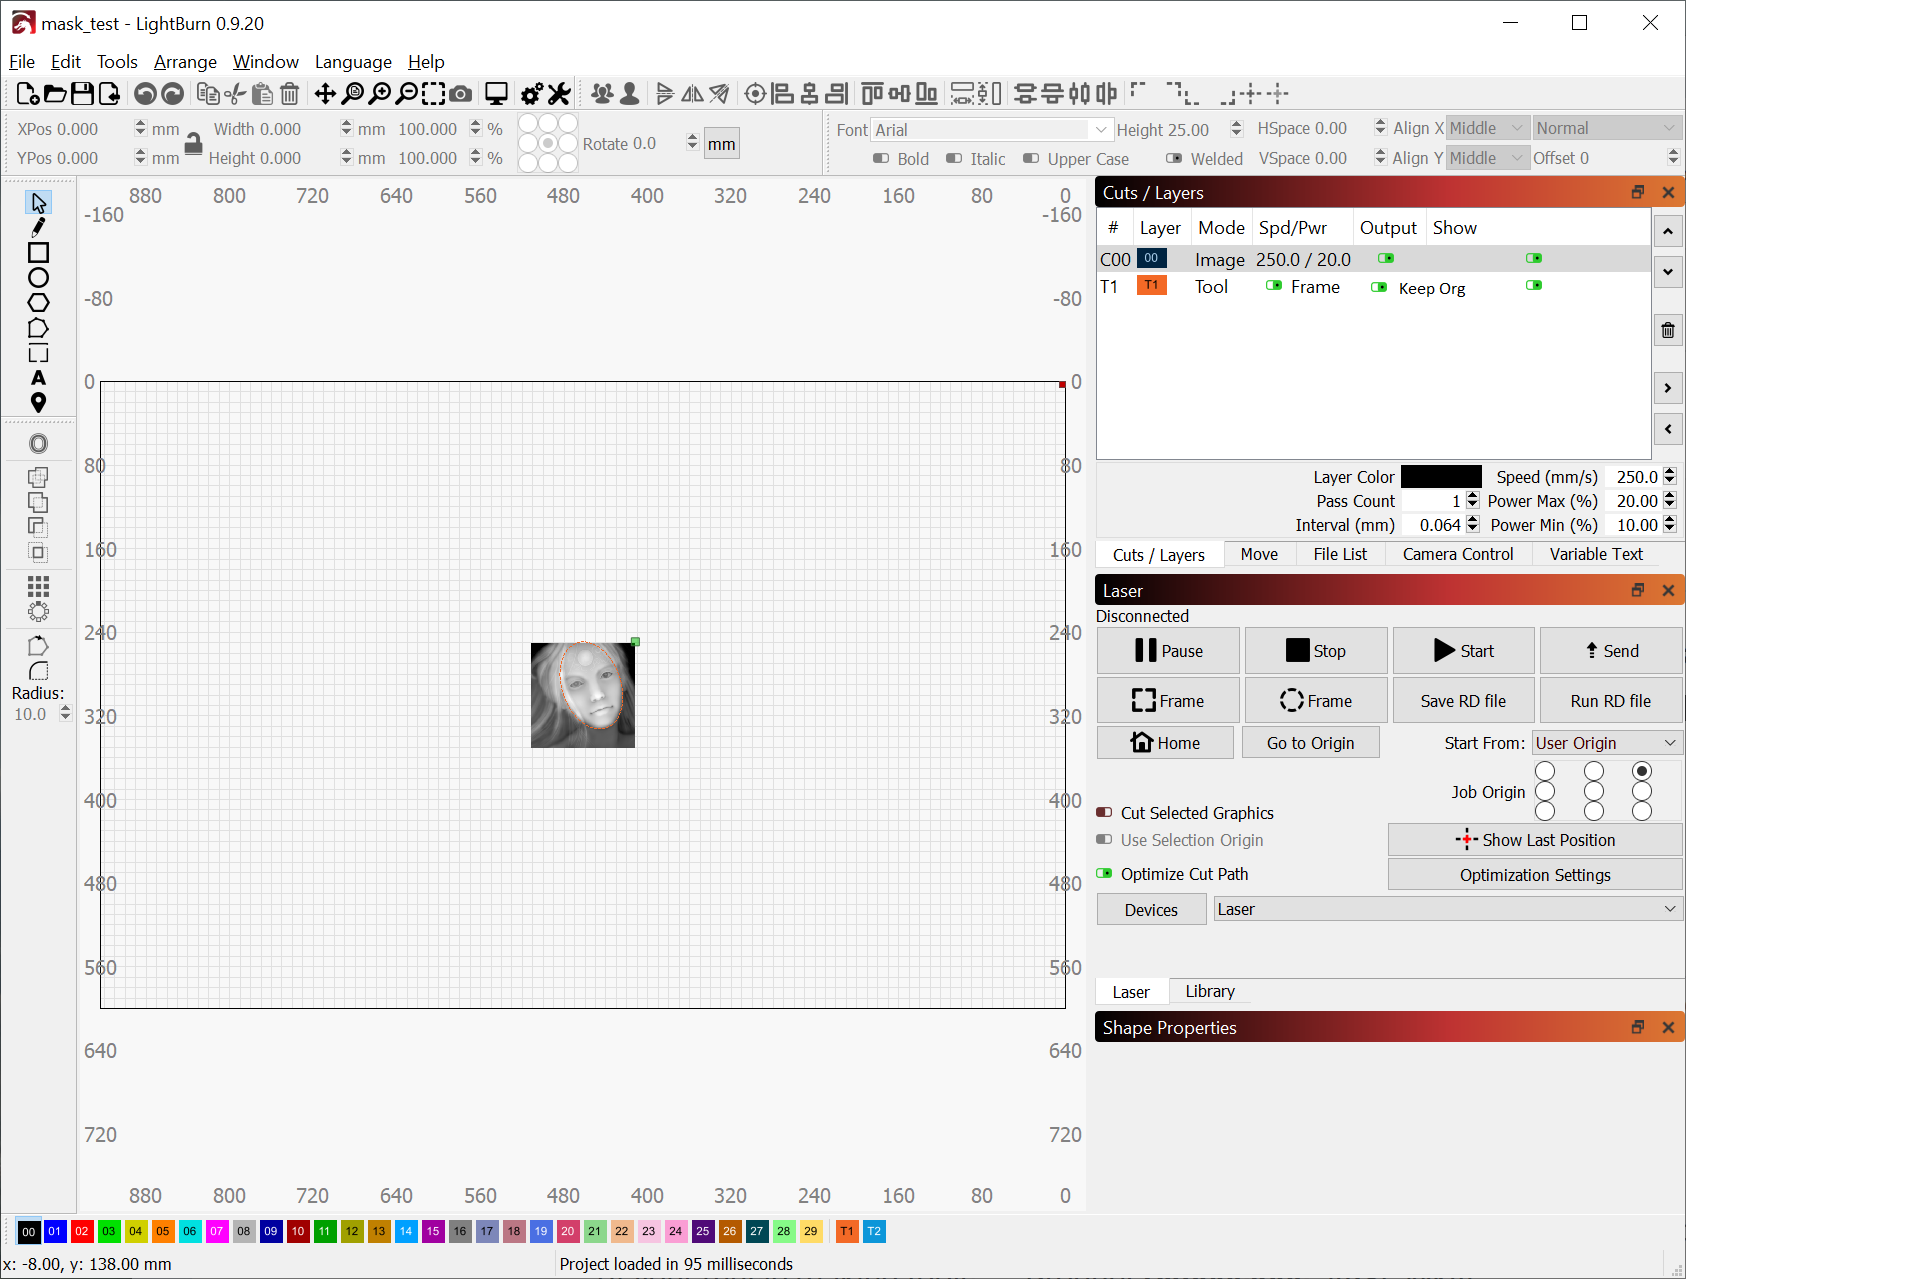
Edit: I tried the bounding box suggestion and it looks like it will work - Thanks
If you are still in absolute mode than the framing will be in absolute positioning - it will frame it exactly has shown (position wise) in LightBurn. Hitting origin on the controller will do nothing because that’s ignored unless you are in “User Origin” mode on Ruida. When you put it into absolute mode it will always be absolute positioning relative to the true origin of your machine (typically where it homes to).
In general if you are using absolute mode you want to make sure that your material is pushed all the up against that corner - then it’s just easier to mentally figure out where it will be.
Or you can use absolute and a camera to register where the job will be run on the material.
Staying in user origin mode and just doing what you suggested is easy enough.
I consider this solved, disregard the ( Please rethink how to do this. Maybe change handling based on origin type selection. I understand the original concern.) comment
Thinking about this more, how hard would it be to add another switch in the cuts/layer menu next to frame that is say, keep origin? This would select keeping the same frame origin as the original image.
That should be quite simple: Copy (duplicate - Ctrl-D) the original to another layer, which doesn’t have the mask defined, and in optimizations just put in Order by Layer and put off detect of duplicates. Make the doplicit layer Output-enabled (switch “Output”) and check in preview…
That ‘Frame’ switch just dictates whether that tool layer is included when computing the origin location - it doesn’t affect anything else. If you wanted a masked image to retain its original size when computing the origin location, the setting would have to be on either the image itself, or a global toggle.
I had a similar problem. When I burned a pencil sketch of myself and my wife the clothing burned OK, but the faces were too pale and didn’t burn well.
So I went back to Corel where I had pre-processed the image and cropped out the two faces with the Freehand crop tool and saved them as seperate bmp files. Then I imported them into Lightburn and put them on seperate layers. Then setting visibility on for all 3 images, and switching Output off, giving grey impressions of all 3 images. Setting the zoom to closeup view, I then carefully moved the two faces until they were exactly superimposed on the faces on the full image.
Then I upped the power by 10% and burned only the two faces, seperately, for a second time. The final burn looked so much better with the 2nd burn of the faces.