I used a circle to mask an image to engrave on a Christmas tree ornament. After flattening, the image still has a square outline which is included in framing. Most times this would not be an issue, however, I am rotating the whole file -45° in order to squeeze this into an area of the material and the “corners” of the image are being included in framing and not in a good way.
I can back up and work around this, I’m pretty sure. But it sure would be nice if portions of a masked image that no longer exist were excluded from framing…
Or am I missing something?

So, I tried changing my workflow to get around this and only made it worse. I tried rotating the image -45°, then masking it and flattening. This only made the problem worse.
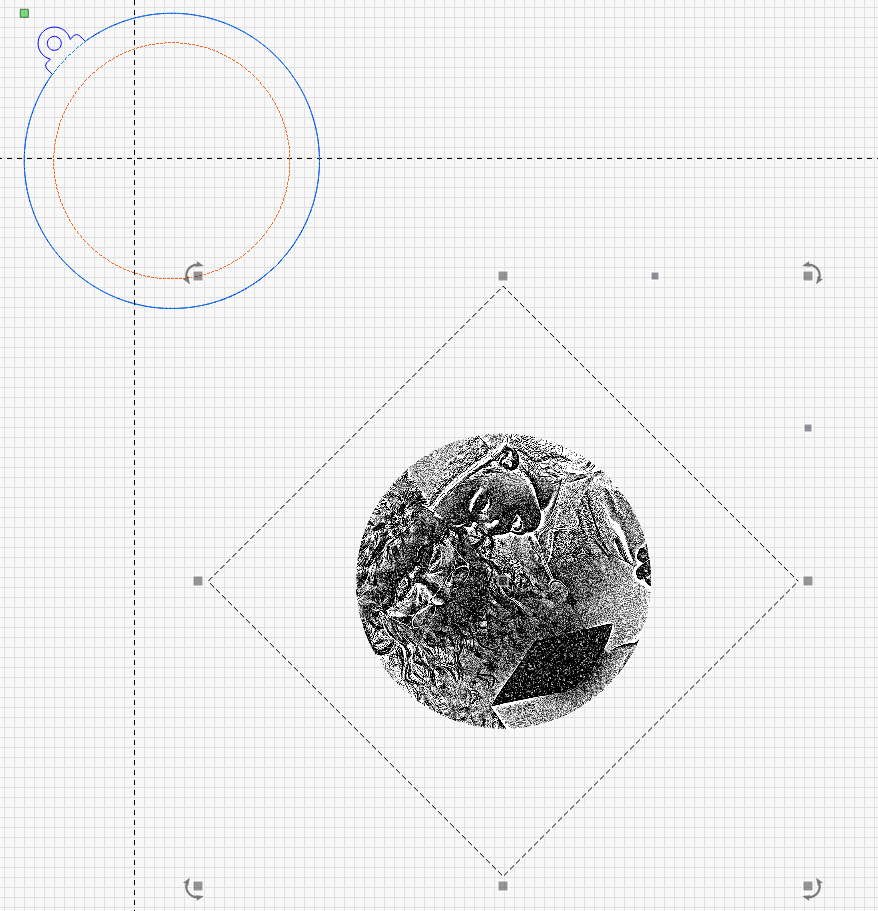
It’s obvious that LightBurn is using the boundaries of the original image to generate the outline. This just seems wrong. I can’t get any kind of accurate framing this way.
Unless I’m missing something that should be obvious?
Can you just exclude the image from the framing operation? Or create a separate object just for framing?
I’m not sure exactly how to do that and then re-enable the image and still have the origin right. Haven’t had time to think it through. I suppose set a User Origin?
What Start From mode are you working in? This would be easiest in Absolute Coords but could be adapted to all other modes.
And are you burning to a pre-cut work piece or are you cutting it out?
I generally use “Start From Current Position”.
I tried framing it selecting just the ornament outline and Cut Selected, Selection Origin, then set User Origin. But as soon as I unhid the image the origin shifted way out.
I’m cutting this out of material and have just enough room to squeeze it in if I can get the framing right and have it actually cut there.
I don’t like using absolute coordinates; I end up jogging and moving all day just to get the laser where I want it. The machine is only three feet away from my PC but it’s still a PITA.
It would be so much easier if, after masking and flattening, LightBurn would use the dimensions of the new image instead of clinging to the dimensions of the original image which doesn’t exist anymore.
Have you tried this for the image framing?

I can’t get the origin in the right place because of the image boundaries.
I can get my framing by hiding the image and using “Cut Selected, Selection Origin”,
but as soon as I unhide the image the origin moves.
Wasted half a day on this stupid test. Done with it.
If you need to use a circular shape to assist with framing/placement then you could just create a new circle the correct size, put it on a tool layer, and snap it to your masked image, then turn the output of the masked image off while you are rubber-band framing. If you were to do this it would be better to be in absolute coordinate mode.
(I think it is just the nature of a bitmap file that they are fundamentally rectangular with rows and columns of pixels, some of those pixels may become transparent but still exist)
I guess the only way to get the origin to behave is with absolute coordinates. An absolute joy - NOT. I could spend half a day pushing the “move” button, going to the machine, going back pushing “move”… etc
There is no need to use any jog buttons in the Move window. Move the selected part in the Editor window and then reframe until you are happy, you can use the arrow keys or nudge the part with CTRL+arrow keys then reframe with ALT+Shift+R. It shouldn’t be a chore.
I agree, it shouldn’t be a chore. But I’m not sure how nudging things around on the screen is all that different from nudging the laser head around. Still have to push Frame and jump over to the machine to see if it’s right.
But I will keep this in mind. I think it might be a useful process in some cases.
This topic was automatically closed 30 days after the last reply. New replies are no longer allowed.