So if the potentiometer on the laser is set to 15% and I select 100% in the software it will not output more than 15%?
My ideal setting of the pot should be 70% or whatever I want my upper limit to be?
So if the potentiometer on the laser is set to 15% and I select 100% in the software it will not output more than 15%?
My ideal setting of the pot should be 70% or whatever I want my upper limit to be?
Correct!
The software has no idea what the potentiometer is set to and is always outputting 0-5v scaled to the percentage you specify for the cut/raster.
The max milliamp rating is a specification of the tube manufacturer.
There is a minimum amount needed to start lasing as well.
The best thing to do is test from that minimum up to where the power level doesn’t increase the depth of cut anymore. That will typically be less than the maximum power rating the tube manufacturer specifies according to what I have seen from Russ on Youtube.
I highly suggest you spend a bunch of time watching his videos and learning more about the whole process, it will help immensely.
The exact number will depend on the manufacturer and model number of your tube.
My 80w red&black has a EFR model F2 tube in it. (says so on a sticker on the tube)
A quick look at the EFR website says maximum current of 28mA and “max current in long term operation” of 25mA or less.
EFR website: http://en.bjefr.com/xsproduct_EN/TypeId-368.html
For my particular tube/power supply combination, 28mA is about 80% indicated power and 25mA is about 70%.
Thank-you both for the information. I will look at the tube when I get home tonight and see if I can find a model #. Doing the research on Lasers, before buying, I had set the max to 80% as soon as I got it, but have always wondered if it was too high.
Ray
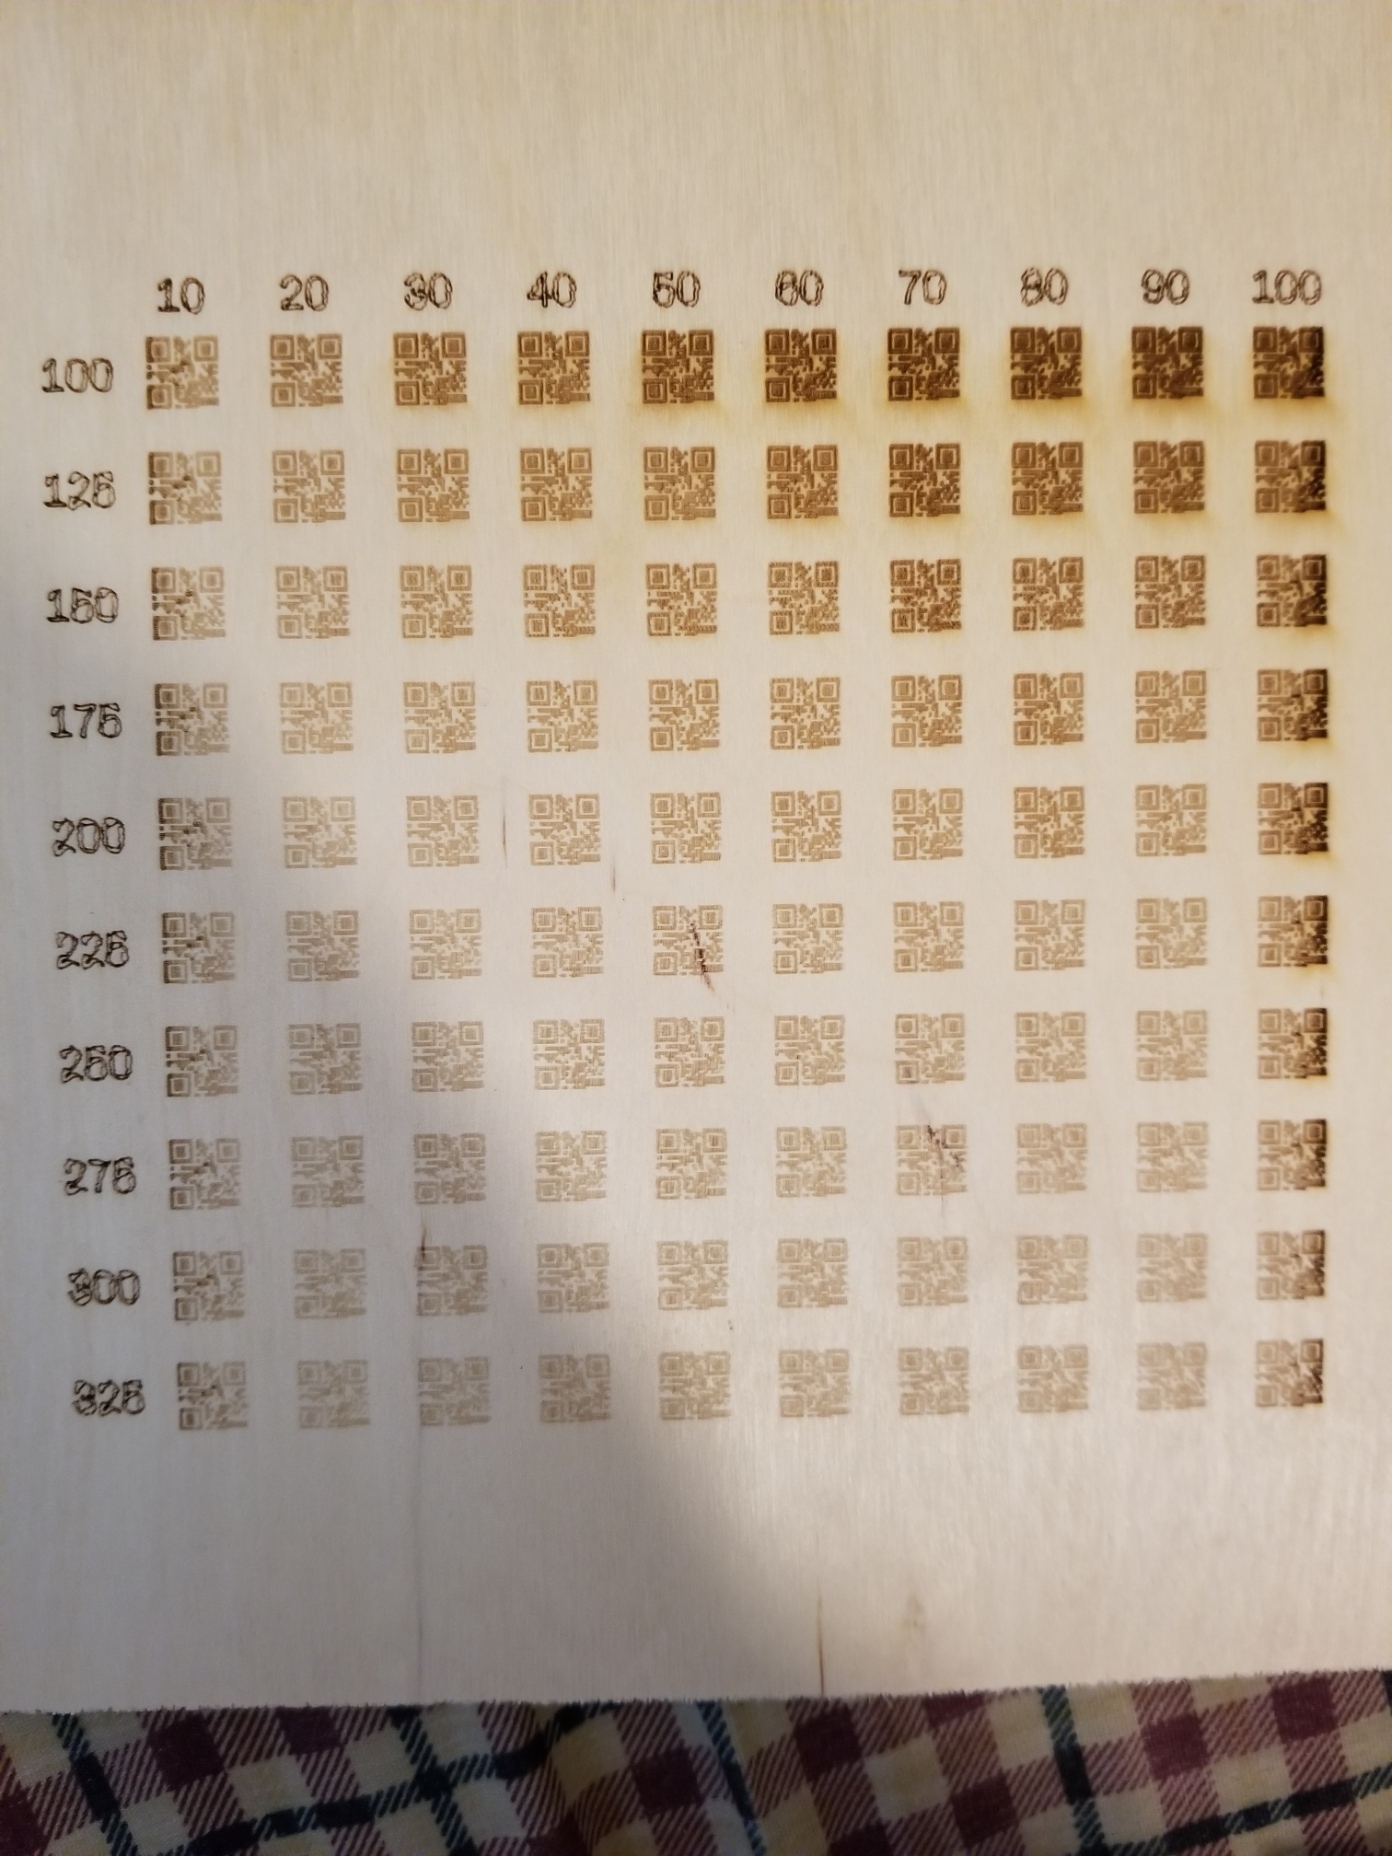
I to have a 2.5W and would like to test this out. Did you base your settings of 10%-100% off of 100% max power?
Yes 100% of the 100% (full power)
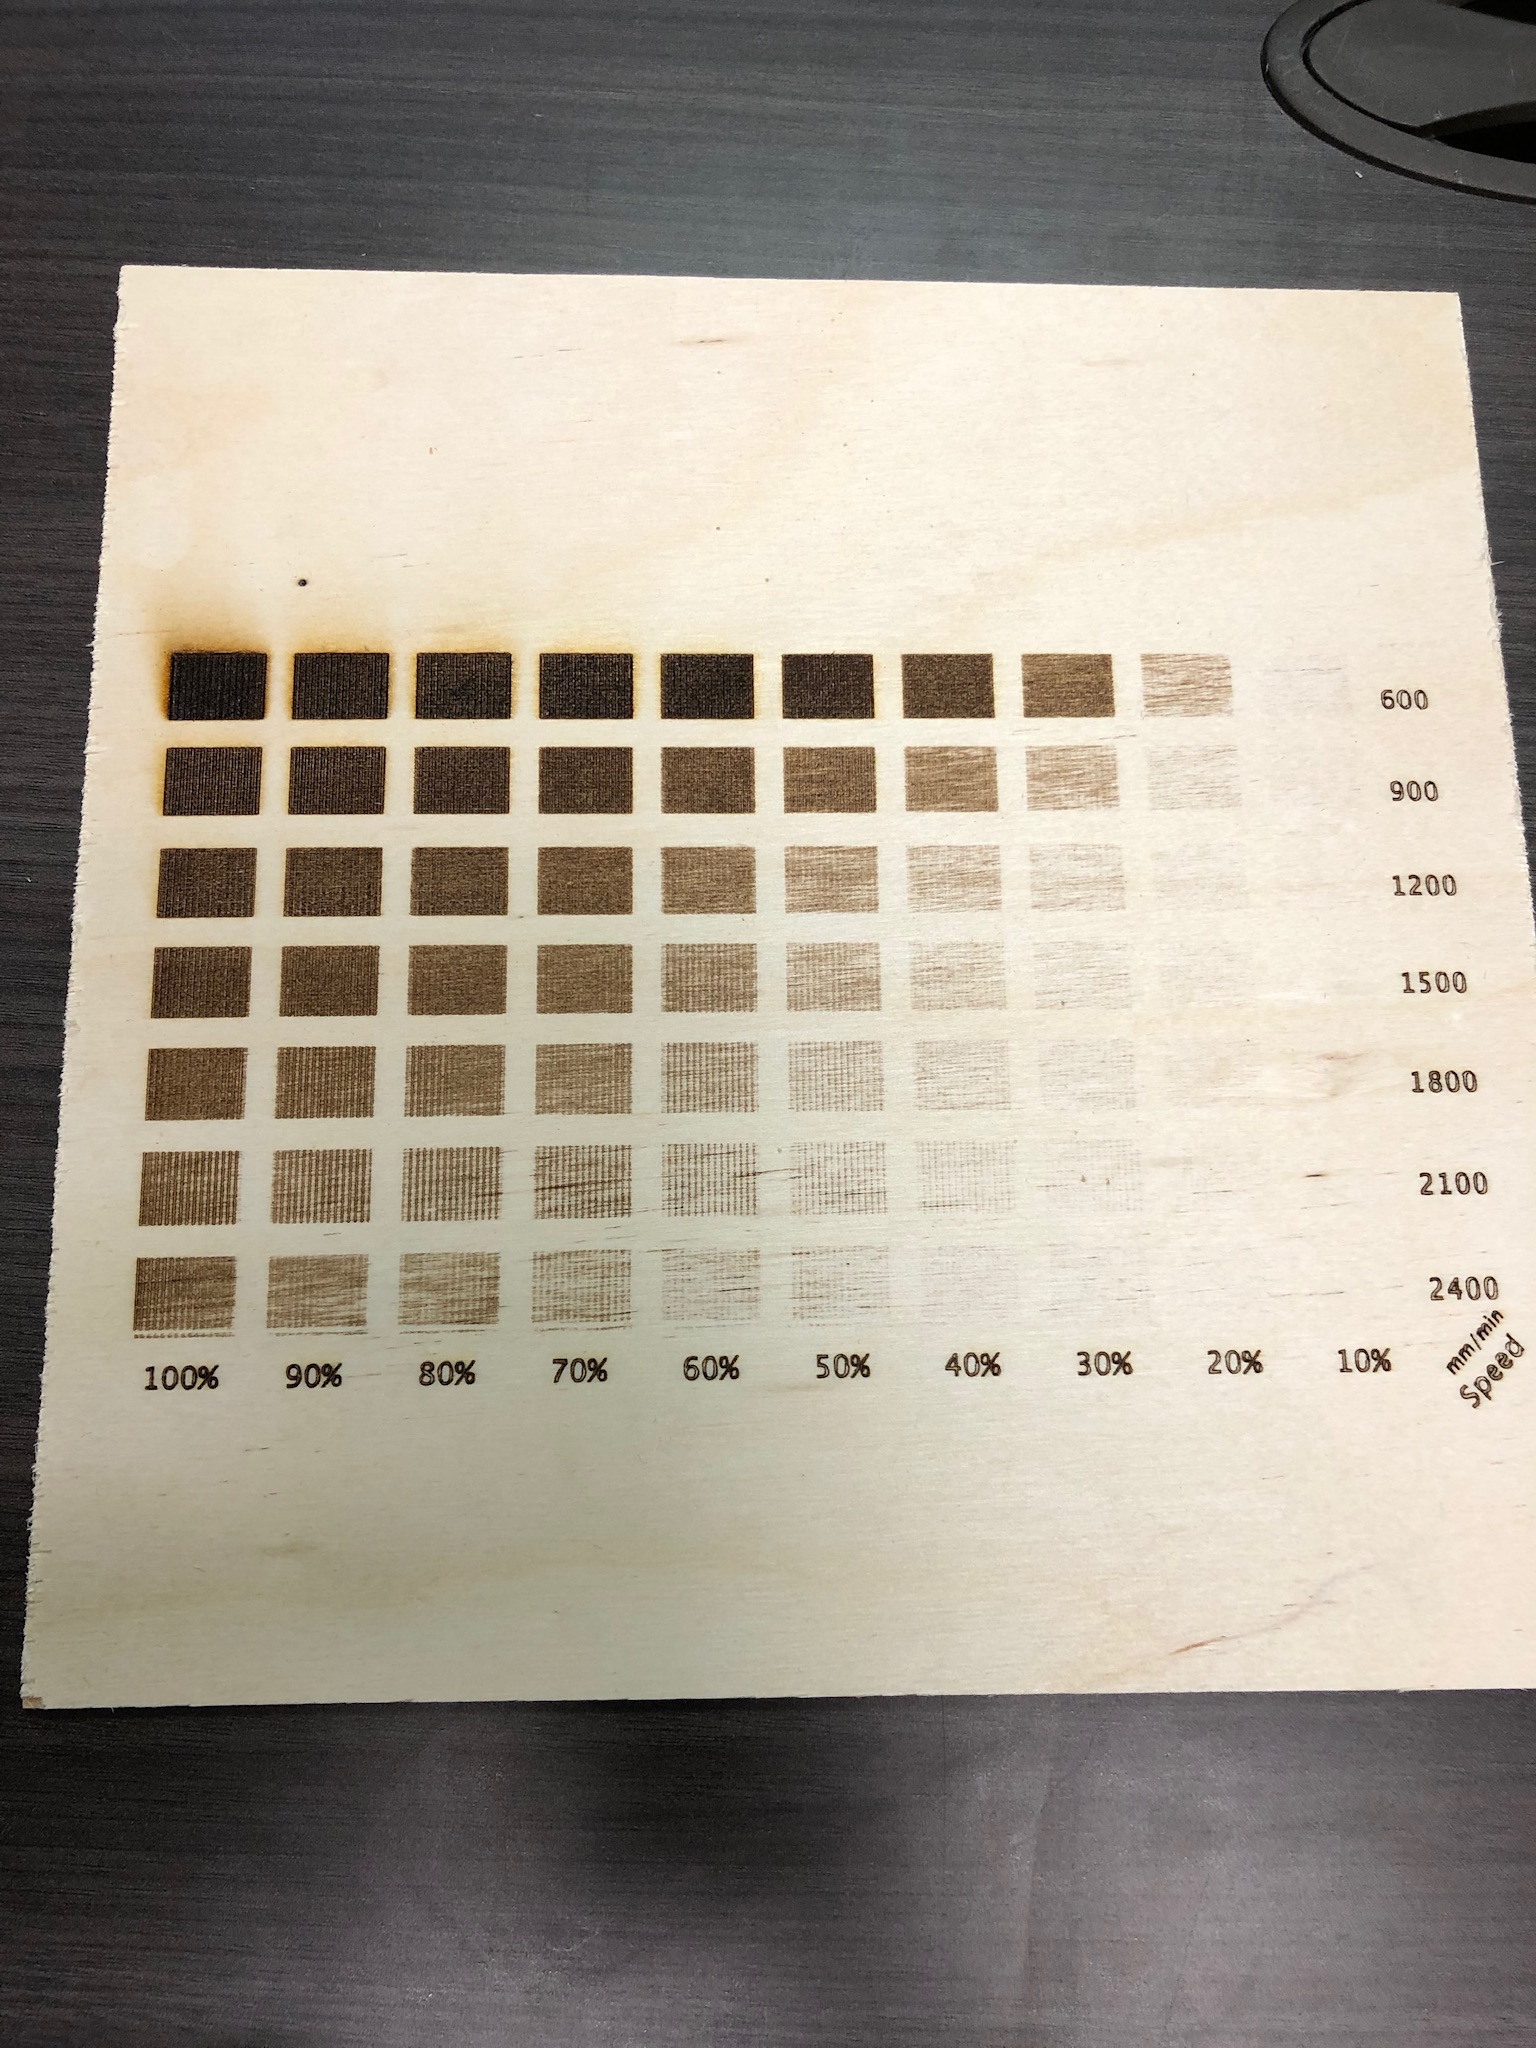
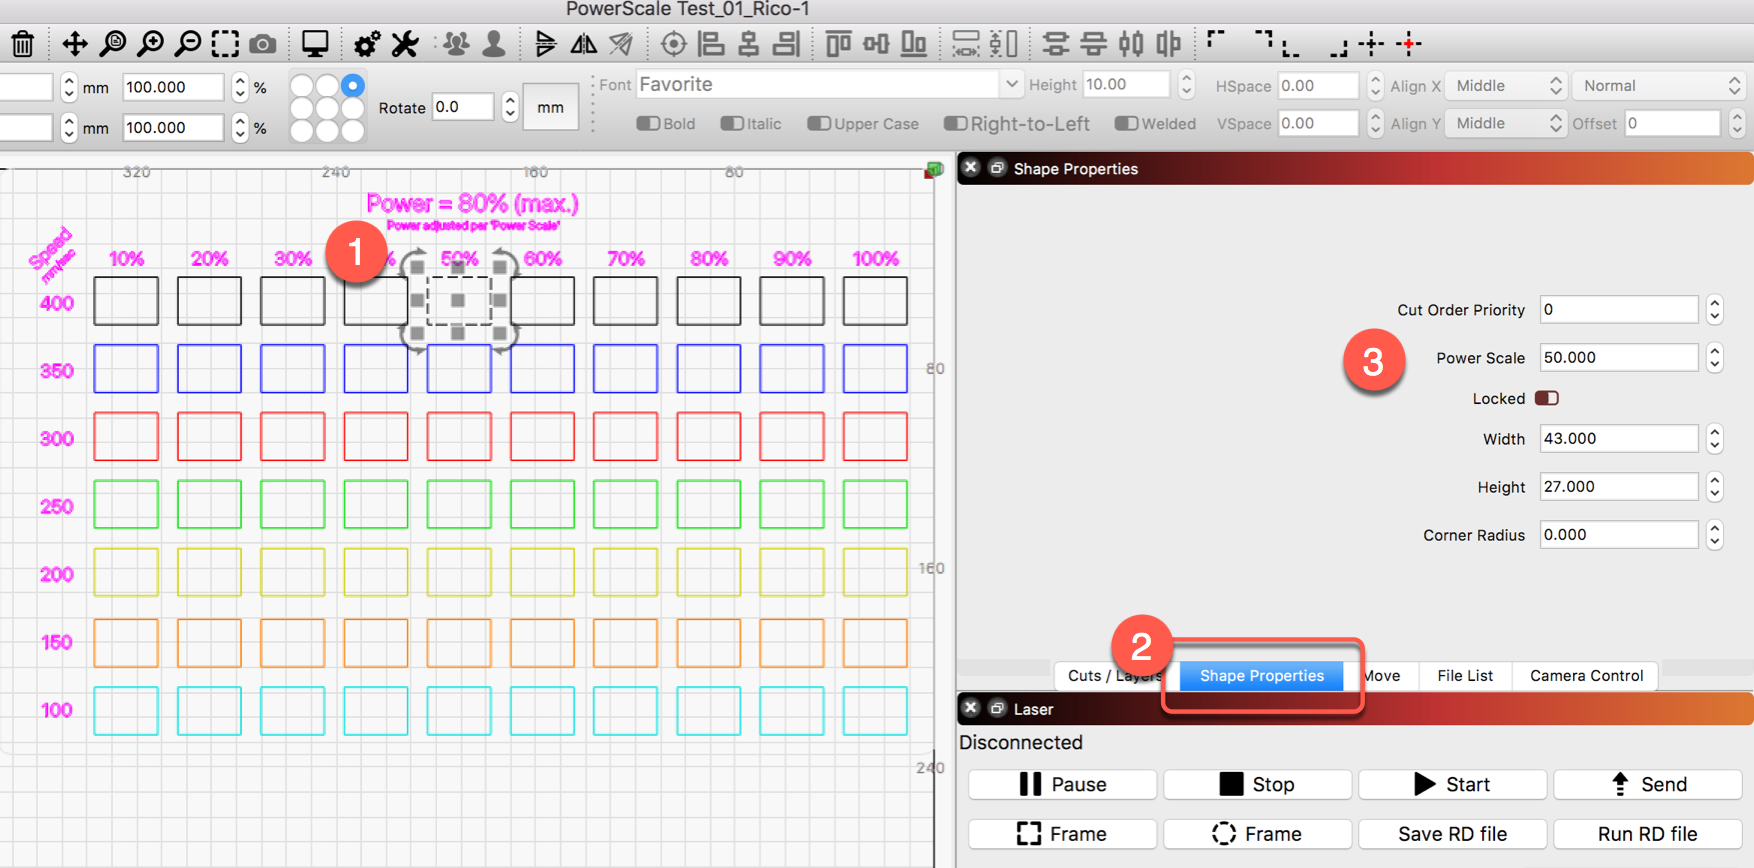
Savardi, wouild you mind posting your laser scale?
Download the one at the top of this thread snd adjust it for you. I’m not home currently but can try to upload mine in 2 weeks (travelling).
Thank you for this @savardl! I was looking for something just like this to run on my 2.5w as well!
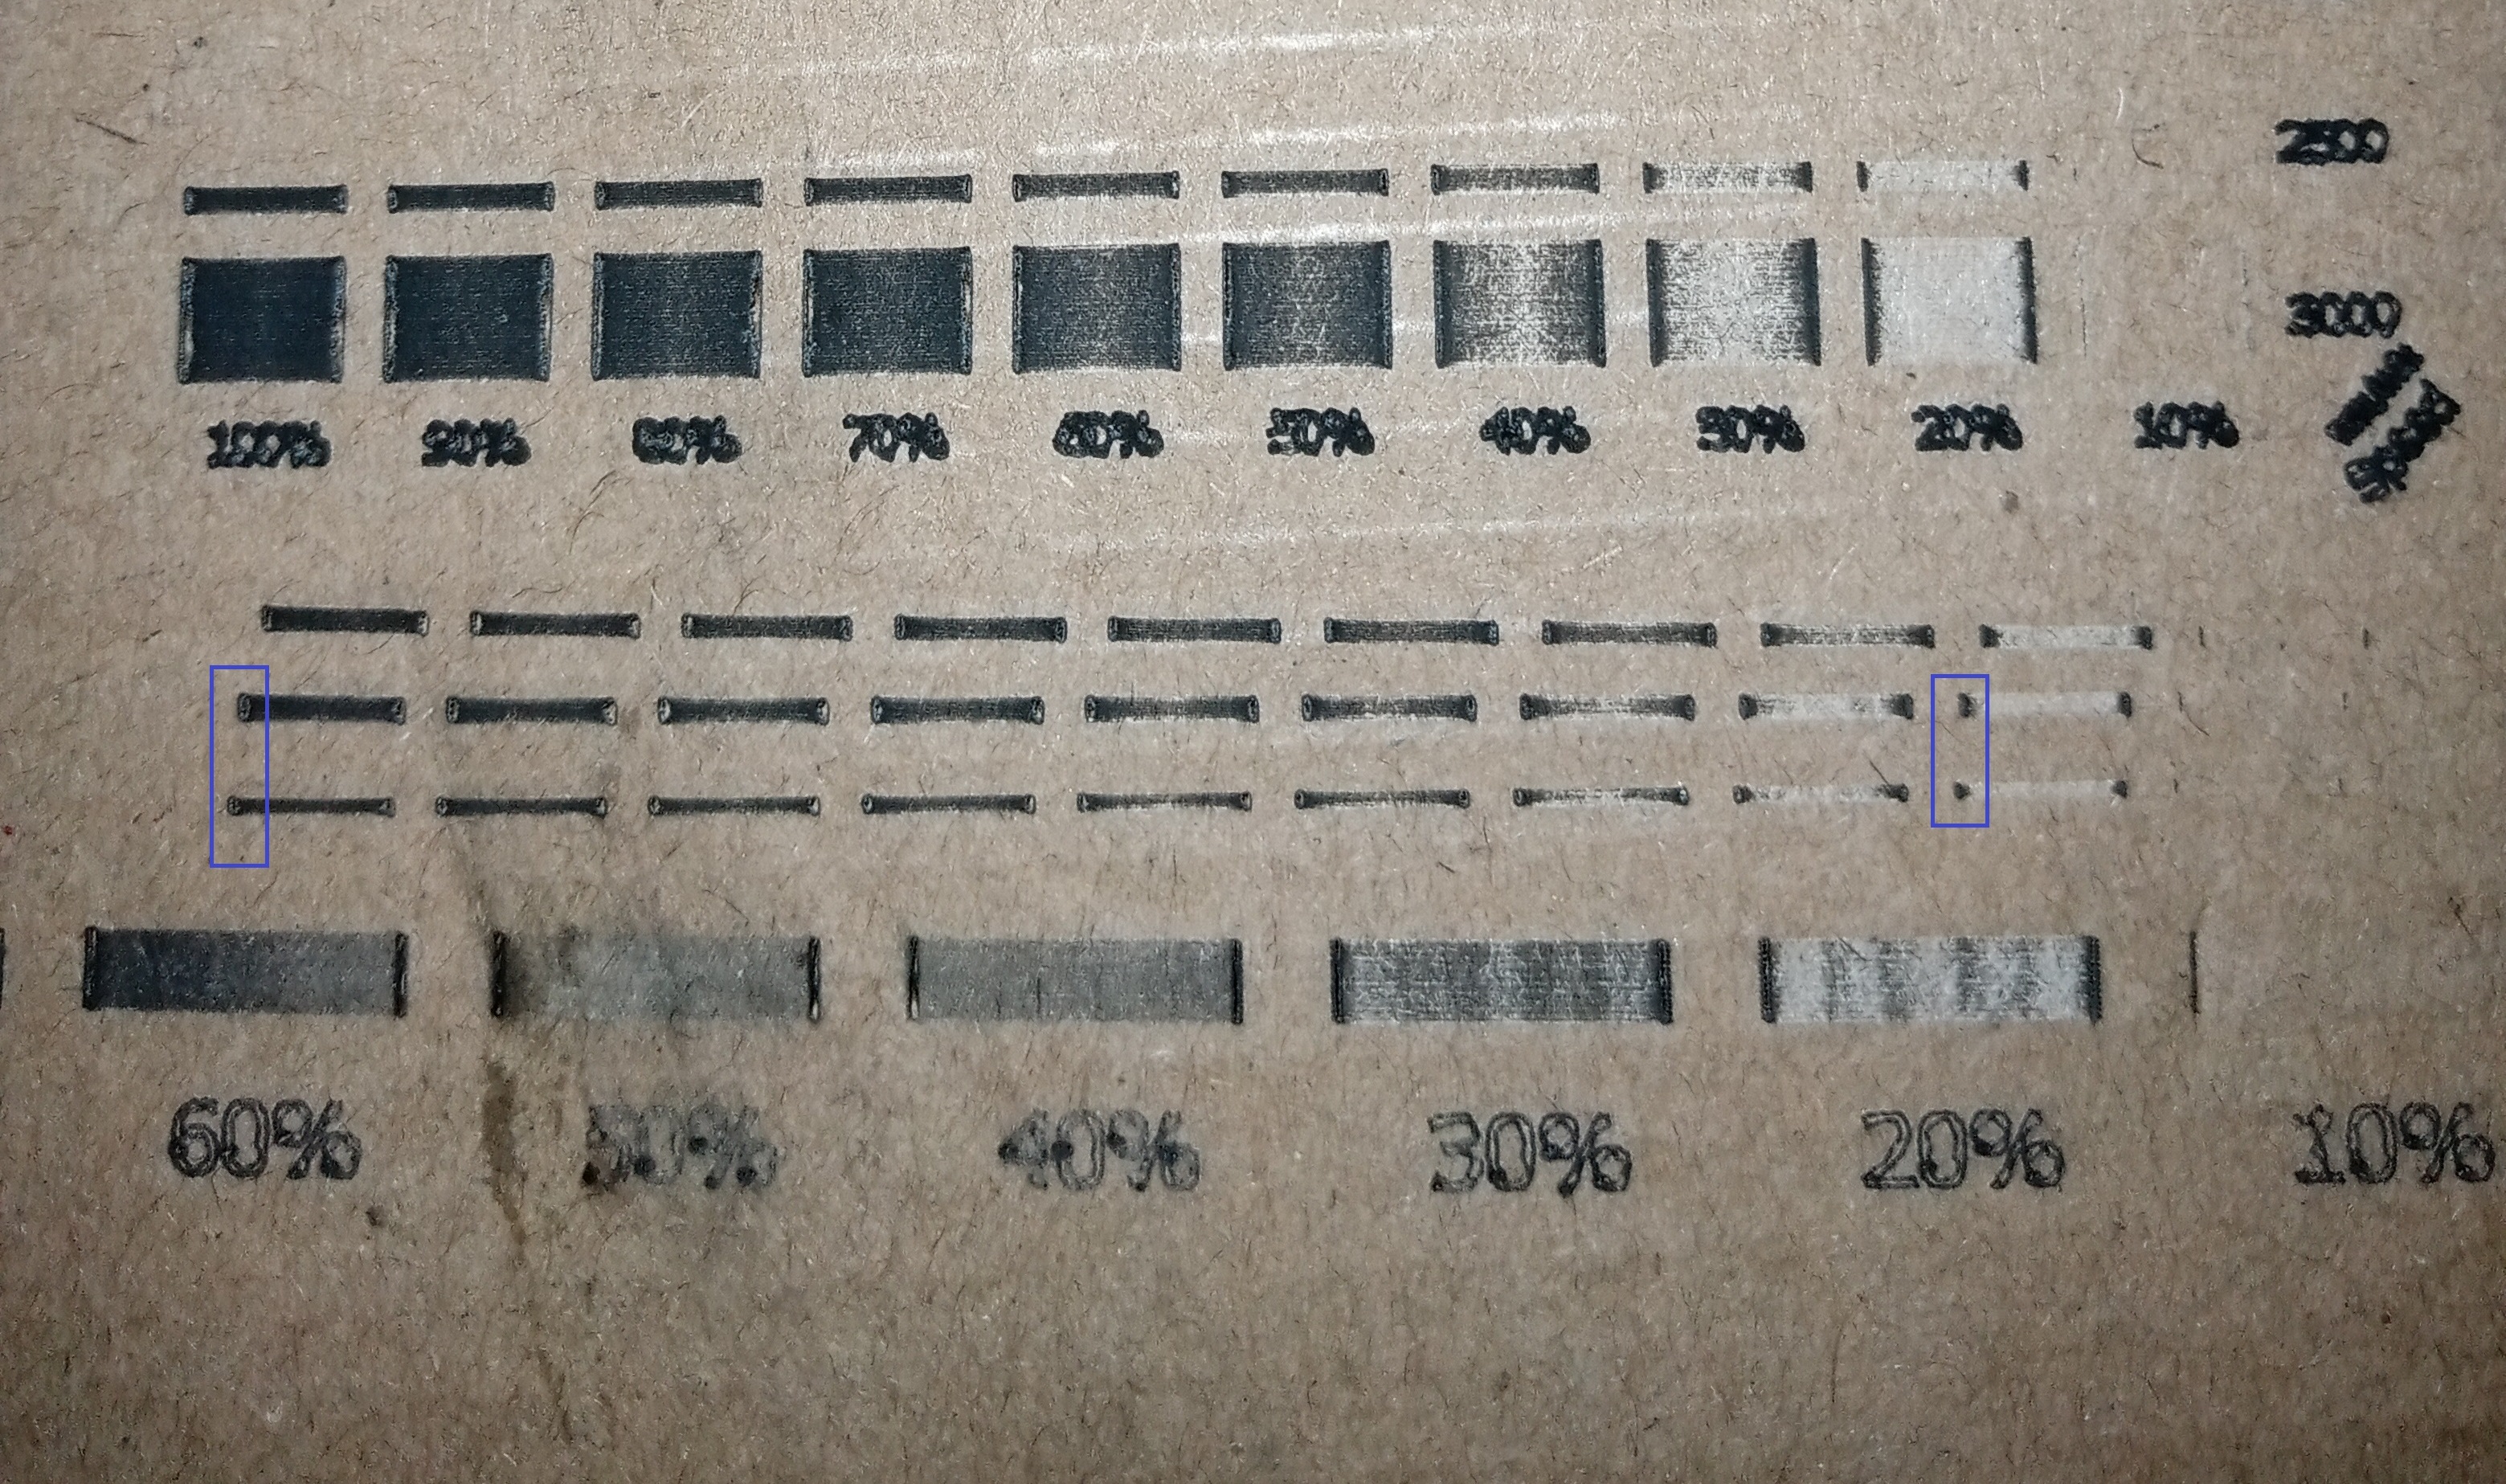
guys can you help me ,why did I circle the blue color burned and had holes while the middle one was not
I get an error when I load this file, @Rick, about some text file not being installed on my system??
This may just be a notification telling you that the font I used in this file is not available on your system, but would need to see the message to confirm.
Probably what it is.
So, I’ve a 90W tube.
I’m trying to dial in a setting to get a dark engraving on a veneer. So how do I adjust the power scale to be more fractional than huge?
Thanks!
John
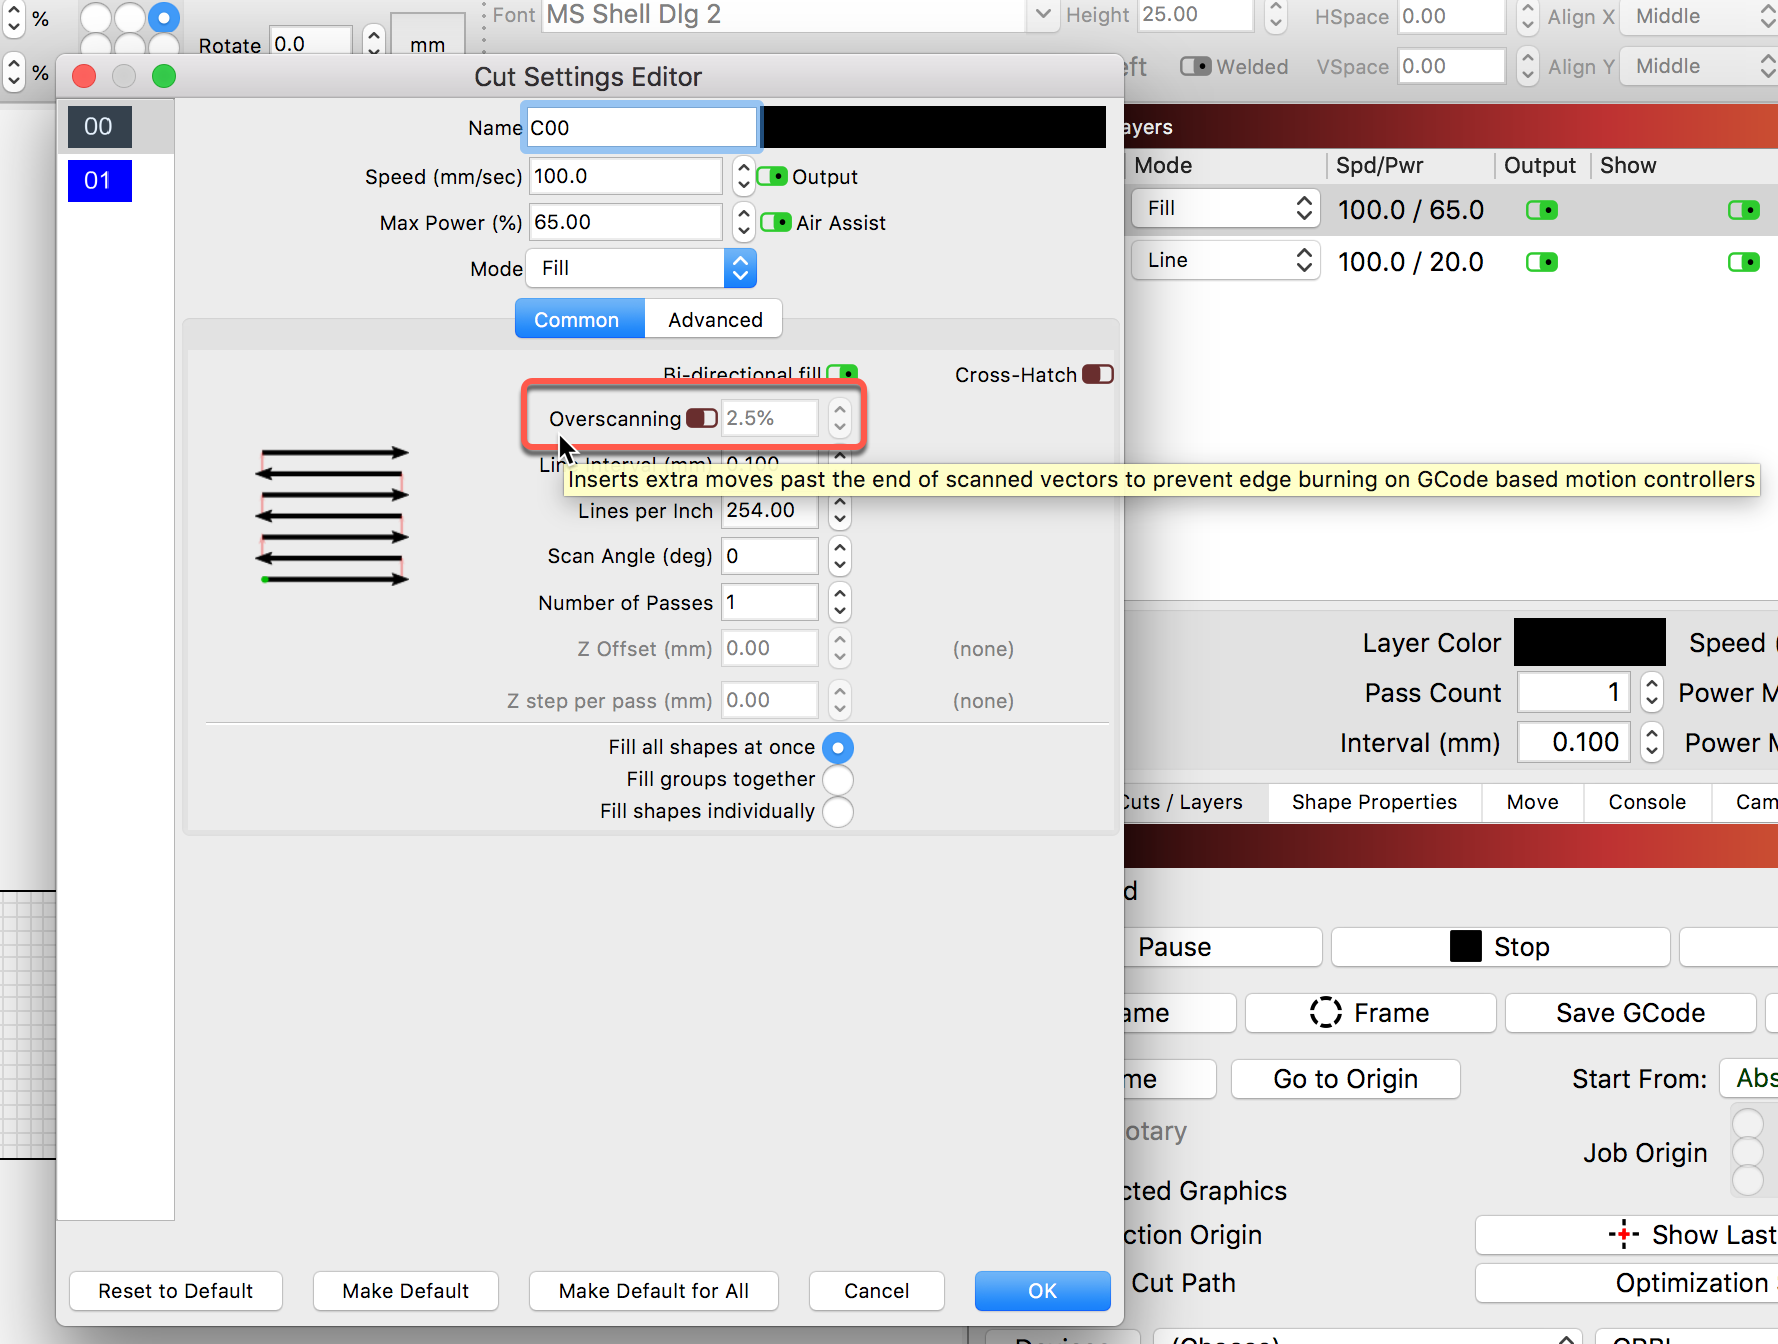
Look at using ‘Overscanning’, which allows travel past the burn, so the laser has some time to turn around and start heading back.