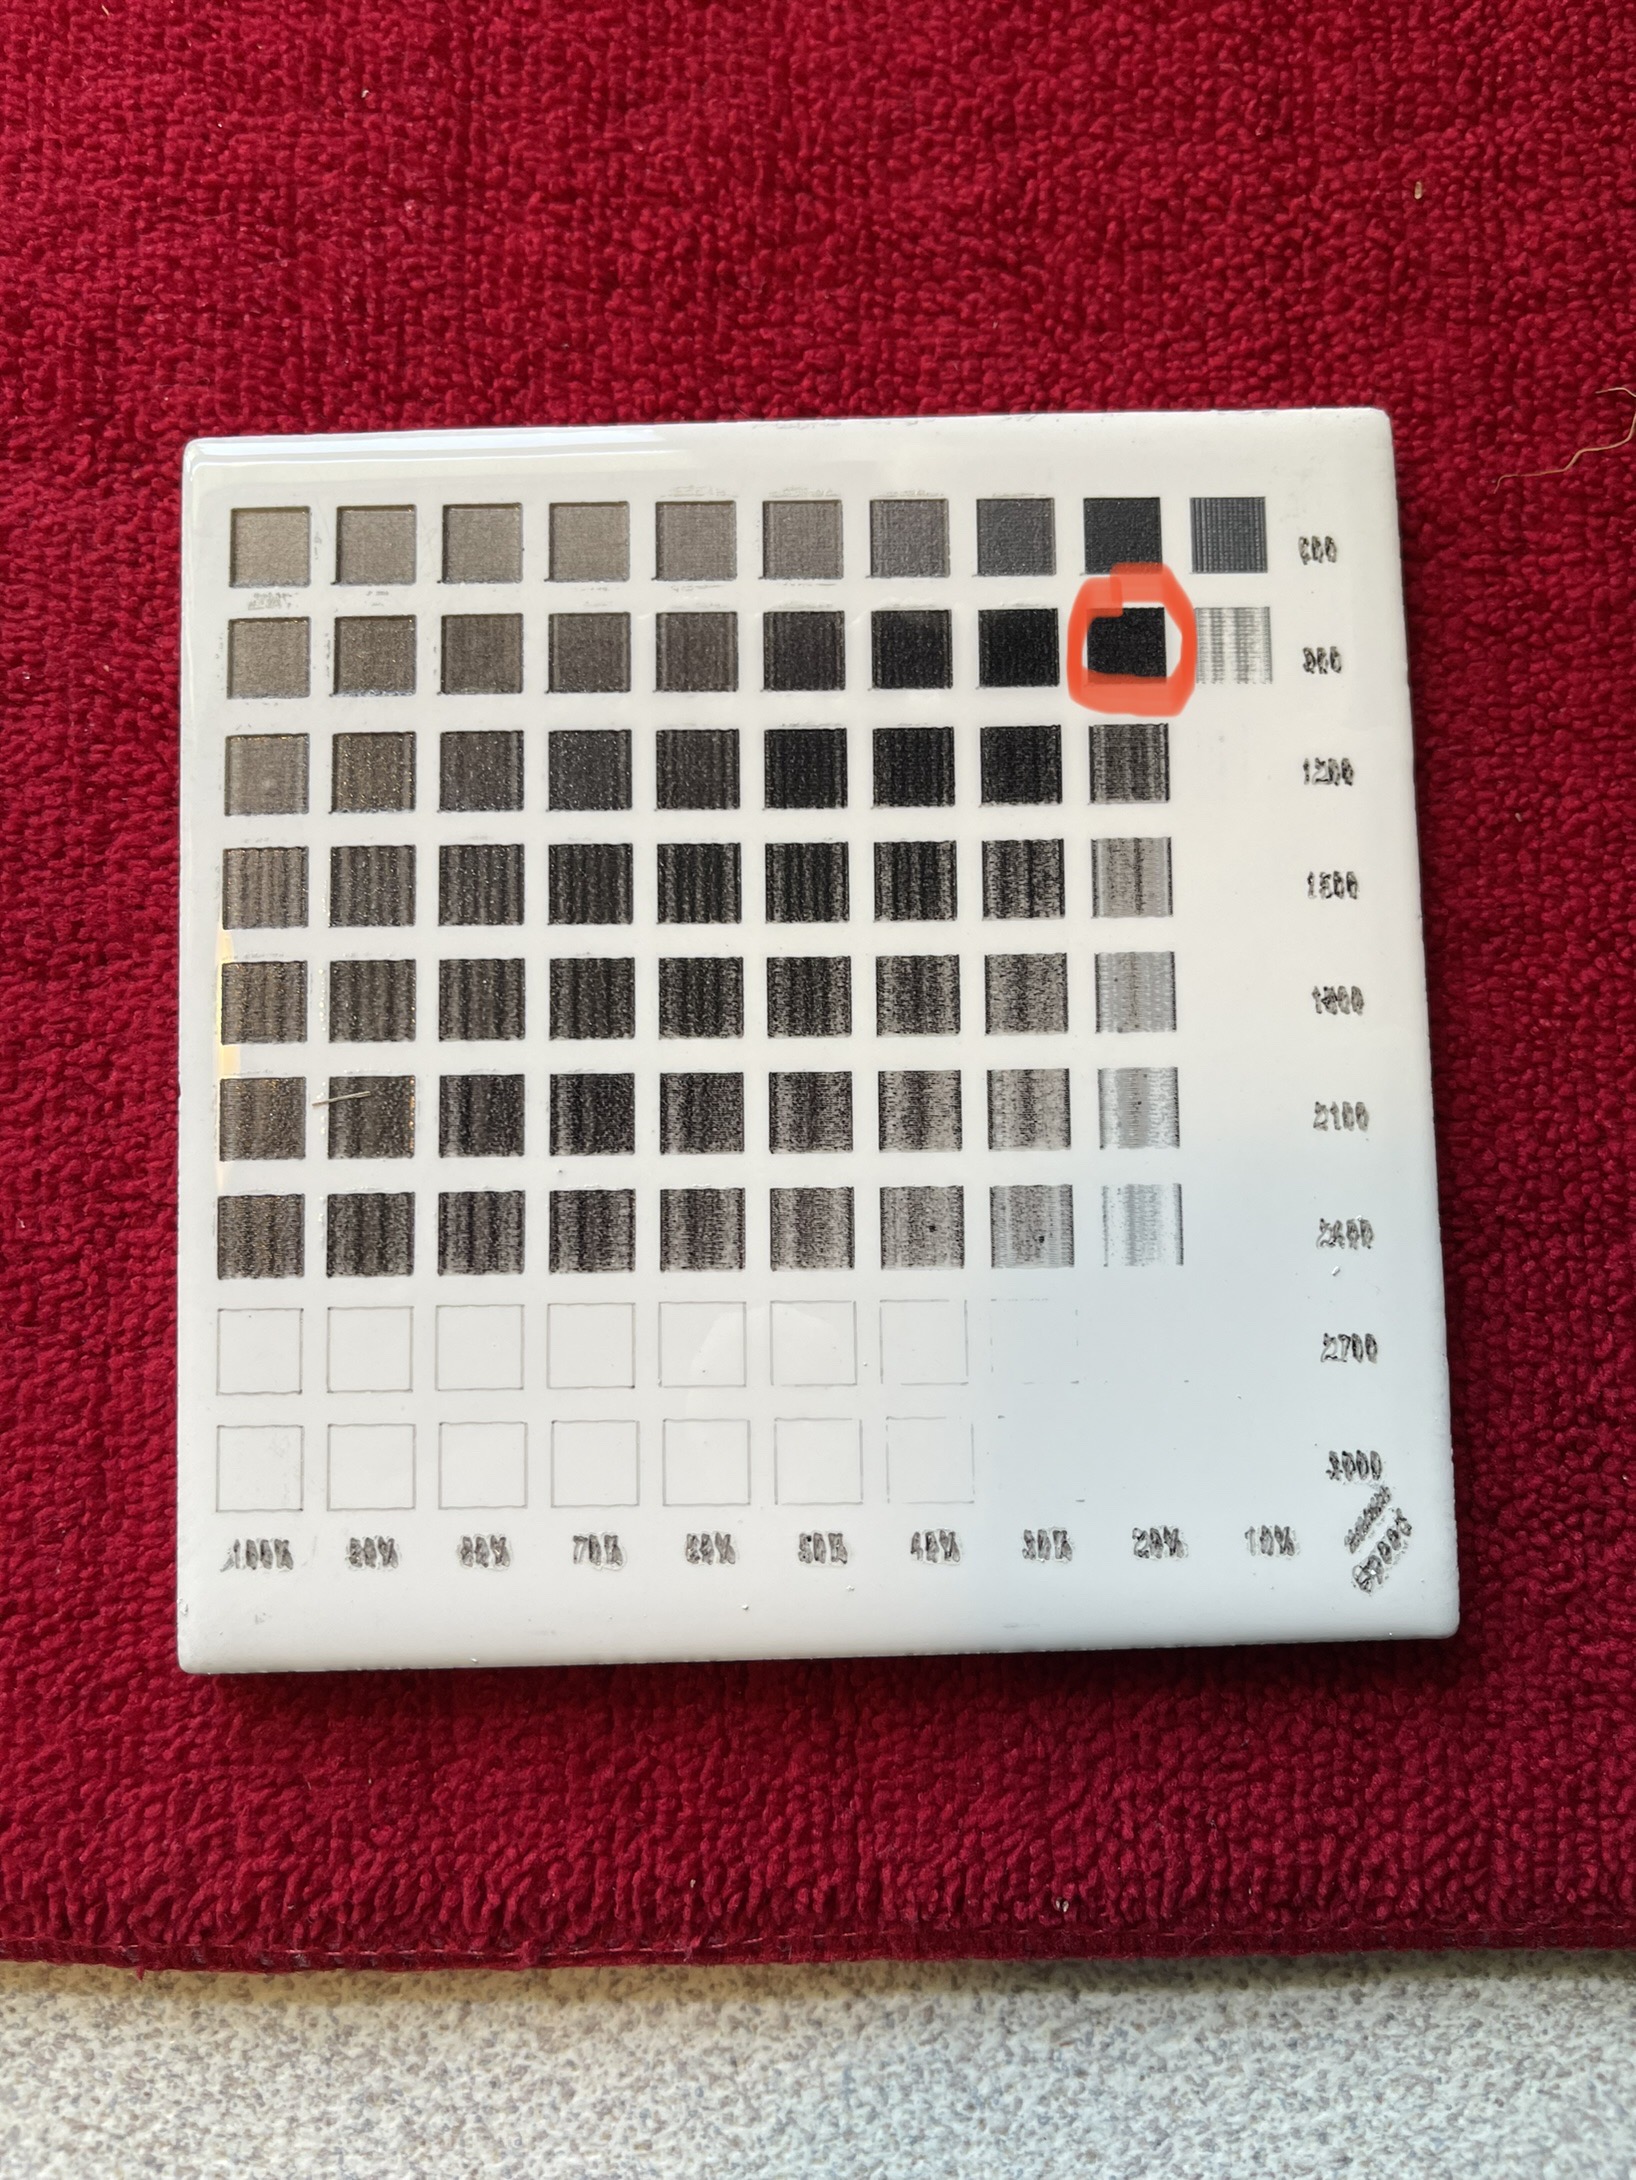
So I’m trying to do the Norton white tile method on a 4” glazed tile, the test seemed to work, but once I added my material and started it, wasn’t even going through the paint. I circled the look I was going for in my picture I’m posting and I had speed set at 600 and 20% power.
So why does it work on test and not my actual project?
I’m using ray5 20Watt laser.
Is the actual project an image? If so, after you have discovered the ballpark speed and power settings through a materials test, you may find it useful to also test those settings in the image mode you will be using.
For testing, isolate from the final sized image a small (but visually important) section of it, an image mask is ideal for this.
Have you removed the paint from that tile…? It’s hard to tell without it being removed…
The type of image mode will affect the results…
All materials have some kind of bandwidth, or how high a resolution you are able to effectively use. This is generally referred to as dpi. If the materials test is not the same dpi, I will guarentee you they won’t match up…
Use this Laser Everything video on photo engraving to determine the dpi for any laser with any material… Take the time to watch it, you will use it anytime you do anything with your laser but cut…
This is in addition to the suggestions made by @NicholasL
Ok, thanks you two, it was a image I was trying to do, and the pic I posted tge paint was removed. I will definitely watch the video you recommended and give it a try. Thanks a lot for your help.