Hi all,
I always struggled to determine how large a material test would be, if I wasn’t using the default 10 row x 10 column & 5mm x 5mm box size settings. I made a calculator to determine the size that a material test will require. Information is entered in the blue cells, and results are given in the orange cells. There are 3 different calculators:
-
Basic - Enter the quantity of rows / columns and box height / width. The result is the overall height and width that the material test will require.
-
Intermediate - Enter the height / width that you want the material test to fit on, as well as the desired box height / width. The calculator will tell you how many rows / columns it can fit into your space, and how much space it will actually consume (the calculator rounds down for the row / column result and will only display a whole number).
-
Advanced - Enter your min / max parameters and your desired interval (example: 5mm/s to 170mm/s, in steps of 5). Also enter the height / width that you want the material test to fit on. The calculator will tell you how many rows / columns are required, and what the minimum box size is in height & width. I prefer to not have my boxes larger than 5mm x 5mm, so I added a force box height / width section. This allows you to manually override the box size, and the result tells you how much space the material test will actually consume in height and width.
One thing to note - I’m using Lightburn version 1.5.02. I believe earlier versions of LB had different spacing in the material test. Make sure the values in the “Constants” section match that of your material tests.
You can use the “Reset Defaults” buttons to restore default values. Default values can be changed in the VBA developer in excel, if desired. This is the only feature that will not work if you don’t enable marcros.
This does not support inches. When you enter the values into LB, type “mm” after you enter the value and LB will automatically convert to inches. (Ex. type “25.4mm” and Lightburn will automatically enter it as “1inch”). Google is also useful for conversions.
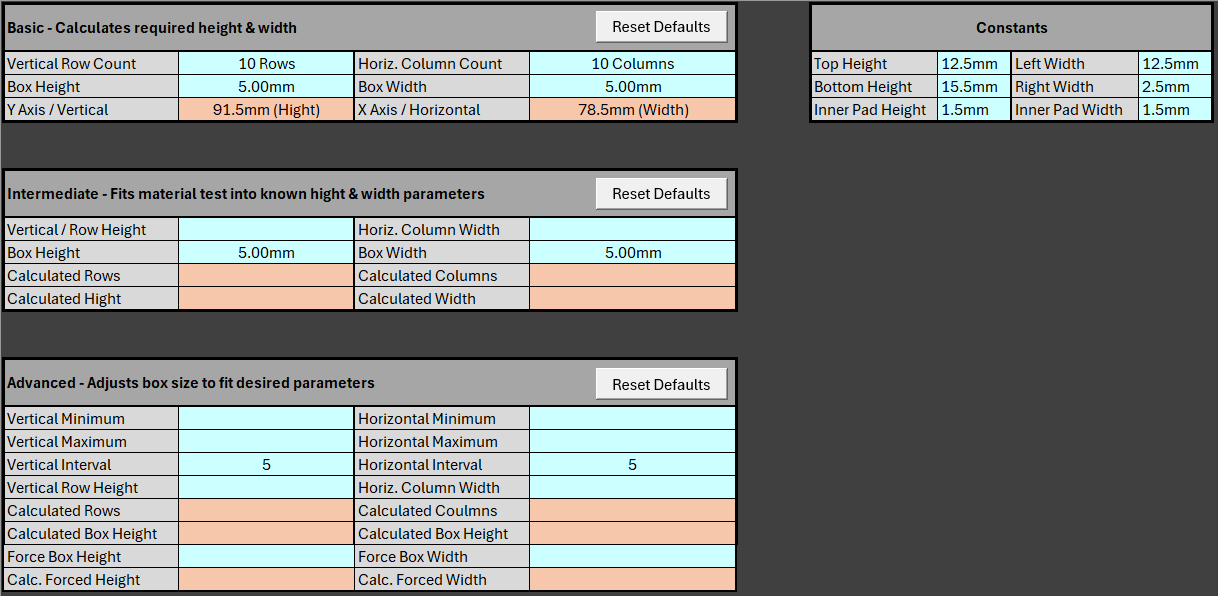
Example after hitting “Reset Defaults”:
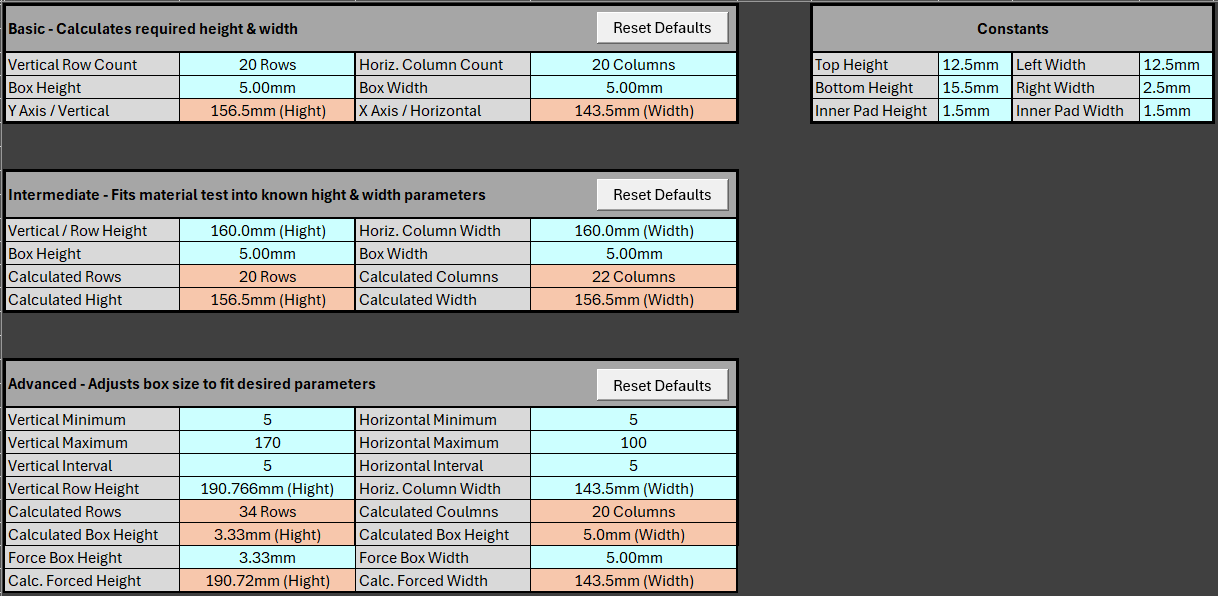
Example of all calculators in use. The data in Advanced is what I used for a test on slate:
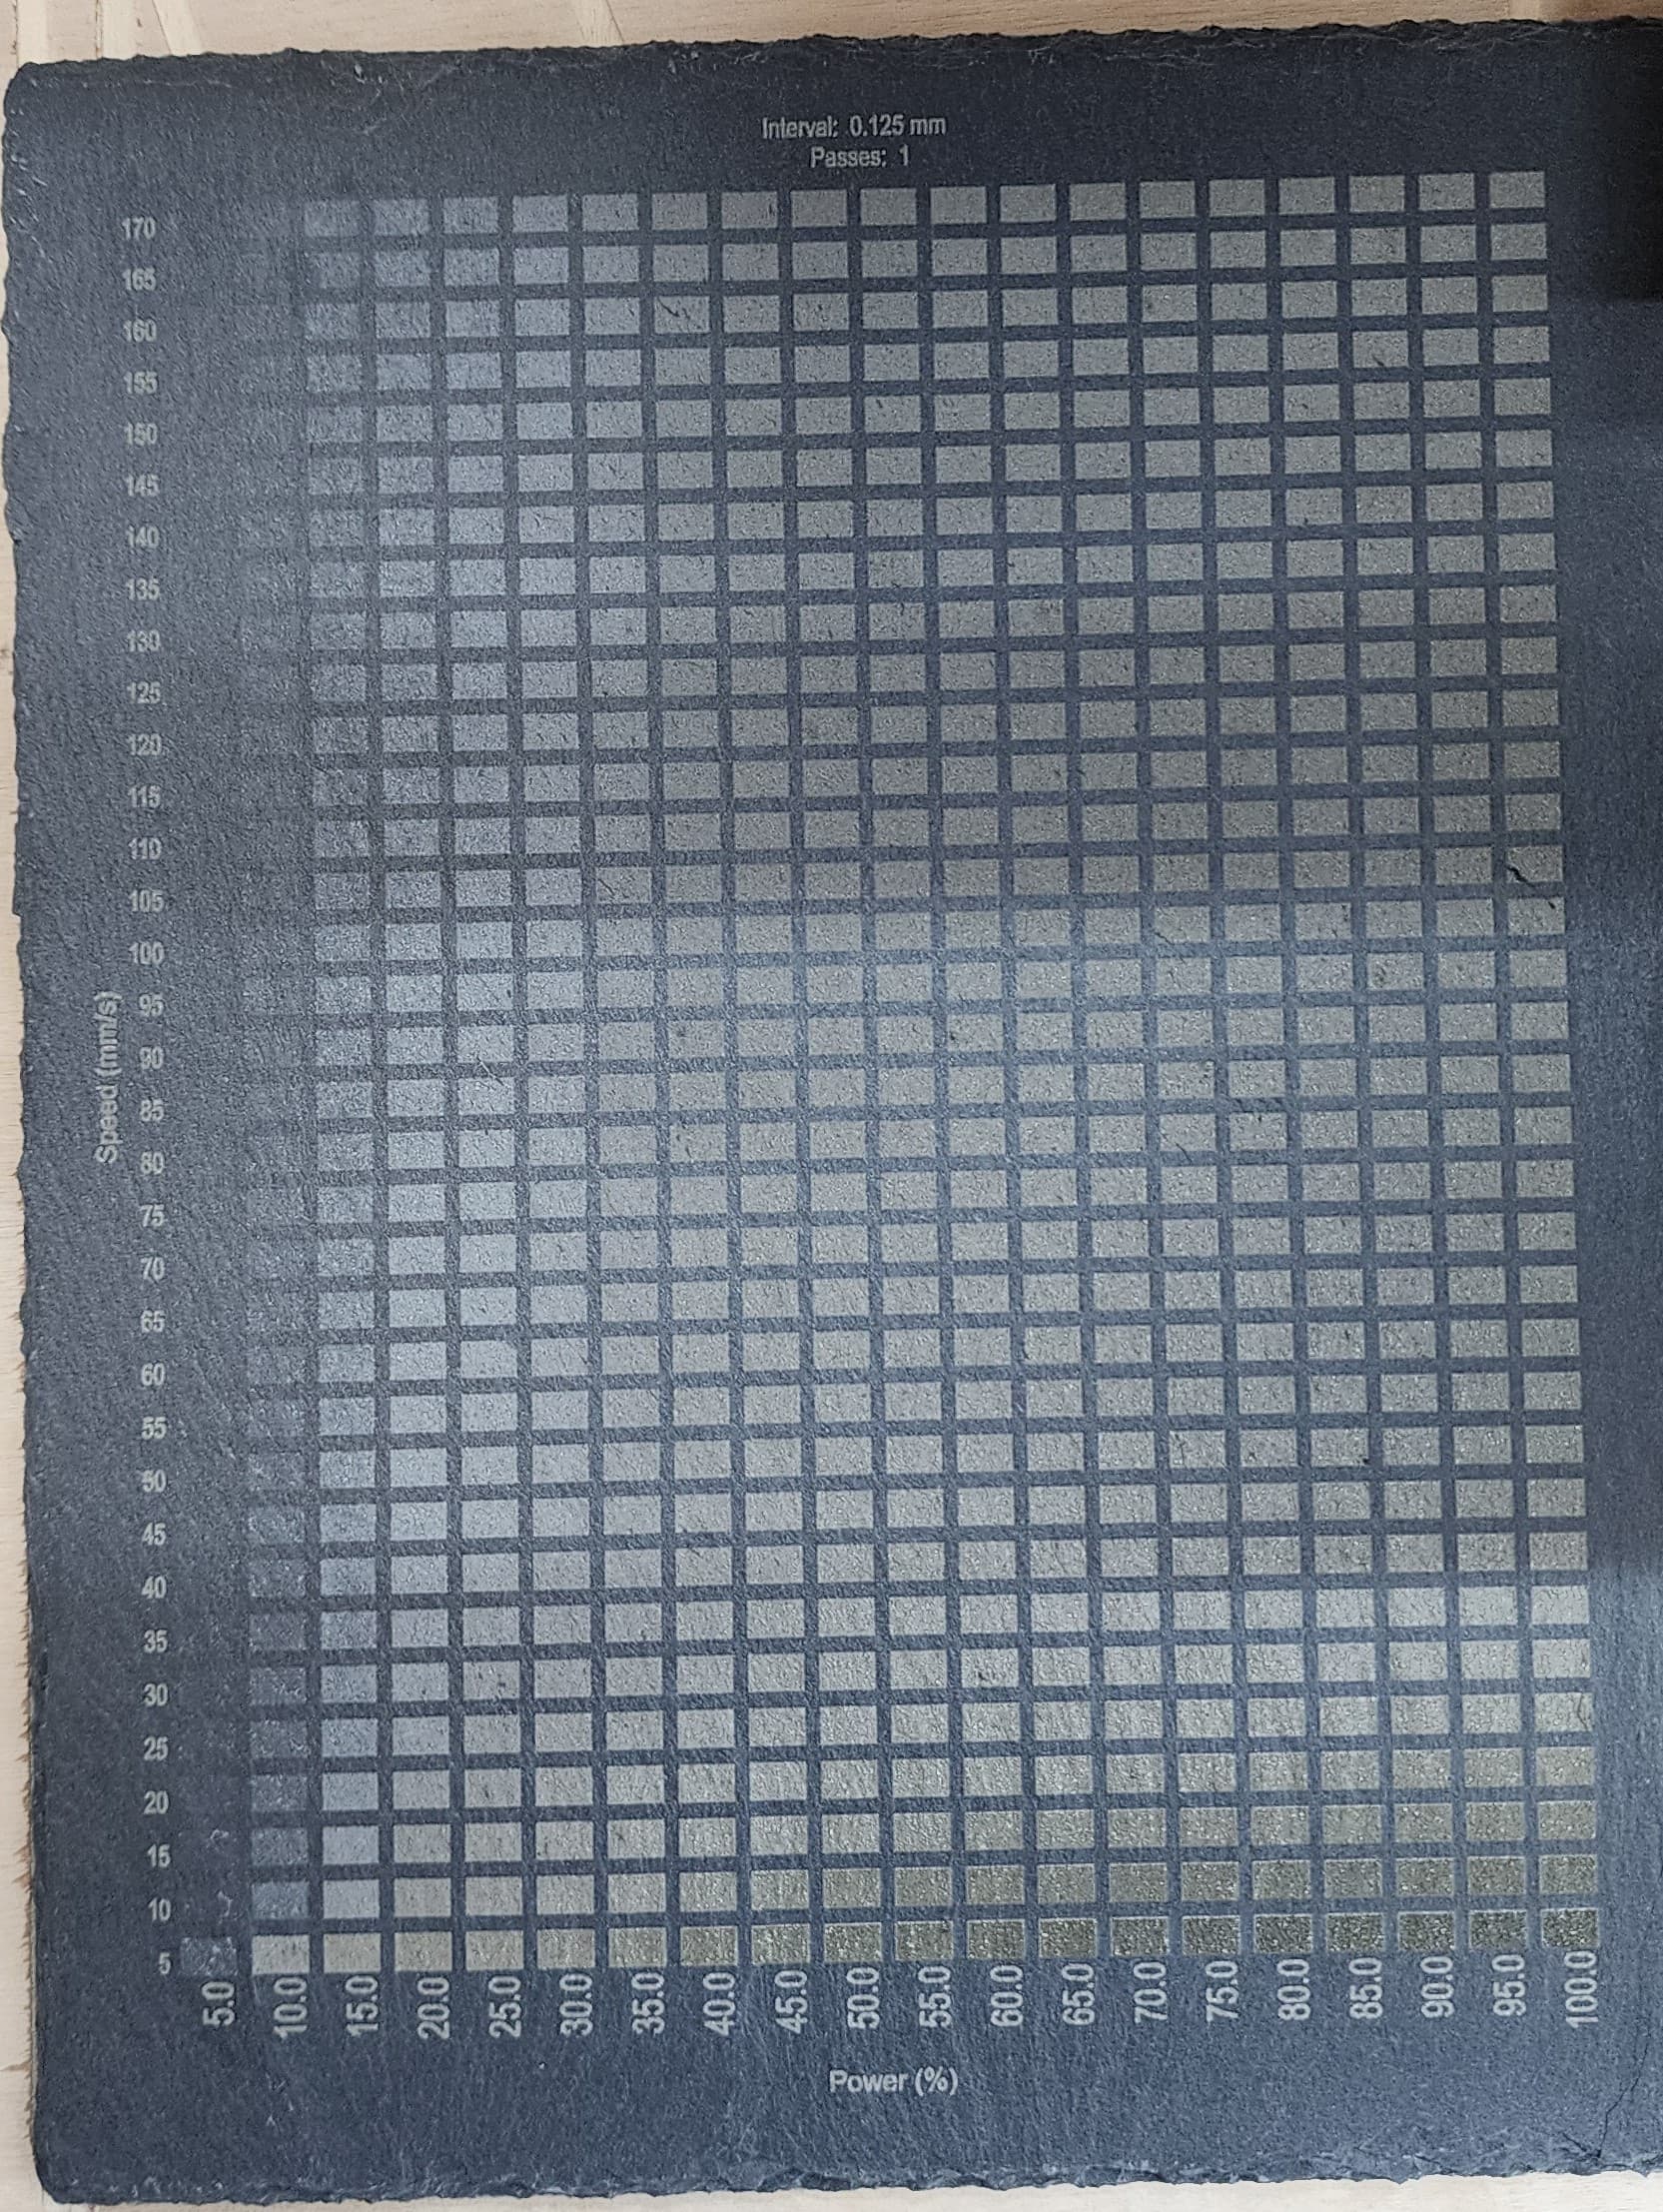
My first test on slate, using the Advanced calculator (note - I purposely added a buffer on the top/bottom/left sides):
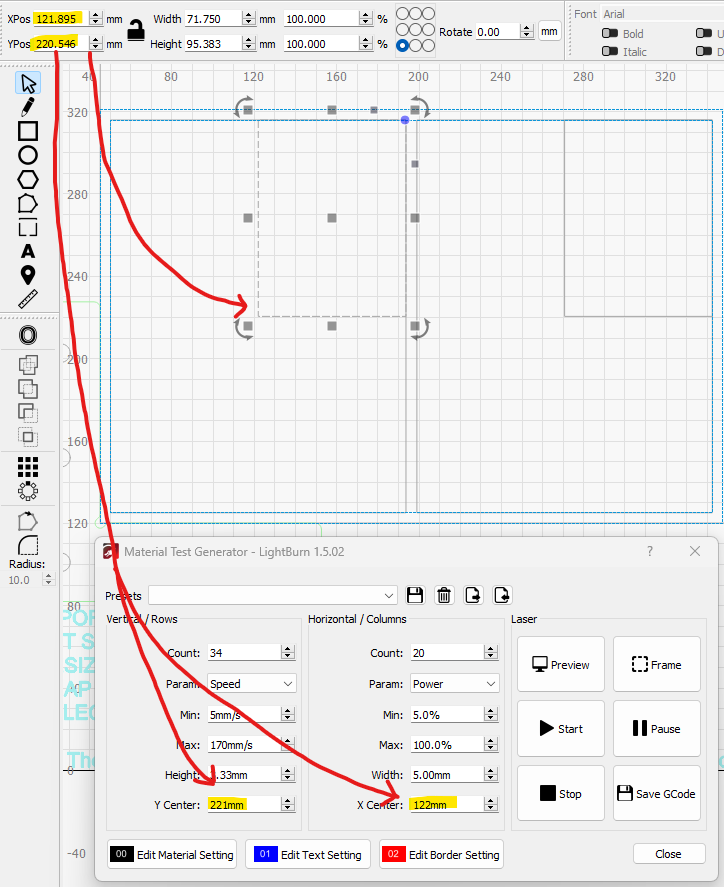
For those wondering how to position your material test - this is how I do it. First, I create a rectangle that matches the size of the material test that I want. I then make another rectangle that is half the width and height, and snap it to the top right corner of the original rectangle. Once in place, if you click on the smaller rectangle, the XPos & YPos (highlighted in yellow) are the center of your material test. This is the value I enter to position my material test. Please note - the example below was setup to have two separate material tests side by side. (one for my 7W laser, and one for my 44W laser). The largest rectangle represents the entire piece of slate that I’m performing the material tests on.
A copy of this calculator can be found in my google drive here. Please let me know what you think of it, and if you would like to see any features added!
-Branden