I just meant switch the power off for the whole machine, wait 10 sec, and then switch it on again.
(There is also a red “Reset” button on Ruida controller panels that would probably achieve the same thing, but turning the whole machine off and on feels like it is more thorough as it gives all the peripheral electronics a reset too)
I see there is also an open support ticket with further discussion to this…just reading now, looks like we now have the project file in question…and machine “bios” settings, nothing seems out of the ordinary.
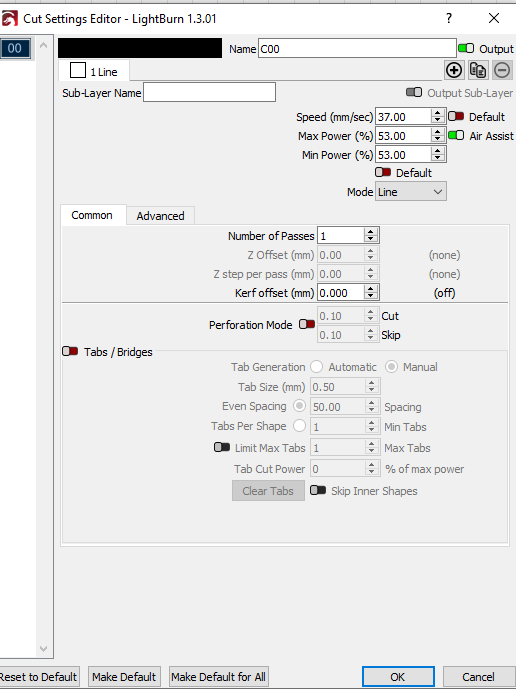
You have a 120W laser which is pretty decent, in the Ruida settings you have the laser tube set at min 2% max 98%, and your project file showed speed 37mm/s at 53% power, this should easily cut 3mm ply.
I cannot understand how the material test would affect the Ruida in a way that would sabotage the power settings, and feel that it is a just coincidence and that you have a possible tube or power supply issue, it is a shame that you do not have an ammeter fitted as that can help diagnose this.
Having a max power setting of 98% is way to shorten the tubes life, unless the power supply was tuned to limit the current to 26mA or so.
How old is this machine, how old is the tube?, how does the tube get cooled - what is the model of the chiller unit, the model of the high voltage power supply unit?
Tests to continue with;
-Do you have any older files still present in the memory of the Ruida controller that you know work, and can re-start from the controller as a test?
-It is also possible to pulse test at 53% power AND simultaneously jog the axis (at a set speed of 37) to test the output on the material independent of LightBurn. (to change the jogging speed at the panel push the Speed button then use the arrow keys to modify the value)
If you are getting a weak burn from these tests above, then first check all your optics are clean and even though you are getting a burn now, so general alignment must be ok - but still good to check you are getting a consistent burn in all areas of the workbed. Lower the power and pulse to check the laser exits the end of the nozzle perfectly in the middle of the orifice (use a piece of masking tape pressed onto the end to verify this - if you carefully pull off the tape after the pulse (at 10% or so) you can usually see the burn hole in relation to the circular imprint of the nozzle end)
-inspect the tube, look for any discolouring due to excessive heat, any sign of arcing damage to wiring on the high voltage side.
-when the tube is firing can you hear any unusual sizzling or crackling noises coming from the high voltage power supply unit?
Let us know how you get on, and if anybody else has anything to add?
I have attached your machine settings for anybody interested, I don’t believe any of these settings have suddenly changed, but it is interesting to see them in comparison with my RDC6442G in the right hand column, actually one other thing I noticed was that your max travel is x3100 and y2100? and no other hard limit switches? - which potentially means you will have more chance of crashing the axis, shaking the optics etc, especially when just jogging the laser head about.
lbset comparison.pdf (318.6 KB)