I’m setting up to produce some business cards and I’d like to run the material test on them. Unfortunately there does not seem to be a way to pull the materials test into a project so that I can frame it up within the size of the card, or align it with my card template. Am I missing something, or you just cant get there from here?
I’m also confused as to how the settings interact. When I change the speed (left, vertical) the height (which I expect) and the width of the test pattern changes. Similarly when I change the power (right, horizontal) the width (which I expect) and the height changes. ???
Ok, I’ve started building my own test array. I created a 6mm square box with rounded corners, cloned that so I have a row of 10, and I’m setting the power from left to right at 10, 20…100%
The boxes are filled, but in the box parameters I can only adjust power. If I assign different layers to the boxes, then I can adjust power and speed. What’s confusing me is how a power setting of 50% interacts with a layer setting of 50%. Is it then 25% or does one setting override the other, and if so which wins?
Looks like layers isn’t really the right way to do this as I’m going to run out of layers trying to set up 10 power settings and 5 speed settings. So how can I change power and speed for each patch?
I haven’t used LB in quite a while…
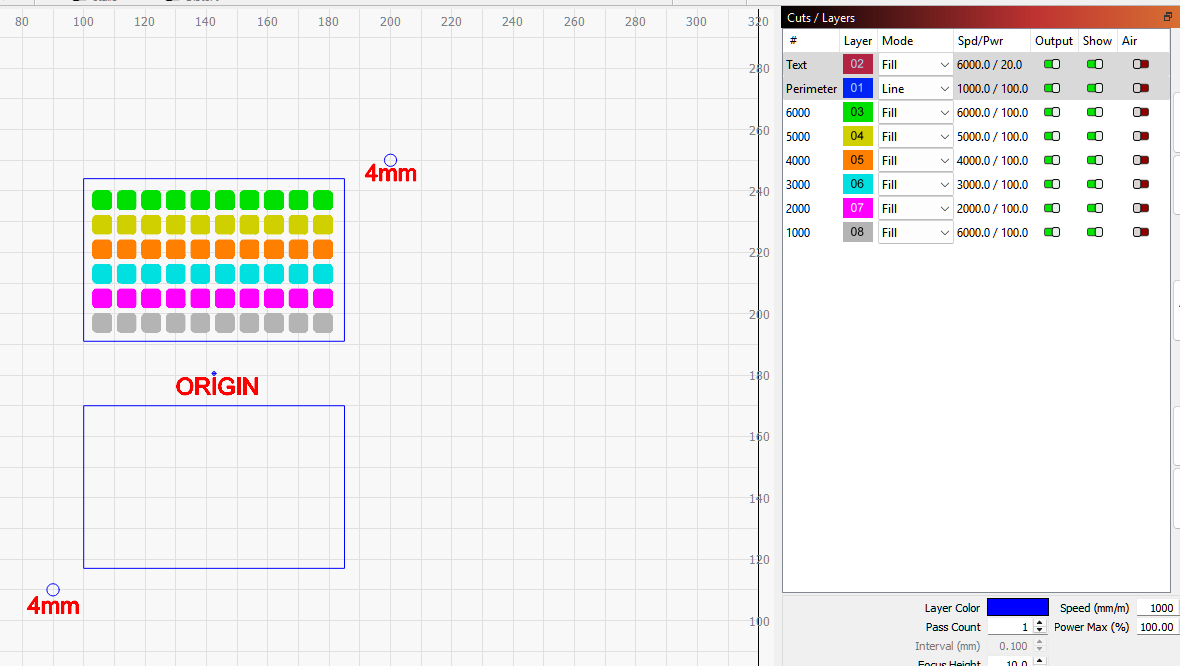
Well in the end, I planted five rows of ten 6mm rounded squares, filled, and used layers to set the speed and the object properties to set the power. No text, but I know what’s what. Worked fine.
I did discover than the snapmaker 40W laser is more than enough for low cost PCB material at 1% and 9000mm/min That material is what I have on hand to test with, the bix card blanks arrive tomorrow.
If you don’t have much space anyway, just create three or four squares that you test with different settings. Should be faster to accomplish.
You can also use an online generator, that creates editable files:
What is changing when you change the speed or power settings? If you set it for 5mm x 5mm squares, that would (should) not be changing. If you have it set for 5 rows and 4 columns, that will not change either. The only thing that should change is the scale increments displayed.
Please provide screen captures of what you are seeing.
When I change the size of the box in the speed, the size of the whole pattern in both directions is changing. When I change the size of the box in power, the size of the whole pattern in both directions is changing.
On a business card? Where do you have room for the text? A 6x6 (36 patches) pattern on that would be way too compact for meaningful results. I would not exceed a 2x3 pattern material test there.
Hmm… My card template is 85 x 53 mm. I’m setting up 6x6mm patches, a filled box with rounded corners. I seem to have room for at least a 10 x 5 array. The details in the engraving will be MUCH smaller than 6mm. What am I missing? I’m not trying to do the card info AND the test pattern, that would be nuts. The test will be all by itself, taking the entire area of the card.
I don’t think the Material Test gives rounded corners. Tell us how you did it.
You did not mention what material is used for the business cards… Aluminum = You either burn off the coating, or you do not. a 6x6 test would not be very useful here. Wood, paper, leather, etc. = More useful to test because you may want a specific degree of charring of the material.
The material test generated by LB is not working for me since I can’t adjust it to fit the size of the card. So, (see pic I posted) I am creating my own. I planted boxes with round corners, and set them as filled, using the layers for speed, and the box properties for power.
I have aluminum coming, but I may also do other materials. I’m just getting started again with the snapmaker in laser mode, and lightburn, so I’m trying to get up to speed. I’ve been derailed a couple of years by some serious medical issues.