Once upon a time, way up on the wall at the end of the hall at work there was a clock. This clock was just another run of the mill battery-powered wall clock, just like millions of others, but this clock had a problem. It was lazy. While other clocks would tick ever forward, 24 hours a day, one day after another, this clock couldn’t quite make itself move that fast. It wasn’t bad at keeping time, but losing a minute or two every week added up.
So, everyone pretty much disliked the clock, but having to reset it every few weeks just wasn’t broken enough. As far as “Facilities” was concerned, it was a perfectly functional clock. They were apparently completely unconcerned with the annoyance of the staff, which was ever so slowly building as the hours almost passed.
The almost-fine clock held to its perch up high on the wall for years, but then one day, a miracle occurred. The clock stopped ticking! This wasn’t like all the other times the ticking paused because another cheap dollar-store AA battery had died. No, this time even a fresh name brand alkaline cell wouldn’t revive it. The clock… was dead.
(Okay, it was actually only mostly dead. Pressing hard on the right spot on the back of the movement would make it tick again, so it was probably a bad solder joint or something. Perhaps it could’ve been repaired, but after years of frustration over lost time, we certainly weren’t going to tell Facilities that.)
Naturally, now that the clock was well and truly (mostly) dead, surely Facilities would quickly replace it with a new, working, accurate clock. Right? Right?
So, several weeks later, I was looking around and managed to find this backward-running clock movement on Amazon. A plan was hatched, and after work was over one day, I snagged the (mostly) dead clock off the wall and brought it home to my workshop. It only took a few screws to open the front of the clock. Pulling the hands off then let me pop the movement out of the back. The replacement movement dropped right in (more or less).
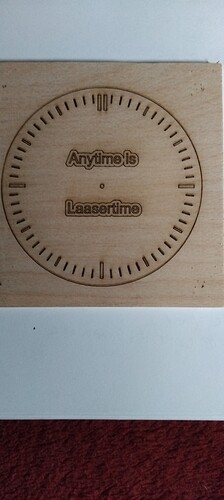
Everything was as easy as pie, but what would I do about the clock face? The existing face was numbered, as clock faces tend to be, but that was unacceptable for a clock that would soon be reading mirrored time. So, taking inspiration from my beloved watch, I whipped up a nice minimalist clock face with no numbers, text, or (non-metaphorical) complications. I rather liked the design I came up with:
To make the clock face, I first cut a disc of black poster board (with a hole in the middle for the movement). Then I cut a second disc of white poster board with the clock markings cut out as well. I used a a few pieces of Scotch permanent double-sided tape to stack the discs onto the existing clock face, yielding a nice matte white face with matte black tick marks. Here’s the LightBurn file I used on my 100W CO2 laser:
ClockFace_Minimal.lbrn2 (40.5 KB)
I reassembled the clock (leaving off the second hand, as that would rather give the game away), and early the following morning, before anyone was around to notice any shenanigans, it went back up on the wall at work. It was obviously not the same clock, so a few people noticed, but it took a while before the true enjoyment began. One by one, people eventually noticed that it was not broken or stopped. It was ticking… but in the wrong direction.
Anyway, it was a fun project for just a bit of quirky “art”. People got a kick out of it, and the few of us who still pay any attention to wall clock time have long since gotten used to reading the backward clock (although it still takes a moment sometimes). Thankfully, it’s been gloriously accurate, not dropping even a minute. It’s been on the wall now for something like 11 months… so why am I posting this now?
Well…
You see, I wasn’t quite completely honest with you with the photo of said clock, posted above. That’s not the backward-running clock that I put together a year ago. That’s actually a completely different clock of the exact same make and model (thanks, eBay!), with the same hands on the same custom-made minimalist clock face. It looks identical to the existing clock, but this one ticks clockwise (go figure).
So, early Tuesday morning, before everyone starts showing up for the work day, the existing backward-running clock will be replaced with its identical-looking forward-running doppleganger, and a very long game will pay off on the first of April.


