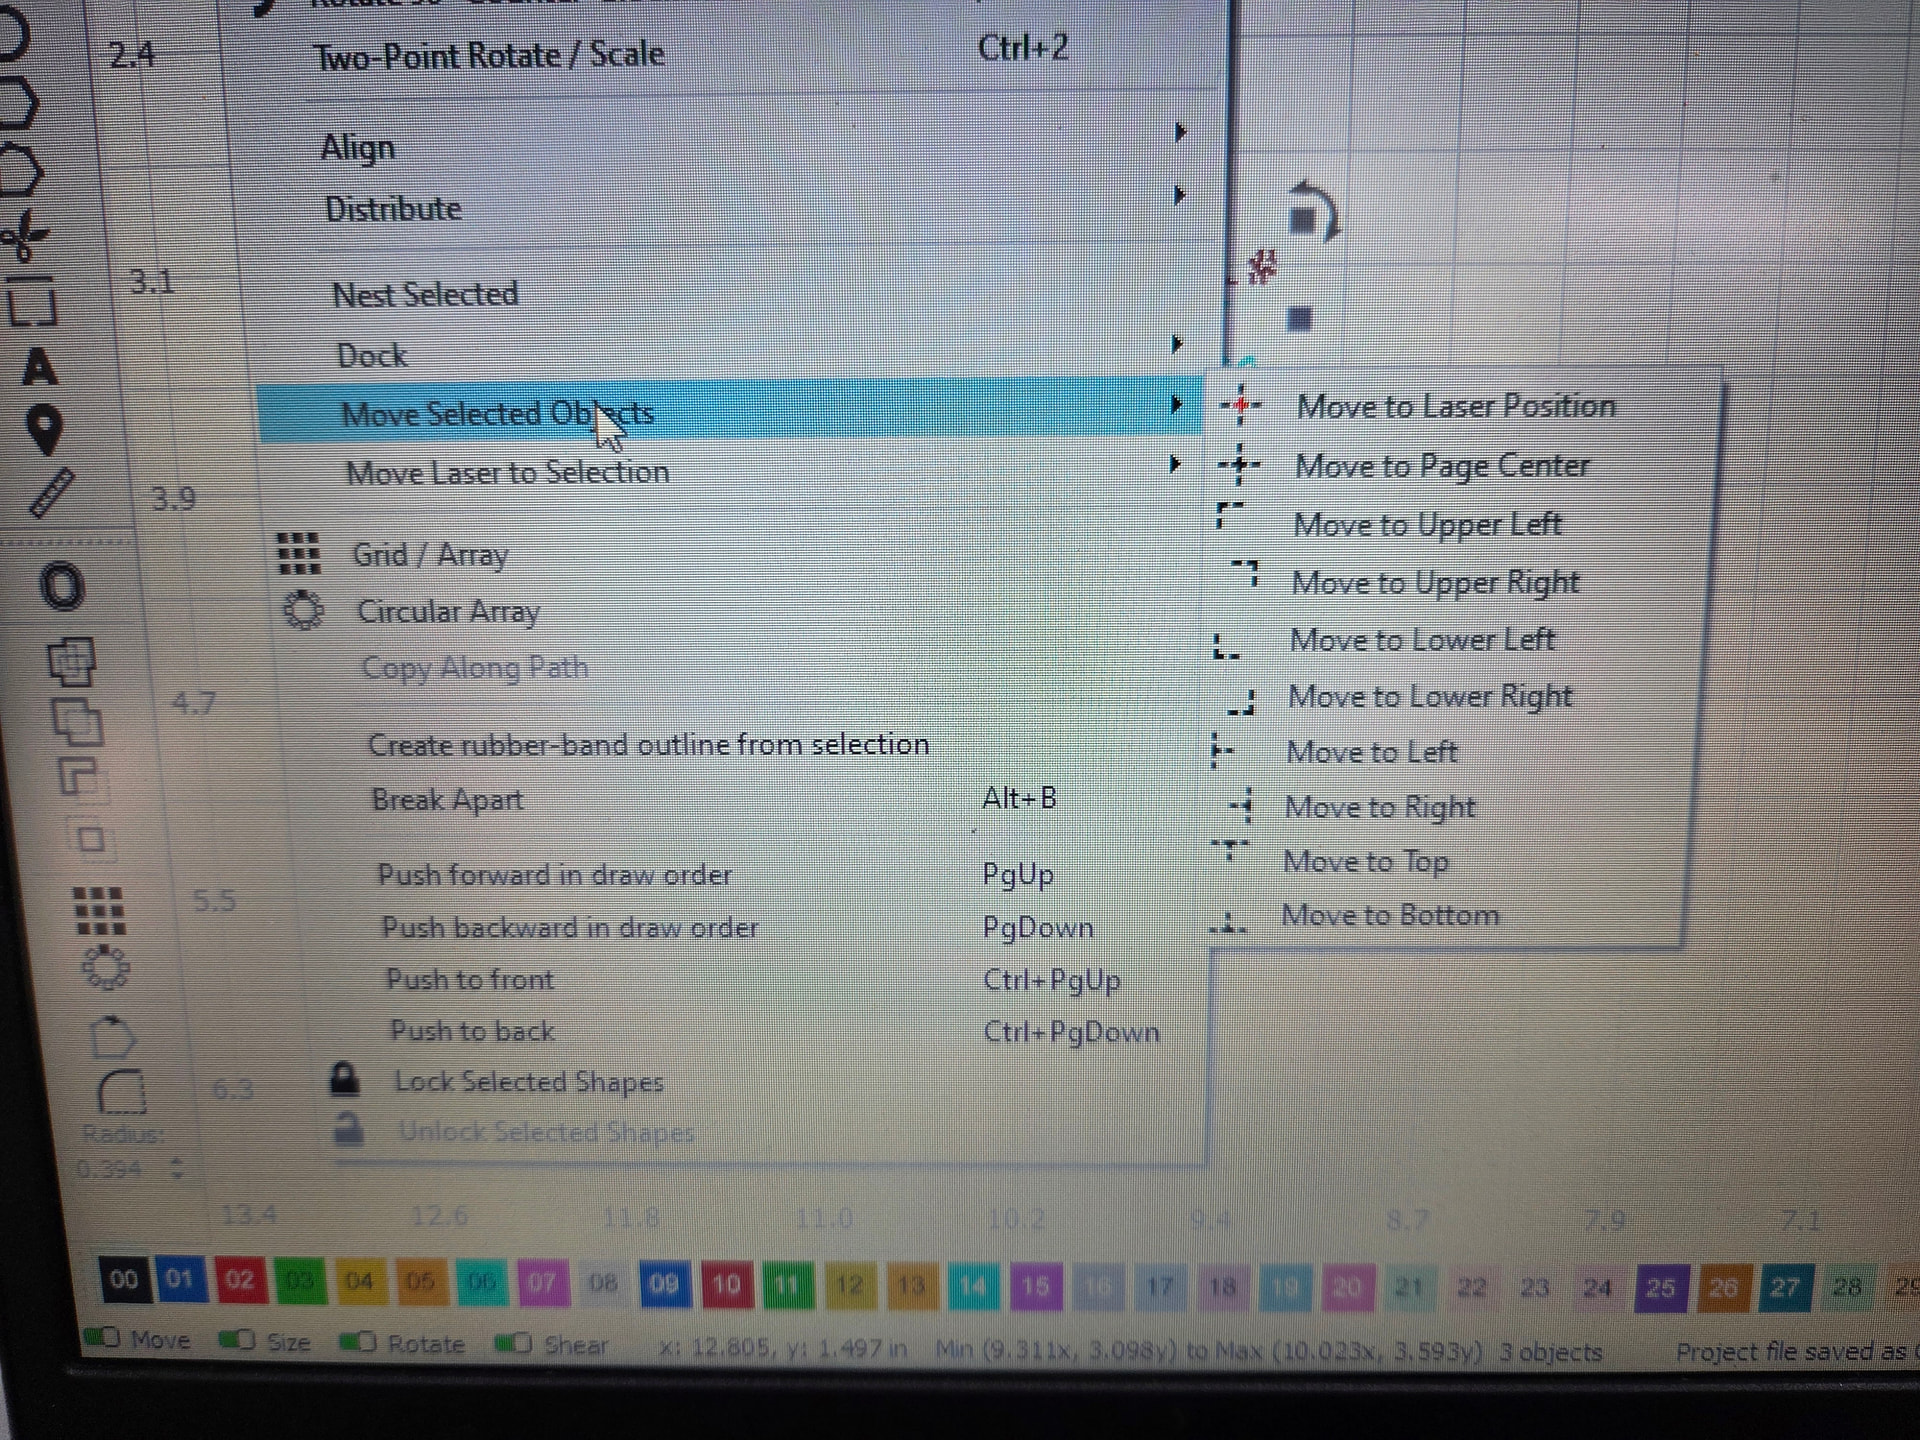
I have a new Boss Laser FM Station machine with Lightburn version 2.1.04 installed. I can’t find the Move to Laser Position Icon. It is there on my LS machine running version 1.7.08. Without this feature I can’t position images/text/arrays in the exact location for marking. The manual for the FM machine, available from the Boss Laser site for download, has illustrations that do not match what is actually running on the PC making it nearly worthless.
However it does describe how to position the file for marking which is:
Position the file onto your piece of material is a very simple process.
Select the Light/Red button from the lower menu bar. This turns on the red dot.
Place the material on the worktable. Where you think you should have it positioned.
Depending on your preference select or deselect “Show Contour” on the lower menu bar.
Once you are happy with your placement and Fiber Glasses are covering your eyes. Select Mark.
Line 2 suggests placing it where you THINK it should be. This is a giant software step backwards! With the Move to Laser Position Icon you could position it EXACTLY where you want it marked.
Anyone out there have a solution for placing files of what you want marked exactly where you want it marked on the part?
It’s not available for galvo devices, my guess is that it wasn’t needed since the start position should be thought of as being at the center of the workspace.
Once you start framing, if you cannot physically move the part to align with the framing - you can nudge the framing (moves your job) exactly where you need it marked, please see:
We mark most of our parts fixtured 30 pieces at a time in an array. We tried to jockey the fixturing around but the framing image projected onto the parts is too dim to determine where it will precisely mark. If it’s wrong then I just scrapped 30 pieces.
With our other machine we are able to move the entire array to the laser providing perfect makings every time with the “Move to Laser Position” option.
With a diode or CO2 laser, you click on that icon. Then you click somewhere in the design grid and the laser module will move to that position on the machine.
Just to reiterate @NicholasL answer and bring this together: Move Selected Objects to Laser Position isn’t available for Galvo devices.
That tool relies on the reported XY position of a gantry laser head. Galvos instead use Absolute Coordinates, with positioning/alignment handled through the workspace and framing system.
For your 30-part fixture, the practical route is to establish a repeatable fixture position and align the job to that.
Thank you for your response. I have more questions…
If I select all the text and images on my work page then as a group then select “Move to Page Center”. Is it moving the group center of the text/images to the Center of the Page? And is the Page Center indicated by the red light dot?
If you make some designs and then test what happens, you will remember this better than getting an answer.
I know you have a Fiber machine, but the Lightburn design space is very similar for all laser types. I made up a test file for you to play with. Use the Centering Tool (bullseye) to see how things align
The blue dot is in the center of the bounding box, not the center of balance for the designs…
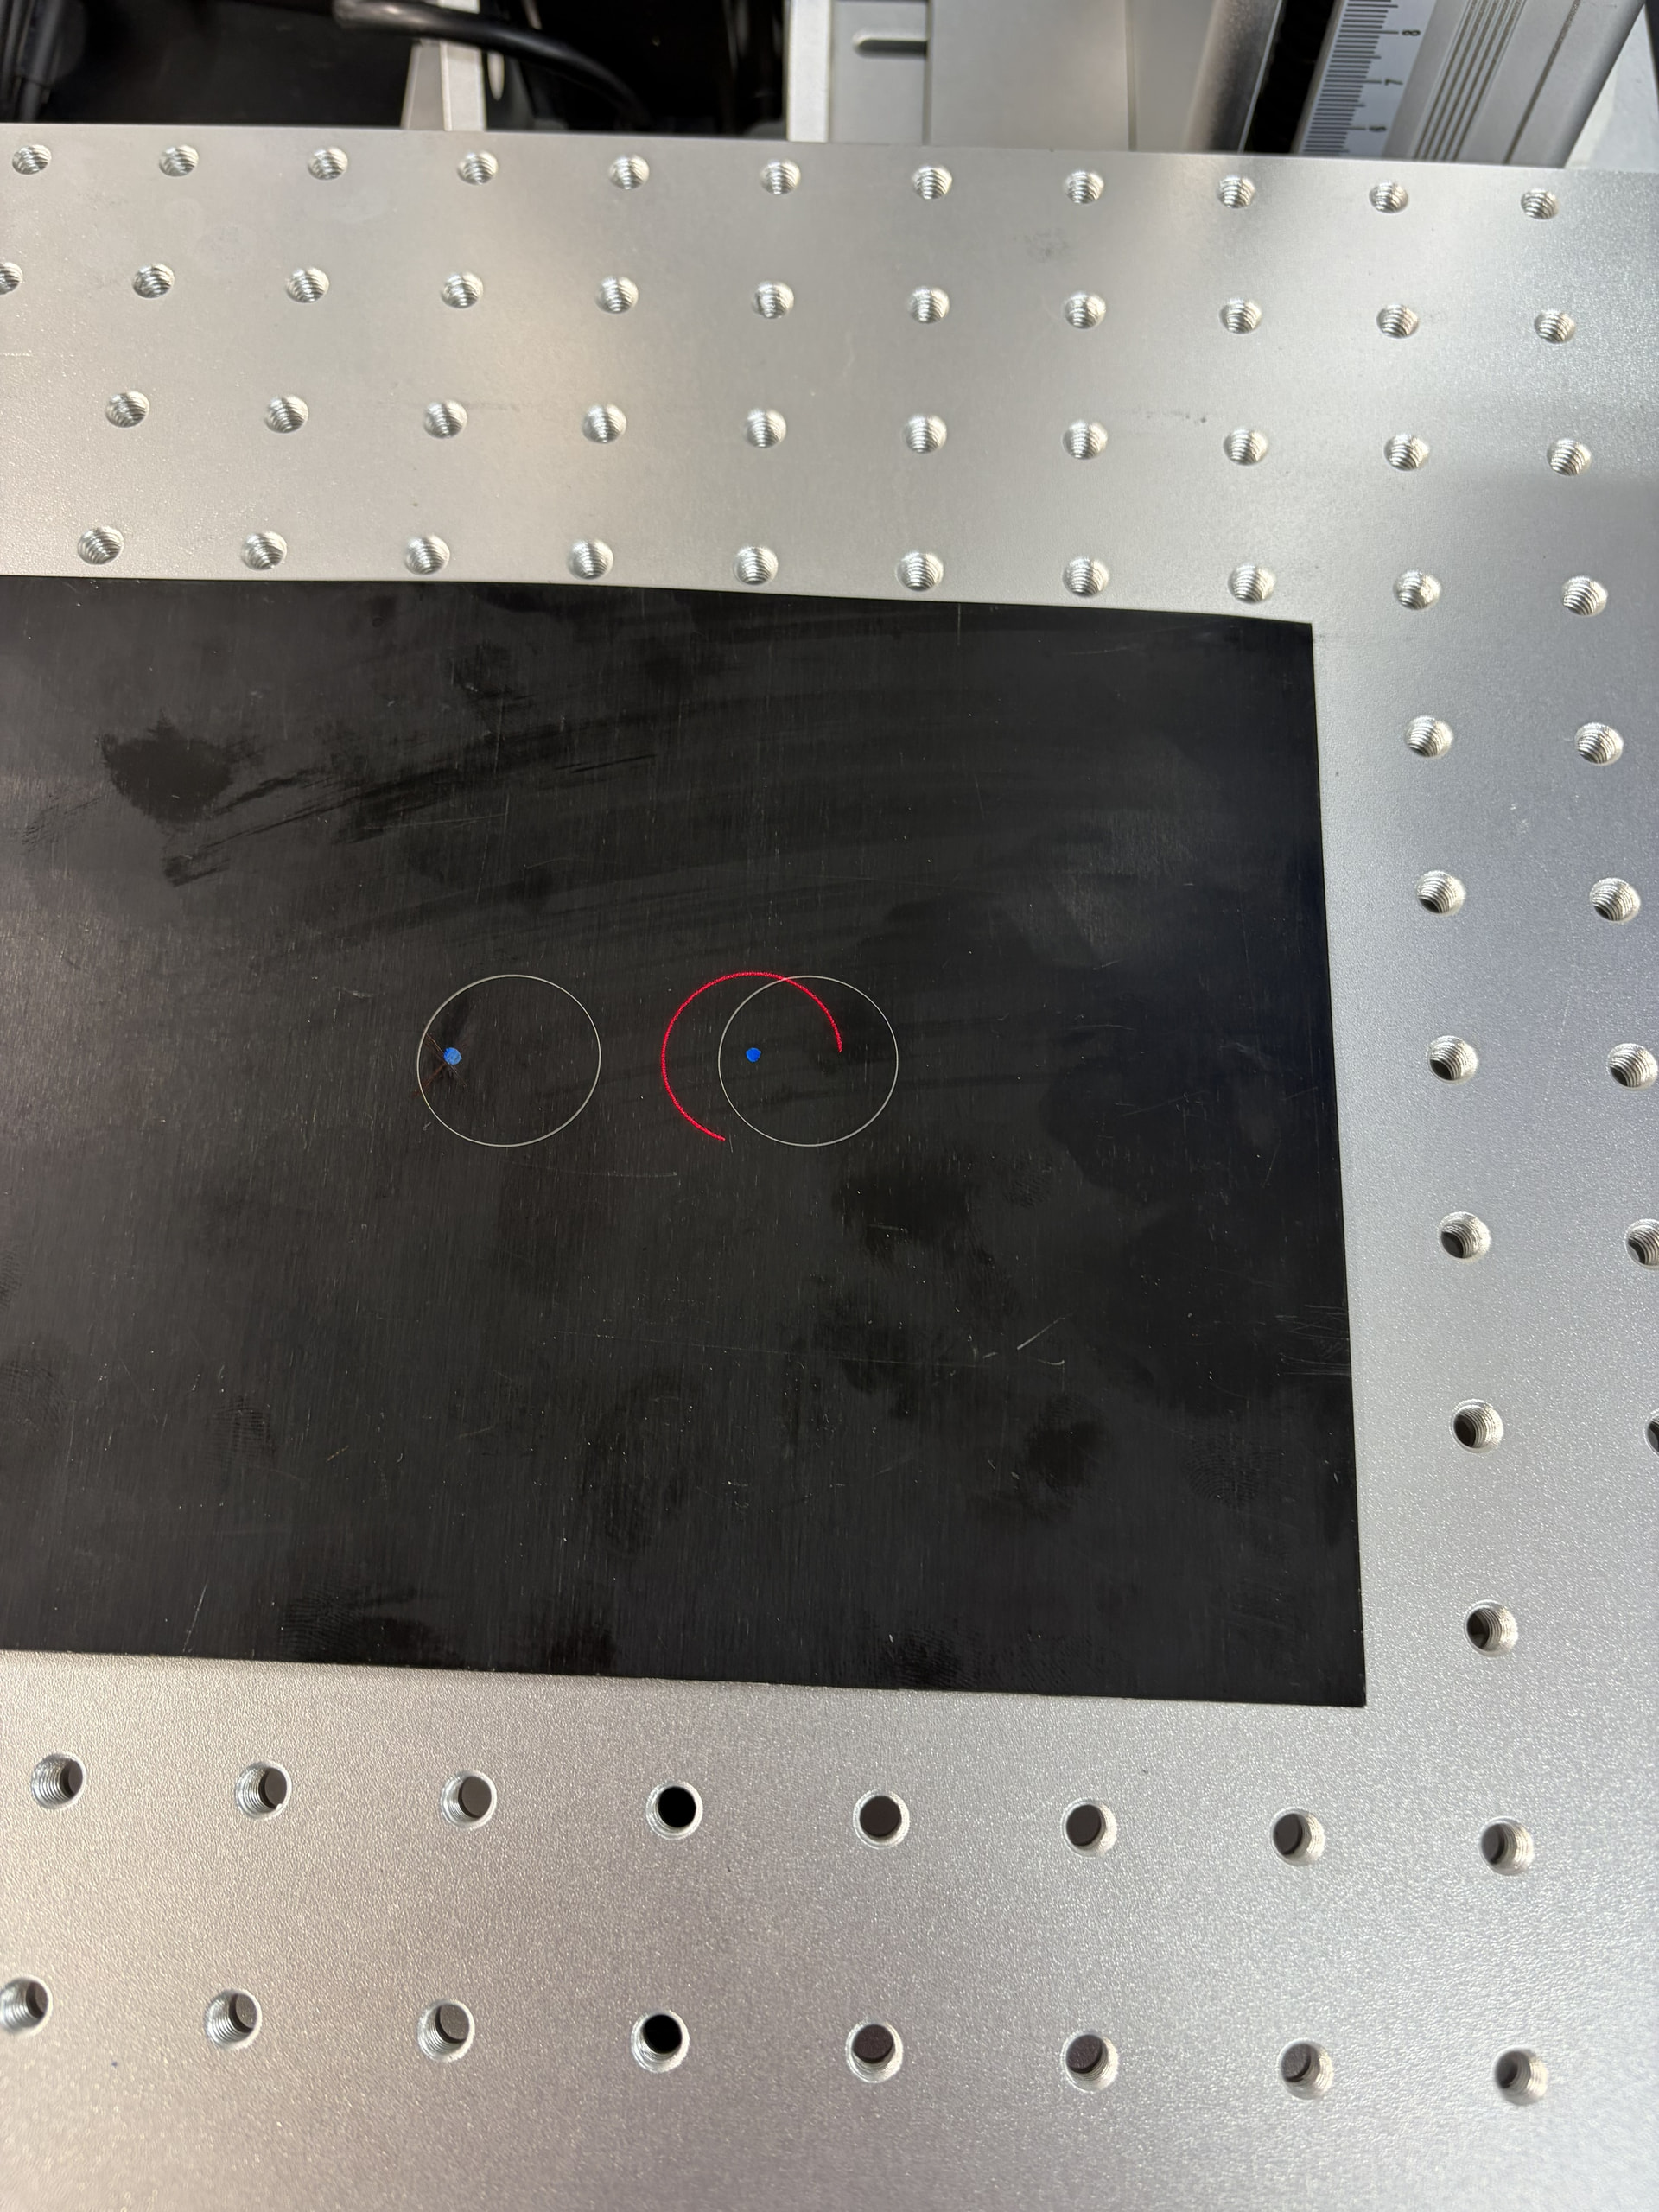
The problem I’m trying to solve is that the laser is not marking my text/shapes/arrays centered about the red dot. Have a look at the attachment (ignore the circle and blue dot on the left), you will see a blue dot that was used to center up the work piece with the lasers red dot. You will see a portion of the trace that is centered about the blue dot. I would expect the marking of the circle to be centered about the blue dot but it is not. As you can see the circle is marked about 8mm to the right.
Any Ideas why this is happening?
Thanks for confirming what we thought could be the problem Nicholas.
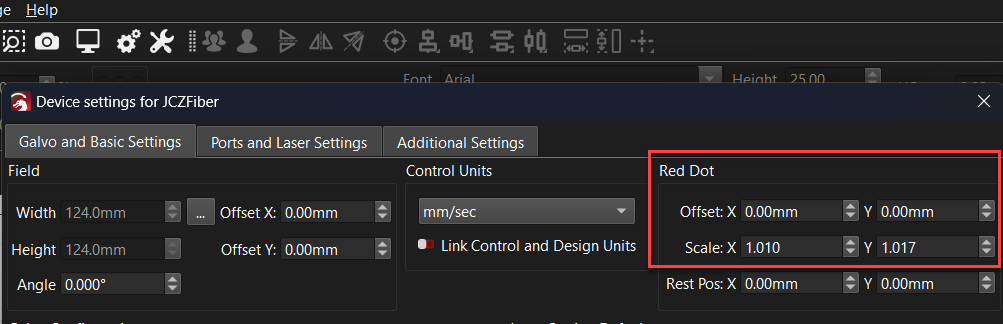
From the factory the numbers were 8.25mm (X) and 0.80 (Y).
First I tried making it 0.00mm (X) and 0.00 (Y) but it didn’t help. Then I put 8.25mm (X) and 0.00 (Y) in the Rest Positions. This change has positioned all my marking centered about the red dot.
What are these Red Dot parameters for?
Presumably, the physical source position of the red dot laser will be slightly different (out of line) to where the fiber laser is coming from, so these parameters allow correction to ensure the galvos will still place the red dot framing in line with the fiber laser output.
The rest position only affects the position the red dot laser is when it is at rest (not framing). If you are using the at-rest red dot position for alignment (sorry I didn’t click that you were doing this), then I guess it makes sense that you would need to make an adjustment there also.