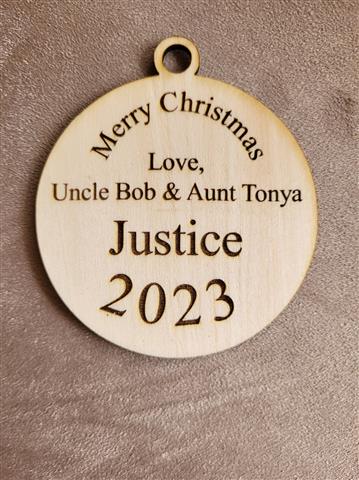
I created a Christmas ornament with the name of nephew on it and tested to see how it would come out. It came out fine, but when I copied the whole image and pasted it so that I could cut multiple cutouts at the same time, the text got all messed up. This is my first time using the forum and have some pictures to upload so will see how that goes. Any ideas on what I am doing wrong? By the way, I am testing out the software and so far I like it. Plan on buying a key if I can figure out some of the things that are messing me up.
Hard to say for certain but it looks to me like your machine is losing steps. Meaning that not all motion requests are being full transmitted into the laser head.
I’d look for something mechanical starting with checking belt tension. I’d suggest checking both X and Y belts but focusing on X since that’s where you’re having an issue. Belts should be taught with no slack in the belt but should not be stretched.
While you’re looking I’d suggest reviewing the other mechanics to see that everything is in good working order.
Thank you. I will check on that today. I appreciate the help!
OK, I adjusted the belts and even put a little grease on the rail that the laser is on (grease was supplied by XTool). Still getting the same thing. If I do a single ornament at a time, it does just fine, regardless of where I start on the board.
I also created a new file, just in case it was something about the file.
I changed the font, in case that was the issue. Still no help.
Any other ideas? Thanks in advance.
Maybe there is a setting I have messed with that I can’t remember I changed that is messing things up. Is there a way to reset all the settings back to the way it was when I installed the first time? I tried uninstalling and reinstalling but it appeared to come back the way it was before I uninstalled.
Can you provide the following:
- Full screenshot of LightBurn with design loaded. Please have Cut window showing
- Screenshot of Edit->Device Settings
Note that reinstalling LightBurn is almost never helpful in resolving issues.
When you checked the belts, did you notice whether or not they were loose at all?
When I checked the belts they might have been too tight. I loosened them a bit.

One other thing just happened. I started doing individual ornaments. The first one came out just fine. I positioned the laser to start cutting in a blank area of the wood and it messed up. I get a message that it might be out of bounds, but for some reason I get that all the time. After it messed up, I hit the home button, then moved the laser to a blank area, framed it, hit start and got the same message again. Hit ok and it came out just fine.
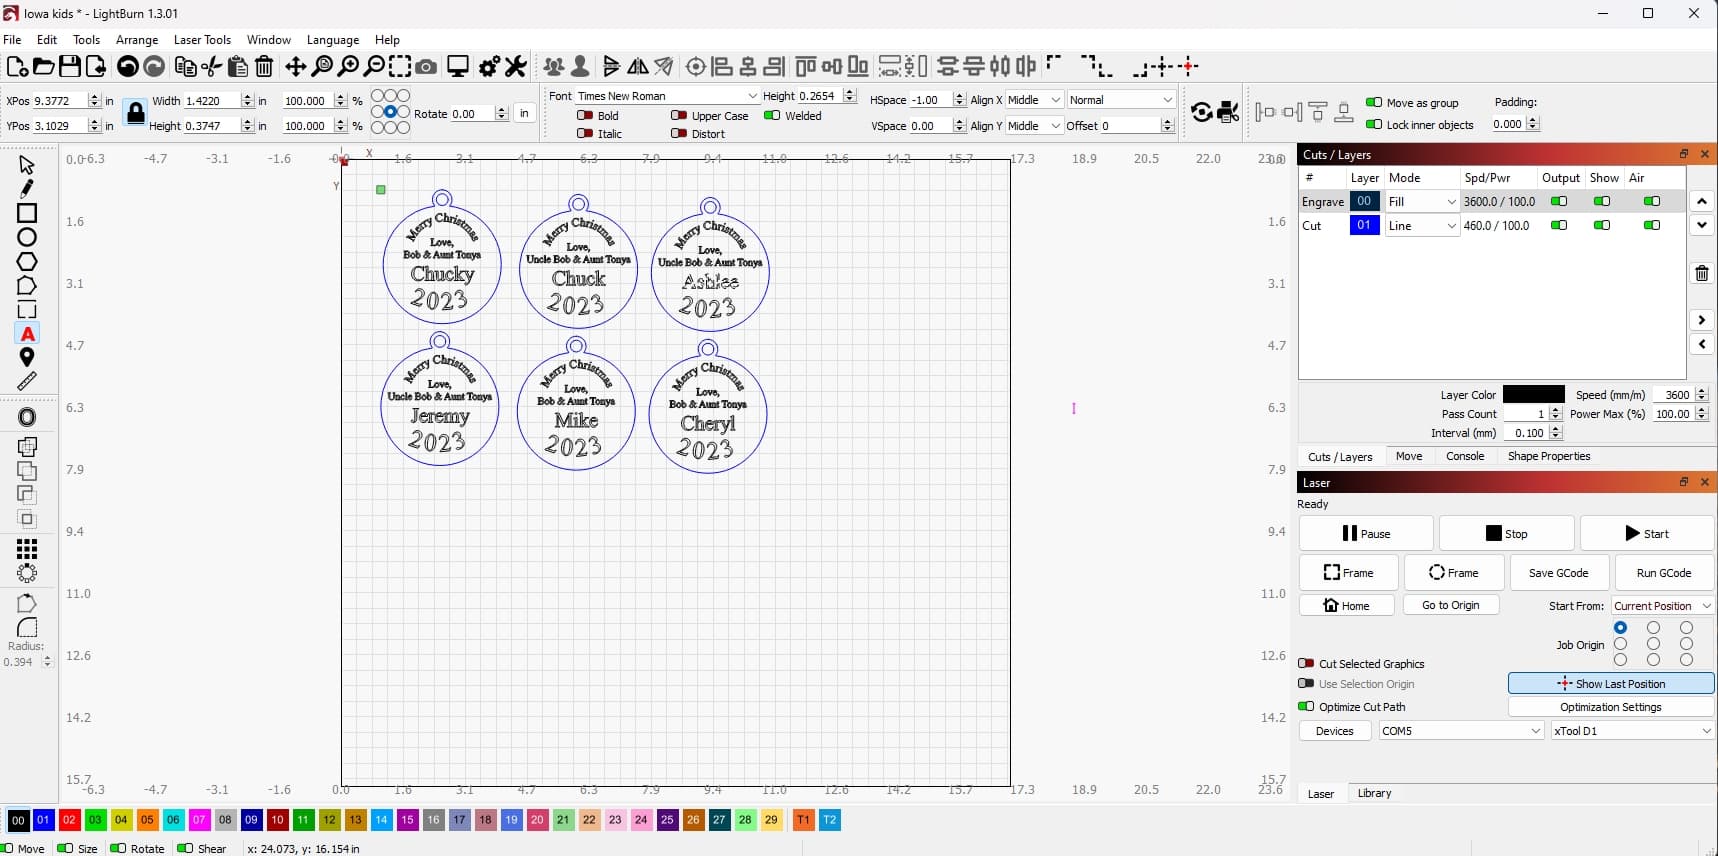
I am uploading the screenshots as requested.
Oh, one other note. The screen shot of the workspace includes copies I just put in so that you would see what I was working with when it messed up. I had removed everyone of them except one to do them individually. I will leave them as is and select the option to only cut what I have hightlighted until I hear from you.
I think what you’re dealing with is a workflow issue.
Here’s what I suggest for workflow:
- Turn on the laser with the laser head at top-left of the frame. This is referred to as manual homing.
- Whenever you want to move the laser head do so exclusively using the jogging controls in Move window. Do not move the laser head by hand ever after homing.
- I’d suggest starting with using Absolute Coords as your start from mode rather than Current position. This is the most intuitive mode and will map the location in LightBurn workspace to physical location on bed.
If you follow these steps that will insure that you stay within bounds. This could also address the initial issue you were experiencing but only if that occurred under specific conditions. I’d suggest trying this out to see if the original problem persists.
OK, will give it a go! Thanks for the ![]()
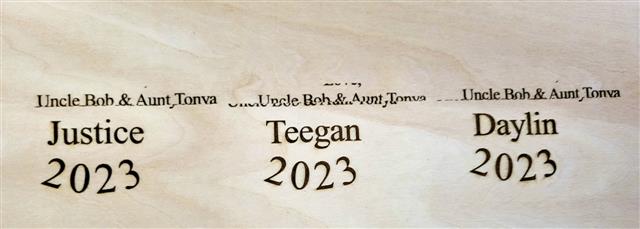
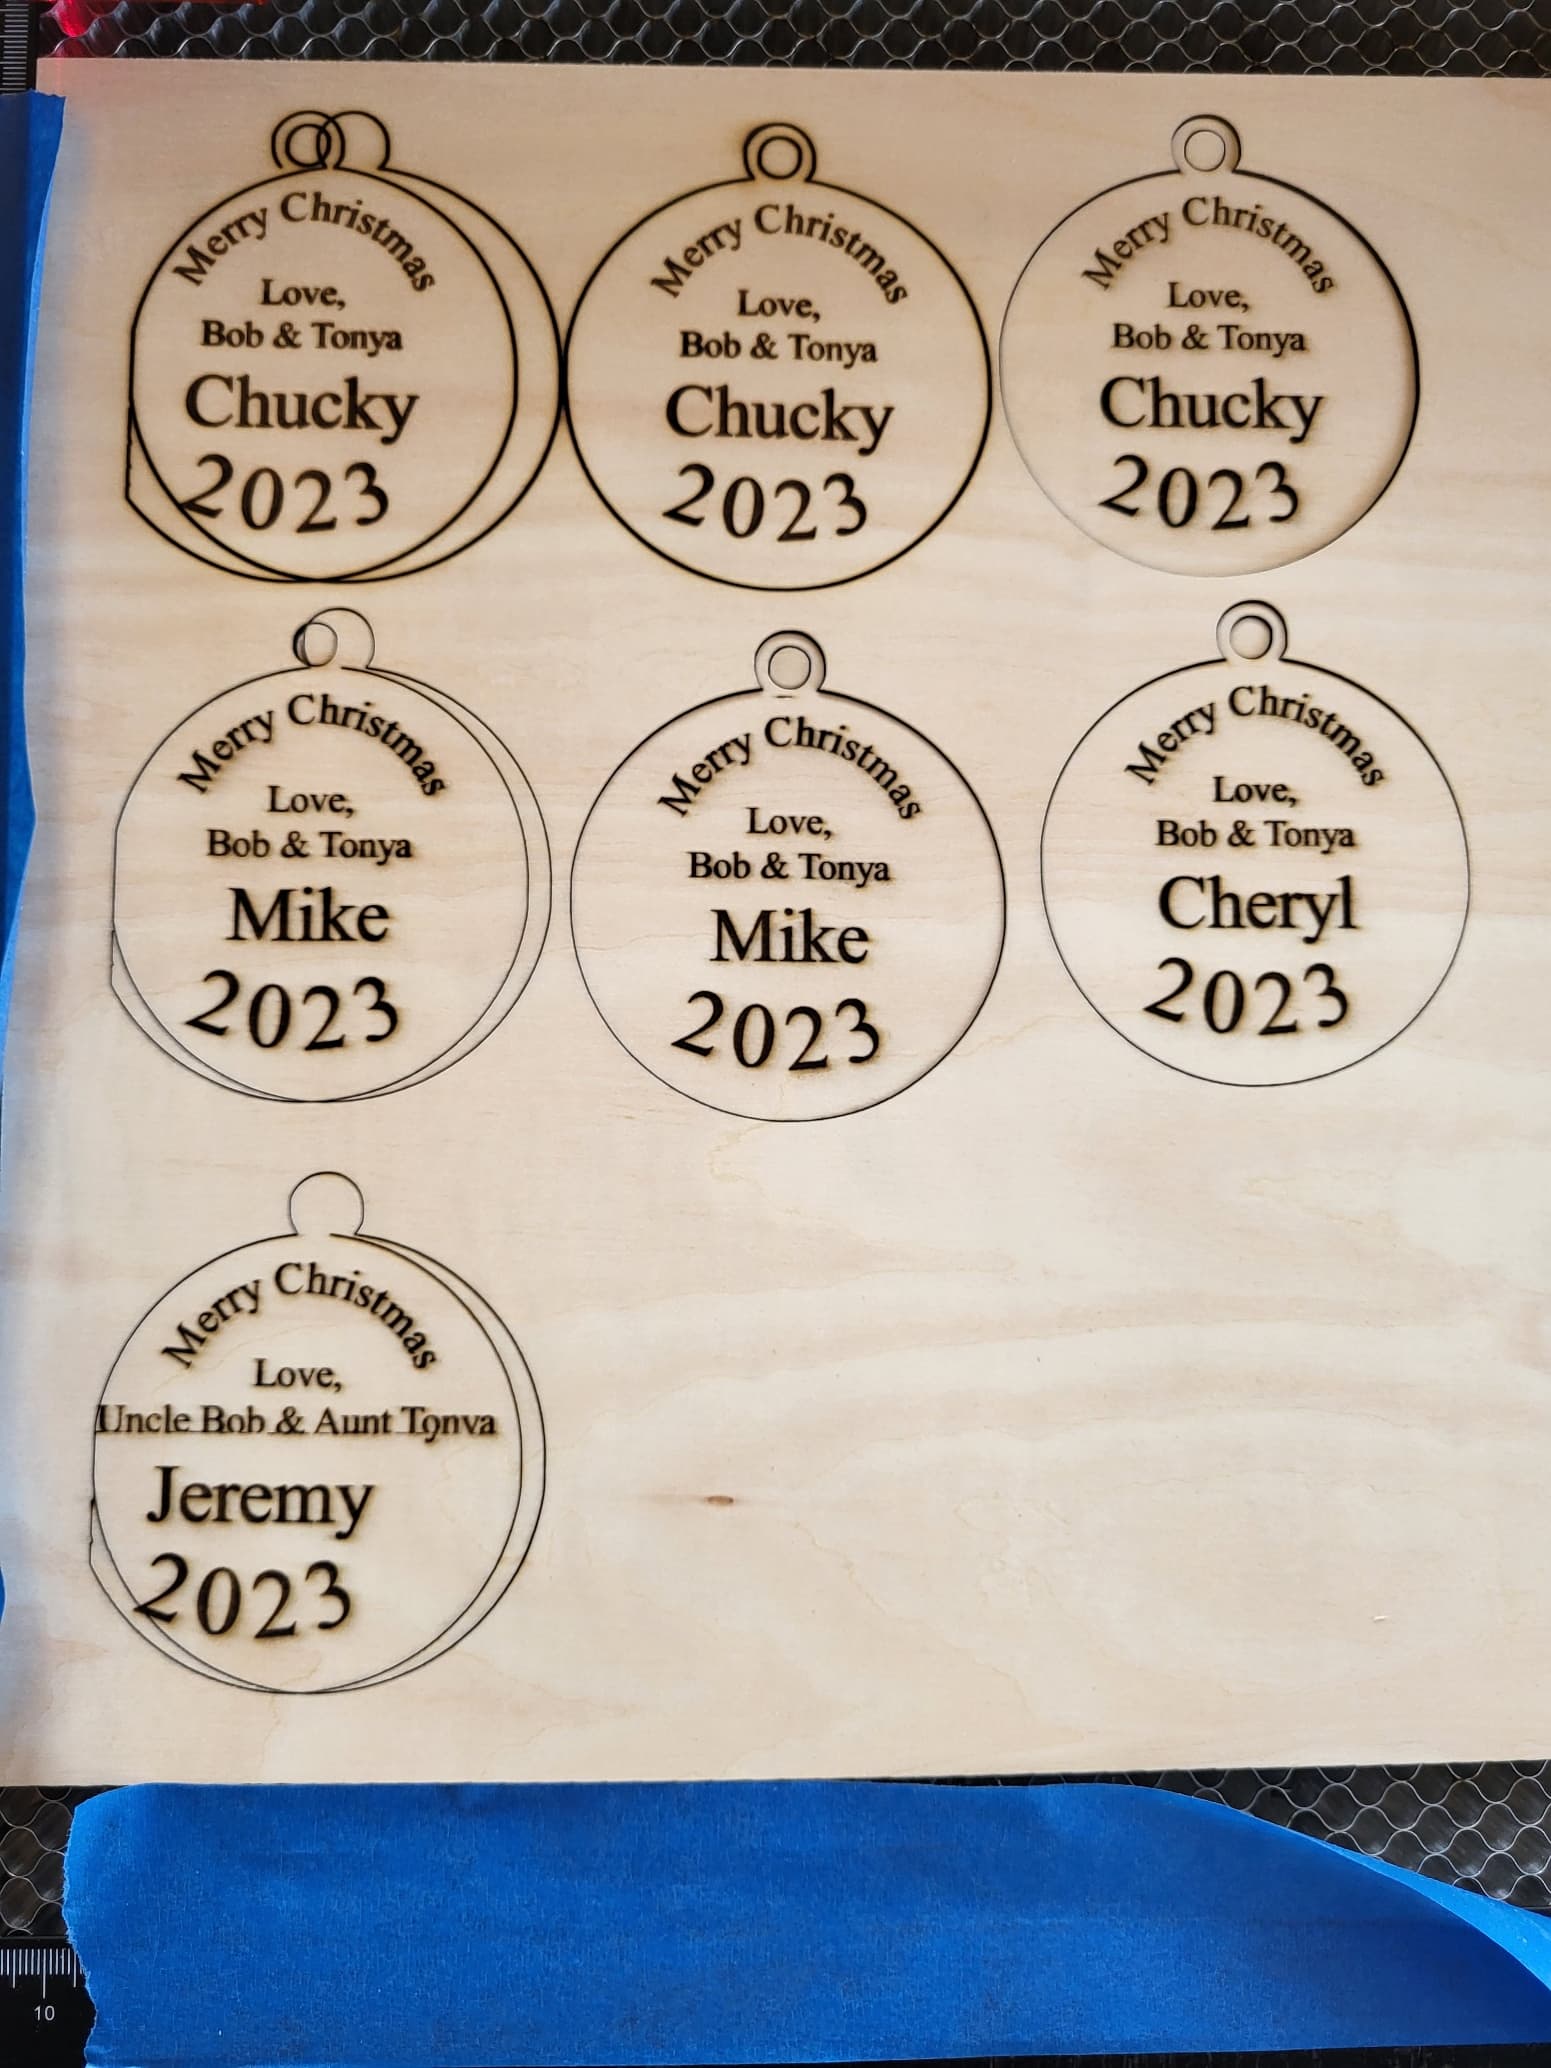
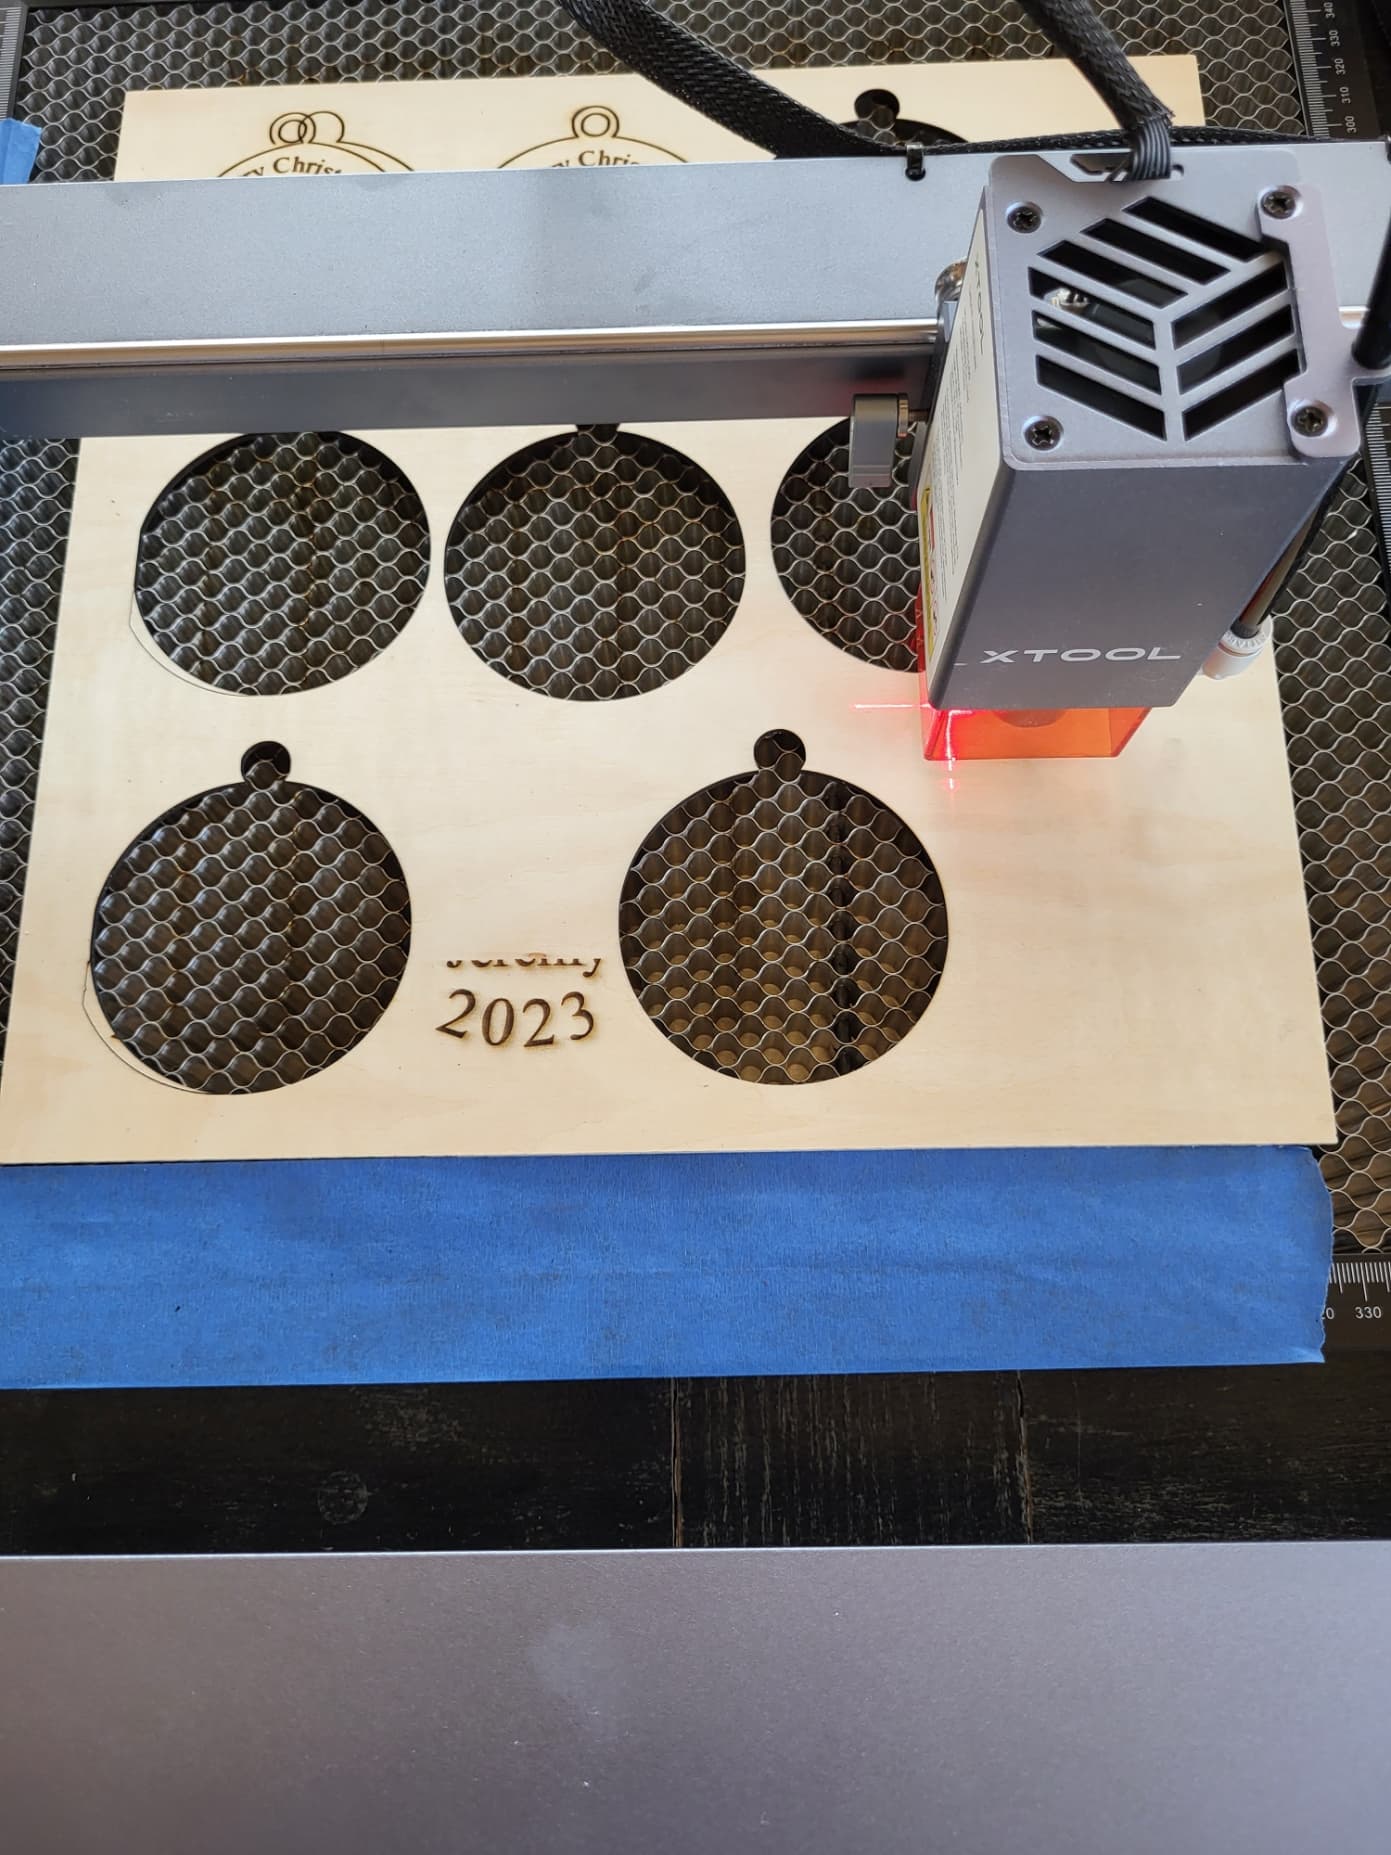
Still having issues. Things seem to be working accept on the left side where something is messing with the laser. I don’t do anything to the image other than have the laser move towards the center or right of the workspace.
Was this done using Absolute Coords? Is the laser head crashing into the side of the laser?
Also, can you confirm that you’re aligning the laser with the red crosshairs? Or are you using the primary blue diode laser for alignment?
I tried using the absolute coordinates but apparently I am confused on how that works. I have been trying to save material and wanted to cut in blank areas of the material I have messed up, so the absolute coordinates did not seem to work for me and I had to move the laser (used the move tool as you suggested) and selected Current Position.
I am using the red crosshairs to line things up. And, when I started the jobs in the picture I last uploaded that are not right, I did not get any errors about being out of bounds.
Maybe my issue is with the primary blue diode laser for alignment because I am not sure what you are asking? Remember, I am new to this, but having a blast.
And, please know that I am very grateful for the help you are giving me. Even with the frustration of current issues, it is nice to know there is a boat with a lifeline out there trying to help. ![]()
I can only speculate but I think what happened is that since you used Current Position you may have been in a situation where with the -16 mm offset from the crosshairs to the actual primary blue diode laser that the laser module crashed into the left side of the machine because the head was too far left when starting. That would explain the shift and the vertically burned edge but not sure. I would really only expect this on one of the ornaments, not all 3 on the left edge.
Note that you can place the material on the bed and then, while using Absolute Coords, move the design in the workspace until it frames where you want it on the material. There are other techniques to align the material but good to keep it simple for now.
No. I think you’re okay. I just wanted to make sure you were in fact using the red crosshairs since you have a Pointer offset intended for that setup. There are some people that don’t realize they have a red crosshair and use the blue diode instead but still have the Pointer offset enabled which creates an issue.
I am currently trying to cut an ornament that I select in the software to the area shown in the picture. I also have a screen shot of Lightburn showing my settings. I am not understanding what I have to do to get it to start in this location. I have tried what I thought I needed to do but when I frame it goes all over the place. I am sure there is an easy explanation.
Also, perhaps you can explain the upper right corner. There is a green square and a red dot. When I move the laser using the move button there is a red crosshair that apparently is a representation of the crosshair on the laser. I see that when I change the location of the origin in the grid the green dot/box moves to a similar location represented by the grid. Am I supposed to do anything with all those dots?
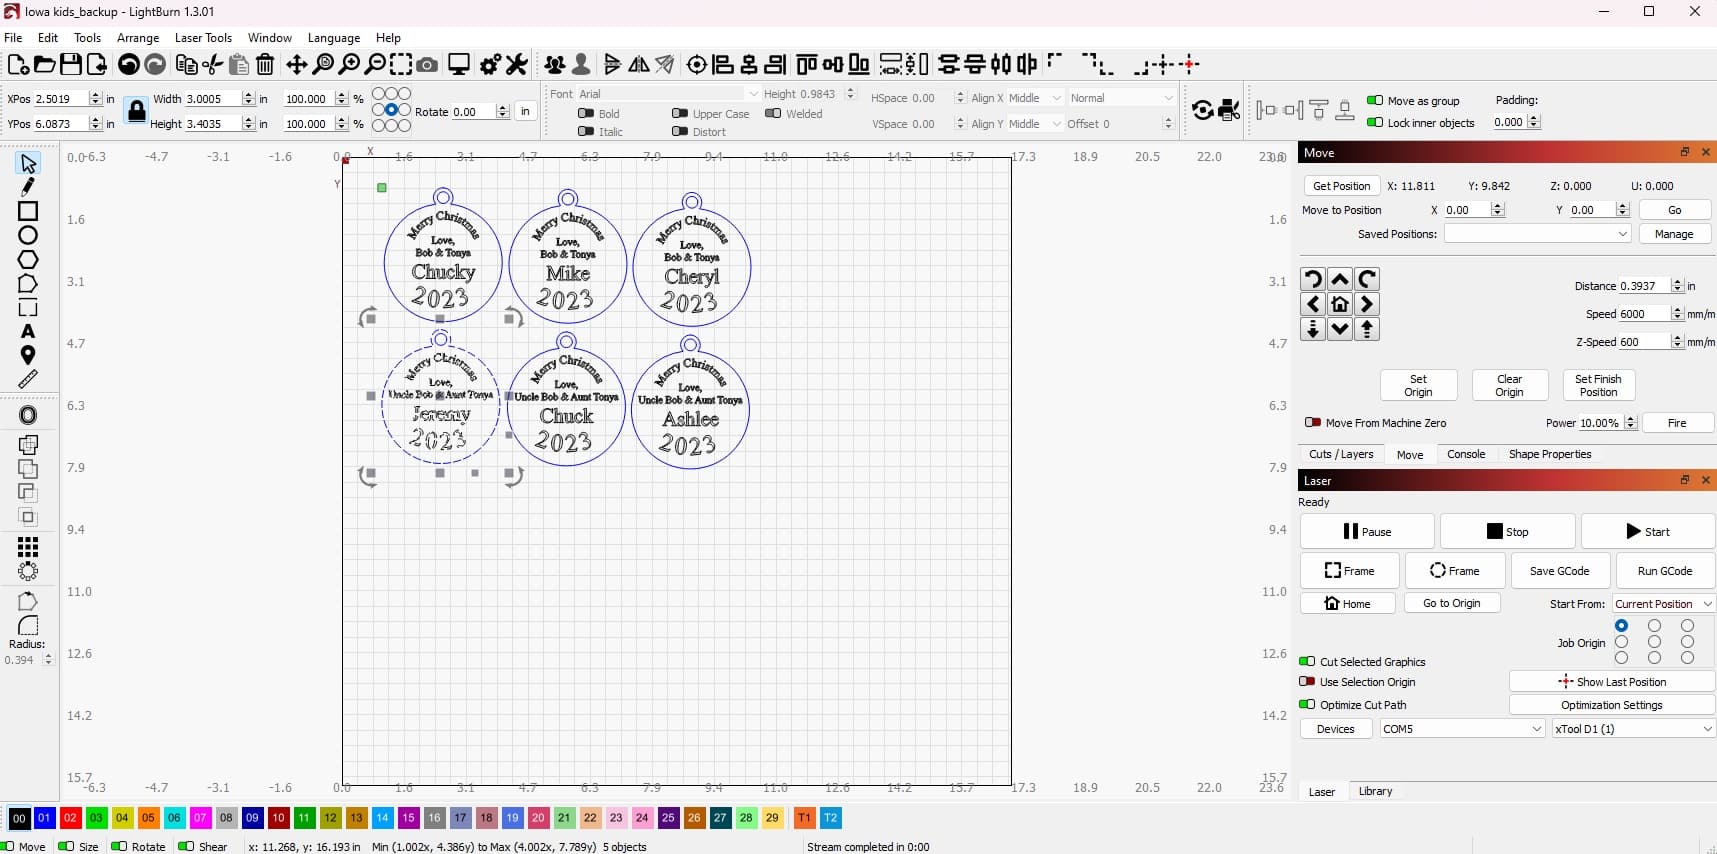
Based on the position that the laser is in I suspect you want to enable “Use selection origin” in Laser window. This limits the objects used to determine relative origin position to the ones you’ve selected, not all that are present in workspace.
I assume you mean upper-left as I don’t see anything at upper right. Red square is your machine origin, basically the origin as configured in Edit->Device settings. For most lasers this is also generally the corner your machine homes.
The green square represents the position of your job origin.
I suggest you review LightBurn docs and video on the subject to better understand how this works:
Understanding The Different Start From Modes In LightBurn - YouTube
Coordinates & Origin - LightBurn Software Documentation
Thank you. The video helped. I did figure out what I needed to do. There is an option, “Use Selection Origin” that I turned on and it moved the green selection button to the object I wanted to cut. That fixed the issue of cutting on the material where I wanted to cut.
Next, I will try to nail down why things were messing up on the left side. I am almost done with this particular project so once I am done with that, I will try on card stock just to see if I can get things to work (low power of course).
Again, thanks for all your help. Still have a few days left on the trial version, but definitely getting the license.
This topic was automatically closed 30 days after the last reply. New replies are no longer allowed.