I’ve made a 3d layered design that has 5 layers that are all cuts that will be with a different piece of wood
So I will toggle a layer on in Lightburn, cut it and then toggle it off for the next one.
So I need to make all 5 layers red, which has my cut settings.
However this makes the layers merge.
Am I forced to make each layer a different colour and copy the settings for each one across?
Simplest way could be
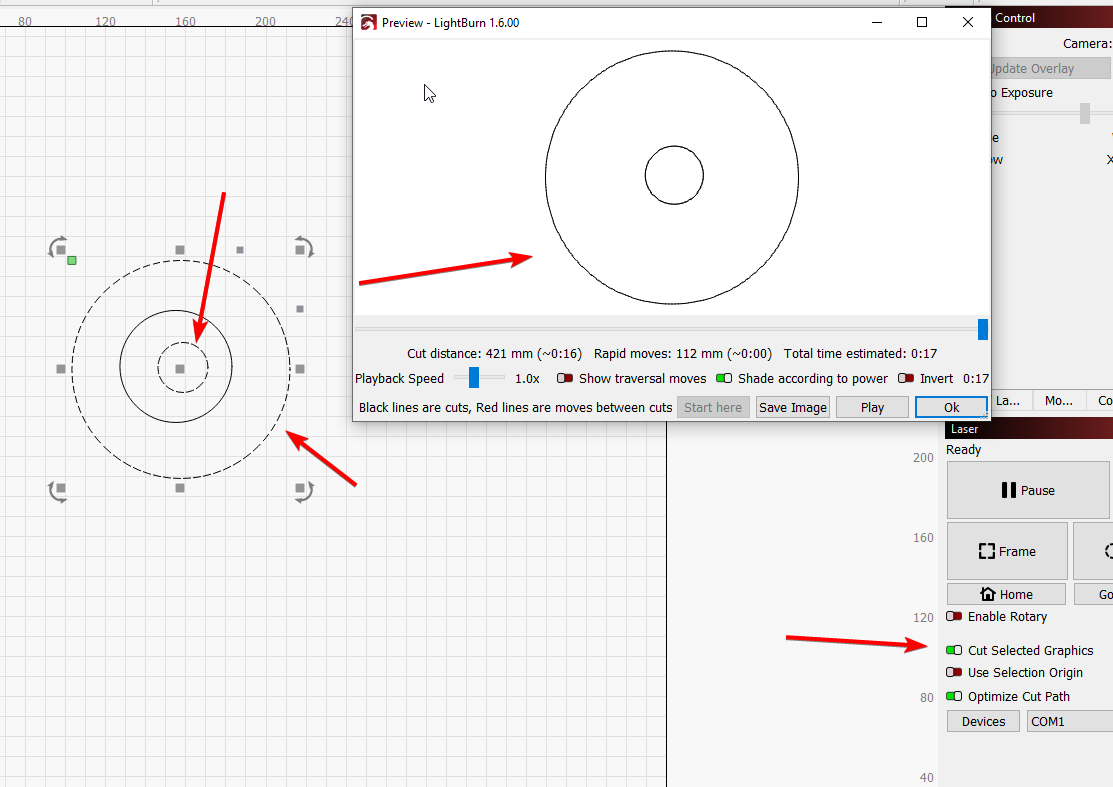
Enable Cut Selected graphis
Click the object you want or objects
Then Start
(preview first to confirm)
Unfortunately that wont always work for some situations as some objects completely covered another one, exactly. So I might not be able to select a line on that object to select it without selecting another object in the canvas. Although it might work sometimes thanks.
It’s looks like I’ll just have to copy my settings over to each layer’s colour, which is a shame as I like to have those other colours for things like engraving and it will change my defaults for other files.
Although not what you seek this might help
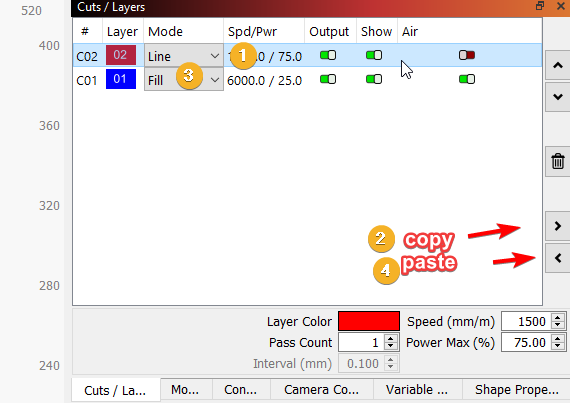
Copy/paste settings between layers
3 Likes
Thanks, that helps too.
I wonder if Lightburn has an object list, similar to layers so I can select an object from a list of names rather than having to visually click it in the canvas to select?
Worth adding to feature suggestions when you can
1 Like
1 Like
I did something similar with layered paper:

The orange layers cut heavy cardstock and the red layers cut colored paper, but they all used the same fixture:

I used Print and Cut to align a template to the fixture, then snapped each layout to the template and Fired The Laser.
It requires more setup than switching the layers on and off, but keeps everything properly aligned with the correct settings for each type of paper.
1 Like
Shift click the layer in the cut/layer window will select everything on that layer.
Alternatively, turning off visibility of a layer disables click/fence selection.
Mentioned above, copy/paste layer settings is handy, as is Material Library assign and link.
Right click the layer column headers to see a context menu with helpful tool such as invert selection, deselect all, select all, etc. options vary depending on header selection.
I’m not sure there’s an accepted best practice on how to work with layered designs. I’m working on my first original now, so I’m making up the workflow as I go along. 9 layers so far. Cutting the third prototype this weekend. I could see that layer count doubling, depending on what the Head Mistress thinks.
I’ve been doing all the design work off the grid and stacked as-assembled while toggling fill/line to help visualize. For the actual cut layers, I duplicate each layer and arrange those on a single layer on the grid to maximize material usage. Most of the layers also have engraving (mostly assembly aids like layer # or position), so those details get spun off to a separate layer.
So…9 assembly layers that are “never” set to output + 2 output layers (cut+engrave) + a single tool layer workpiece outline.
This allows me to maintain an aligned design, help avoid my habit of accidentally dragging while selecting, and minimize scrap. It makes for a somewhat cluttered workspace and bloated filesize, but that doesn’t concern me. Storage and (virtual) workspace are effectively unlimited.
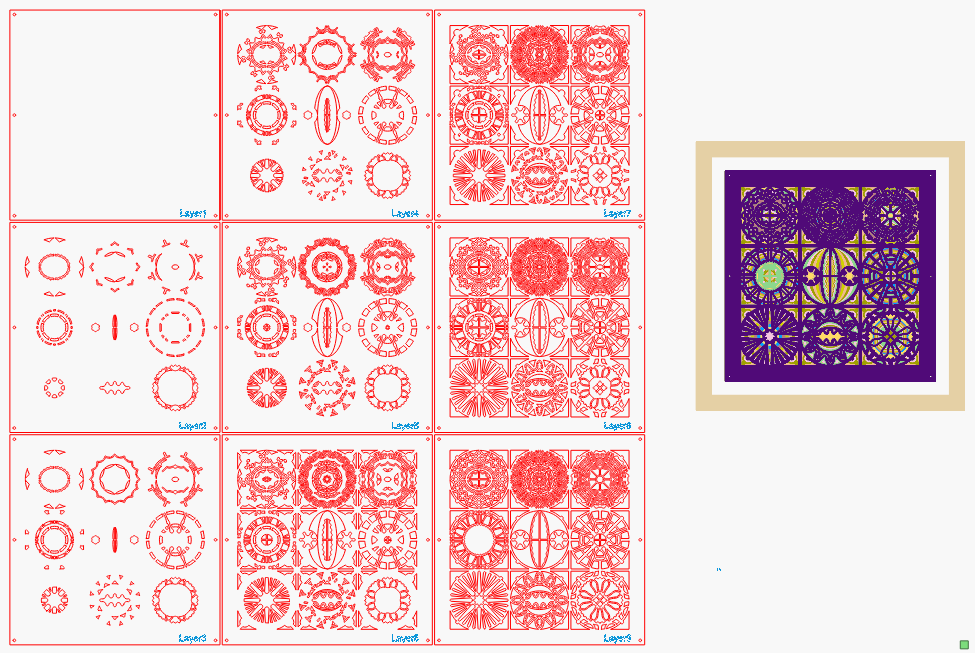
I don’t use Lightburn to run my laser - I have a Universal Laser Systems VLS6.60 and it runs off of Illustrator. I mostly create layered paper art that is 9 layers of cardstock, a white matte, and a frame. Here is a link to a layered PDF of what the finished piece looks like.
It is pretty easy for me to do like the OP references, because I create layered PDF files with one color - RED - and I toggle the layer I want to cut on, and it is sent to my laser. LB works a bit differently, but you can get the same result.
Like @ednisley mentioned in his example, move the separate sheets around and put them on the same layer. I create primarily 9 layers, with the bottom layer (Layer1) having no cutouts, and only registration holes. I use doll rod to align my different sheets of cardstock, and then adhere only on the outsides with double faced crafting tape.
I don’t add any engraving info like @cggorman does, but it helps when you have a lot of layers. I generally number mine with a pencil after I cut each one.
I don’t have a laser attached to Lightburn, but I attached a LBRN file of how I would do it. My layout is similar to @ednisley, but depending on your laser bed size, you might have reposition. On my example, I am using 12" x 12" cardstock, and my finished size is 11.75" x 11.75". I also make a matte (which I didn’t show in LB) that covers my registration holes. I mostly use frames that are about 15" x 15".
Nine_Lives.lbrn2 (1.9 MB)
I tried that, then gave up and burned an ID into each piece. This is a view from the back of the stack:
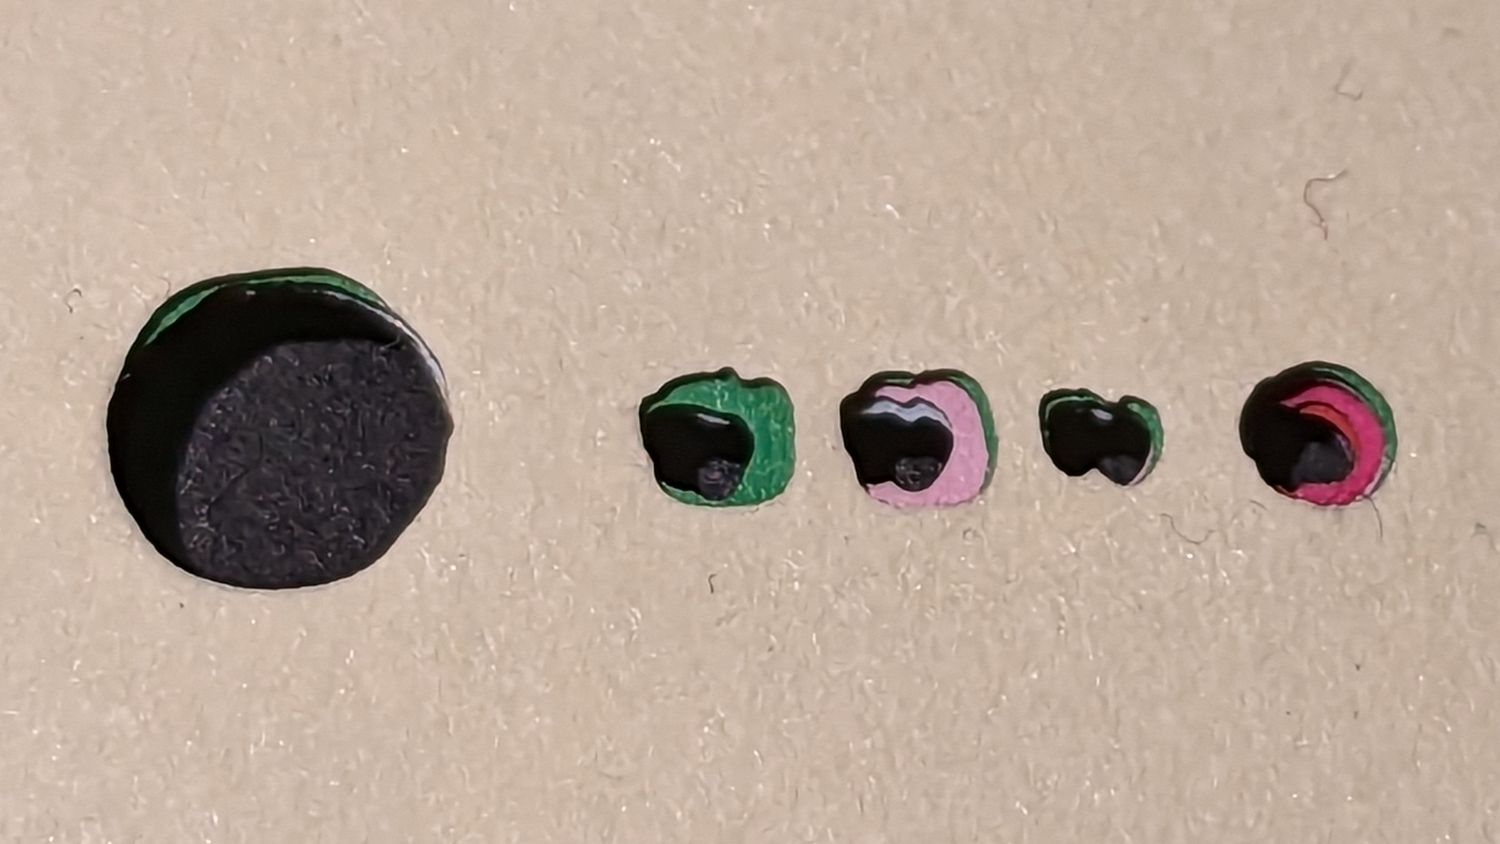
The 5 mm hole gets a fixture pin (one of four) and the other four are the layer number in binary: 0001 through 1011 from top to bottom for that design, with 1 mm holes = 0 and 2 mm holes = 1. The little rectangular slot in the lower right of the fixture surrounds the ID.
Cutting a 1 mm diameter hole with a big CO₂ laser doesn’t produce pretty results, but the ID definitely simplifies sticking the layers together.
2 Likes
This topic was automatically closed 30 days after the last reply. New replies are no longer allowed.