I’ve recently purchased an Omni X UV laser and am having loads of fun with it!
Flat images come out amazing:)
Now I’ve been struggling for hours with the rotary and can’t get it to work properly.
The main problem is that the end result has gaps in it.
A big clue as to where the problem originates seems to be that instead of rotating smoothly it jitters back and forth to do a few lines here and there.
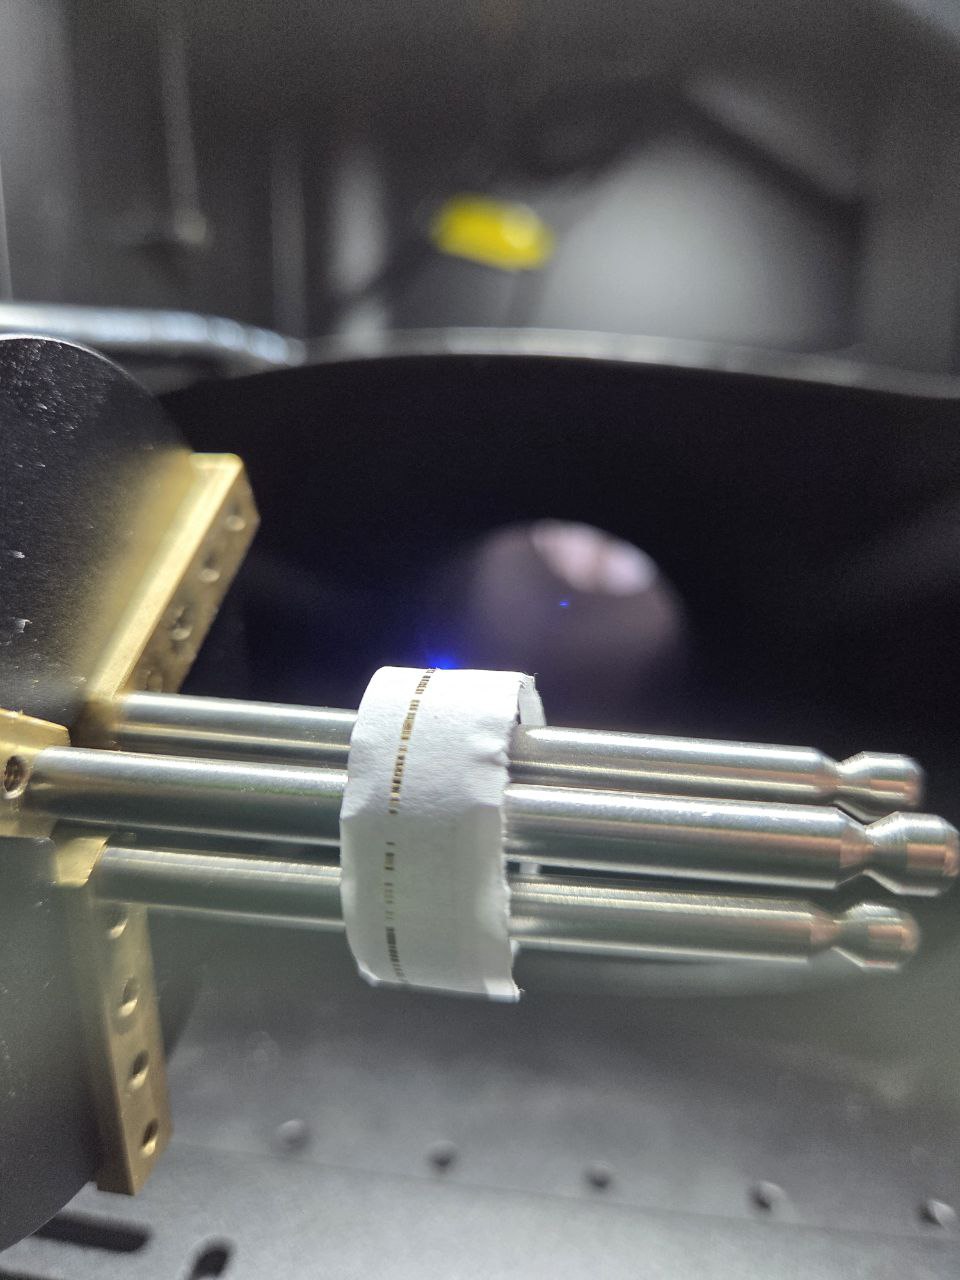
I’ve set up a simple test with a standard box 1mm wide, going around a ring.
Can anyone help point me in the right direction? This is my first experience with a chuck, so I hope it’s a rookie mistake.
Some info that might help:
-The same things happen with an image
-Split size can go as low as 0.023mm, this shows the same behaviour but smaller (harder to see on video)
-Optimization settings Cut in Direction Order/Reduce Travel Moves/Reduce Direction CHanges don’t seem to do anything
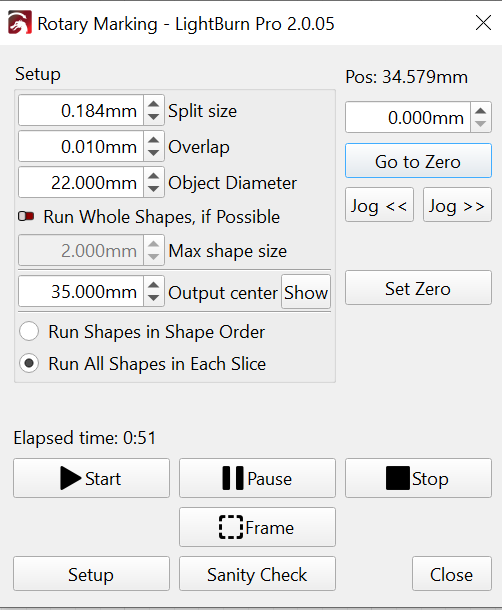
Thank you for your idea, I divided these 4 parameters by a factor 10:
Min/Max speed, Acceleration Time, Return Speed.
There is one huge gap and loads of small ones.
It also overshot by a few degrees/centimeters, so it kept going when it went round once already.
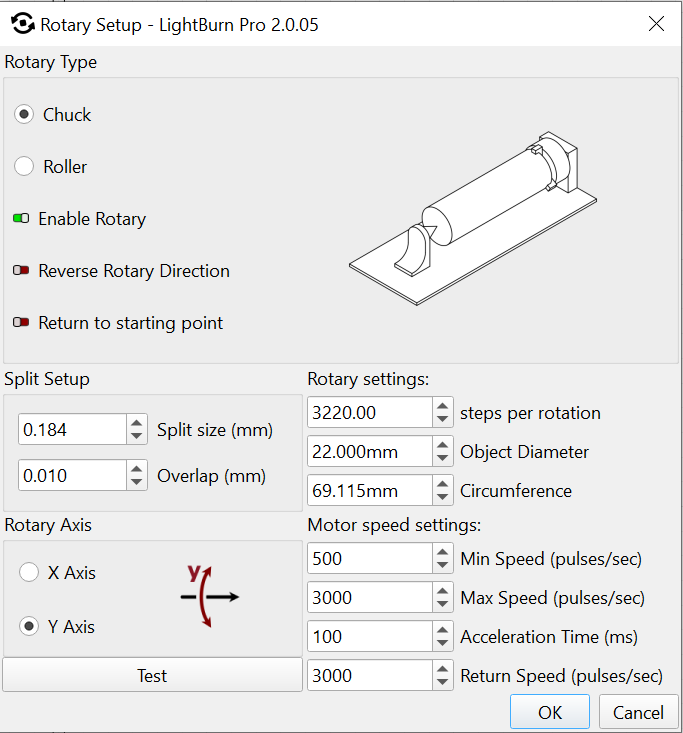
The diameter is 22mm, I drew a line of (22*3.14=)69mm, that checks out..right?
Happy New Year Ed!
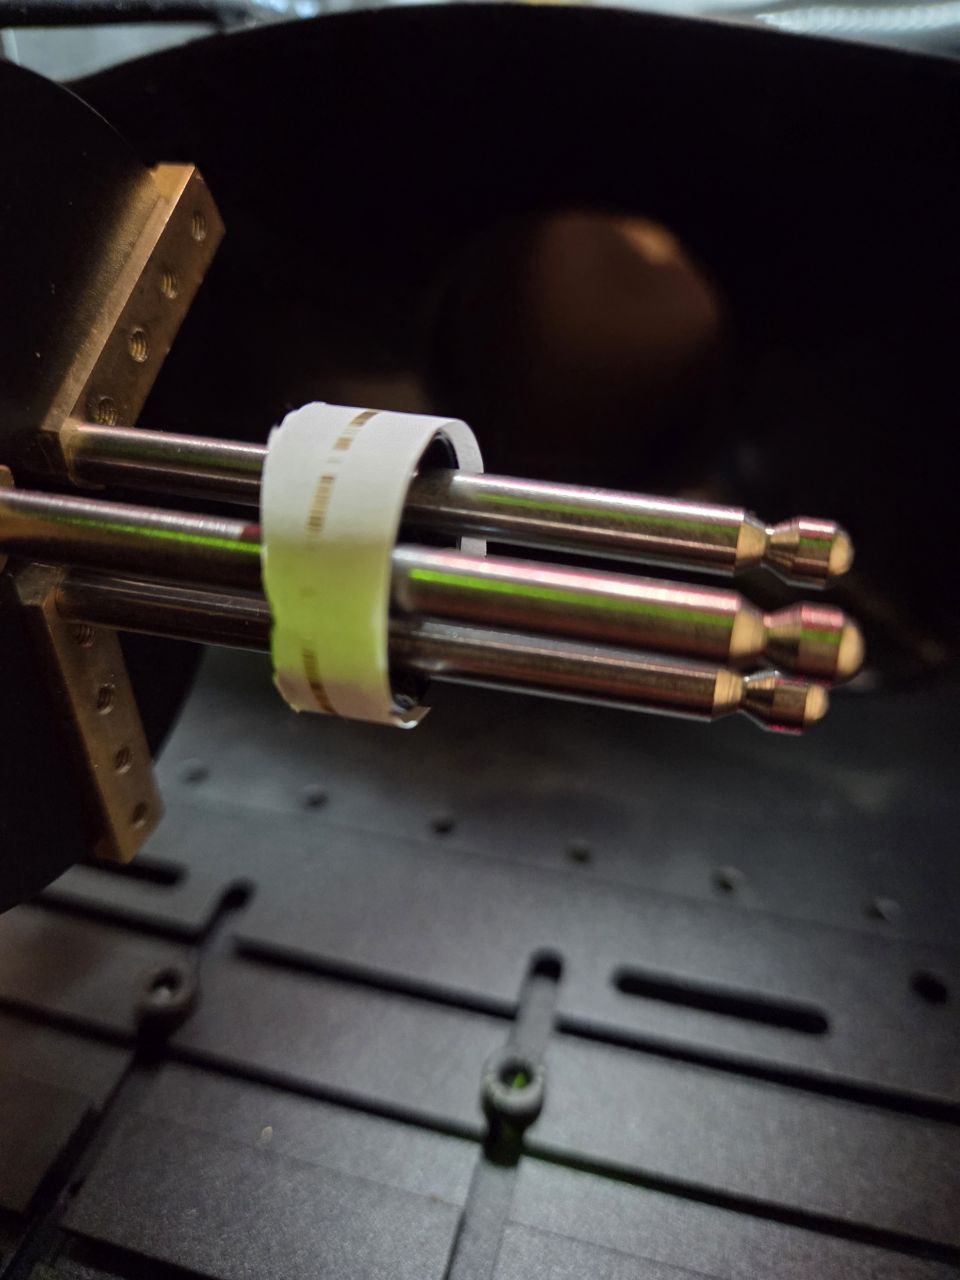
Doing both things you said made a closed circle with no gaps!
Min speed = 50
Max speed = 500
Acceleration time is 10.000 (!)
This made it painfully slow, and the individual lines are still showing, but this is something I can fix with trial and error optimization
Thanks a bunch
I hope your start of 2026 was a good as you made mine
For Fill areas, those can be the same value, because the controller uses the Overscan area to get up to the Max speed.
I was referring to the speeds & accelerations in the Machine Settings for each axis. Those will let you maintain the overall speed for the X axis while limiting the rotary speed / acceleration (which is less critical, because the laser beam is off during those motions). Although you can save / restore those settings in lbset files, you must (remember to) load the appropriate file for each setup.
That could be a matter of getting the Line Interval closer to the width of the focused spot or, more accurately, the burned area it creates.