Howdy, all.
Without paying stupid amounts of money, I built a pretty solid system for keeping my red box 100W laser cool. With the addition of the ‘blue’ laser coolant last weekend, I’m pretty happy with its performance.
All based around ‘stuff’ I had lying around the shop already, with minimal exeptions. I did have to buy the little tank for this project, but it was under $30. A magnetic pump and silicone hoses from my beer brewing era. A spare radiator, 12V fan and 12V 50A DC power supply out of a project that went 24V instead of 12V. A freebie project box, a pile of buttons/cords/switches/horns from a lifetime of tinkering, and a thermostat (like Inkbird stuff) modules since I already use them to control my radiant floor in the shop. They’re cheap, but come in C instead of F. I just have a max set for a ‘getting hot, start looking for a pause point’, and the onboard relay just trips the little panel mounted flashing horn.
More or less, the thing is just a closed loop, pulling through the laser tube into the top of the tank, pull out of the bottom of the 1L aluminum overflow tank, through the radiator and push it back into the the tube. Pretty simple, right?
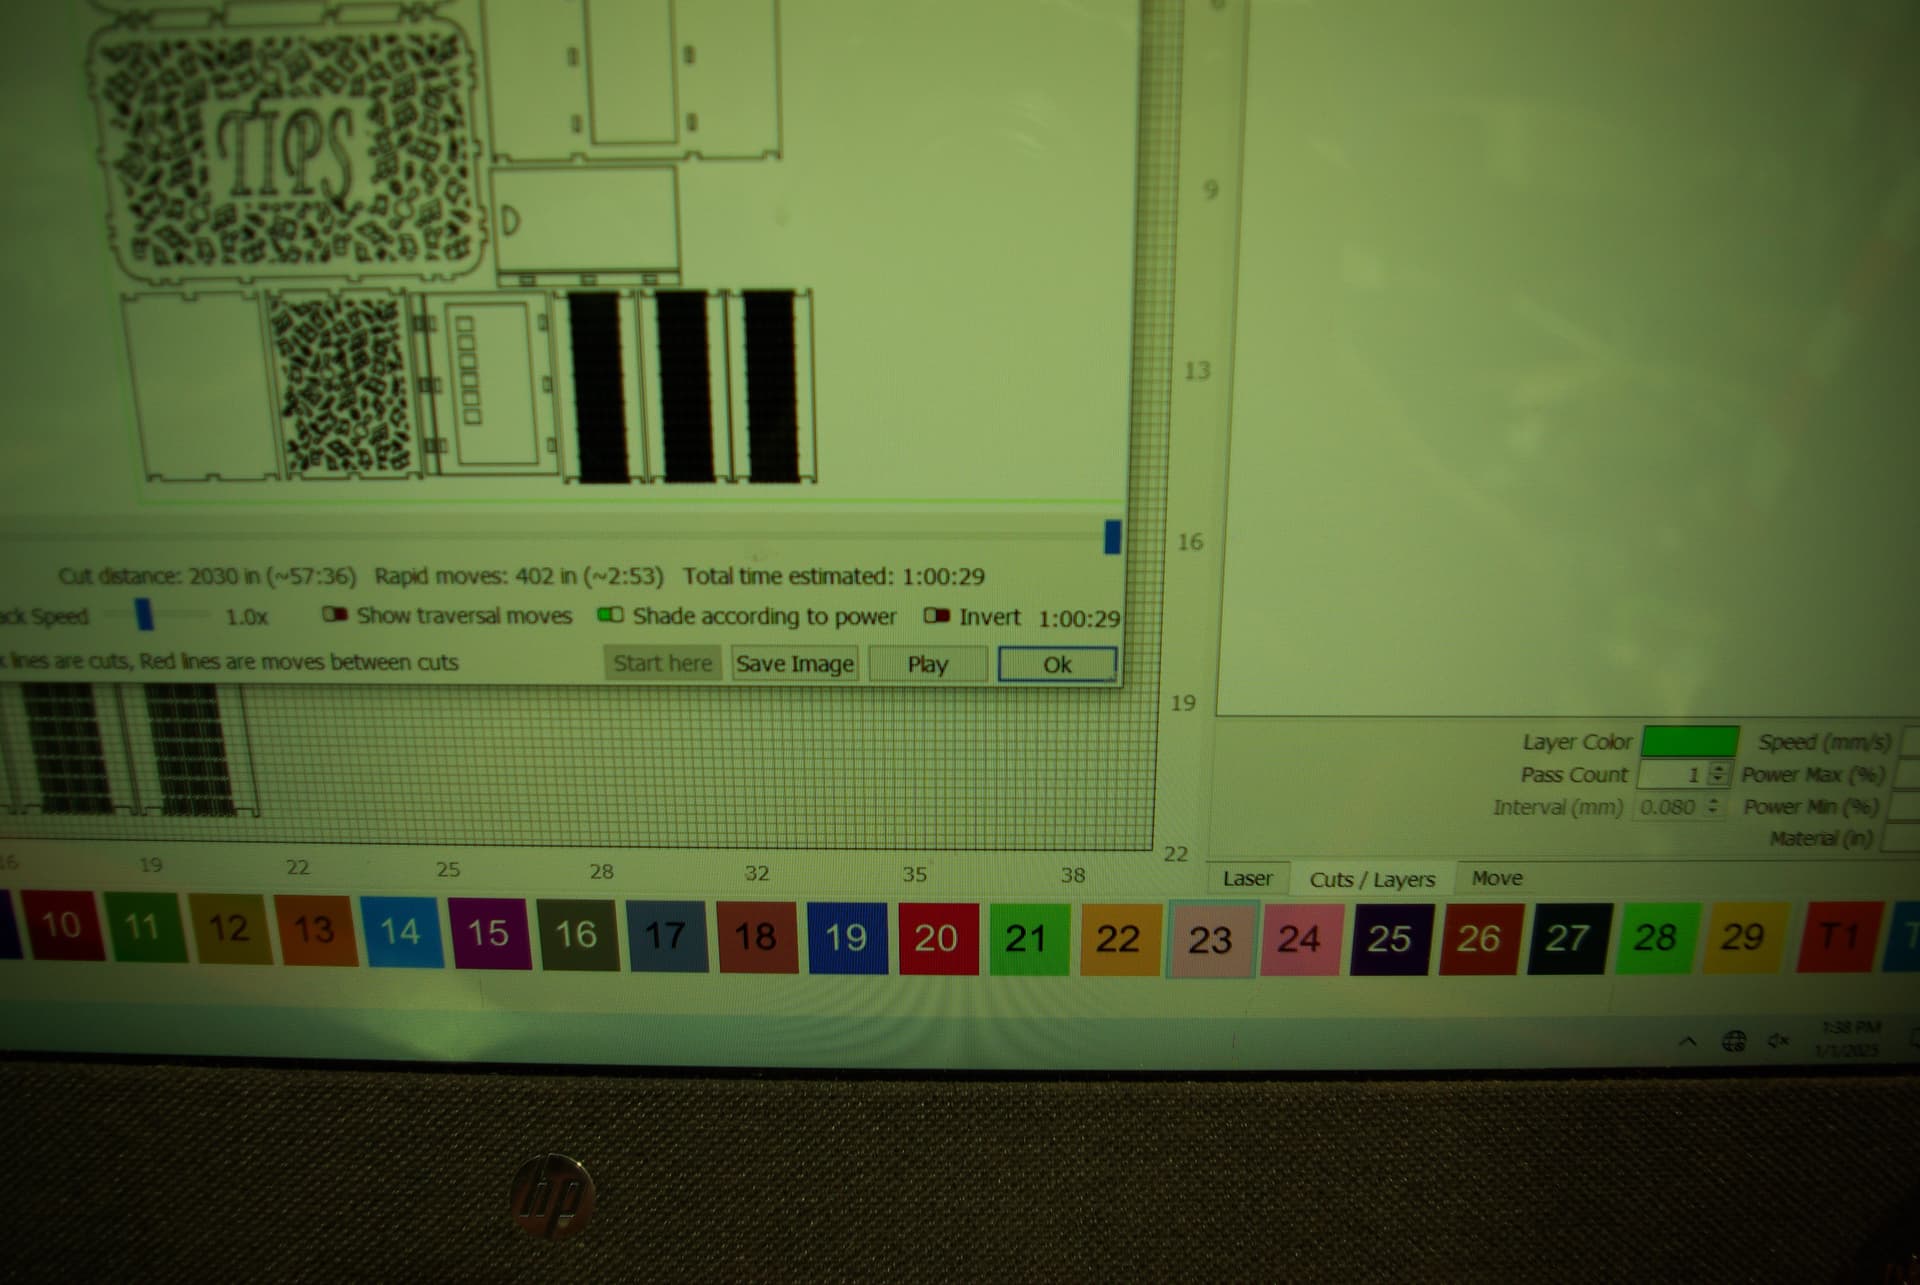
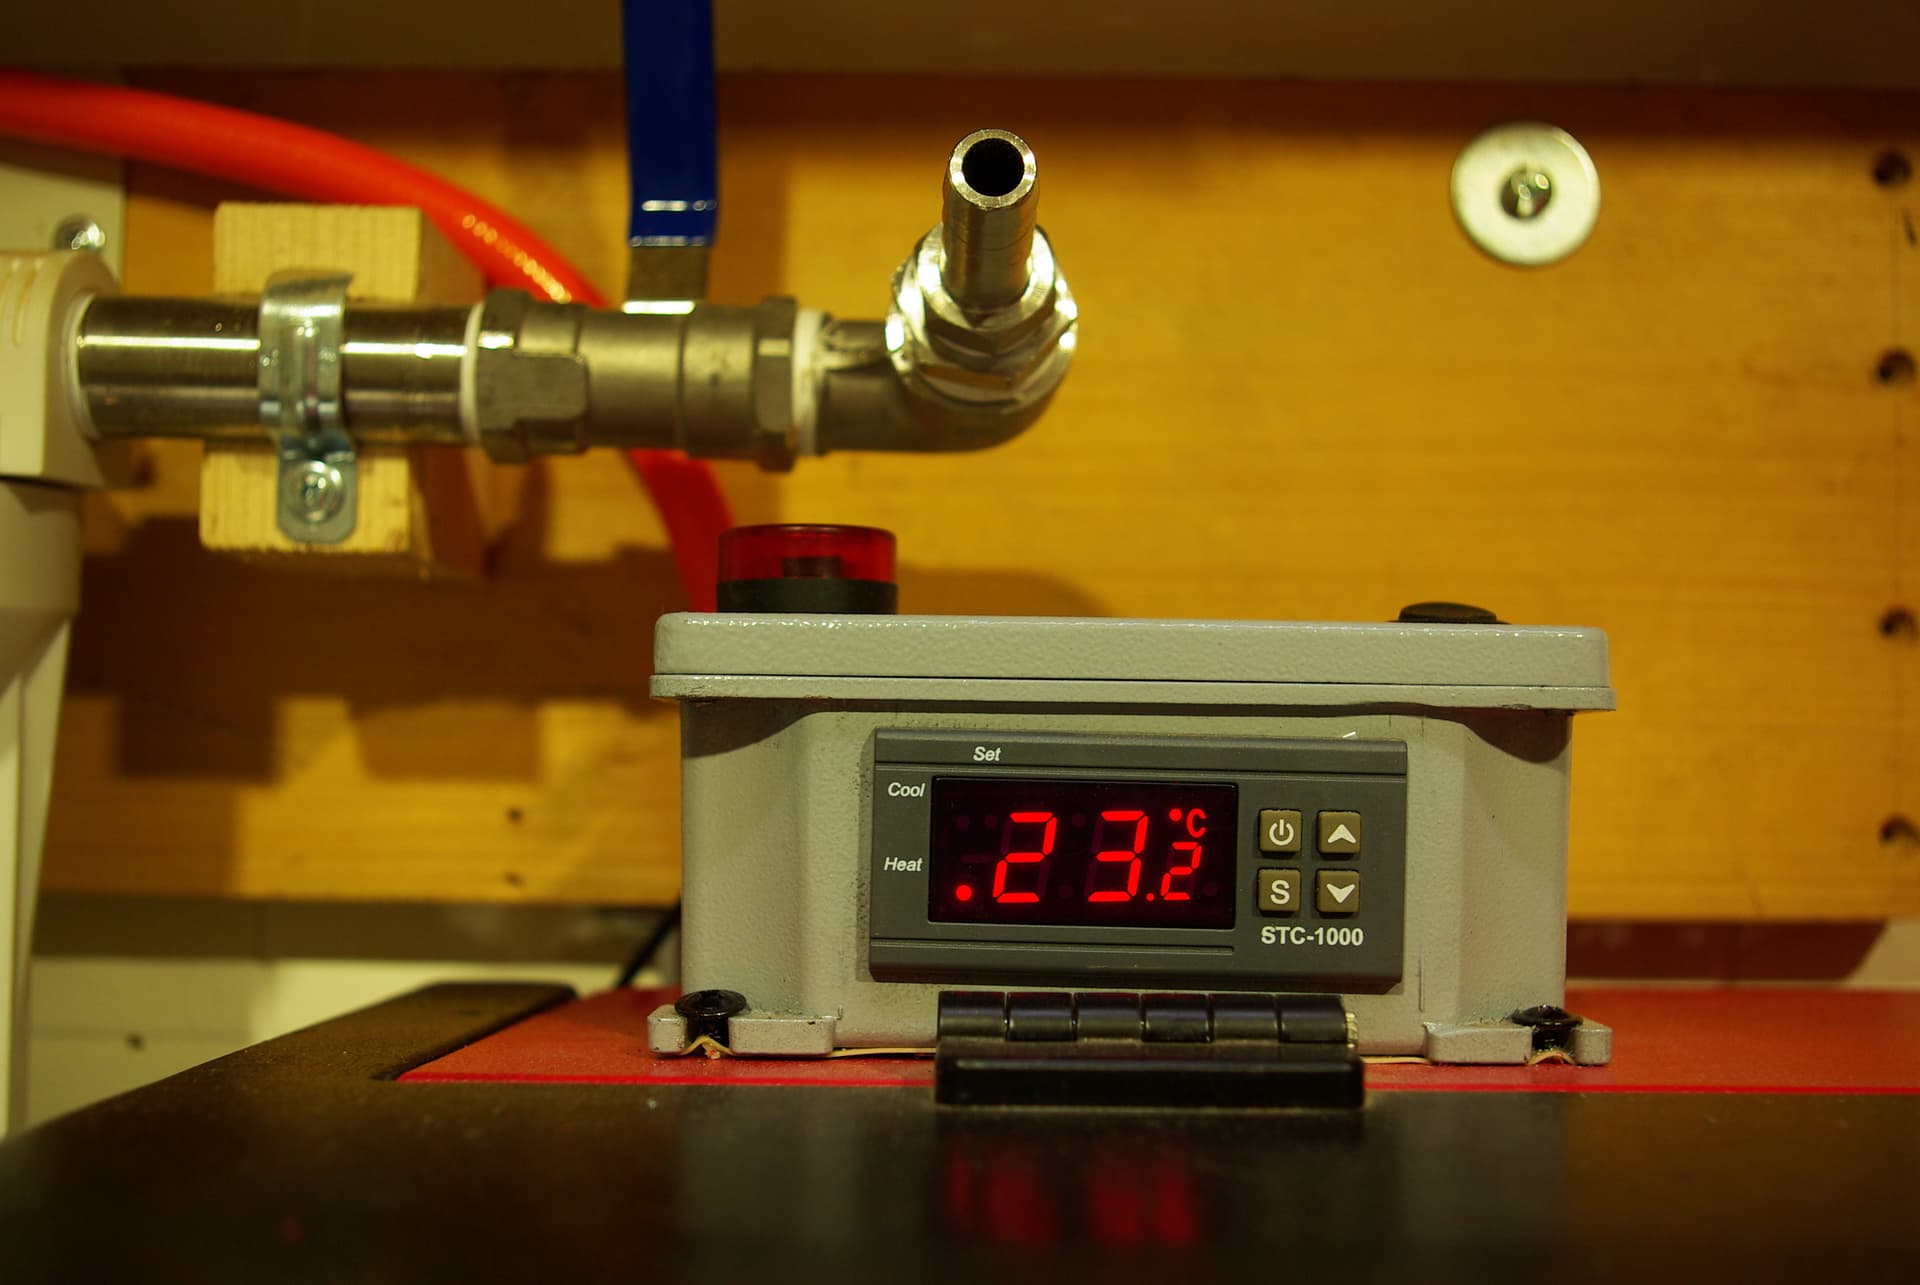
Temperature sensor is directly after the tube in the top of the little tank, so the 21-23C (72-74F you see is right out of the laser. This reading was during a 1hr run at 40% and 30-IPM cutting 1/4" birch ply. The 700 piece sheet of letters is my hot run, and it barely makes 32C (89F) during the summer. The 23C was back down to 18C within 10min of stopping. I’m pretty happy with this thing once again.
YMMV.
Stainless stuff up top was a filtered water setup for the brewing days.
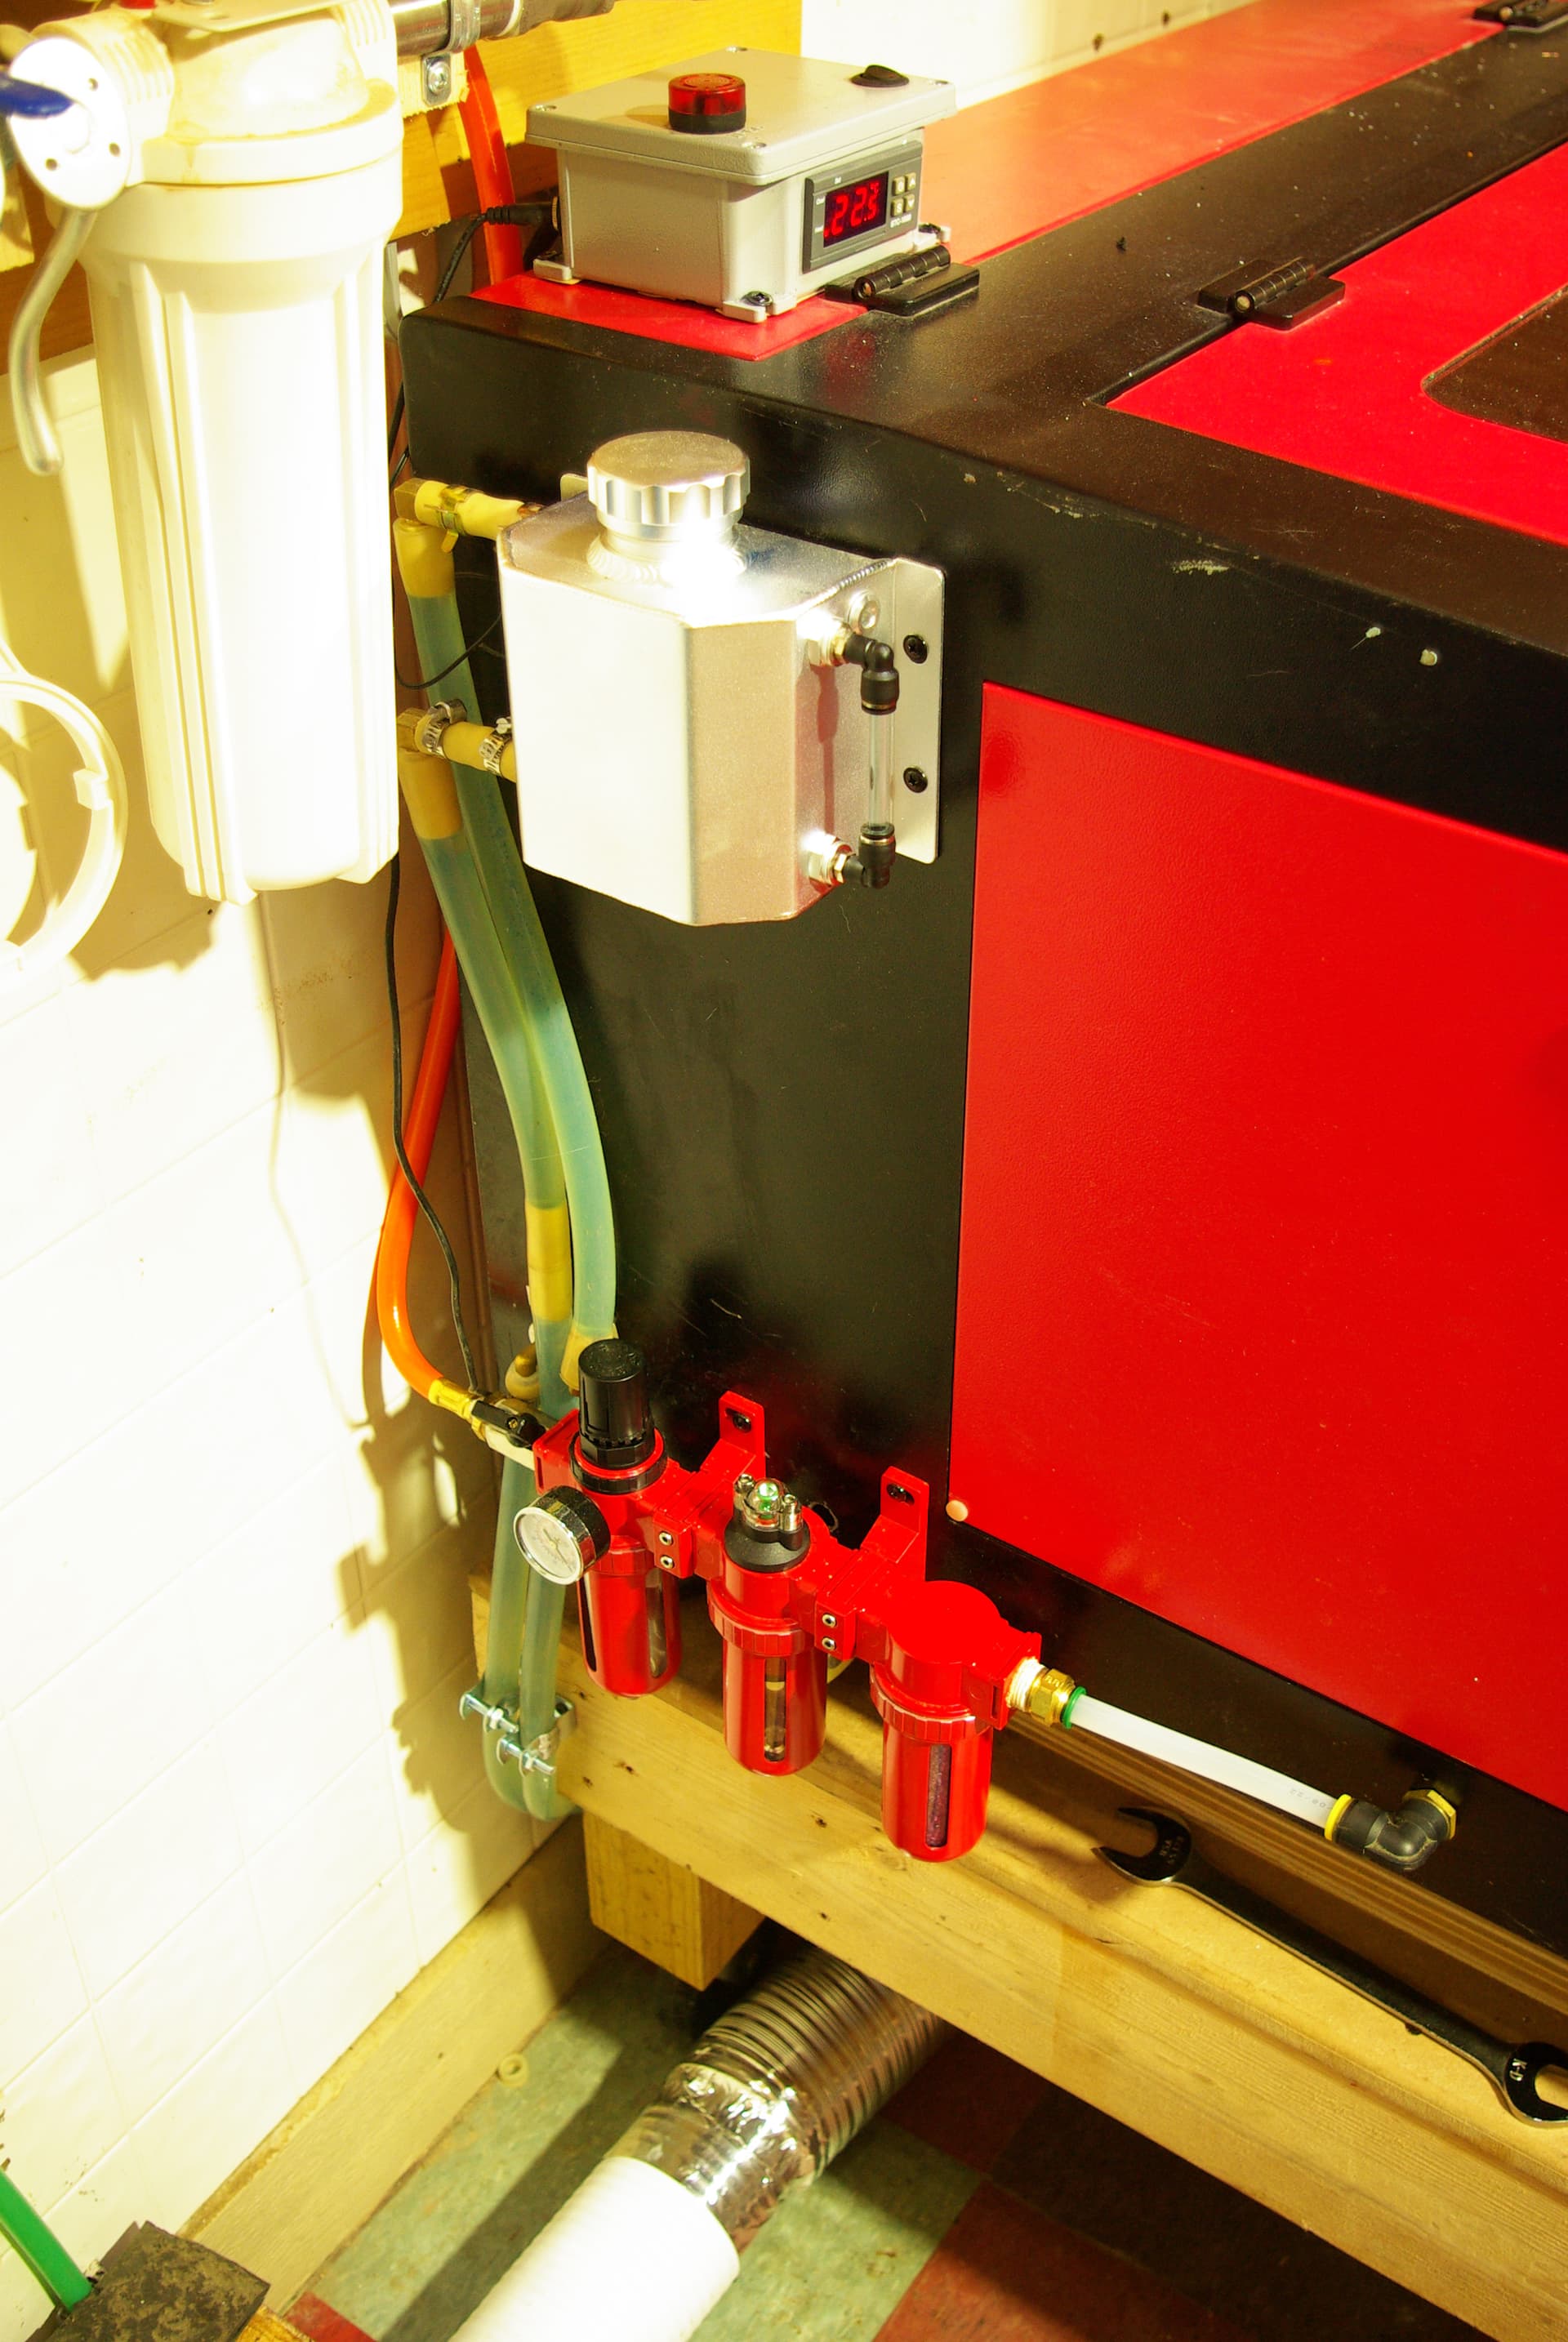
Ignore the red air filtration setup. It works, it was free to test, so I don’t argue with it being a wart on the side.


Ignore the 4" duct. It’s the exhaust for the fumes. Just the car AC radiator and some silicone tubing. Power supply is set directly on top of the radiator, right next to the fan.
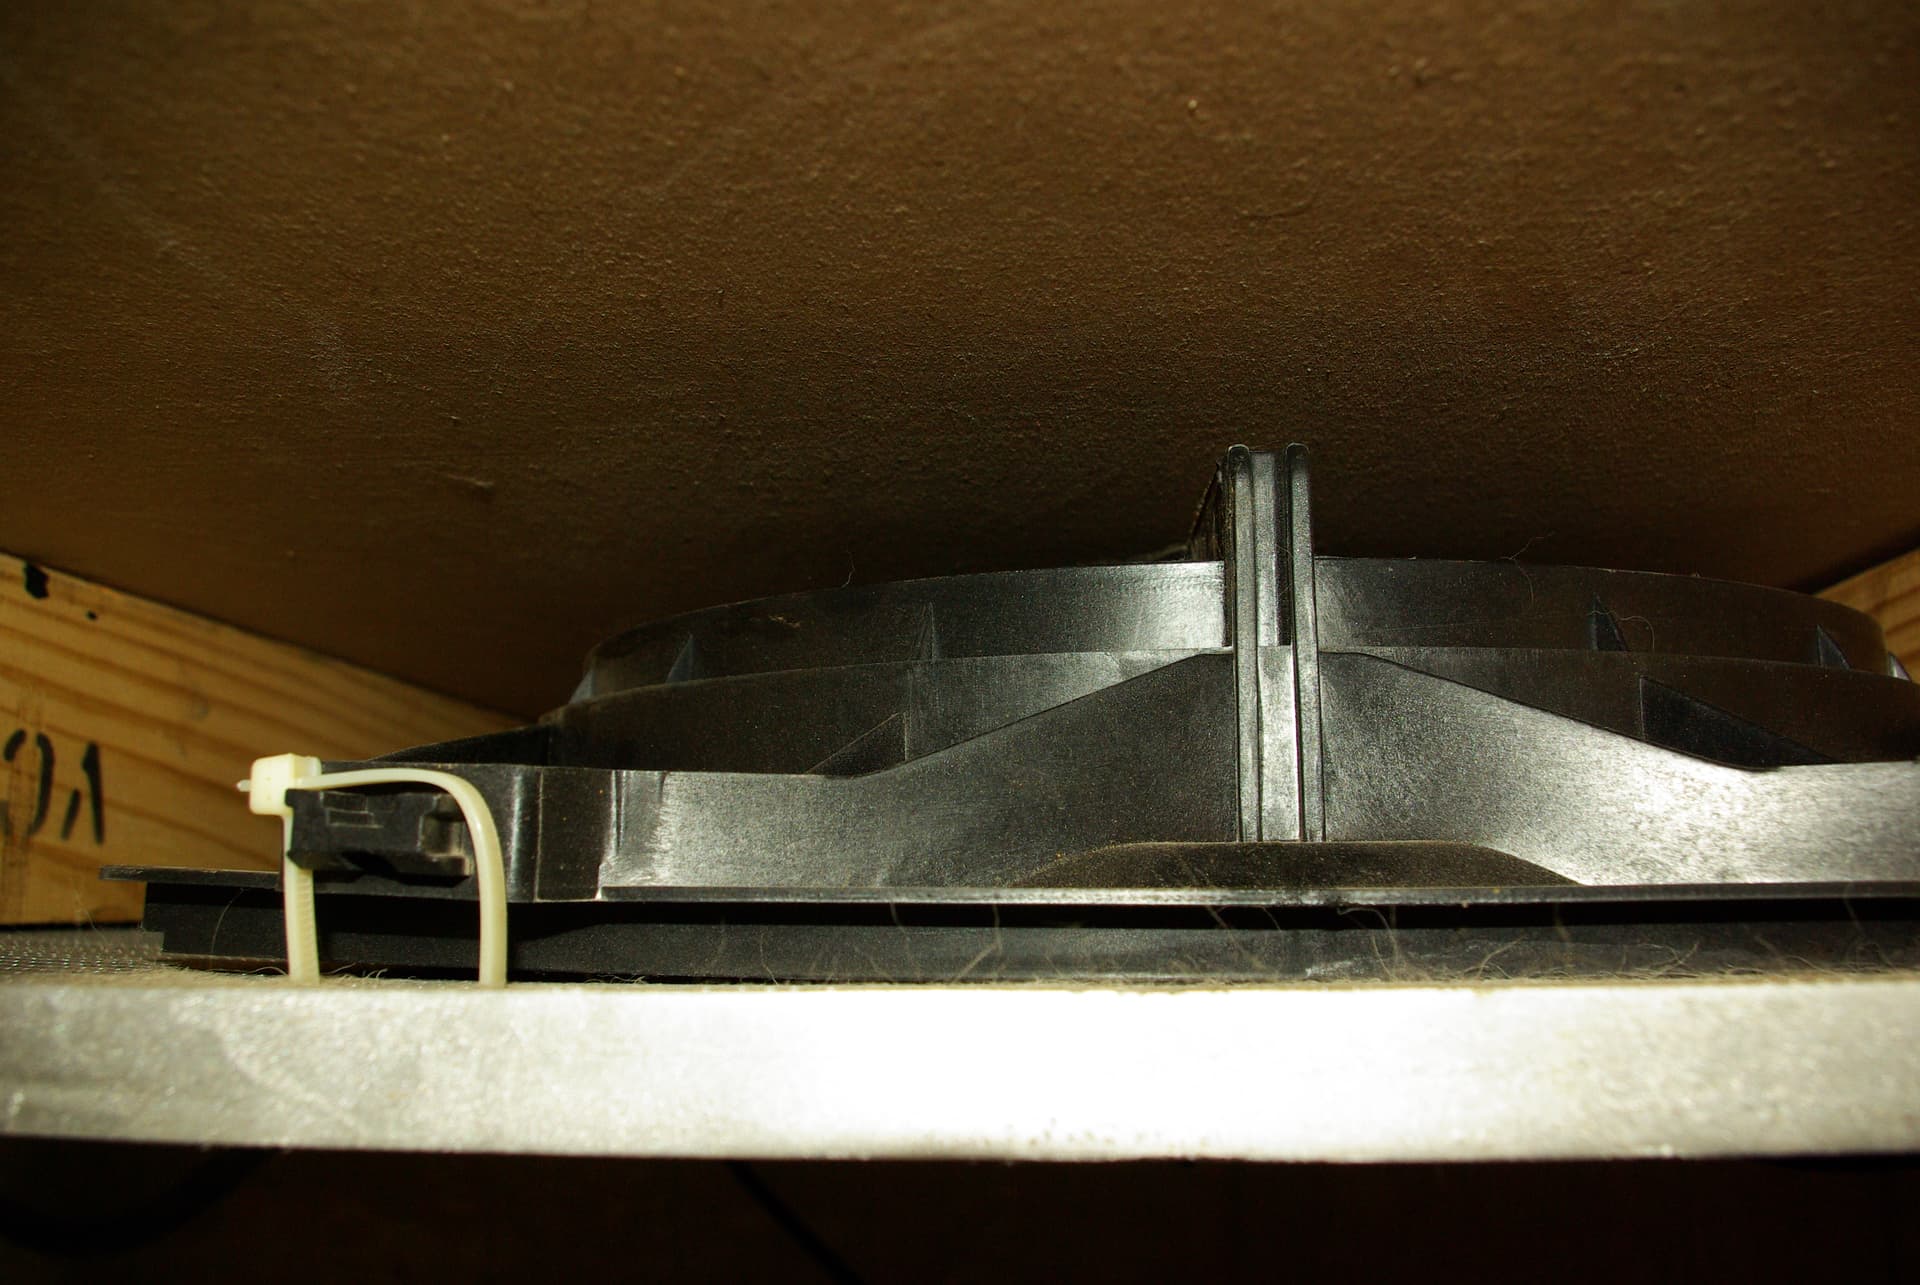
Amazon.com: High-Power SMPS 110V/220V AC to 12V DC Converter - 50A 600W Power Supply - Adjustable Switch Transformer for LED Strip, LCD Monitor CCTV, Radio/Car Stereos, 3D Printer - includes 2 Clamp Wires : Electronics power supply, recycled automobile AC radiator and fan.
And lastly, what we’re cutting to get the temp reading.