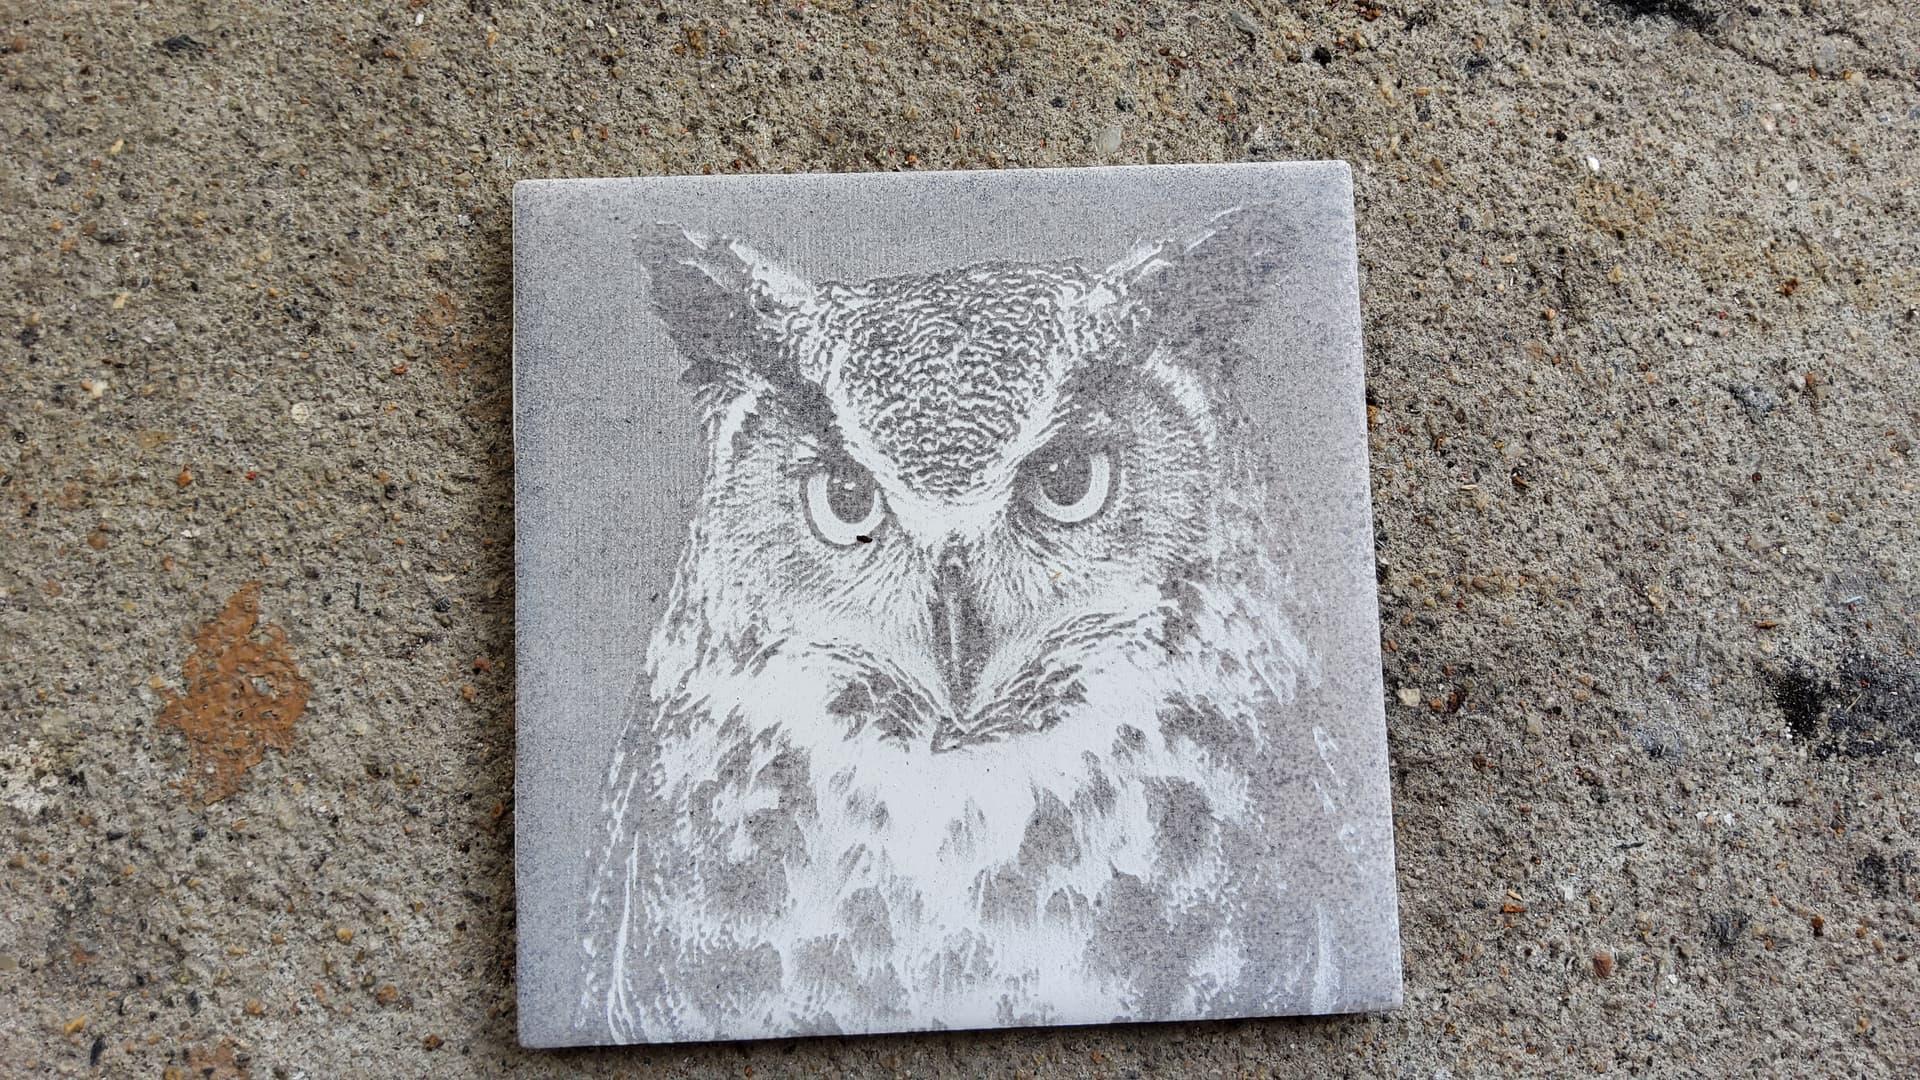
I am slowly getting there. This is Krylon ‘hammered gray’ and top coated with krylon satin black. 4.25"x4.25" white tile.
Sculpfun s10 10 watt
1300mm/m @13% power
45° angle
302 dpi
1hr 16mins

3 Likes
Oh sorry, it was using Jarvis to keep time down. Next time I will do grayscale. All image processing was done in lightburn.
1 Like
That came out really nice, I never thought about the hammer texturing paints.
Thanks for sharing.
Beautifully done. The detail is exceptional!
Thanks guys. It’s really hit or miss for me. I tried doing a NWT of another gorilla and it came out totally burnt. 2hrs down the drain. It might be the paint itself, I used an acrylic primer this time, it might be the thickness, not sure why the same settings always come out different for me.
My mother passed last week. She loved owls, so that was a test to see if I could get a nice looking picture so I can make an owl one for her grave site. I’m headed to the basement now to do a few more attempts. I’m just not that good at NWT, so I guess I might just have to seal a painted tile a few dozen times.
I appreciate the positive feedback.
1 Like
So, prob not exactly the place for all this, but I’d like to give people an idea of how to enhance and change the properties of an image for burning/engraving. It was really hard for me to get at first…still is to be honest, and of course it depends on material being engraved, but it’s pretty much universal to over exaggerate the image.

And I still was off a bit. When in doubt, over enhance.
This was a test done NWT with very old H20 Krylon primer I found in garage The price was $2.50.
Same 10 watt laser
1300 mm/min @ 45% power
0 scan angle
310 DPI
Jarvis
1 hr 52 min
I still need to adjust for a 6x8 tile
1 Like