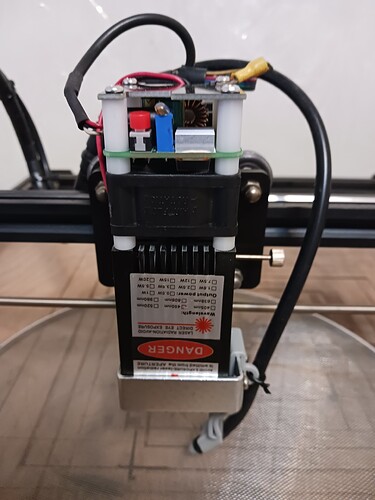
Hello everyone ! Well I finally got my other duties taken care of so now I’m back. Have not even fired up
a laser in a month now. But I have been waiting for my new air assist and my new Zeus 15 W. Opt output
laser module to come in. I had some issues with the laser, I could not get it to fire at all. This module is
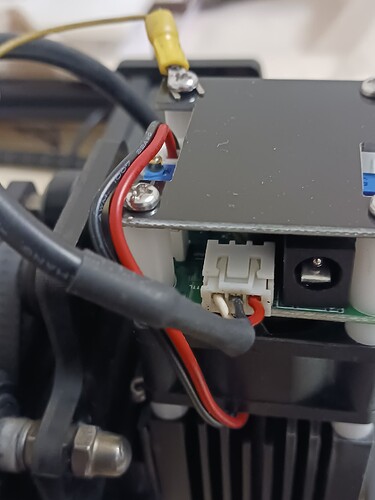
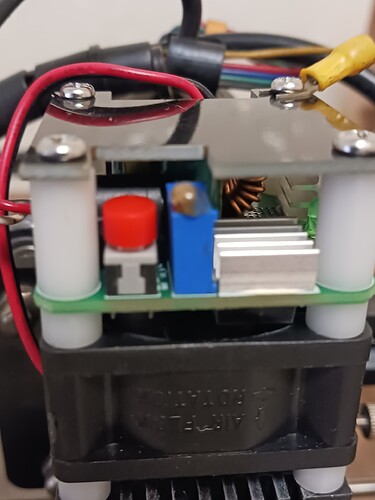
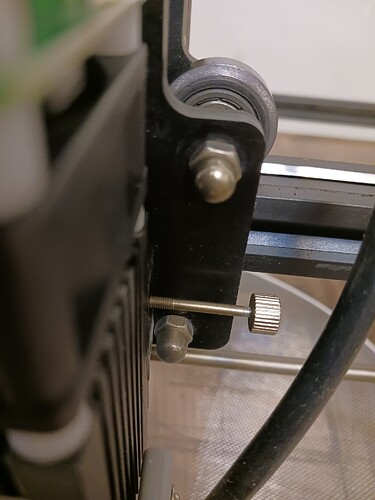
made with it’s own power jack mounted to the laser module itself and it has its own fire button. You can pull this thing straight out of the that brand new shipping package, plug your 12V power straight into the laser, hit the fire button, (while holding it in your hand) and start burning up everything you point it at. HOT DOG, I now own a new “mini” fire breathing dragon !! So I thought, web site said plug and play with any Ortur. What A lie, “I think”! I ended up pulling the new lase apart to get to the controller board, started tracing out the circuits and I found that the laser is not wired for PWM. Instead they have their laser wired as MWP. So I got out my trusty pin remover and swapped pins P & W on the Ortur wiring harness so my ortur is now an Ortur “MWP” setup. It works real good, almost started a fire on my first test. So does this mean that I am the proud owner of the very first "ORZE MPW, 15W. laser rig? I forgot to say that the mounting holes on the Zeus are different from Ortur"s. I ended up drilling two new holes in my Ortur Z axis slide bar.
That"s all folks so Bye for now.
Randy
What is this?
I can’t fathom a laser module that uses anything other than the basic standard input…
Would you mind posting a manufacturers link?
![]()
Hello Jack: The only thing I have is a service link, ( service@zeuslasers.com ). I ordered the thing off ebay and it was shipped out of Cal. The only paper work is one sheet with instructions that don’t tell you anything. I’ll take some pics for you asap
Randy
Is this the animal?
![]()
I think it is, I found only the module itself on e-bay. Tax & shipping I gave $165 usd for it
The interface
Control interface: 2.54 - 3Pin port (12V/GND/PWM) (TTL / PWM control power)
Should be ok electrically…
![]()
I think there may be some confusion here. P, W, and M do not represent pin assignments on the board. PWM is an acronym that stands for Pulse Width Modulation and describes the control signal used to indicate the intended power level of the laser.
For 3-wire solutions the pins on the laser module are typically V, G, S (or PWM/TTL). V is for positive voltage that’s used to power the laser itself, G if for ground, and S is the PWM signal used to indicate desired power level. PWM typically uses TTL 5V but many modules can take a wide range of signal voltages from 3.3 V up to 24V.
yep, that’s the one – I also sat down a few ago read EVERY line in the instructions. Down toward the bottom it did say that you might have to swap the wires.
Randy
I just call them - power, ground. and signal – red, bk. & yellow I swapped red and yellow.
This is what was confusing… what is WMP?
![]()
Because he had swapped red and yellow wire positions in a Red-Black-Yellow connector, he’s saying PWM->MWP.
yep - that’s what you have to do to get a ORZE MWP laser. It’s one of those one of a kind things. LOL
Hello Berainlb & Jack;
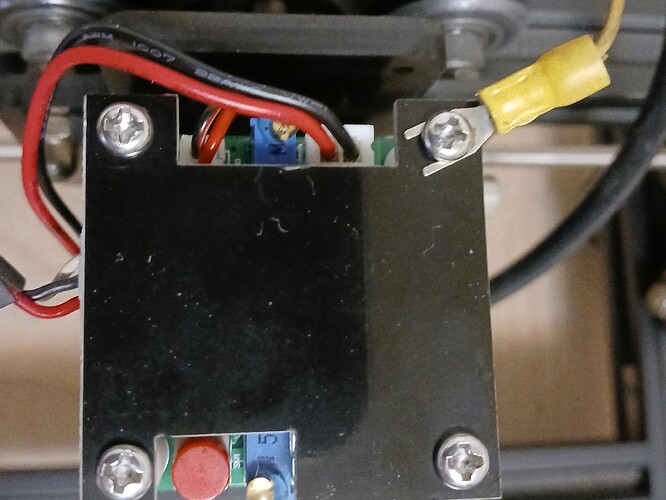
Here are 3 Pics showing : (1) power and signal swapped over & 12V. power jack, (2) shows the laser fire button and (3) shows the fan and laser plug.
The problem now is that this thing has adjustable focus lens, which I don’t like. Now I have to design my own air assist housing to mount, (some how). I have an idea to take a piece of aluminum rod that I have and throw that into the Leigh, cut it down to cone shape, drill 3 holes with one large enough and deep enough to fit over the screw type focusing lens, then I’ll drill one 2mm hole through down the center of the first hole. Then drill a hole off the side for air to attach to. Somewhere I have some small aluminum tubing for the air. A new problem is that I’ll need to remove the air assist every time I need to refocus. (big pain you know where). So I have an idea go buy a piece of aluminum channel bar with 40mm inside width. I’ll next cut a piece off the channel bar about 30mm wide and drill hole in it to weld the air nozzle to.
Next I’ll drill and thread a hole in one of the channel bar risers for a finger tightening set screw to hold the rig up in place. ( I think - LOL )
air assist.lbrn2 (10.3 KB)
OK - enough for now - time to start playing with my laser again, see what else I almost set on fire, LOL.
Randy
Consider setting the focus once to a specific focal distance, then lock the focus ring in place. Then instead of trying to come up with a method of trying to change focus come up with a method of changing the physical height of the laser module to achieve focus. Essentially this converts the laser to a fixed focus type.
Alternatively you could use an height adjustable bed to change focal distance.
Py:
I have one mounted to Ortur & mounted the laser to it. That is how I focus it now, the problem is that my height adjuster is - loosen a set screw on the side and adjust it by hand. I have to hold onto the laser with one hand and use the other hand to operate the set screw. now try to raise or lower the laser just 1, 2 or 3 mm. Makes it a pain in the “hands” (LOL). I have been looking at Z drive adjusters, nice but a little pricey.
My ortur 4.5 w. came with fixed lens and a slide adapter. I have the Zeus laser mounted to that, but this thing is so heavy you have to fight with it for 5 min. to get good focus. So right now I use the slide to get it close then twist the focus lens a little. Until I get either a manual twist or Z drive adjuster I’ll just have to make due.
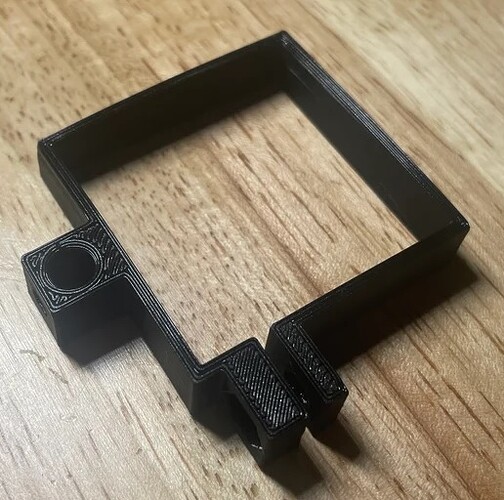
If I could offer a couple suggestions. I’ve worked with a gentleman by the name of Phil Ellerbrock who 3D prints parts for Ortur lasers. I’ve gotten risers, air assist adapters, legs and the like. He also has a Z height adjuster. As PY mentioned you can get the focus close twisting the lens and then adjust the height up and down using something like Phil’s height adjuster. That way you could clamp an air nozzle to your lens and use some silicone tubing to connect it to your pump. Phil’s site is Philament 'n Laser Designs (https://designsbypnl.myshopify.com/) and if you contact him by email he would be more than happy to adjust his designs to fit unique hole patterns (if that was necessary). I don’t know if you have a 3D printer (or access to one) but you could print something like this (it’s for a 40X40 laser module) to hold the silicone tubing and then bend some copper or brass tubing into an elbow shape aimed at your focal point. Just a thought.
Hello Mr. BB321:
Thank you for the info. I have been looking at P&L Designs, Might even contact them although I like the idea of making my own parts when I can. Seeing how I have all the leighs and mills to do the work with. It’s more fun when I go over to play in the shop also. If you look at my last post you can see that my air blows at an angle. I really dislike that. I burn a lot of wood and ash gets blown all over the place. When my laser is cutting left to right, the air just blows ash back into what I just cut. That’s no good. When the laser is burning right to left, yes it blows MOST of the ash back out of the way but it also blows it around so much that I can’t see just how well the burn is working at all. With air blowing straight down, it blows all the ash out and away from the work area all way the around my burn. It may only blow the ash away from my work area for distance of 3 to 5 inches, but that’s enough to see what the burn is looking like. I burned my first wood test last night with the new laser, I burned a 1936 Studebaker Dictator. (6" X 9"). It turn out looking really good, but because of ash build up, I couldn’t see just how well the burn was going. After completion I carried it out to the shop, hit with 120 lbs. of air and it turn out really nice. I made my burn at 1200mm/m and 35% power, (15w opt. o.p.) LOL, to much power for that slow speed. But it did make a nice 3-D burn out of it. Well I have rambled on enough now, talk with you later.
Randy
This topic was automatically closed 30 days after the last reply. New replies are no longer allowed.
