Hi,
totally newbie. When I start up my machine homes into the top right corner, but it thinks that my work is 10000 mm in lenth (x axis) instead of 700 - so it crashes into the side of the machine. I have tried looking at how to change this measurement to no avail. In lightburn it is all set up to travel max of 700 but it is still starting up with 10000 as the measurement for both x and y. any help will be gratefully appreciate. Thanks Helen
I think the 10000 mm situation is a red herring. The homing process isn’t dependent on knowledge of the working size. It will move in the direction of home until it hits the limit switches, one for each axis. There are different styles of the limit switches but they work functionally in the same way. If the switch is triggered, the head will stop moving in that direction.
If your head is crashing into the frame that means that for some reason the switch isn’t being triggered. Recheck all your connections. Check for disconnected plugs, frays in the wiring, bad connections, etc. All the way from controller to the switches. Try triggering the switches manually to test. You may want to disengage the laser head while you do this or be prepared to stop the machine if the the switch doesn’t work.
It’s also possible that the switch itself is not being engaged. If your machine uses a hall effect sensor as a limit switch there would be no mechanical activation. There’s a magnet that gets within proximity to trigger the switch. Check that whatever contact points that are needed to be mated are actually able to reach the switches.
Separate from that, how are you determining that the working area is set to 10000 mm square?
1 Like
On the screen of the of the controller it says x 10000 and y 10000 - so that is why I am assuming the working area is set to that distance and the laser head is going past the 700 to find the 10000 mark.
What would I be looking for as a switch for the machine.
I can actually take the head - over past the edge of the honey comb and it doesn’t stop.
thanks
I will look into it again. Helen
Ive just been out to the machine, and spoken nicely to it - still doesn’t want to behave at all. I’ve checked all the connections and they all seem secure.
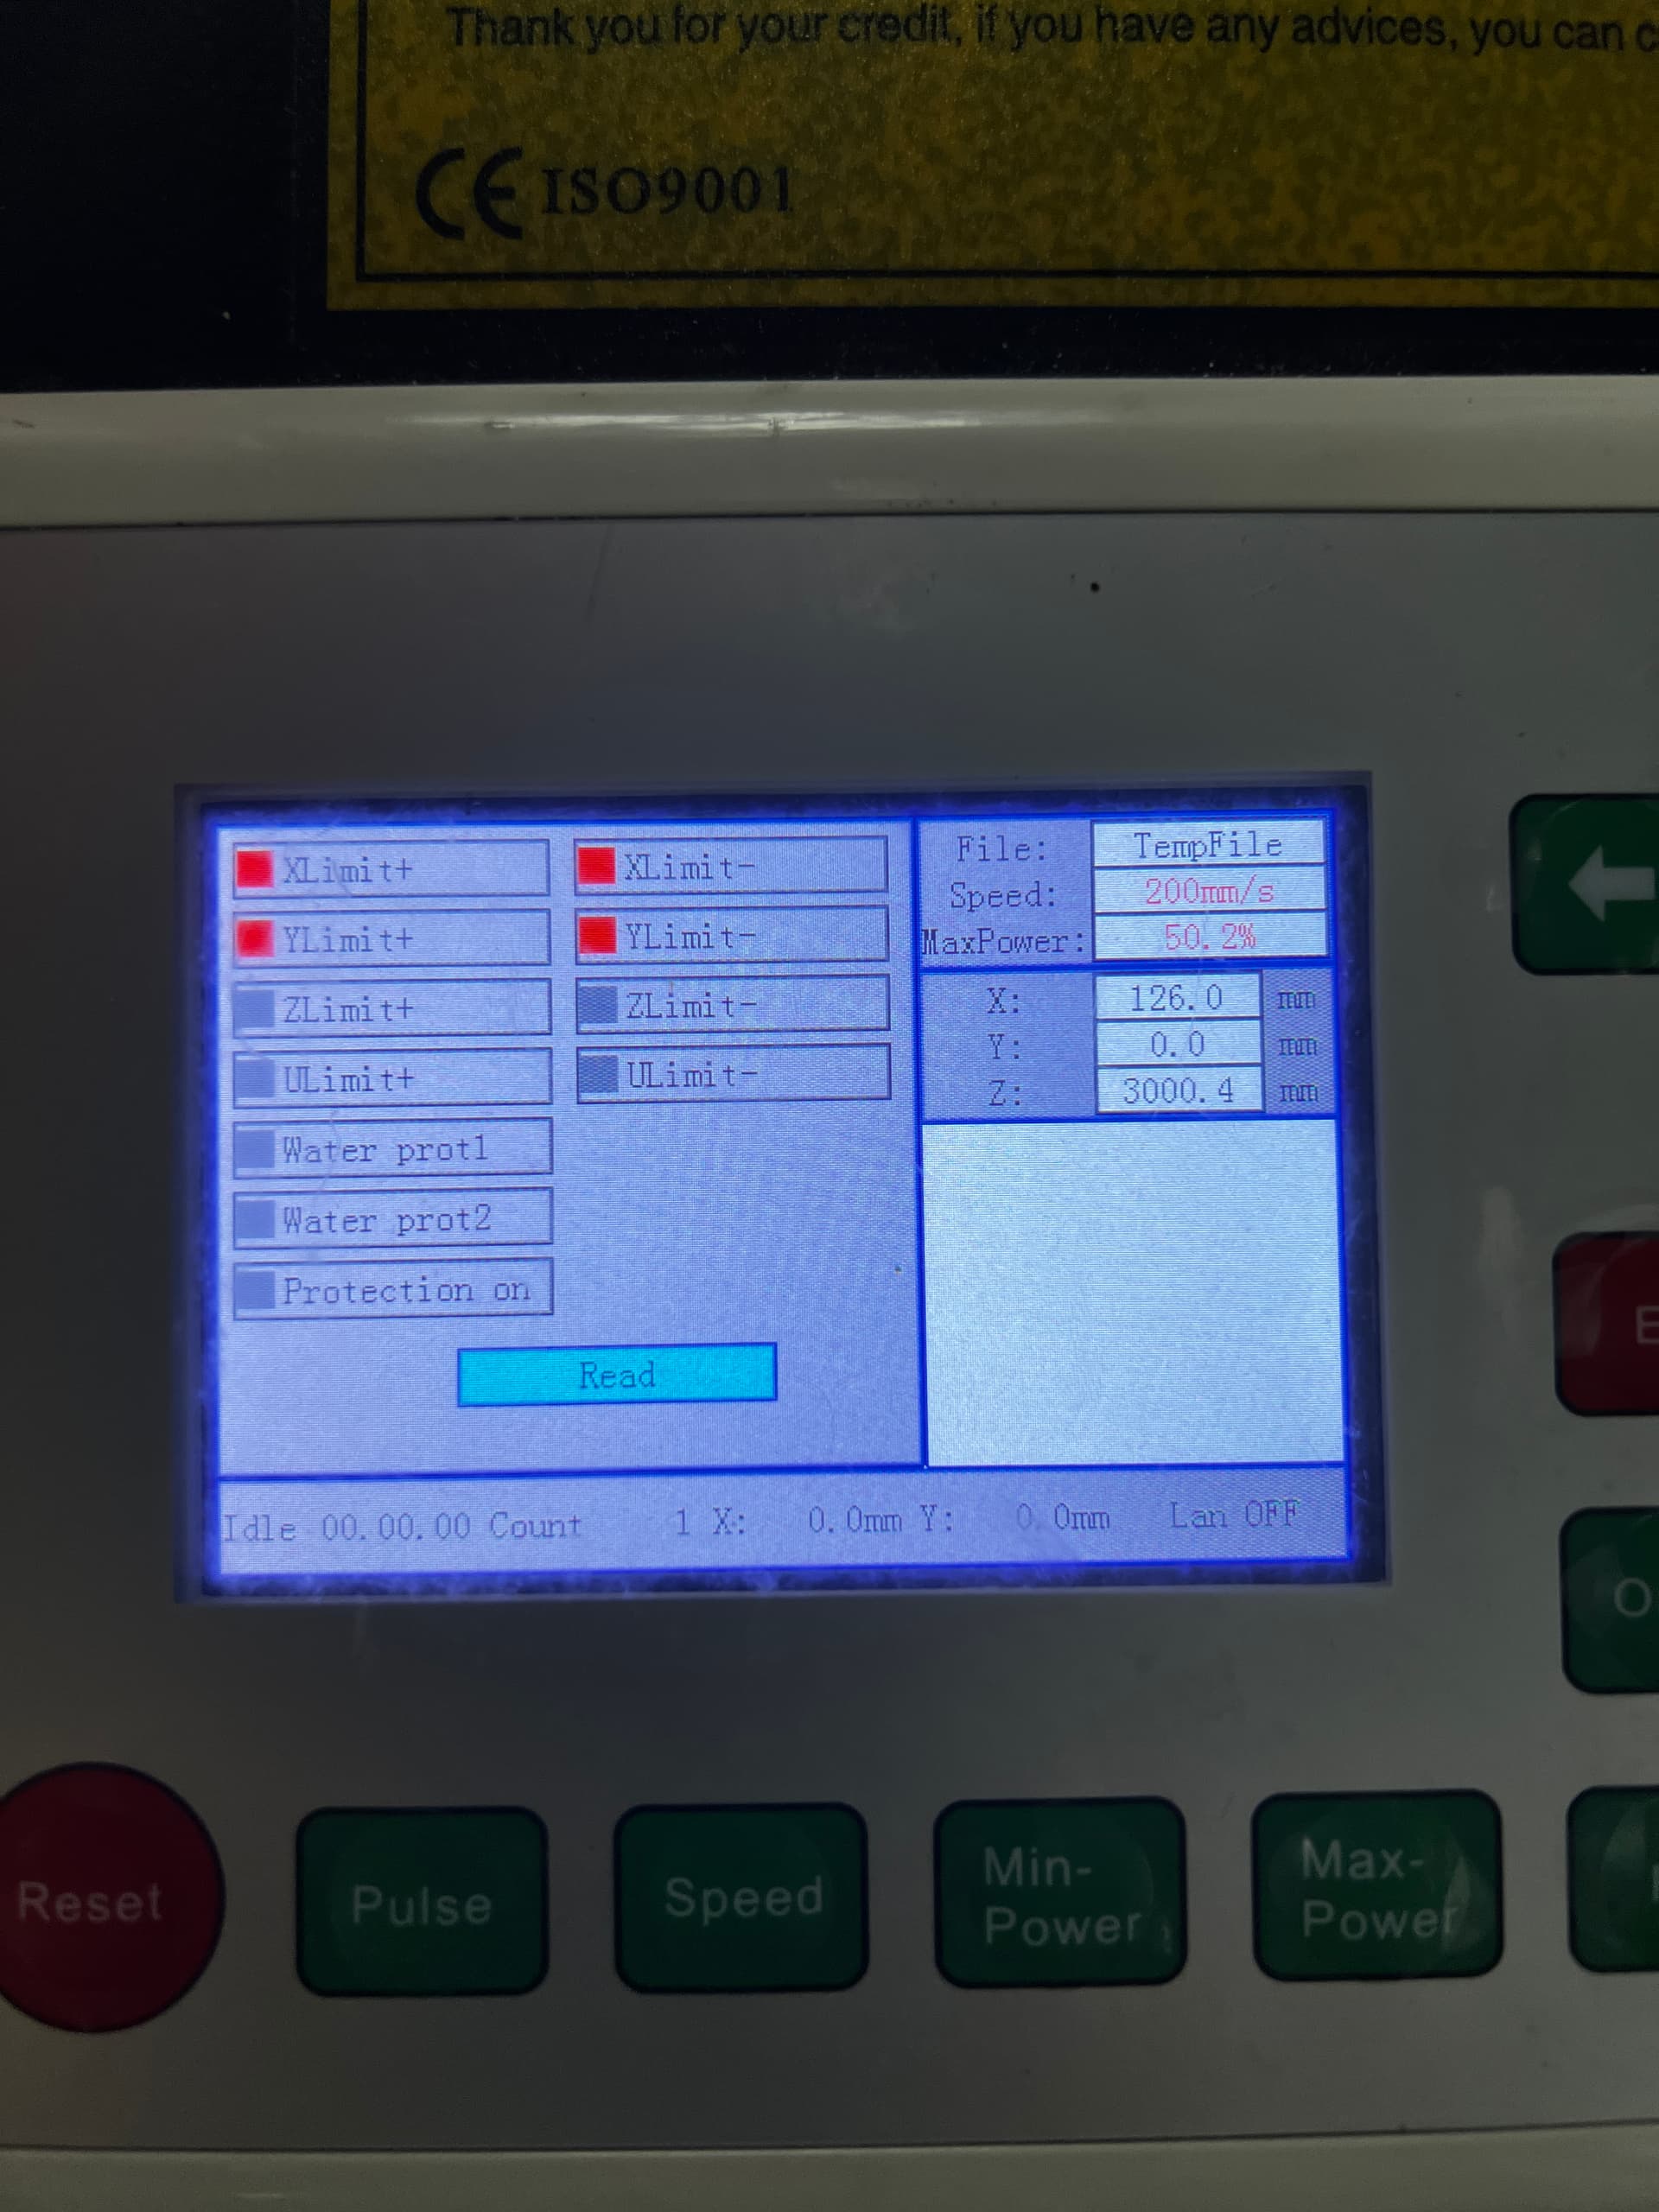
When I go in to the diagnostic area this comes up - but I don’t know what it means?
Can you provide some background on the machine? Is this a brand new setup straight from the factory? Or this was a working laser that’s somehow acting up?
Depending on the type of switch used (eg. mechanical, optical, inductive) it could look a little different. But they’ll be setup so that when the laser head is close to home that something will either come into physical contact or trigger.
Take a look at this youtube video. He has an OMTech but is having the same problem as you. His has optical switches but will give you an idea of possible location for your machine.
Limit Switch Origin Problem with 60W OM Tech Laser - YouTube
Alternatively, you could trace the limit switch wiring from the controller up to the switches themselves.
Its brand new it was working, and then, it just started playing up…
I honestly didn’t touch any settings.
I’ll check out the youtube - thanks
that is exactly what is happening with my machine exactly.
This is almost certainly not a settings issue. Almost certainly a hardware issue where the limit switches are not working.
Do you have the same optical limit switches as the video? Try triggering the switches by passing something over the sensor. If they both stop their respective axes then it’s because for some reason something physically is not in the right position to trigger the switch.
If one or both switches fail to stop the motion then something else going on. If both fail, then likely something more fundamental but it’s possible that they both failed independently. Check the switch itself for damage… check for good connection to wiring. Follow wiring closely all the way to the controller and look for any damage or disconnected connectors.
Report back findings please.
2 Likes
After watching the video, it isn’t homing.
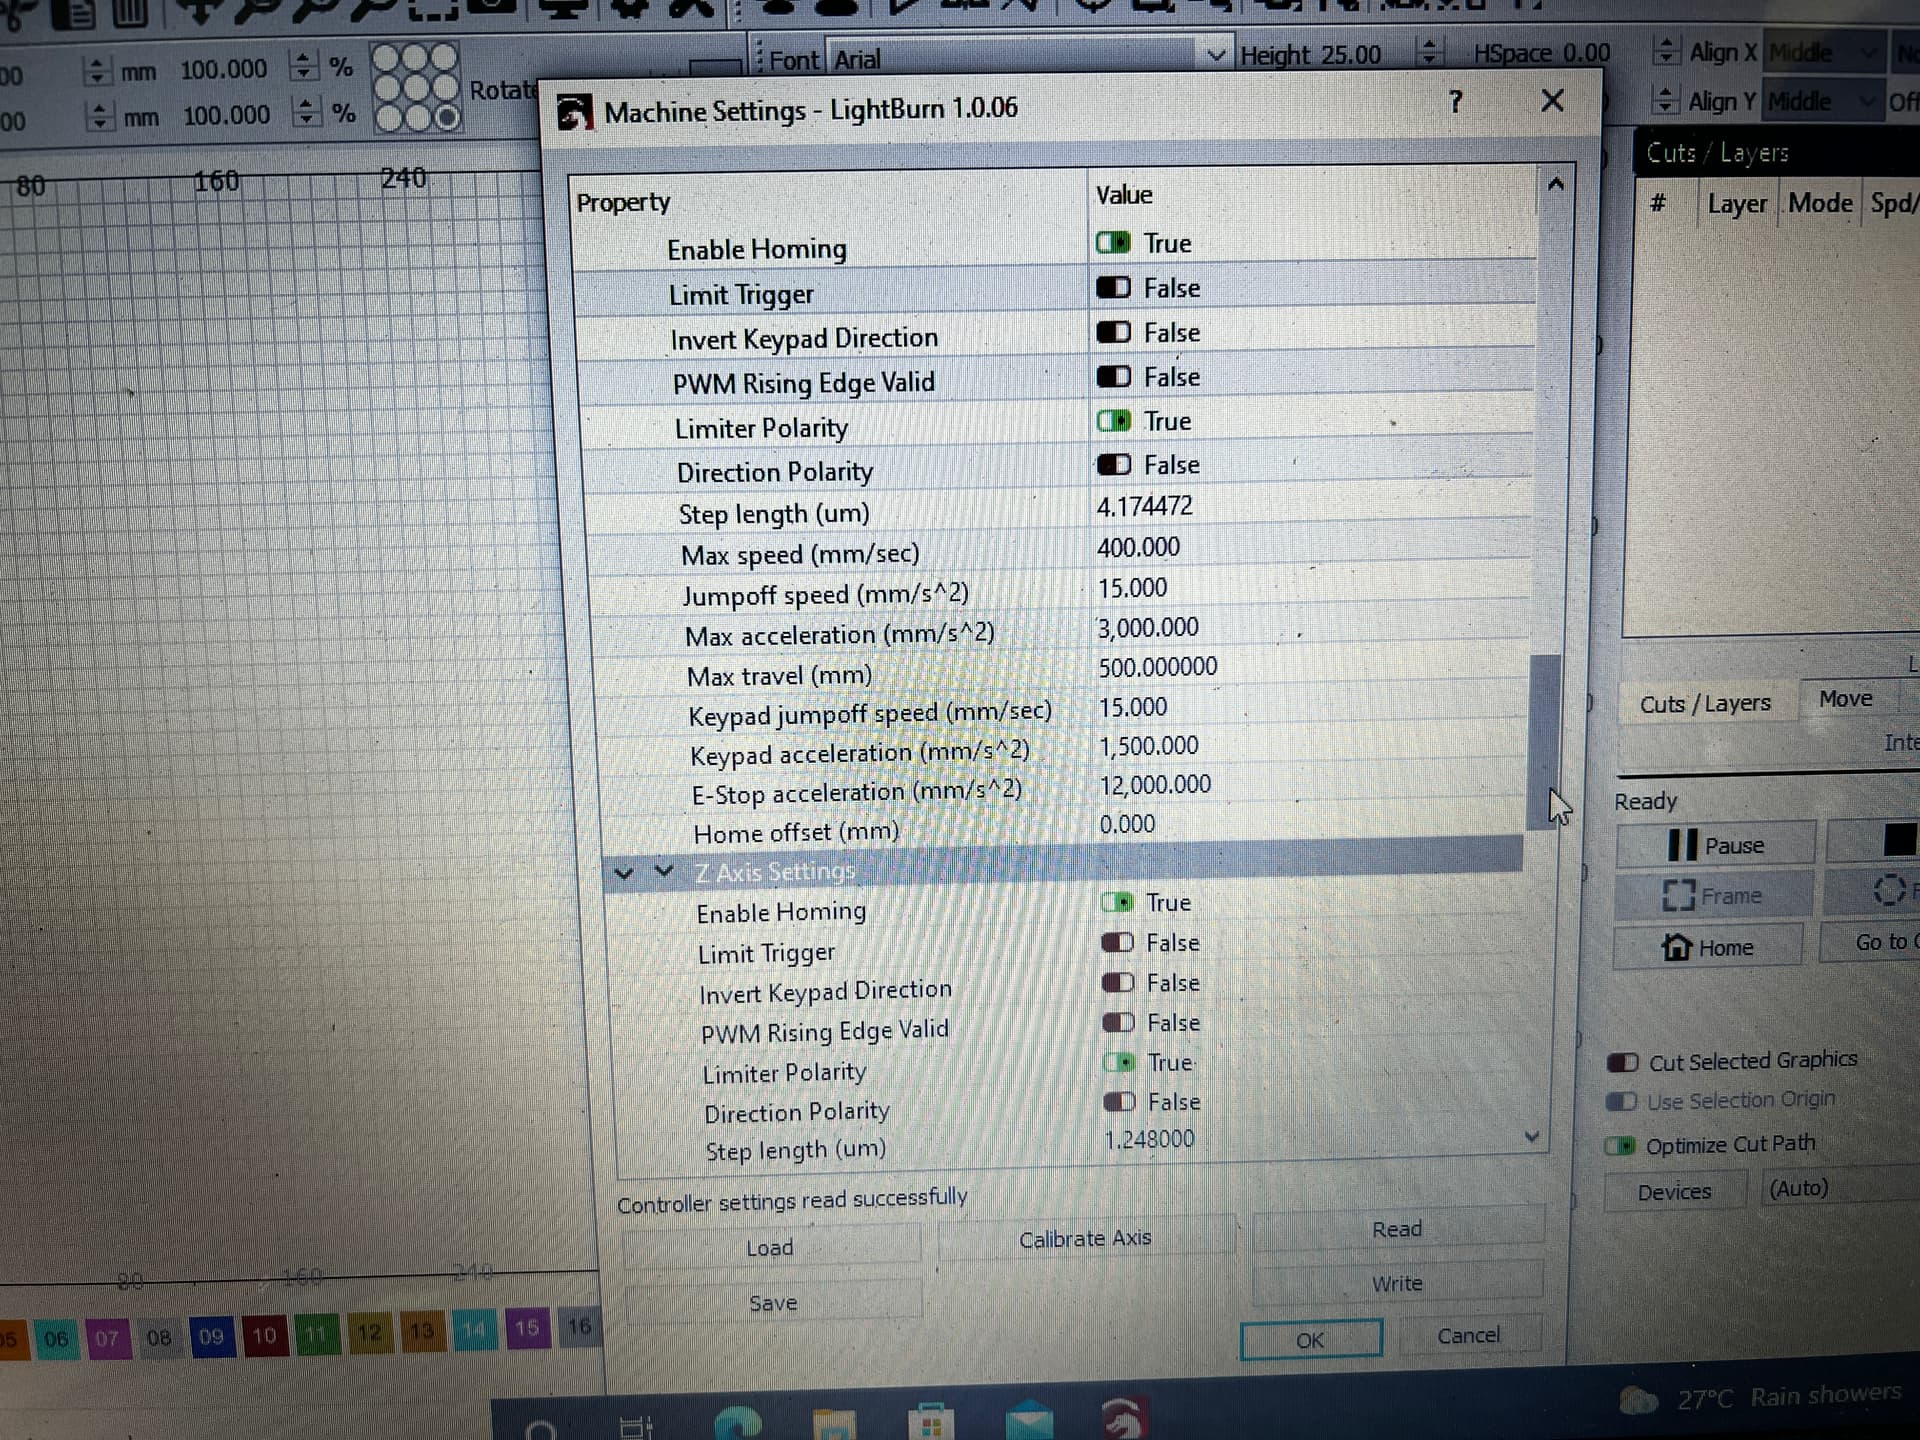
If it fails to home, it will display maximum values for x - y and z which are 10,000 - 10,000 - 3000
How Lightburn configured for machine size makes no difference as these values are taken from the controllers internal setup when a homing cycle completes properly.
You can see if the hardware path to the controller is OK by going to the machines diagnostic screen, the last photo you last posted. It is also NOT showing a 10,000 x 10,000 area…? This must be from the ‘strange’ home you can do from ‘mid table’…?
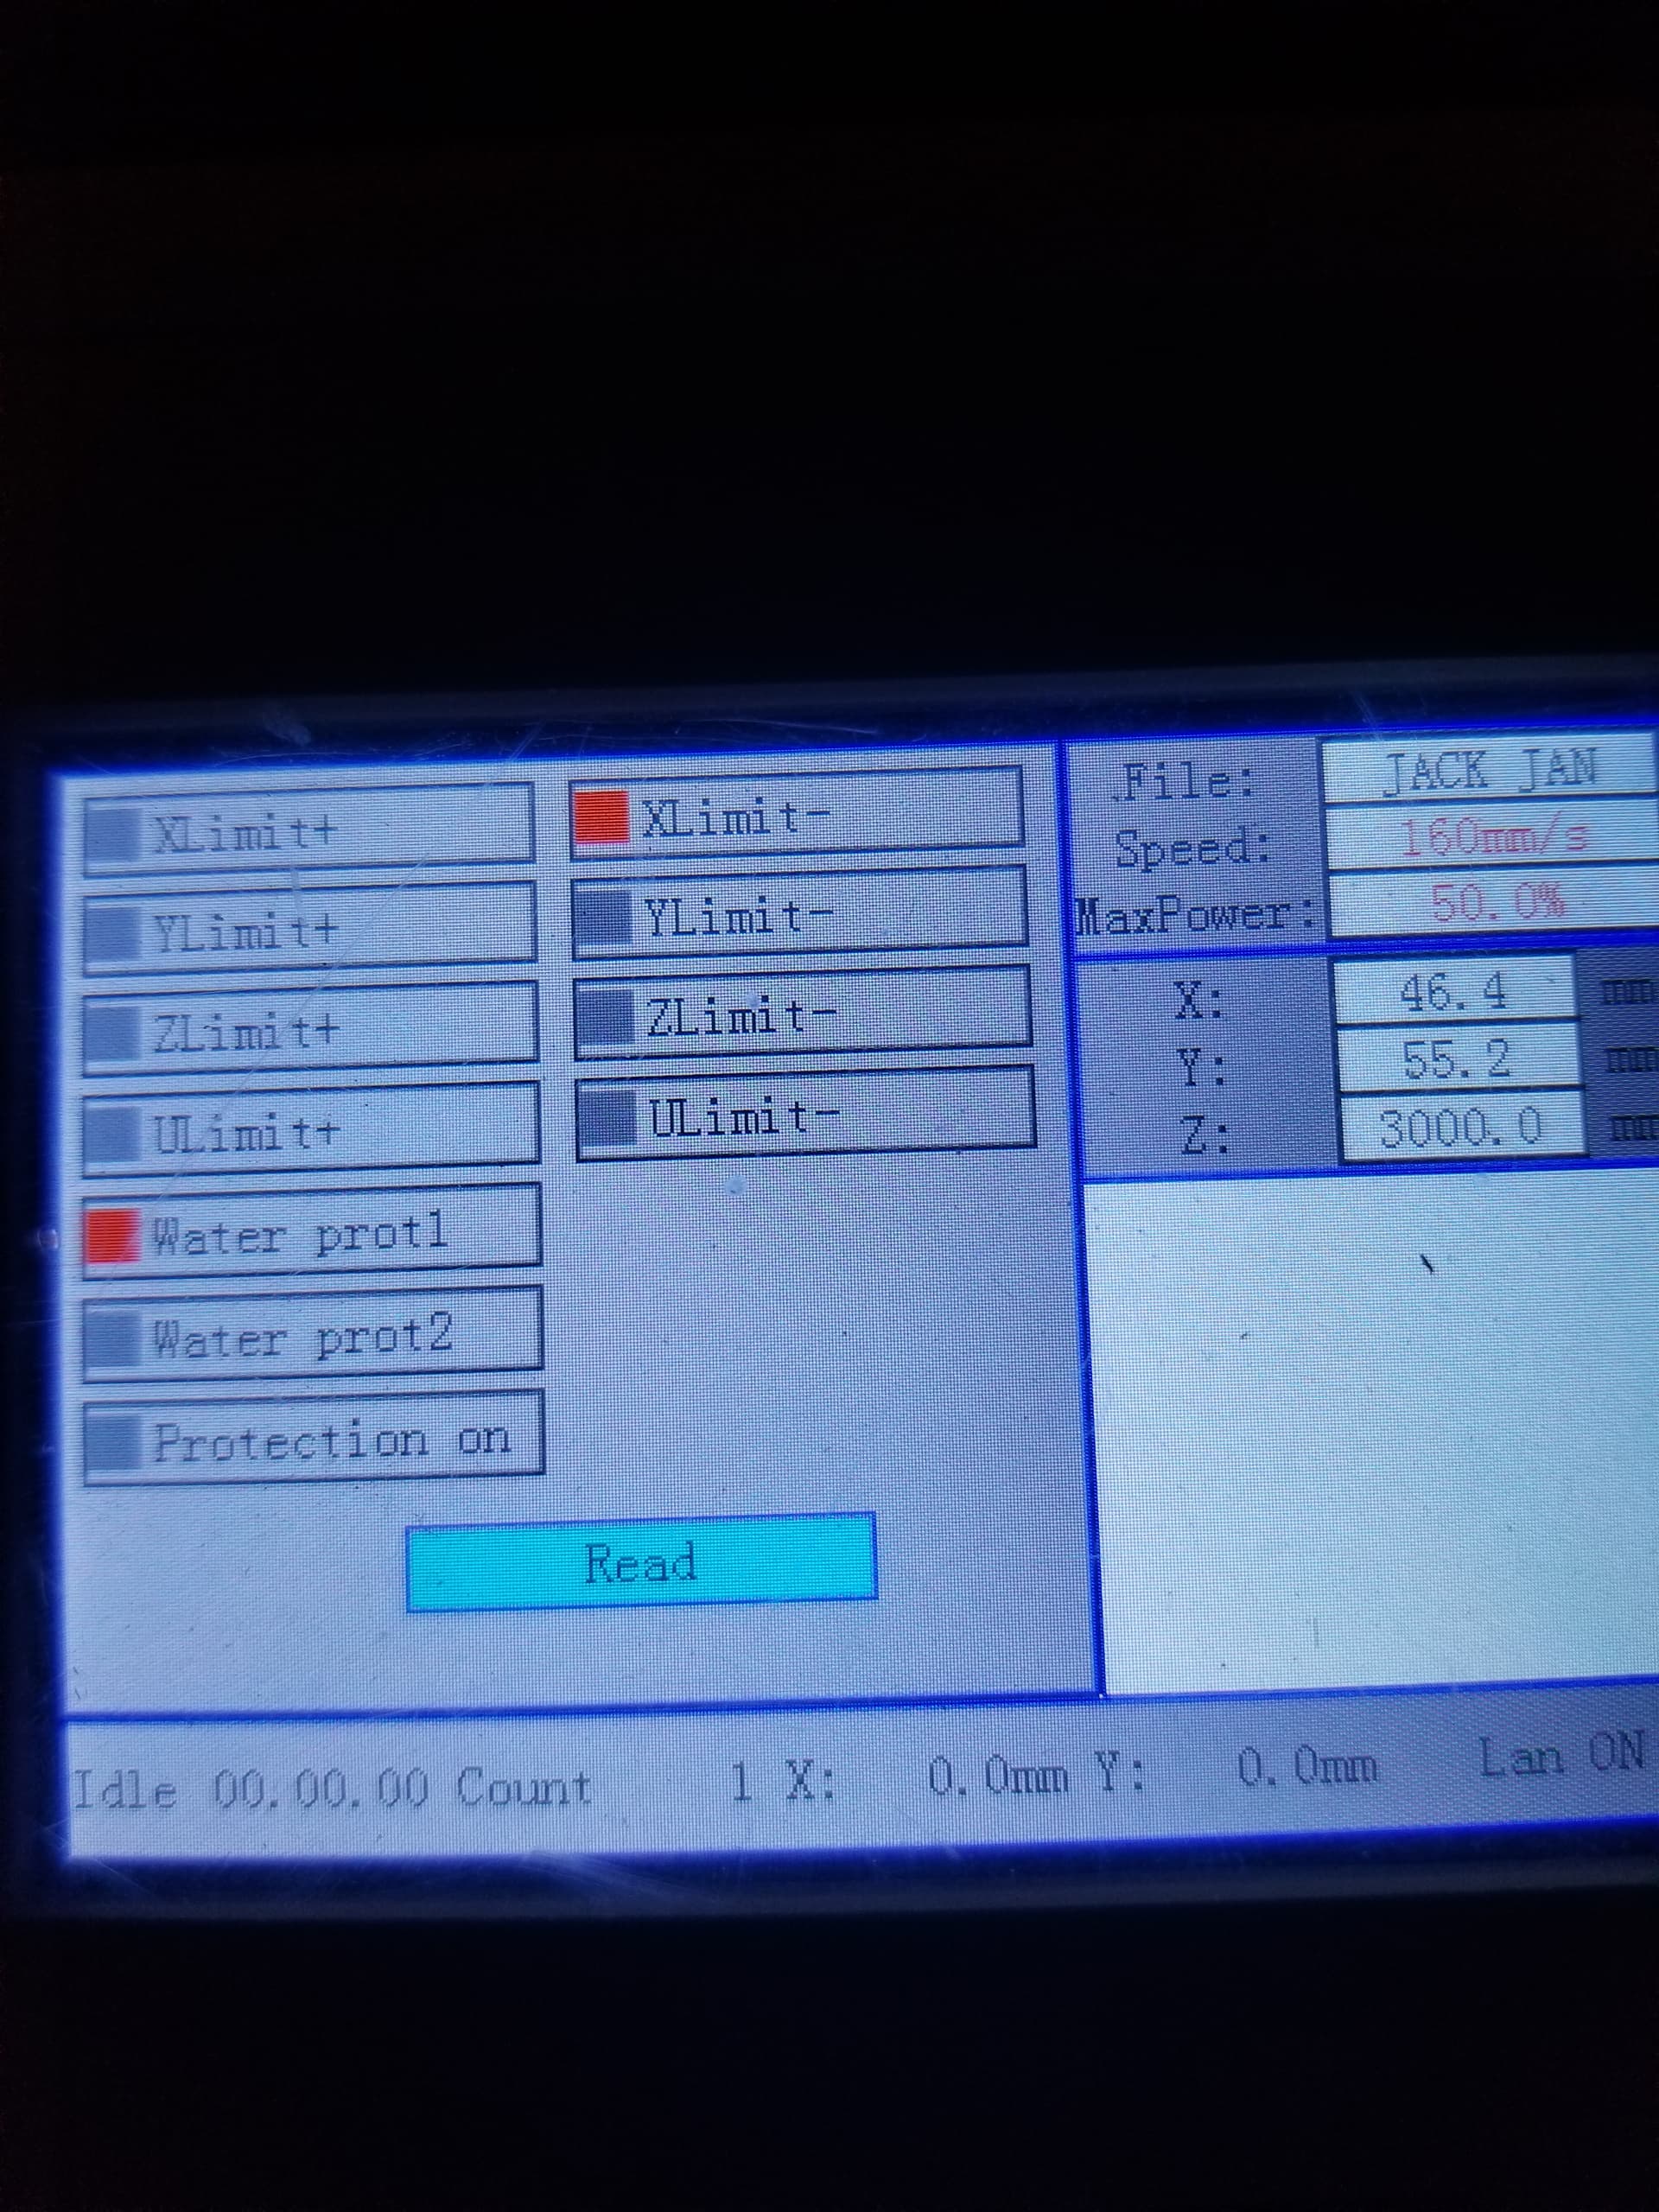
You can manually triggering the limit switch. If you trigger the X limit, the LmtX- identifier will turn red on the diagnostic screen.
Here is my ‘screen’, the door protection is Red as the door is open. Notice there are no other indications showing active (‘red’).
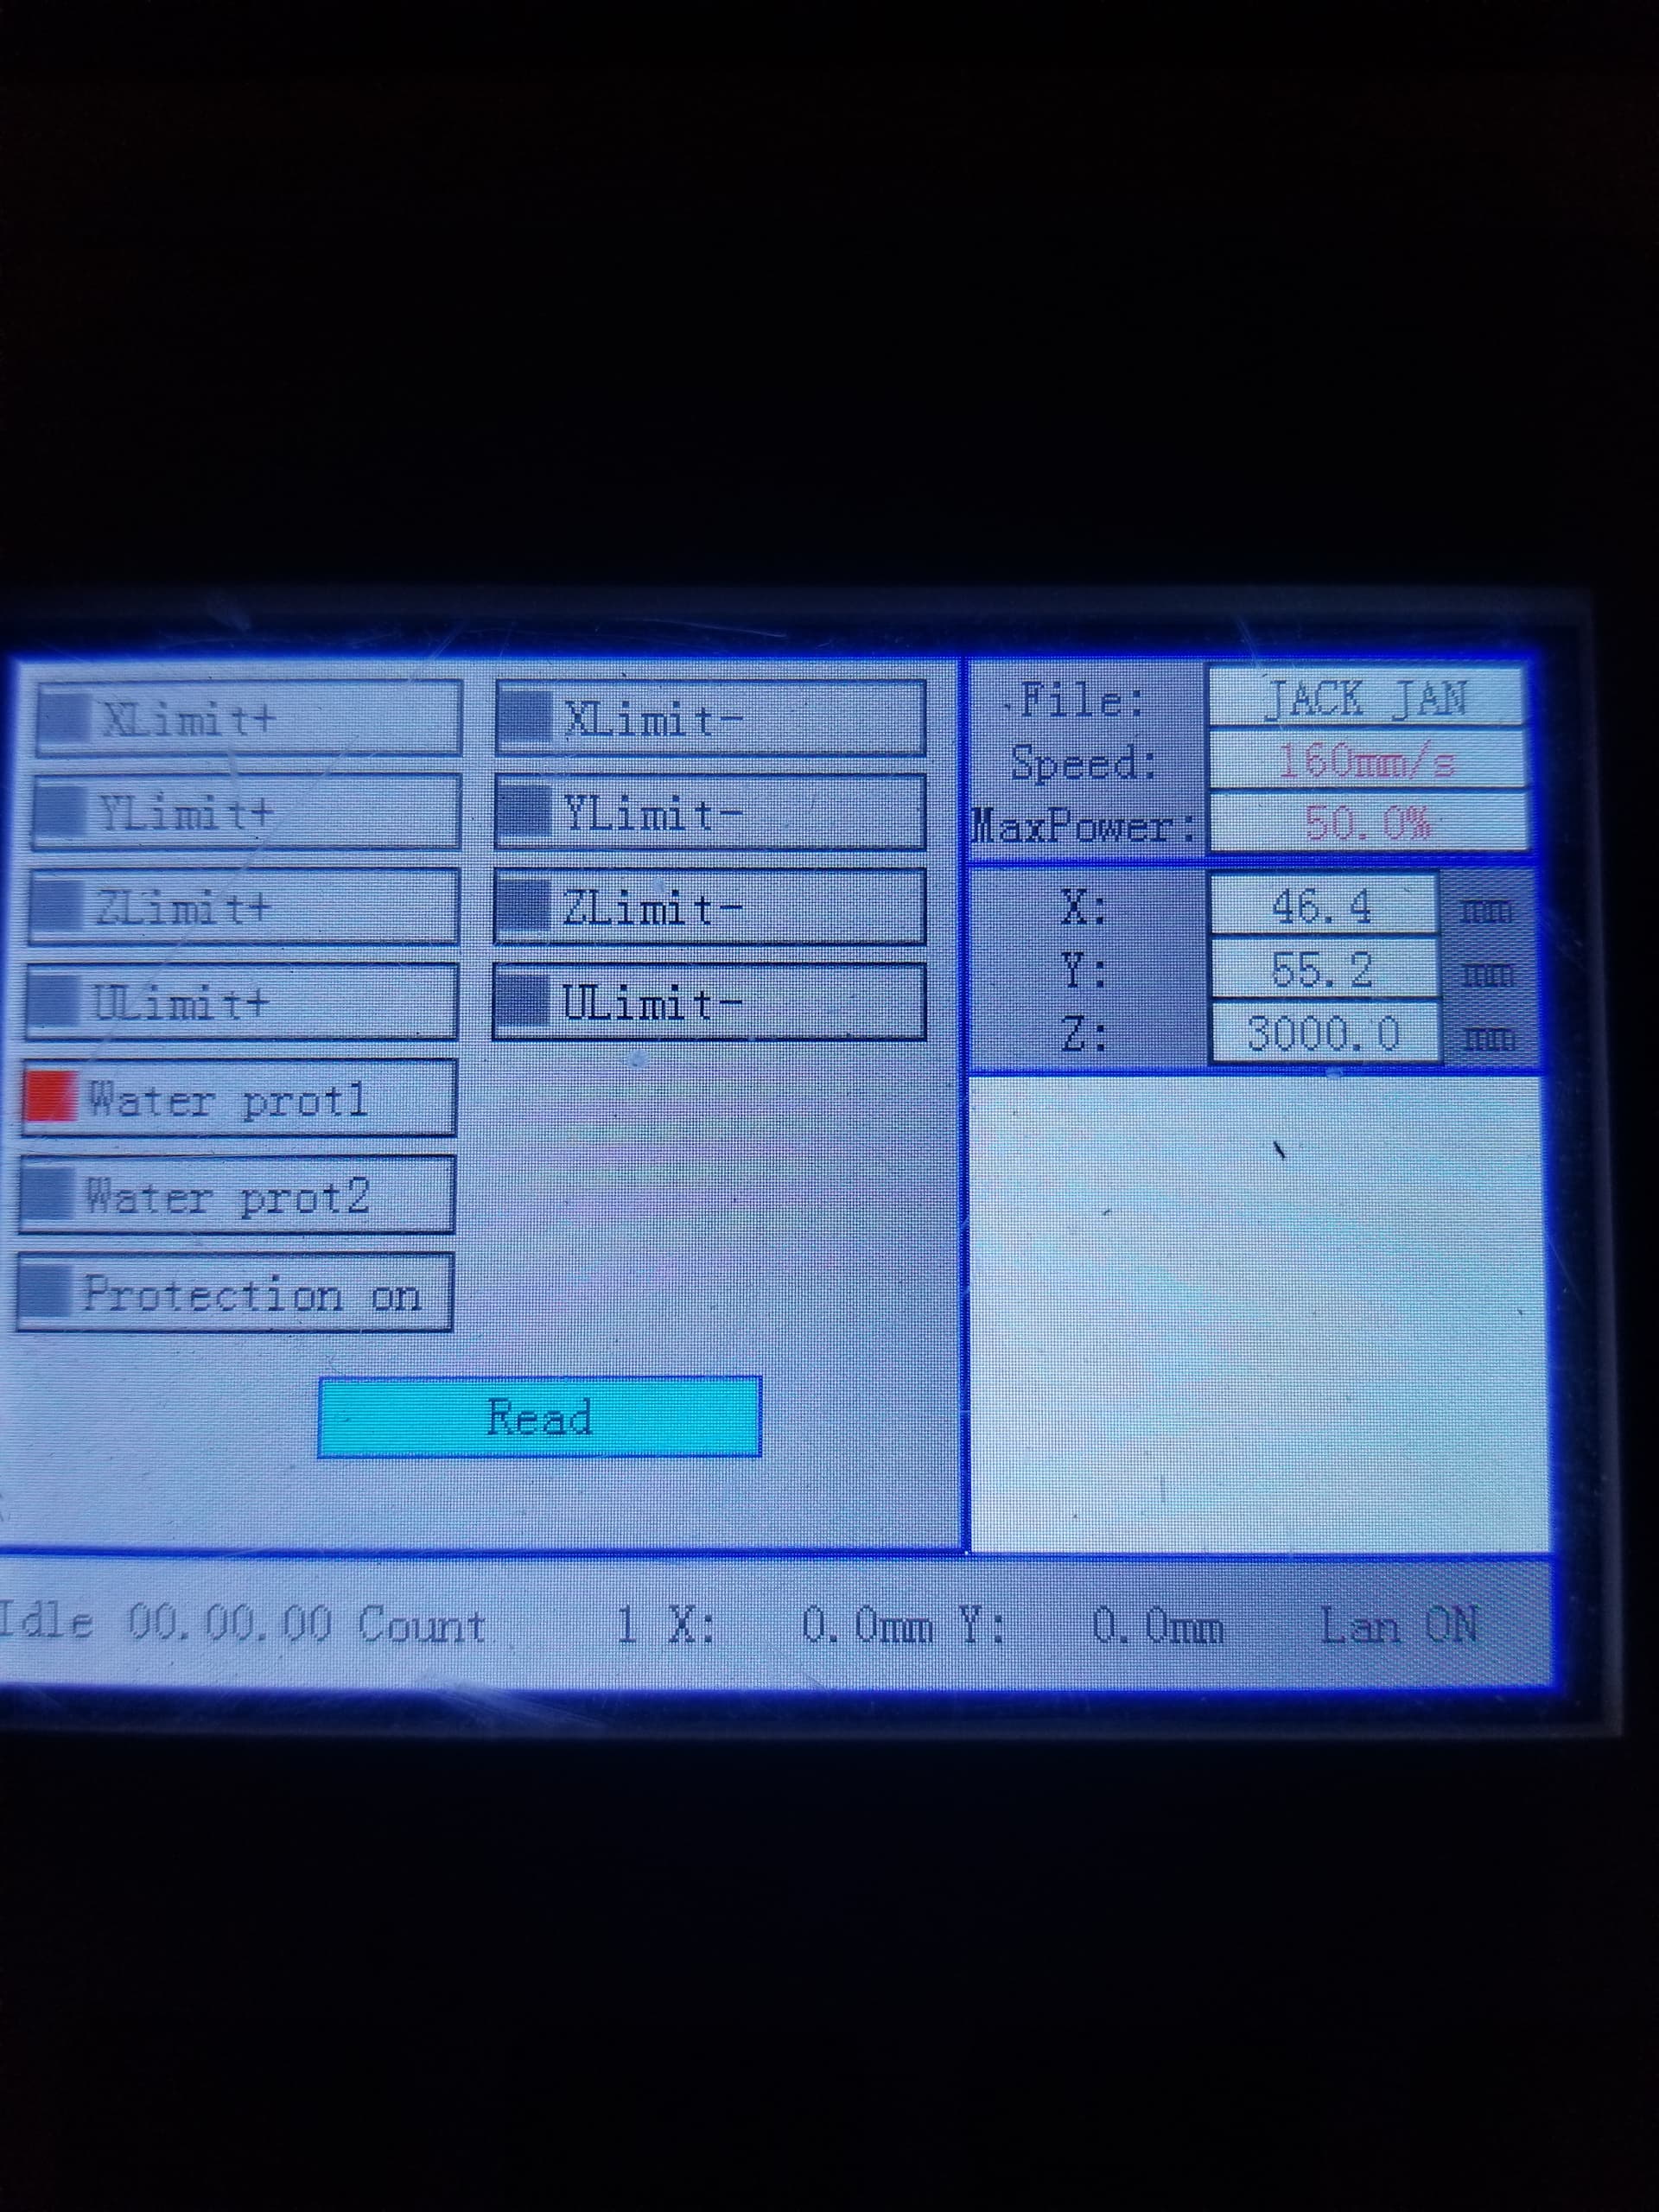
This is manually triggering the X axis limit sensor… This works in ‘real time’.
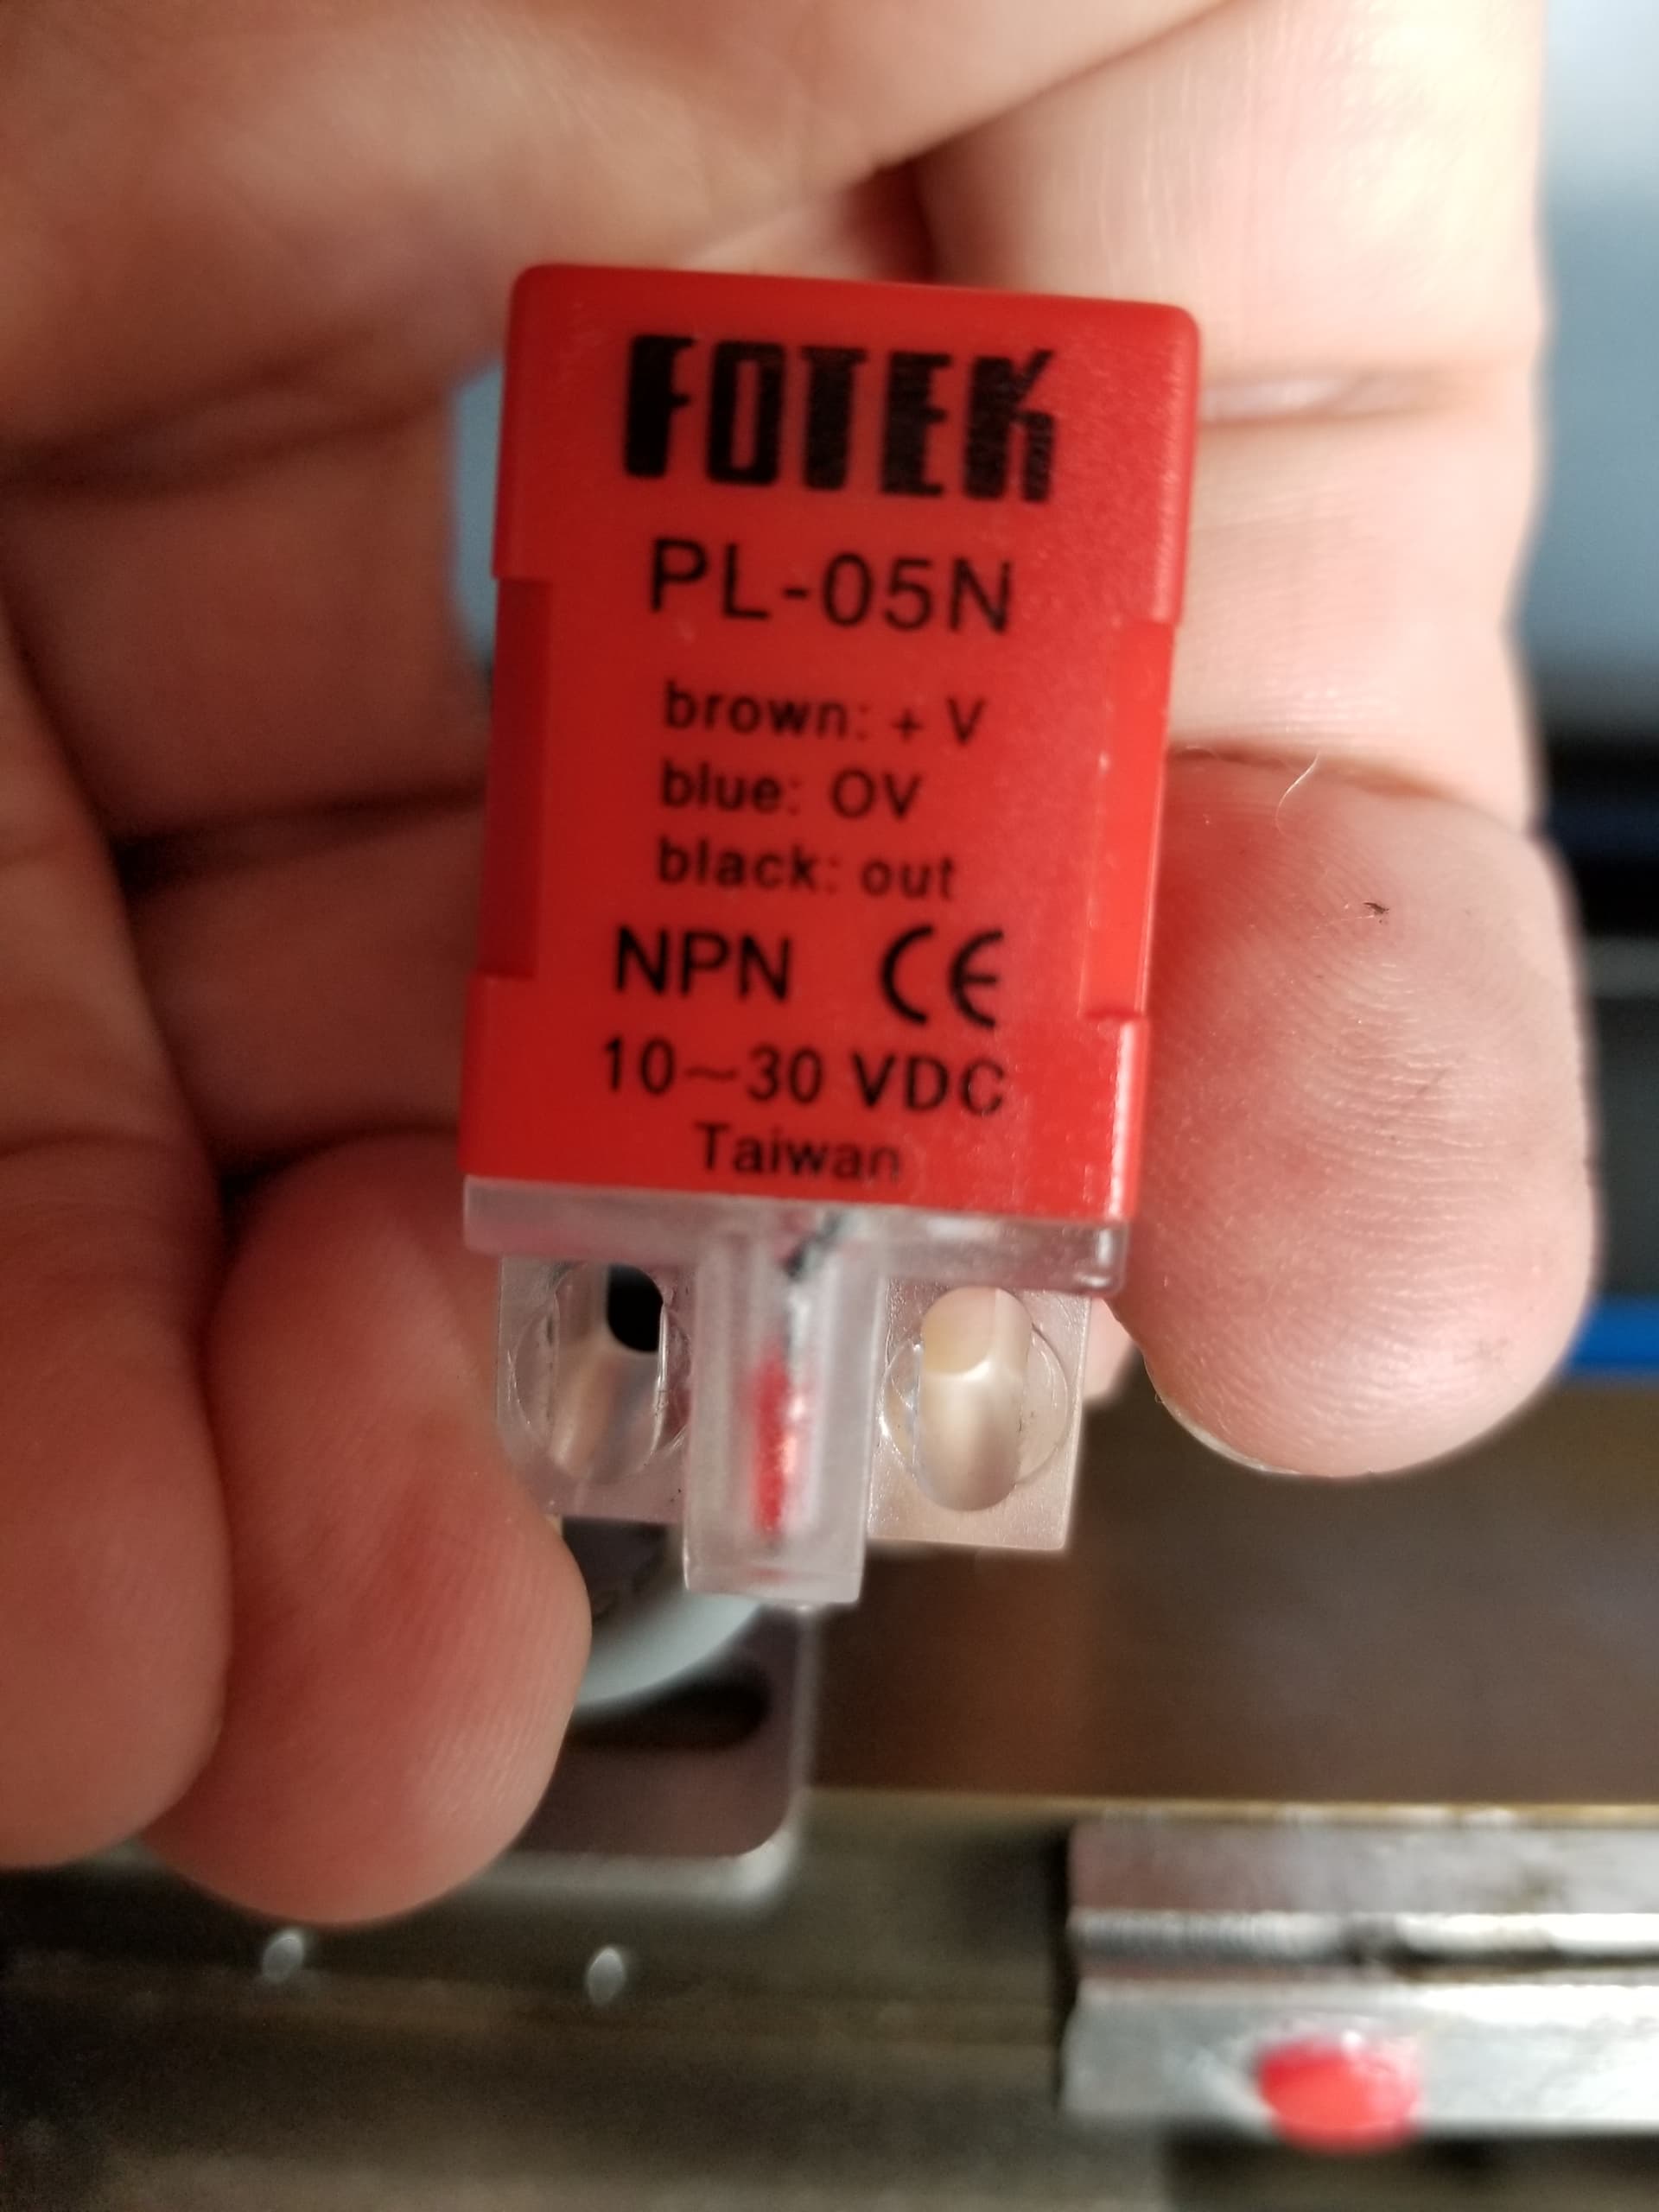
I have ‘hall effect’ limit switches that look like this
The screen you post looks like ALL of the Limits switches, including the ‘hard’ limits are showing as active…? Do you have ‘hard’ limits on your machine?
I’m really suspicious of some issue as to why you have all 4 limits active…?
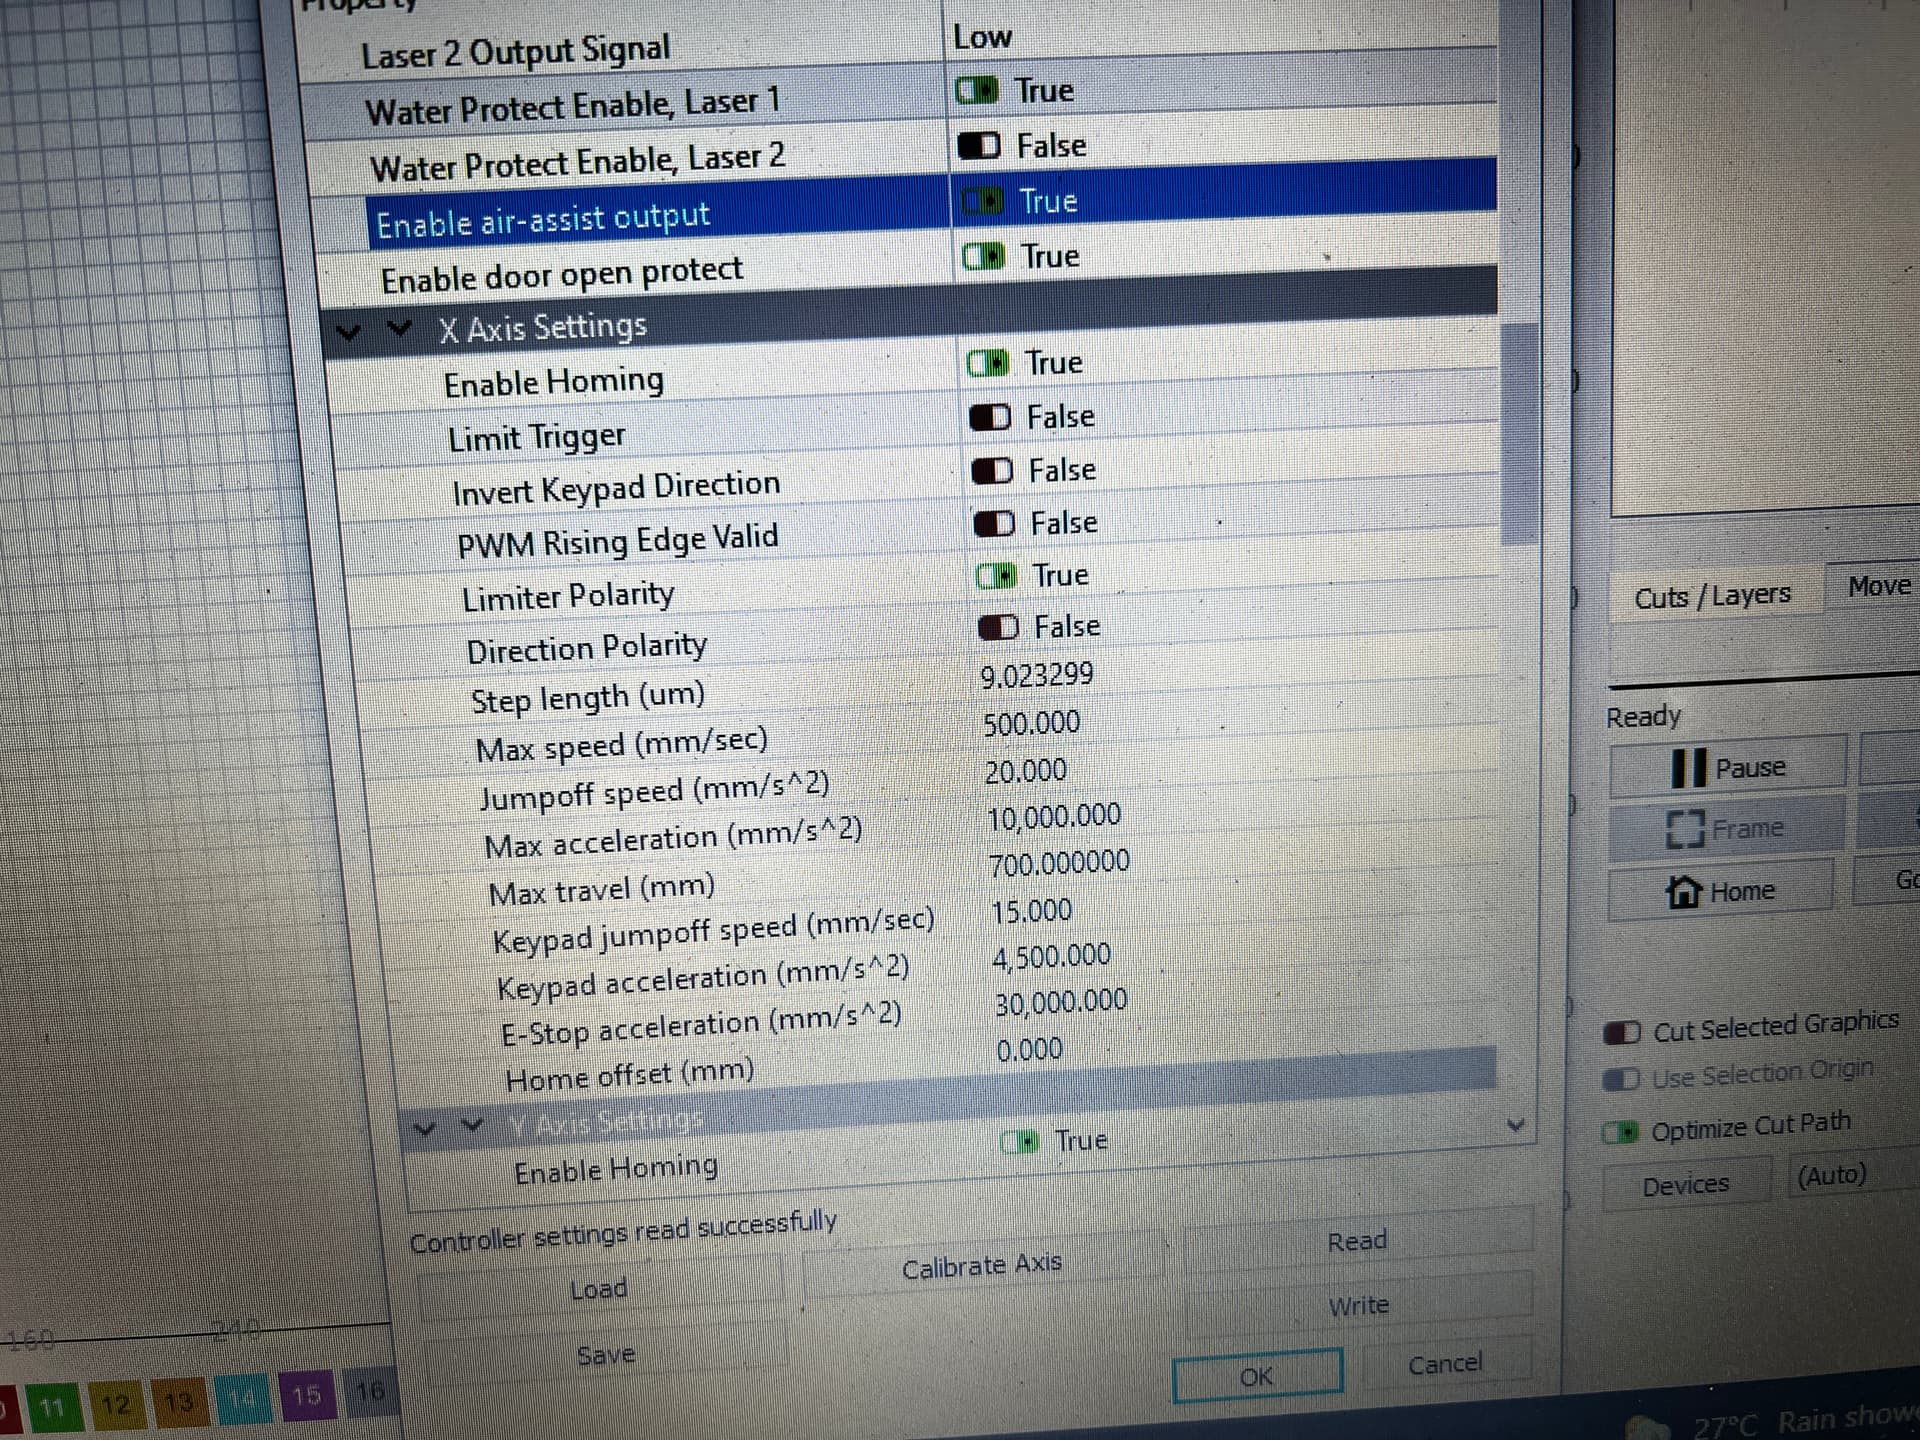
You can disable homing in the Ruida controller via the ‘Edit → Machine settings’
It appears that you have some kind of X motor issue…
Good luck
![]()
2 Likes
The red squares are indicating failure of the controller diagnostic test for your limits on both the X and Y axis.
I might suggest contacting the vendor for further diagnostic processes they might want you to check. You will most likely have to do this to get replacement parts from them anyway. ![]()
1 Like
Not sure what you mean…
I run that diagnostic and use it to test my switches. They turn ‘red’ when the switch becomes active.
Are you saying that not all of them should be illuminated…?
It does have the odoriferous odor of hardware…

Sorry, yes. Just looking now, I see different results documented directly from Ruida, depending on the controller model.
Another reason to contact the vendor of this new machine. ![]()
Yes I have the same switches as in the video. The one on Y is work glowing red but the x doesn’t. So my assumption is it’s a $4.00 aud part which is causing the problem.
Have sent the vendor several videos still waiting to hear back closed for Christmas break.
Could I ask one small question…
could some send me what their x axis and Y axis should look like under the vendor settings please.
Just in case I played there with suggestions.
Thanks
aud?
Did you replace the faulty X limit? It doesn’t appear to work in the video.
The first picture you posted of the diagnostics, is that still valid?
Do all 4 top indicators show red?
Restoring from your original ‘factory fresh’ configuration is always the proper ‘fix’ to get back to ground zero. Hopefully you did save it when you first received the machine?
This is all ‘vendor’ specific information. Getting it from the vendor is a much better tact. If you can find someone with the same model, that would be a good starting point if all else fails.
Good luck
![]()
no< i didn’t save it when I first started - had no idea how. And I didn’t know I had too.
The vendor has agreed to send the part it will taked 10 -15 days to get here. (from China)
To get it from Cloud Ray ? 4 australian dollars - but 34 australian dollars to post it… so it becomes a very expensive part. Lucky the vendor is sending it now.
They are also sending me a video on how to replace it - which i think - is a bit rich, since it still under warranty. I will have to talk nicely to my son, as his fingers bend better than mine.
I have set the homing to the rear left - (when I face the machine) which means it is no longer going over to the rear right where the Y limiter is and bashing into the side.
Thanks for all your help - I will keep you posted - I just hope it is the limiter.
I really want to play. Helen
That’s madness. Probably want to find a local supplier before your warranty expires.
How did you achieve this?
This usually doesn’t work too well for most people.
Did you physically move the limit switches?
I hope you backup your computer…?
Parts of the Ruida configuration is ‘vendor’ specific. If different motors are used or different types of lasers, so they have to be flexible.
As a good ‘rule’ if you can change something, make a copy of the original somewhere for safe keeping. Even a grainy screenshot is better than just guessing. Lightburn has a nice interface ‘Edit → Machine Settings’ you can load/save to file or read/write the controller.
I have a separate 'configuration for my rotary, so I just ‘load’ it and ‘write’ it to the controller. When I’m done, I read the ‘non rotary’ configuration file and ‘write’ that to the controller. I know it’s set up correctly.
It’s a learning game, just relax you’ll pick it up pretty quickly just hang in there…
Since it’s on the X axes, it will be wired through the ‘drag chain’ for that axis. You can take the ‘chain’ apart at the ‘curve’ and pull the wires straight out through the removed link area.
Good luk
Take care
![]()
This topic was automatically closed 30 days after the last reply. New replies are no longer allowed.