Newby with laser. I’ve done several projects and I’m now trying to get started engraving photographs.
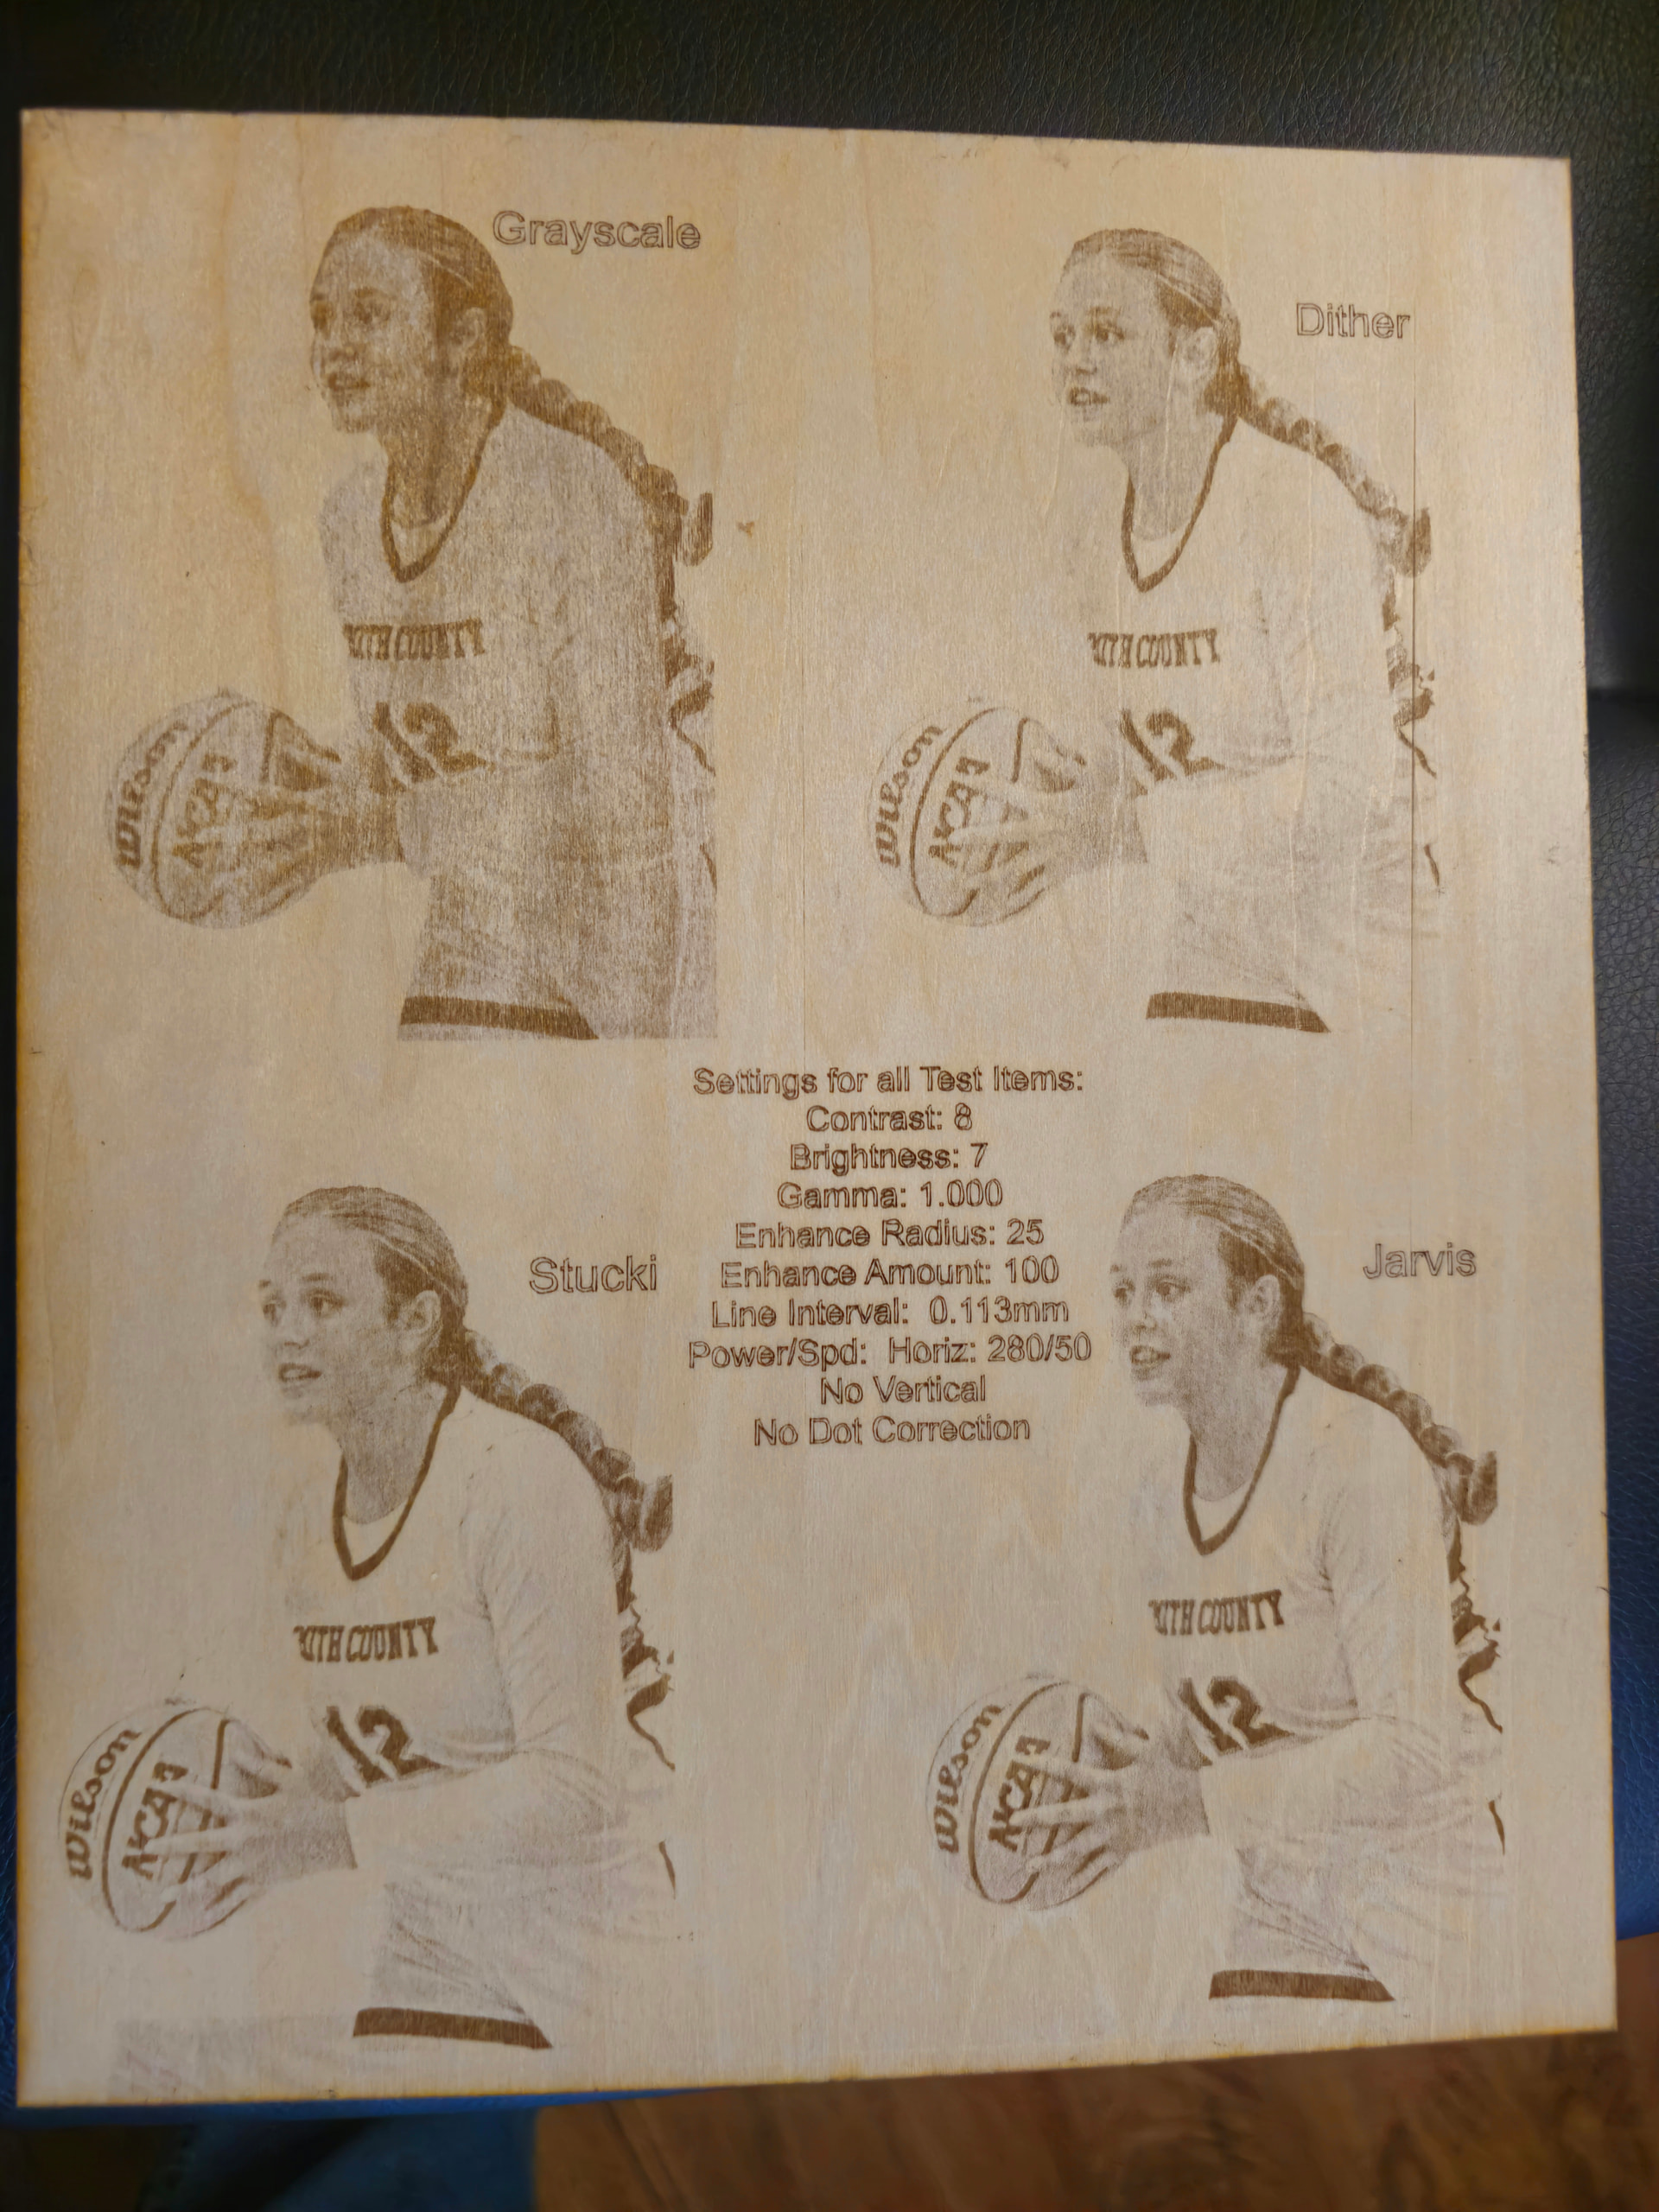
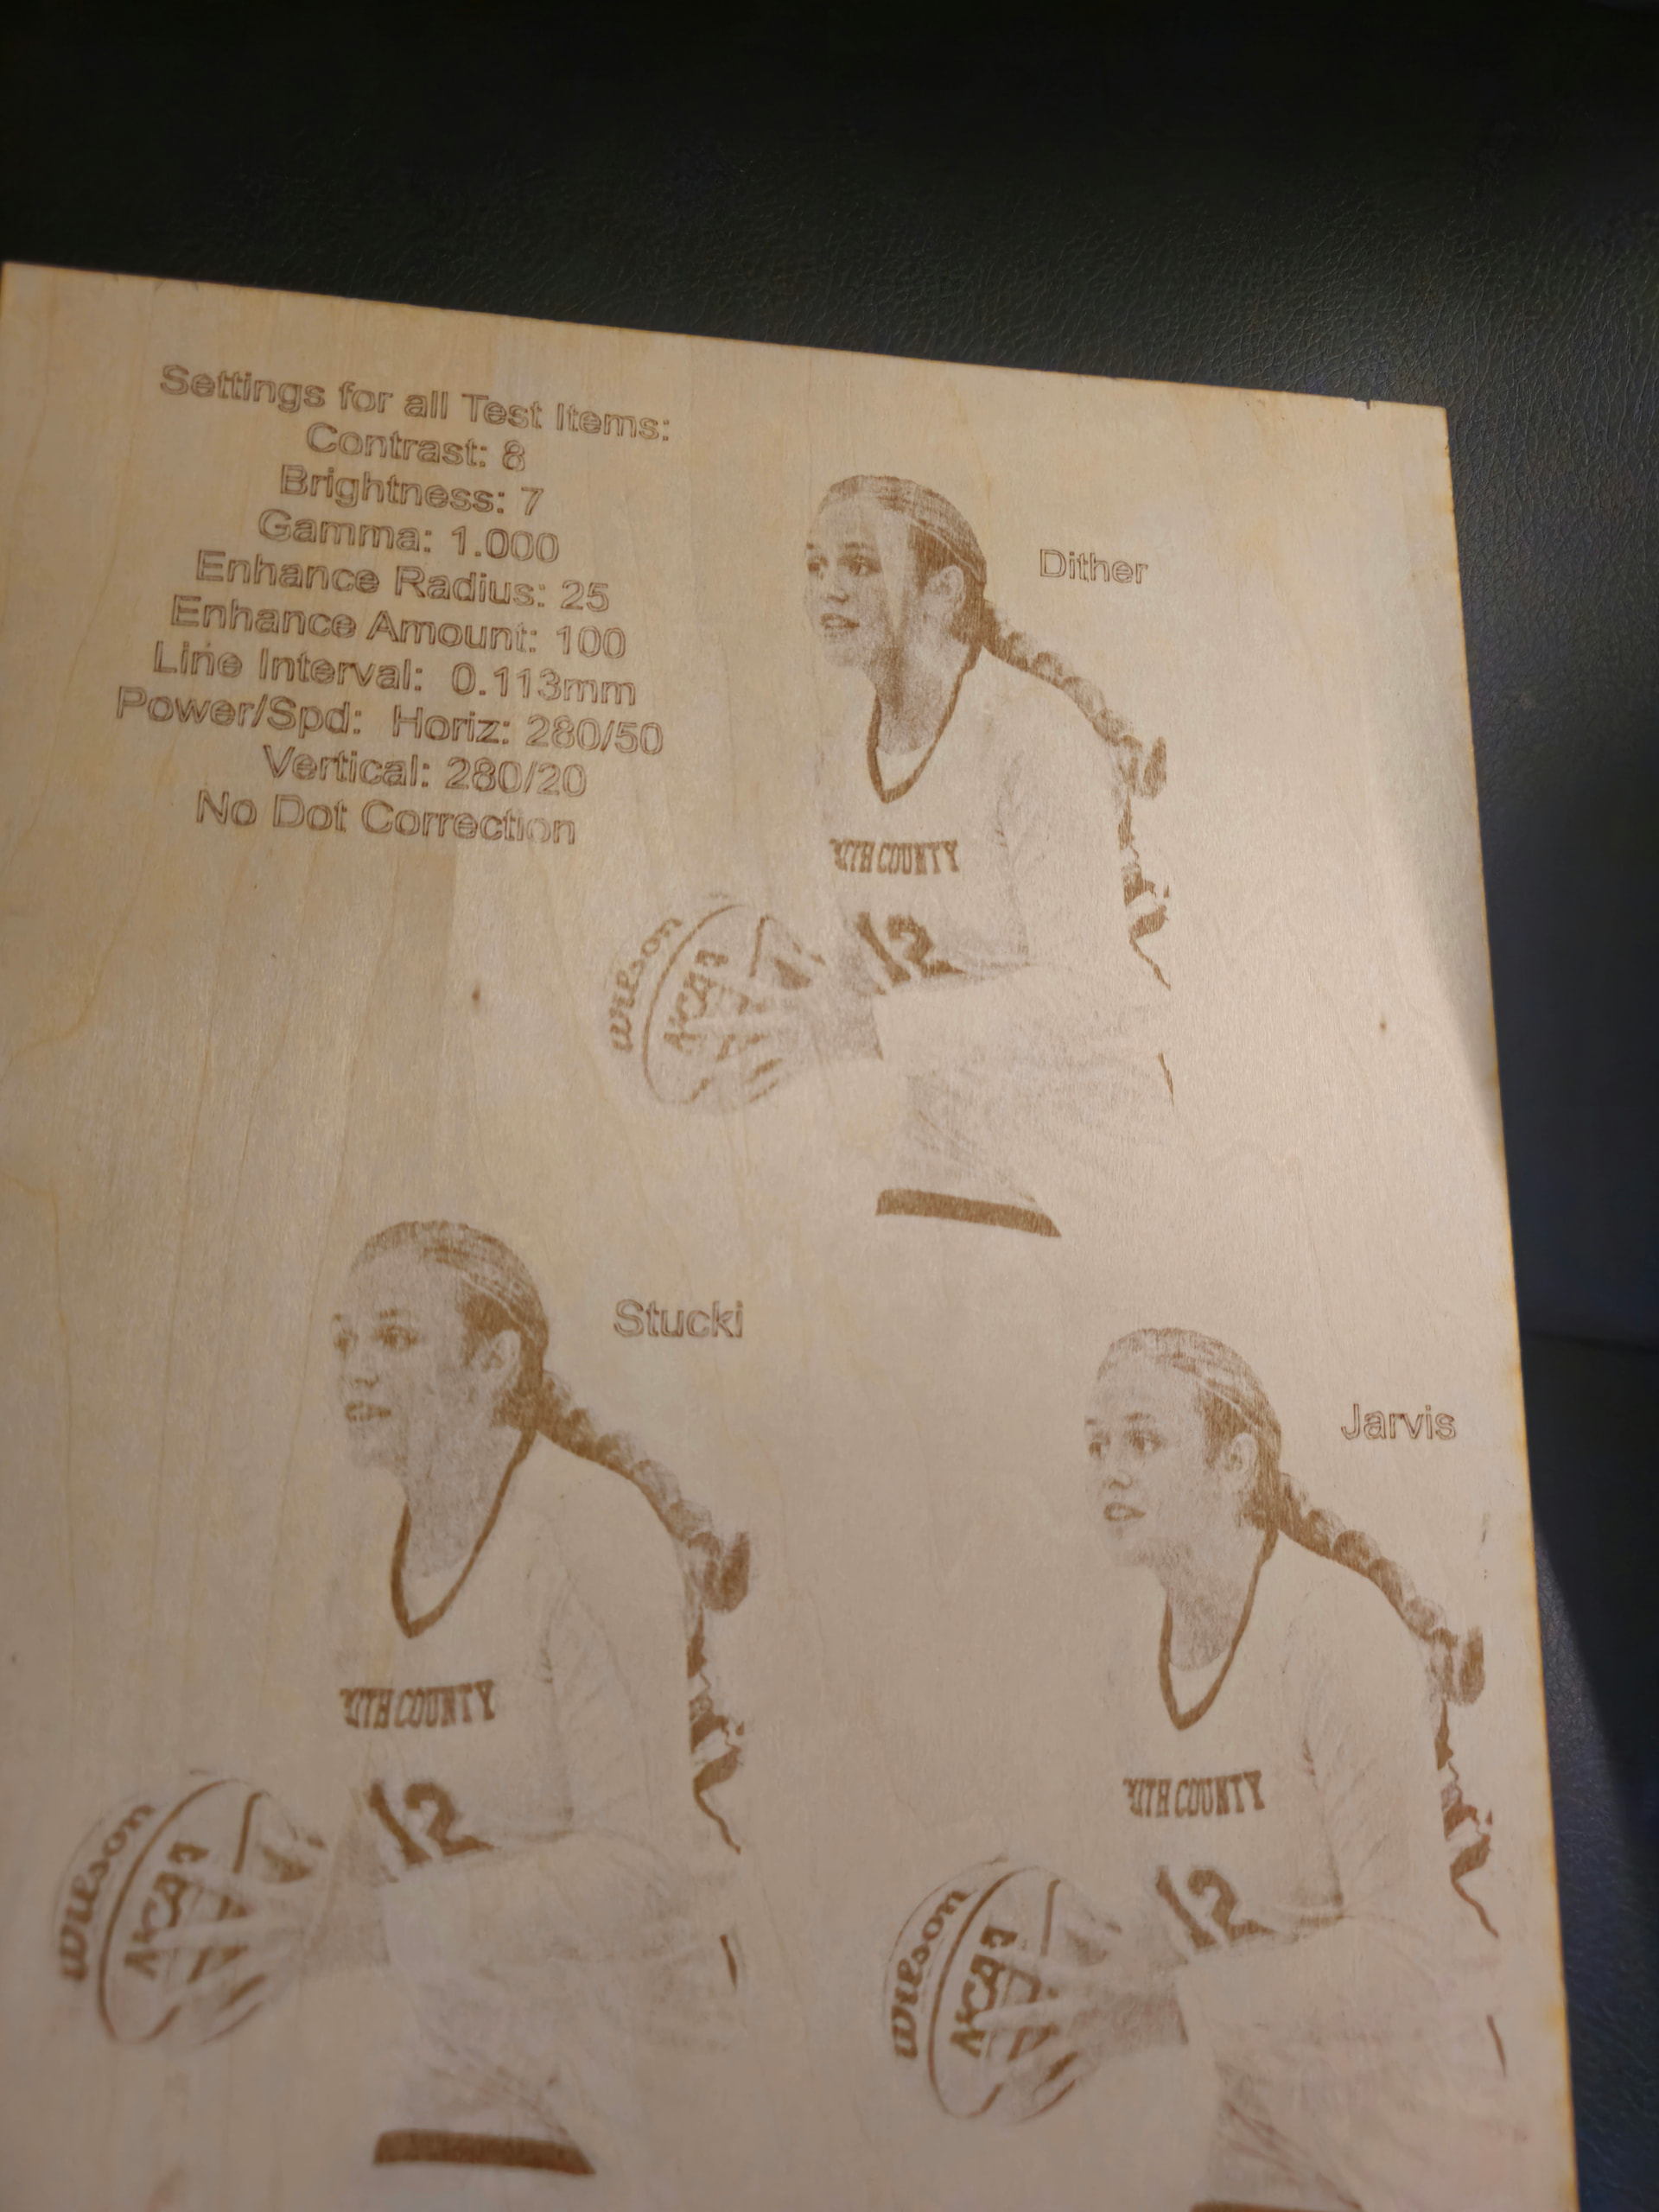
Using a 10w Diode laser, with Lightburn software. I’ve been struggling with settings for photos. My latest effort involved running identical settings in Jarvis, Stucki, Grayscale and Dither. Two different tests…two different power/speed settings.
If I’m way out of line asking this, let me know. I apologize and wont’ do it again.
I’m hoping someone with much more experience than me can maybe point me in the right direction regarding mode and settings.
It is the right way to go by testing the different photo settings to find the best setting that suits your machine and your taste. However, there is a big factor in this equation that is missing, which is the material. You have to find the wood and the treatment of the wood that gives the best result. The worst thing is that you cannot be sure that even if you have found the right wood and the right setting, that it will suit your next batch of wood delivery.
I do a relatively small test engraving - each time, on all new materials, to have an indication if everything is ok.
When I using birch plywood, there is the possibility of treating the surface with e.g. borax or another soda-based solution…, I only use it if I am very desperate to find a better result than without it. Because it is an extra step and takes extra time.
Your Jarvist from the first series looks the best to me.
Do you know if the line spacing shown is suitable for your machine?, using the most optimal / correct line spacing gives the best starting position for good images. (, but I assume you have done line spacing tests)
The Jarvis also has the cleanest grain and that helps enormously. Once the laser software and the limitations of laser in comparison to the quality of photography are understood, To perform a few changes to individual areas to achieve good contrast, using 3rd party image software can be very usefuseuseful.
I have a couple of pretty powerful image editing software packages.
My problem is being able to recognize what the photo should look like after I make brightness, contrast, gamma, etc. adjustments. What it should look like before I pull into lightburn and start to make adjustments.
I’ve watched several youtube style tutorials and I can’t get it right.
Digital does such a good job of image representation its difficult to pre judge whats needed for a good laser burn. I find that to just import and run a trial is best.
Your eye will auto tell you the obvious and any others will show up in time. I started to use Gimp as soon as I could..just to get used to the UI. Im comfortable with the basics now.
You need a magnifying glass, better a microscope and judge your line spacing. When you can’t distinguish spaces from lines for sure, you have found the practical line spacing.
Too large a distance gives brighter images with a hint of curtains, too small a distance gives a false image of your settings because you overlap the lines and bring more energy into the same spot and you can actually get the curtain effect here too, just with the opposite energy effect as before.
I have good experiences with sanding the wood with a very fine grain size, it gives a crisper appearance because there are no upright wood fibers that can burn.
That’s two of the best improvement tips right there!
For me, Line spacing adjustment helped to improve overall image appearance and I didn’t really appreciate knowing about it until I settled down and did some real testing…It took a while for my newbie thinking to appreciate the idea of More detail from dots being further apart.
The sanding also has a real benefit. I was doing some keyrings today and hadn’t sanded the birch 5mm ply (I’ve been focusing on slate for a couple of months and forgot to sand the wood when I changed back for a break) I grey primed some and silver inked some others. The grey was OK but the ink really showed the grain and irregular surface and did not look good at all.
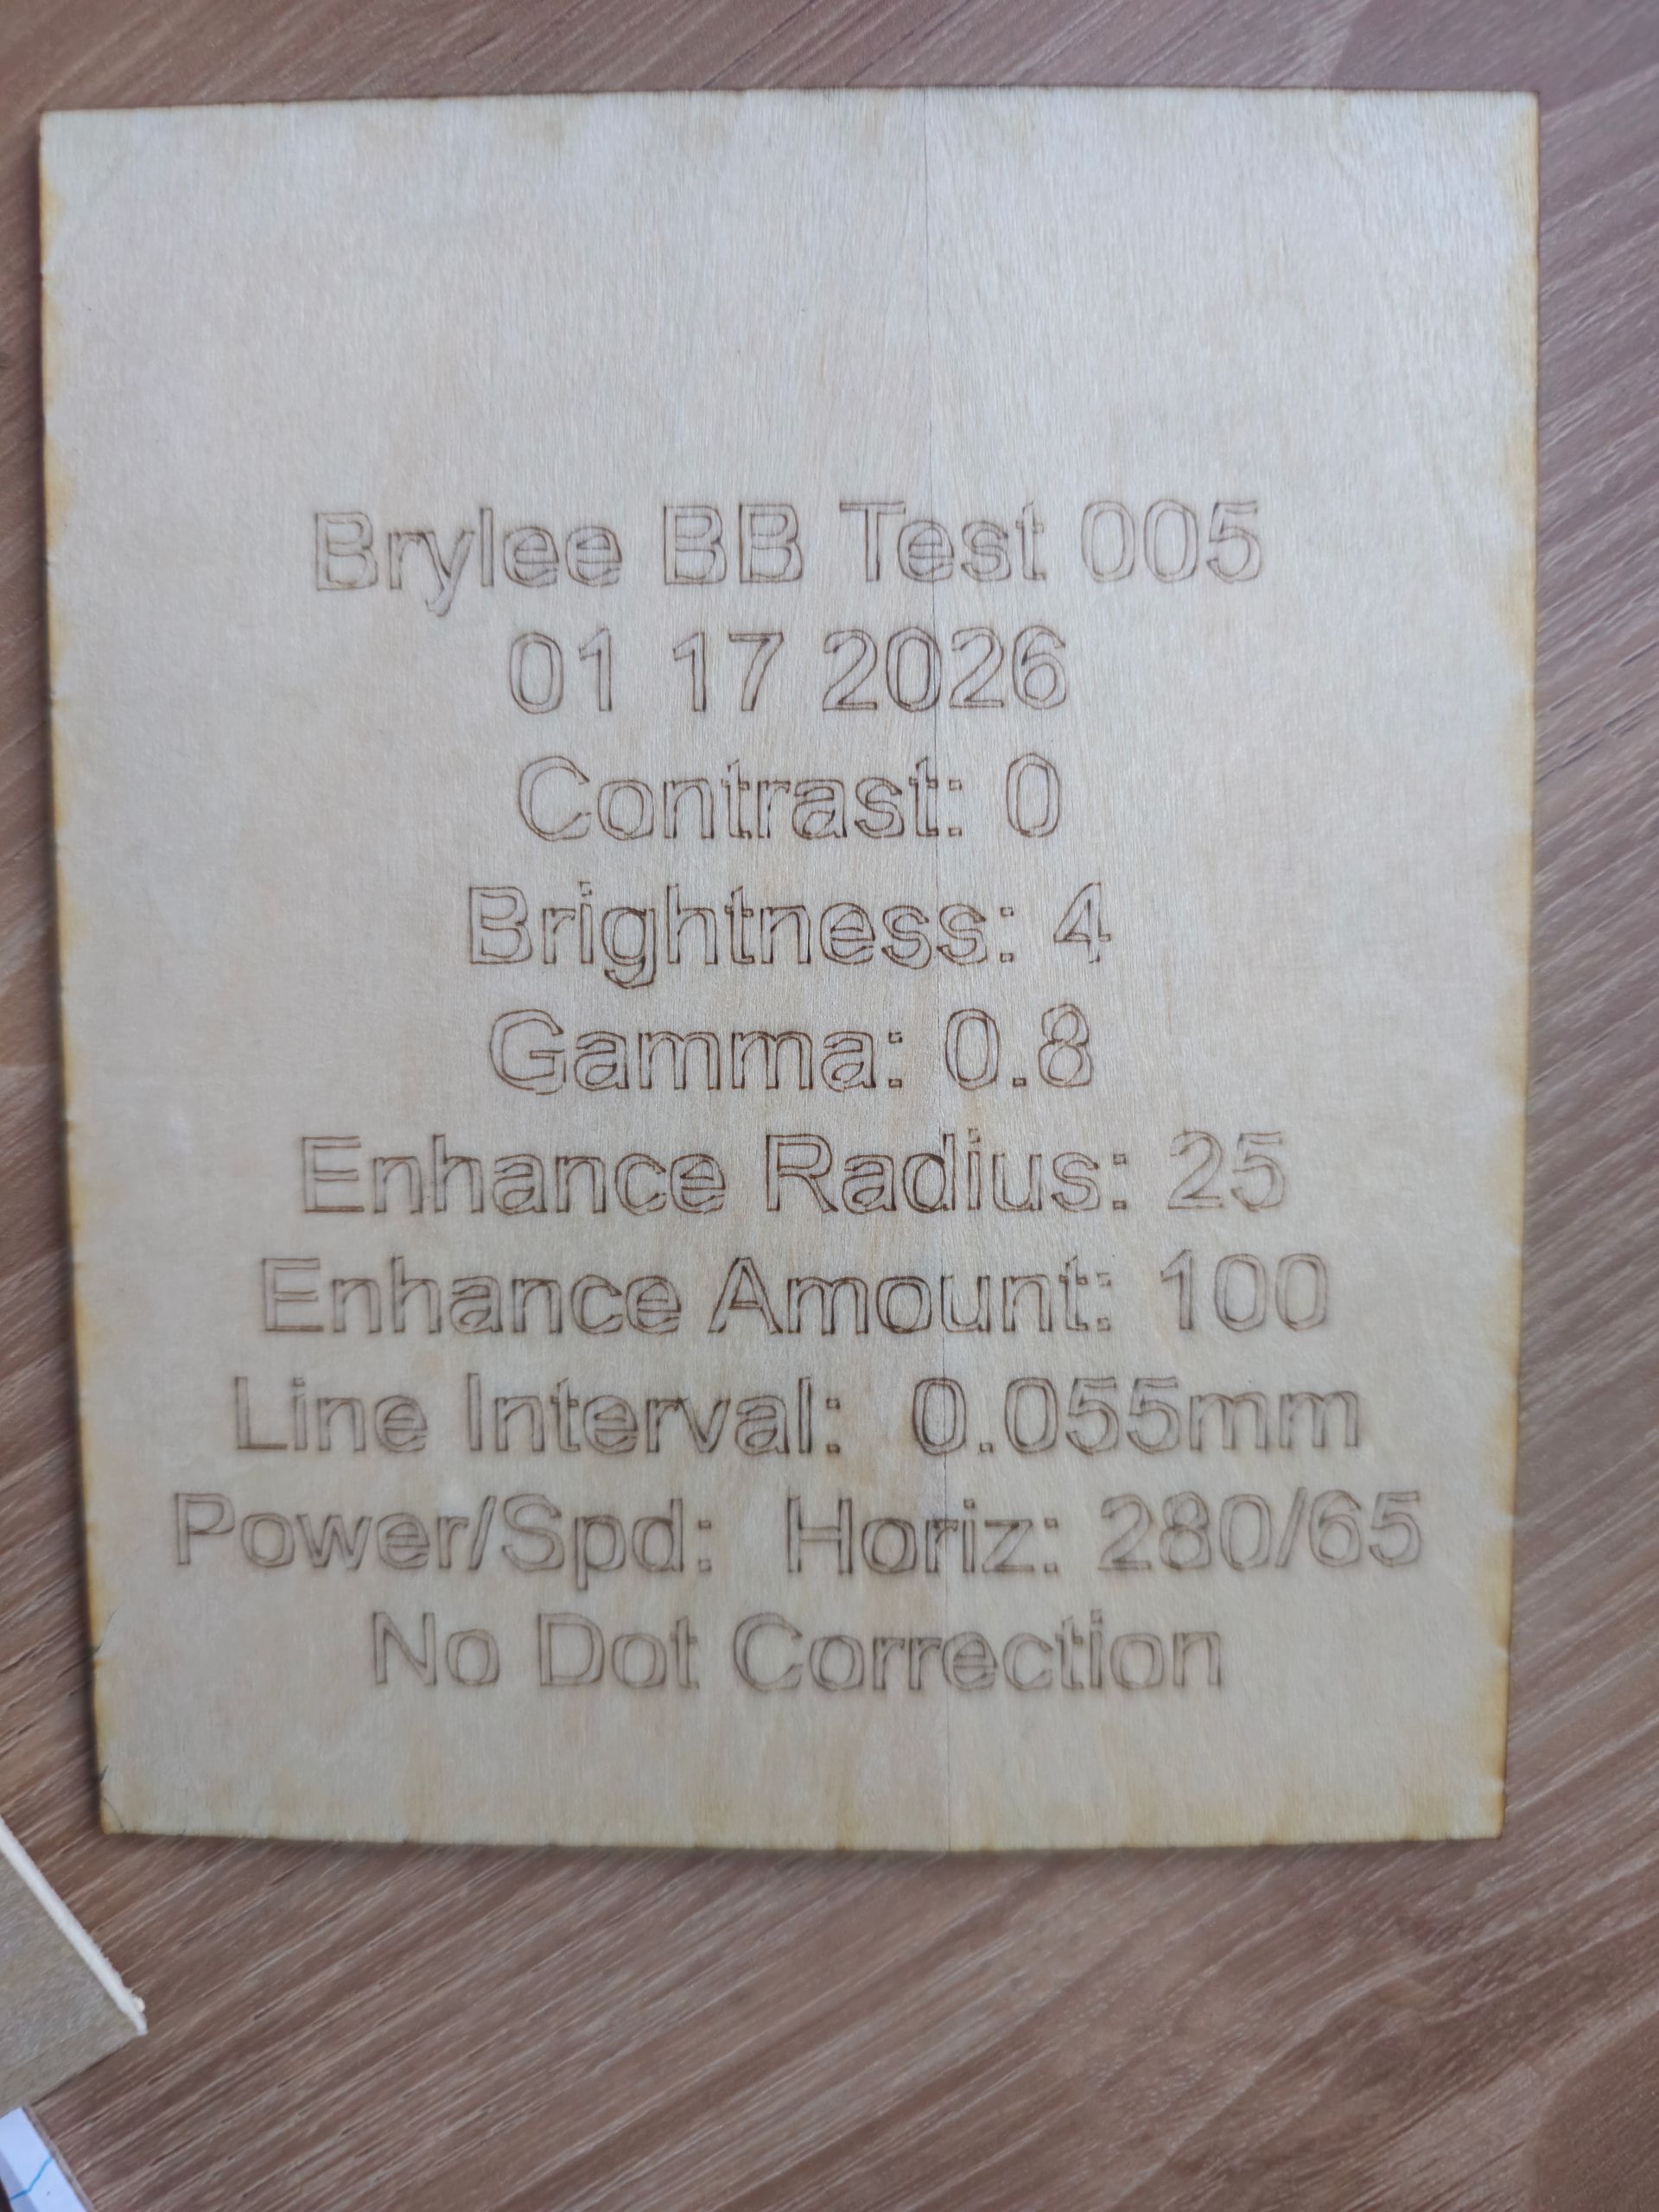
As suggested, I’ve run several interval tests and learned some things. I think what I’m working on is much better. I’ve learned that wood prep is important and I can see the difference.
A couple of follow up questions… what is the best way to make the dark areas darker? …more/less power? …more/less speed. Or do I need to treat the wood with borax or something?
Finally, this is about 3 x 5 inches. Will it look the same if I make it bigger…say 8 x 10?
Lastly, how much better do you think this can be with more tinkering?
If you study the lettering in the photo you will see it has issues. It seems ok on the Y axis (vertical lines) but problems arise with curves.
Have a look at your belt tensions and see it any screws are loose and that machine is square at corners (90deg). If all that is ok, what speed setting is the job set to.
Check this out.
Your image looks good because the scanning direction isn’t being affected by the possible mechanical issue or speed.
To make the dark areas darker may affect other areas of the image that are presently ok, as a settings change to effect one area..is also applied everywhere else respectively.
You can make area changes with specific image manipulation software or just find the best balance you can with Lightburn ‘Adjust image’.
If you burn the image bigger, then the line interval may be slightly increased to your liking and will save a little bit of job time.
You may also trace the image and select a specific area to its own layer and apply more lasering or an effect such as hatching or cross hatching.but you will be going over the already lasered image area so apply carefully.