NEJE 4 Max
GBRL controller
System firmware v2.2.3
NEJE firmware v2.2.5
GRBL firmware v2.2.4
LightBurn version 1.7.08
Connected to Microsoft Surface running Windows11 via USB
Issue:
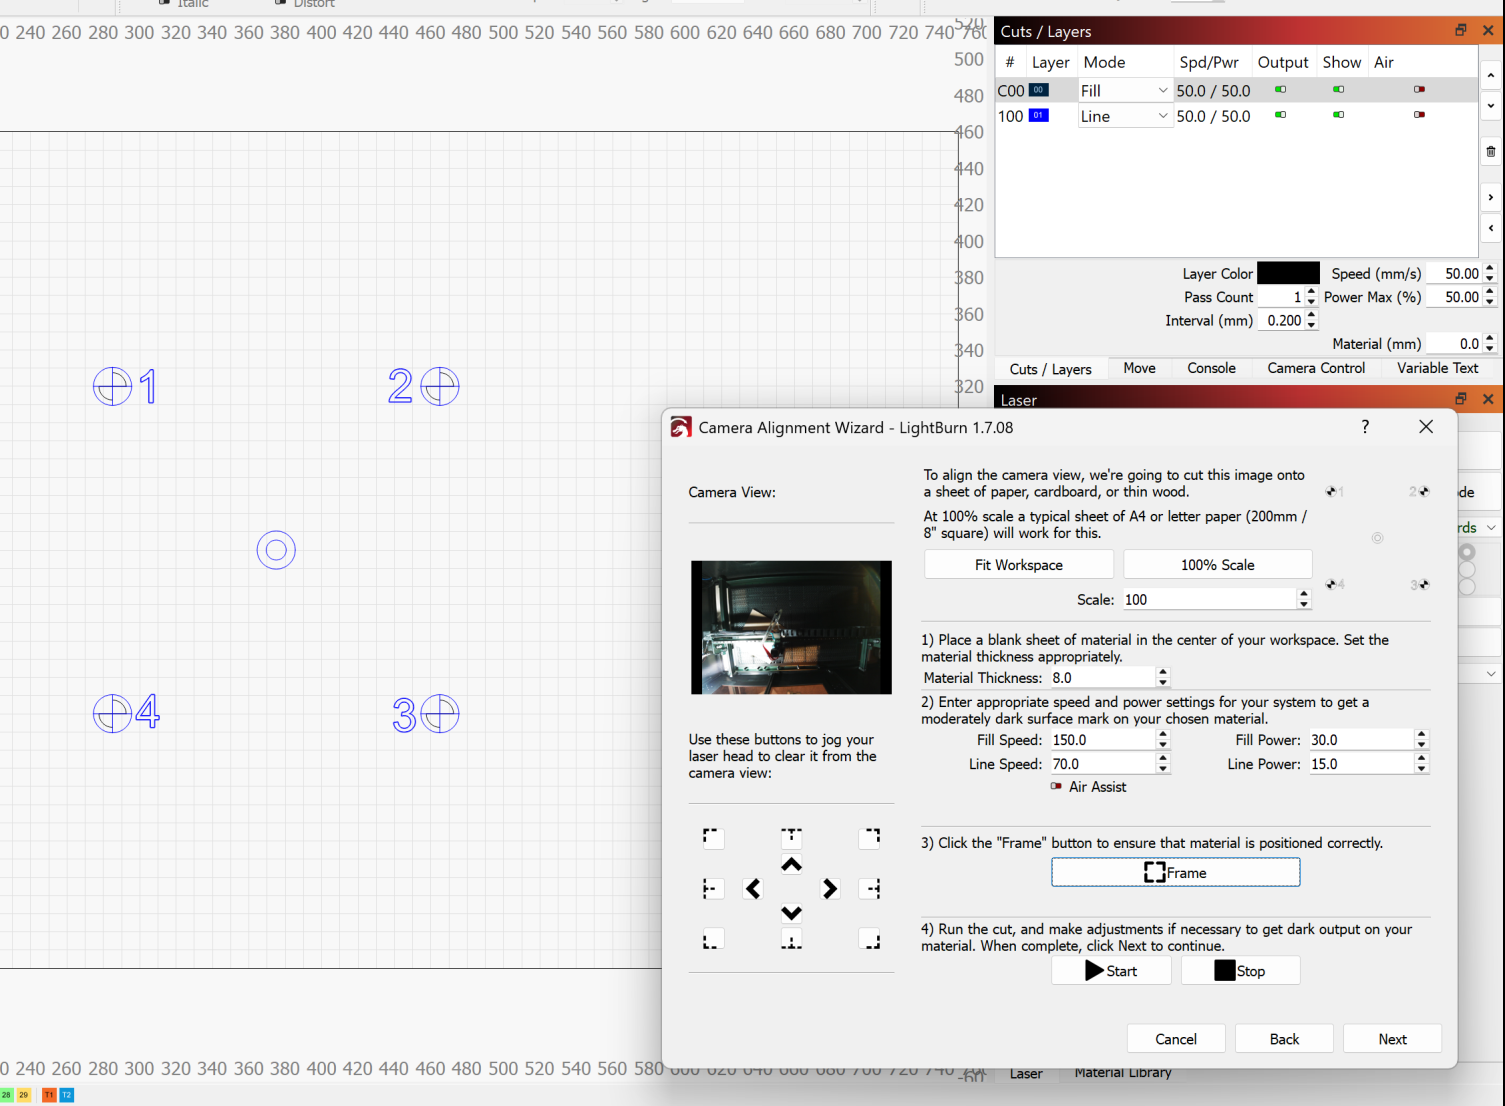
Setting up new Neje 4 Max to use camera for detecting material not working. LightBurn Camera Alignment Wizard doesn’t adjust the Z Axis when modifying material thickness, resulting in Laser nozzle not focusing correctly and crashing on top surface of material (6mm corrugated cardboard).
Troubleshooting steps attempted:
Updated firmware
Verified Z height works for setting material thickness in Cuts / Layers
Verified speed and power settings work normally in Cuts / Layers
Tested multiple Material Thickness variables (6mm, 10mm, 15mm). All result in laser starting from the same Z height and hitting the surface of the material (only when using camera alignment wizard).
Cuts / Layers pane shows the speed, power and thickness for the Fill and Line cut list, but these also don’t update to reflect the modified speed, power, thickness values in the alignment wizard (visible but not editable in the background behind alignment wizard pop up window, which leads me to believe there is something wrong with the alignment wizard…)
Other variables: I’m using a custom GCode (G10 L2 P1 Z-43) to auto home the laser Z Axis height to accommodate for the honeycomb bed and 23mm focus height. This should allow LightBurn to adjust the material thickness for each cut layer. This adjustable height works for normal cuts, but not within the cameral alignment wizard.
I think you have a fundamental misunderstanding here. The camera function does not care about the material height. It is not possible to use a camera calibration with multiple material heights. The camera is calibrated to a specific height (the height you set the laser head to before starting the wizard) and nothing else. The material height setting in the wizard is only for your information, I think.
Just focus the laser on the material and then start the wizard. If you change the material height ever, you need to do the calibration again. If you change the height often, it makes sense to save each calibration to a file such that you can reload it easily. The calibration can’t be used anymore if anything of the setup changes (material height, camera height, position etc.).
Thanks for the response. I understand the point of the calibration is based on the fixed height. With the Neje Z Axis engravers the starting point for the laser head when homed is not the same as the focal point when it starts to engrave or cut. This is the point of using an adjustable Z height engraver that can adjust based on different materials and Z step for multiple pass cuts. I also understand that you would need to recalibrate if using different thickness material, which i would be ok with but as it stands LightBurn is not recognizing the offset in the calibration wizard the same way it does in a normal Cut / Layer adjustment, so there is no way for me to prevent the laser head from hitting the material or focusing to get a good engraving needed to calibrate the camera. Do you have experience with Z Axis engravers or speaking to your experience with static height models?
Yes, the homing point is usually 0,0 for x and y and fully up for z. If you focus on a material, the z axis drops until the probe sensor activates.
I don’t own the Neje (but others with z-axis control, I also built my own), so I don’t know exactly how this does work. Isn’t it the you move over the material, then do a z axis probe and then start? So in case of calibration, you just adjust to the material (like 6mm), do not alter the z axis anymore and then start the calibration. The head is then in correct position and the z axis position is treated as zero.
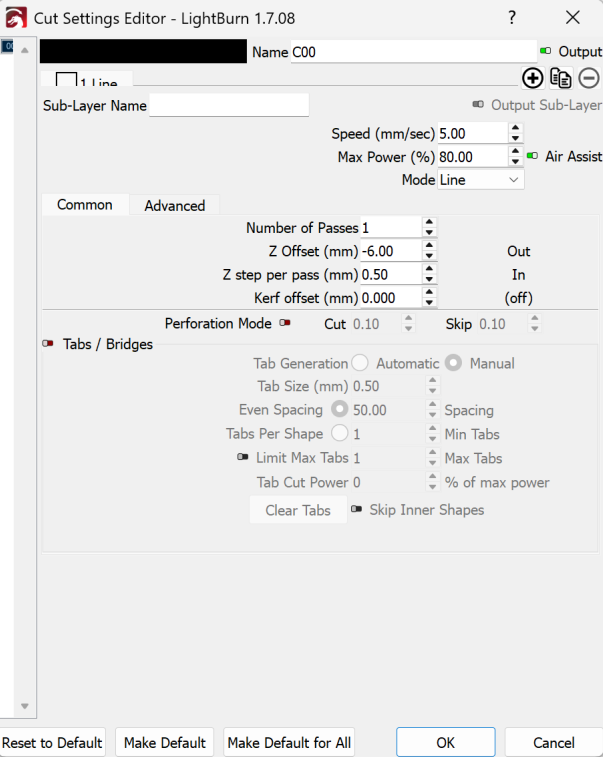
There is no homing sensor on the NEJE. The way the NEJE works is (at least for normal Cuts / Layers) is to set the (negative) Z Offset to specify the target distance relative to the bed or honeycomb instead of a fixed or absolute value if it was a static Z height. For example in the Cuts / Layers menu setting the Z Offset for -6.0 raises or lowers the laser head (at the start of cutting) to account for the material height plus any variance for defocusing the laser if desired (which can be helpful for moving the focus point IN or OUT). This is exactly what’s missing in the LightBurn camera calibration menu and why it may not be possible to do a calibration without going through a bunch of extra steps to temporarily re-baseline my current “relative 0” from the bed each time to account for the material. This would be alot easier if either
LightBurn included a Z offset in the calibration menu
The calibration menu allowed me to change the Cuts / Layers menu at the same time as the calibration menu
The calibration pattern with the 4 rings and crosshairs could be added to a normal cut list and then focused separately in the calibration menu (skipping the step to create the pattern in the menu)
BTW, I appreciate the open discussion and troubleshooting ideas. I would still be curious if anyone in the forum has been successful using a Z Axis variable height rig like NEJE 4.
I modified the G Code setting the baseline for my starting “relative 0” position from the bed to account for the thickness of my material and that allowed me to successfully engrave the pattern. I will use just have to use this method for calibration since there’s no Z Offset in the calibration menu. Thanks for the brainstorming session!