Hi,
I have an issue with the Z homing position and Lightburn (last version). Here is te description of the issue I have supported by a video:NEJE Max 4 - Z Axis Home issue
As you will see on the video,
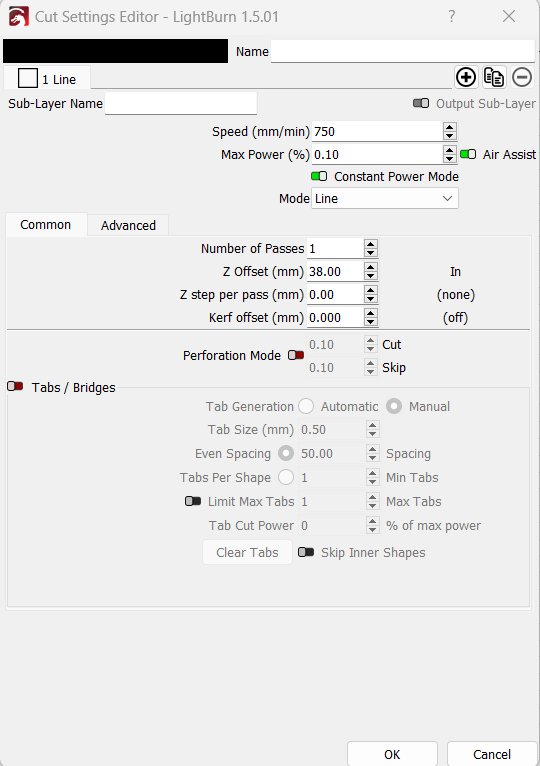
1- the material thickness is 3mm (value set in Lightburn under the Material Thickness parameter in the Material Library)
2- the Z offset is set to 38mm and the laser height is at 63mm (flat to the Z axis stepper motor)
2- the initial Z axis position is flat to the motor when at the HOME position
3- Start the burning of the 3mm material
4- Once the engraving is finished, the laser do not go back to the Z homing position but a little lower. This makes the laser not being position at the same height during the next 3mm material engraving. This means the the initial Z Home position is now modified.
5- For the following material engraving, the material is engraved based on the modified Z Home position, which I believe is wrong.
6- Note that the modification of the Z Home position is proportional to the material thickness. So the thicker the material is, the bigger the Z Home position modification is
Can you provide the following:
- An explanation of what you’re trying to accomplish and what you’re expecting to happen.
- What is the intent of the 38mm Z offset?
- Screenshot of Cut setting
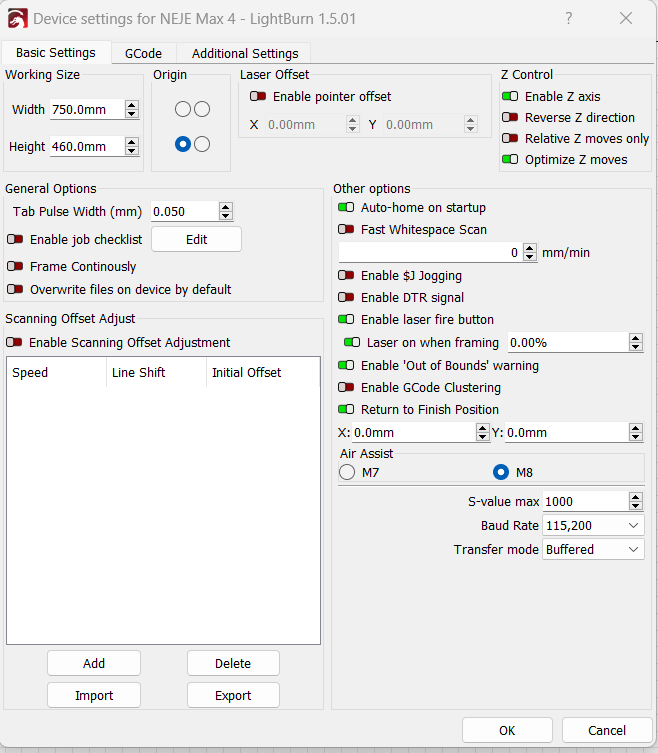
- Screenshot of Edit->Device Settings
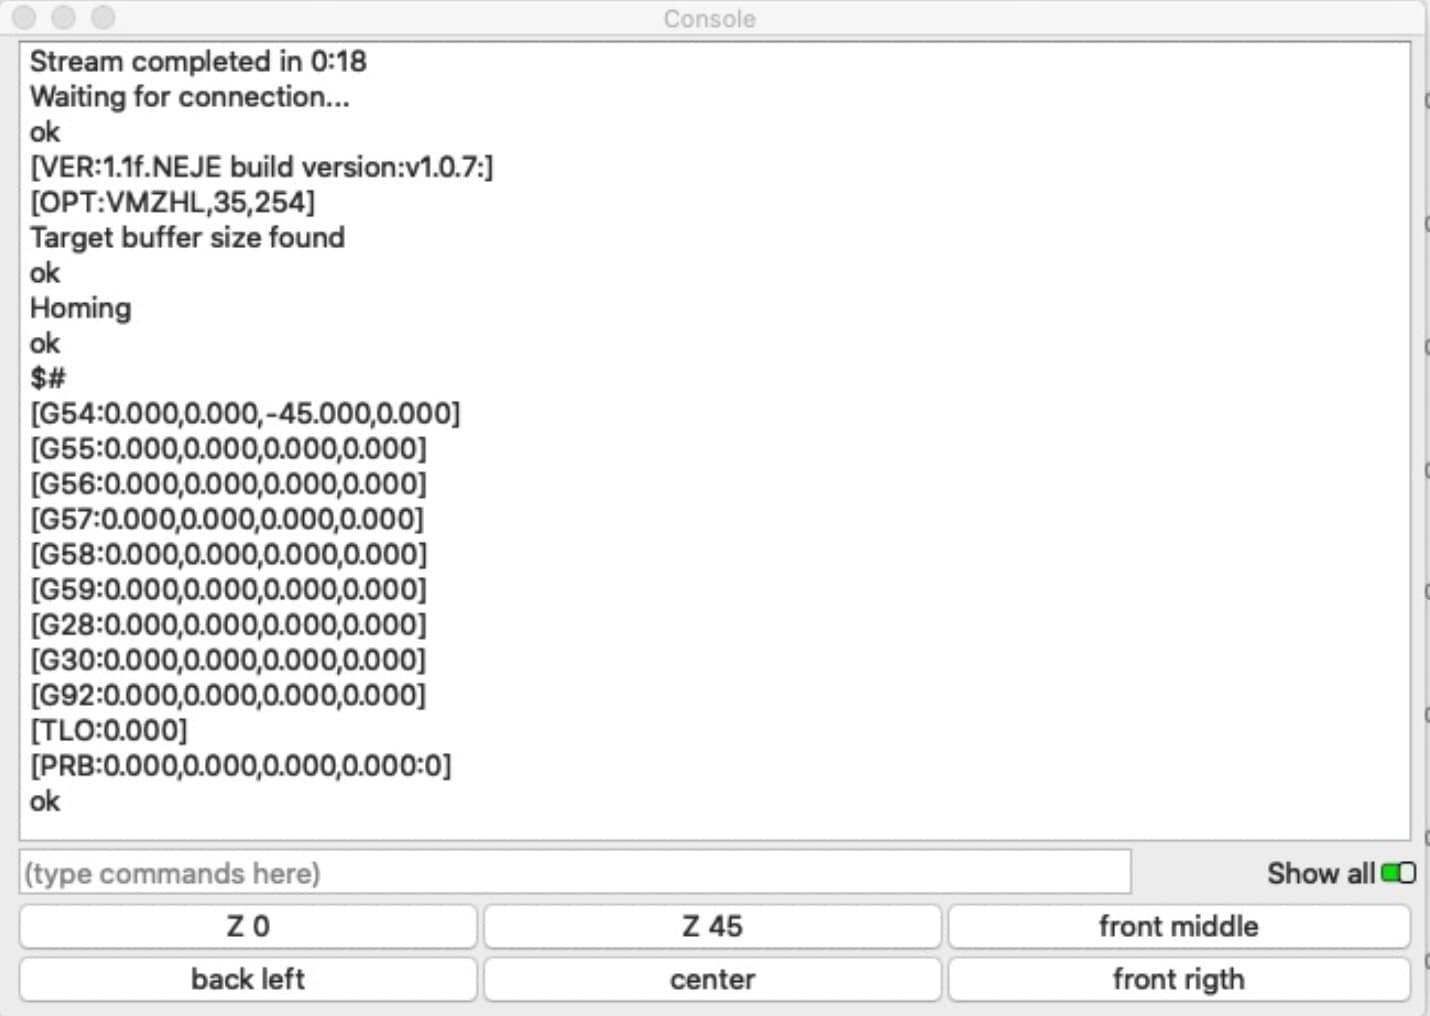
- Run this command in Console and return the full output. The first command will home the machine so be prepared for it:
$H
$#
?
Hi,
Thank you for the quick answer…
1 - I would like to be able to use the Material Library with the values associated to Line, Cut, Text and the Material thickness feature in order to engrave or cut any thickness. I expect the Z Axis to be perfectly positionned based on the material thickness and the focal point of the laser for every single cut I want to perform. Presently it is not the case as described in my initial post.
2- The intent of the 38mm Z offset is the following… and please correct me if my unbderstanding is wrong…
The focus point of the laser is 25mm of the material surface. Presently, the laser is at 63mm of the honeycomb. The Z offset being set to 38mm, it should bring down the laser to 25mm of the honeycomb. The 3mm material thickness should bring the laser 3mm up and still at 25mm of the material surface. Please confirm that I understand the behavior properly…
What happen is what is described in the initial post and shown in the video… After the first engrave, the laser is not sent back to the Z Home position but a little lower (it looks to be equivalent to the material thickness, but I am not sure). I did some test with ticker material and the reepositioning to the Z Home position after the first engrave is worst when the material is thicker.
This means that the HOME must be redone after each material engrave which is the issue…
Screenshot of Cut Setting
Screenshot of Edit/Device Settings
Requested Commands Output
Waiting for connection…
ok
[VER:1.1f.NEJE build version:v2.1.0:]
[OPT:VMZHL,199,1000]
Target buffer size found
ok
Homing
ok
$H
ok
$#
[G54:0.000,0.000,0.000,0.000]
[G55:0.000,0.000,0.000,0.000]
[G56:0.000,0.000,0.000,0.000]
[G57:0.000,0.000,0.000,0.000]
[G58:0.000,0.000,0.000,0.000]
[G59:0.000,0.000,0.000,0.000]
[G28:0.000,0.000,0.000,0.000]
[G30:0.000,0.000,0.000,0.000]
[G92:0.000,0.000,0.000,0.000]
[TLO:0.000]
[PRB:0.000,0.000,0.000,0.000:0]
ok
?
<Idle|MPos:0.000,460.000,0.000,0.000|Bf:199,1499|FS:0,0|Pn:P|WCO:0.000,0.000,0.000,0.000>
ok
Based on this I assume that Z value is 0 at the highest point. Meaning the farthest away from the bed. Can you confirm?
Also, positive Z values bring the head closer to the bed. Can you also confirm?
If so, I believe “Reverse Z direction” should be enabled in Device Settings.
However, that leaves the understanding of how material height is to be used. And you’ll have to excuse me because I don’t have direct experience working with a system like this.
But I believe this means that material height will need to be the distance from the laser nozzle to the material. So in your case 60 mm (63-3).
One thing odd is your use of offset as a focus mechanism. That’s meant to be a way of adjusting focus. So distance away from material height. So let’s say you wanted to focus at 25mm away from the material you would put 25 in offset focus. I believe once you reverse Z a positive 25 will measure distance away from top of material but please be careful with this.
However, this makes the material height setting a little difficult to use since it’s always (63mm - actual material height). I’m trying to think of a way to get material height to work more intuitively.
I think you could potentially reverse the direction of Z and have honeycomb height at 0. And this would make things work more intuitively.
Hi,
Just to let you know that I found a solution to the problem. For some reason, the Material Thickness of the Lightburn Library CANNOT be used in the calculation of the Zoffset value. In short, if the material is 3mm thick, the Zoffset value cannot exclude the Material Thickness parameter because the laser does not go back to his initial ZHome position after the material has been engraved or cut.
If the Zoffset value include the material thickness of 3mm (without using the Material Thickness parameter of the Library, which is left to 0mm), then the laser go back to his ZHome position and everything works just fine.
So, for some reason, the calculation of the Zoffset value using the Material Thickness parameter of the Lightburn Library is not working as I expect it with the NEJE Max 4 and E80 laser…
Hi,
I have the same laser since a month and it is my first laser engraver. I also observed the same behaviour as your’s doing the same procedure. Up to now I was simply adjusting the laser height mechanically after sending the laser at -45 with a 25mm spacer on my honeycomb. Then I wrote 0 in the material height and -45 + the materiel height for the offset. It worked well but you have to put the offset to all the layers.
I have found this youtube video from MRW Z Axis Setup which I implement with an add-on.
I have used his second method.
Like previously I send the laser down at 45 mm, put my 25mm spacer and adjusted mechanically the laser. Then I wrote the command line G10 L2 P1 Z-45 in the Console window. I put the required material thickness and made a try and it worked perfectly. The only thing I didn’t like is that it returned Home at the same height used for engraving. Also have a CNC and prefer to rise at max height before returning Home. I unmarked the Return to Finish Position when finished in the Device settings window. I added those two lines in in the End GCode window:
G0Z45
G0X0Y460
You can put other coordinates if you prefer.
Also added two macros to control the Z axis when needed: Z0 to send the laser at the lower position and Z45 to the top position.
You can try this procedure it seems to be ok, but don’t forget that I am a new user of LightBurn and a laser engraver.
Hi Robert,
I looked at the same video plenty of times… ![]() For whatever reason the command G10 L2 P1 Z-45 did not work for me… I don’t understand why… It did not write the command in the controller…
For whatever reason the command G10 L2 P1 Z-45 did not work for me… I don’t understand why… It did not write the command in the controller…
For now, using the Lightburn library with predefined Zoffset values (including the material thickness) that can be assign to any layers is just perfect for me. I would have like to use the Material Thickness Lightburn parameter from the library but everything looks functional for now and the ZHome value is not corrupted anymore…
Salut Robert,
The only difference in regard with the version is the build… I have build v2.1.0