New Method for White Tile Engraving: Norton White Tile Principal Component Method

From the sound of it, much more alcohol. Try using 2.5 - 3shot glasses of voldka.

I finally got a chance to test powdered TiO2 and I’m pleased with the result.
On the advice of others, I bought food grade powder and made a mixture of:
3 oz very warm water
1/4 tsp Borax
1/2 oz TiO2

Mixed the borax with the water and shook until the borax was dissolved. About ten seconds.
Added the TiO2 and shook it in a covered jar until well blended. Only a few seconds.
Poured the mixture into a paint sprayer similar to the one referenced by @Hank above

and did some test sprays on some cardboard until the coverage was fairly uniform (I needed to shake the sprayer to keep the TiO2 mixed every 8-10 seconds).
Then I tried the solution on two different substrates:

  1. Flat white tile (not glossy)
  2. River Rock
    In both cases I preheated the material to 80C just before spraying so that the ‘paint’ would dry quickly in place rather than running off. This worked well with the tile making a very uniform covering. It worked ok on the stone, but I think an airbrush would work better so you can uniformly cover the exposure area without wasting ‘paint’.

Then I tried a range of exposures on the tile. My laser is a ‘30W’ diode that I’ve measured to 5.5W @100% power. In the photo below, you’ll see two set of exposures, one set ranging from 5% to 70% power at 1000mm/min and the second set ranging from 5% to 70% at 500mm/min.
The triangle infill is using a fill method with 0.25mm line interval, the outline is a simple one pass vector at the stated power/speed.

The rock was exposed with a fill/line cut style at 1818mm/min, 100%power, 0.125mm line interval for the fill, 909mm/min 100%power for the outline.
Here is the rock as painted, exposed before cleaning, final after cleaning:


While the exposure is easily visible, a lighter stone would be much better.

Finally a word about cleaning. EASY! Soap and water on both the material and the sprayer. In fact, I don’t think I even used soap on the sprayer. Just filled it with plain water, shook it up, sprayed it out, and did this twice. Couldn’t be easier!

In Summary, I think this is a winner!
Next steps, try a photo…

6 Likes

Tom,

Looks super! Thank you for the detailed description. I like the idea of using H2O vs a solvent. Probably will keep the sprayer from clogging. And heating the material up to quicken dry time is also a good idea.

What purpose does the Borax provide?

Regards,
-B

Nice nice, very nice!

The heating of the tile is good, I was going to try that when I get a chance to play with it again.
When I spray kiln wash on shelves for glass kiln I always heat the shelves to about 300F/150C before spraying. All the water flashes off immediately and leaves a nice even coat with no runs.

Great work, can’t wait to see a photo. :slight_smile:

1 Like

To my uneducated mind, I’ll call it a wetting agent so the powder blends reliably.

I’m considering another material, carbomer, which may help keep the powder in suspension, but right now I’m happy enough with this (it’s so easy) that I’m not sure I’ll bother unless I need to do some larger number of objects (unlikely since I only do one or two of a thing at a time).

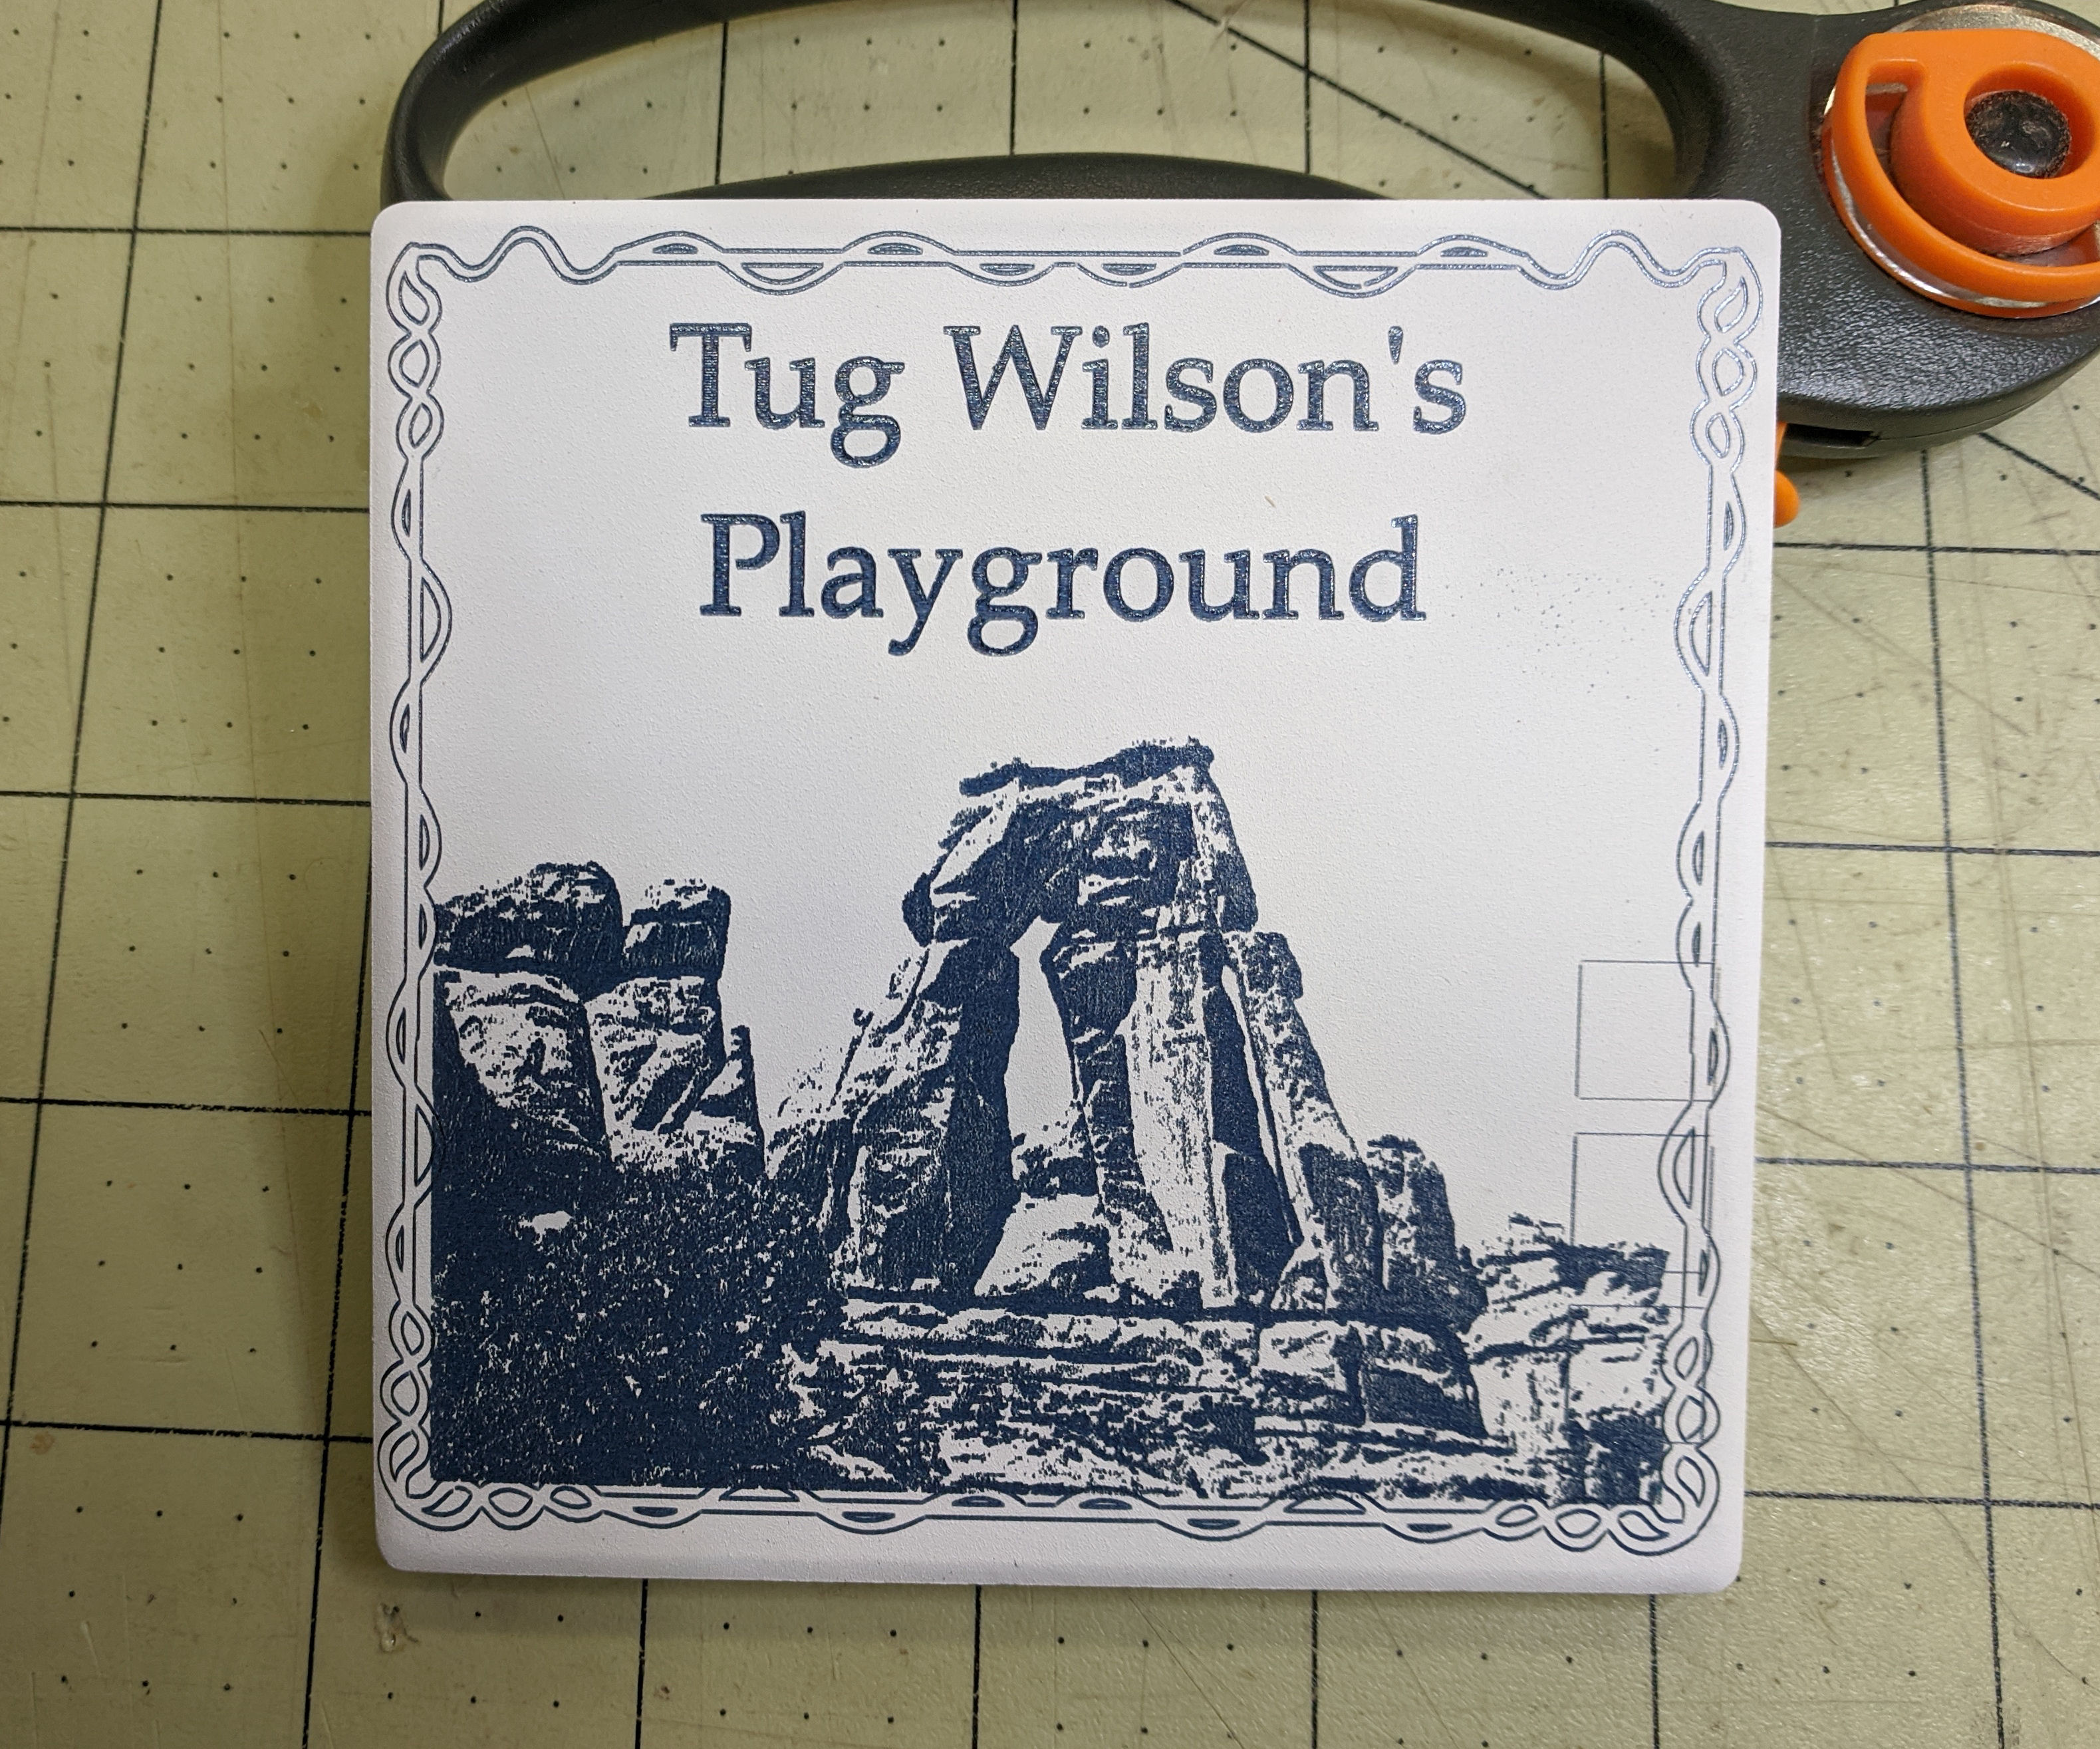
Ok, I’ve done a photo tile (coaster) and did a new stone engraving with a lighter stone.
First, the tile. I’ve done this tile before with my K40:

So this time with my NEJE M2S 30W and this new method of using TiO2 powder. I had a bit of a false start and hadn’t set up my exposure levels properly (had residual Shape Property power settings) so the exposure didn’t come out perfect, but that’s ok, this was mostly a test anyway.
Not yet cleaned:

Cleaned and placed side by side with K40 version:

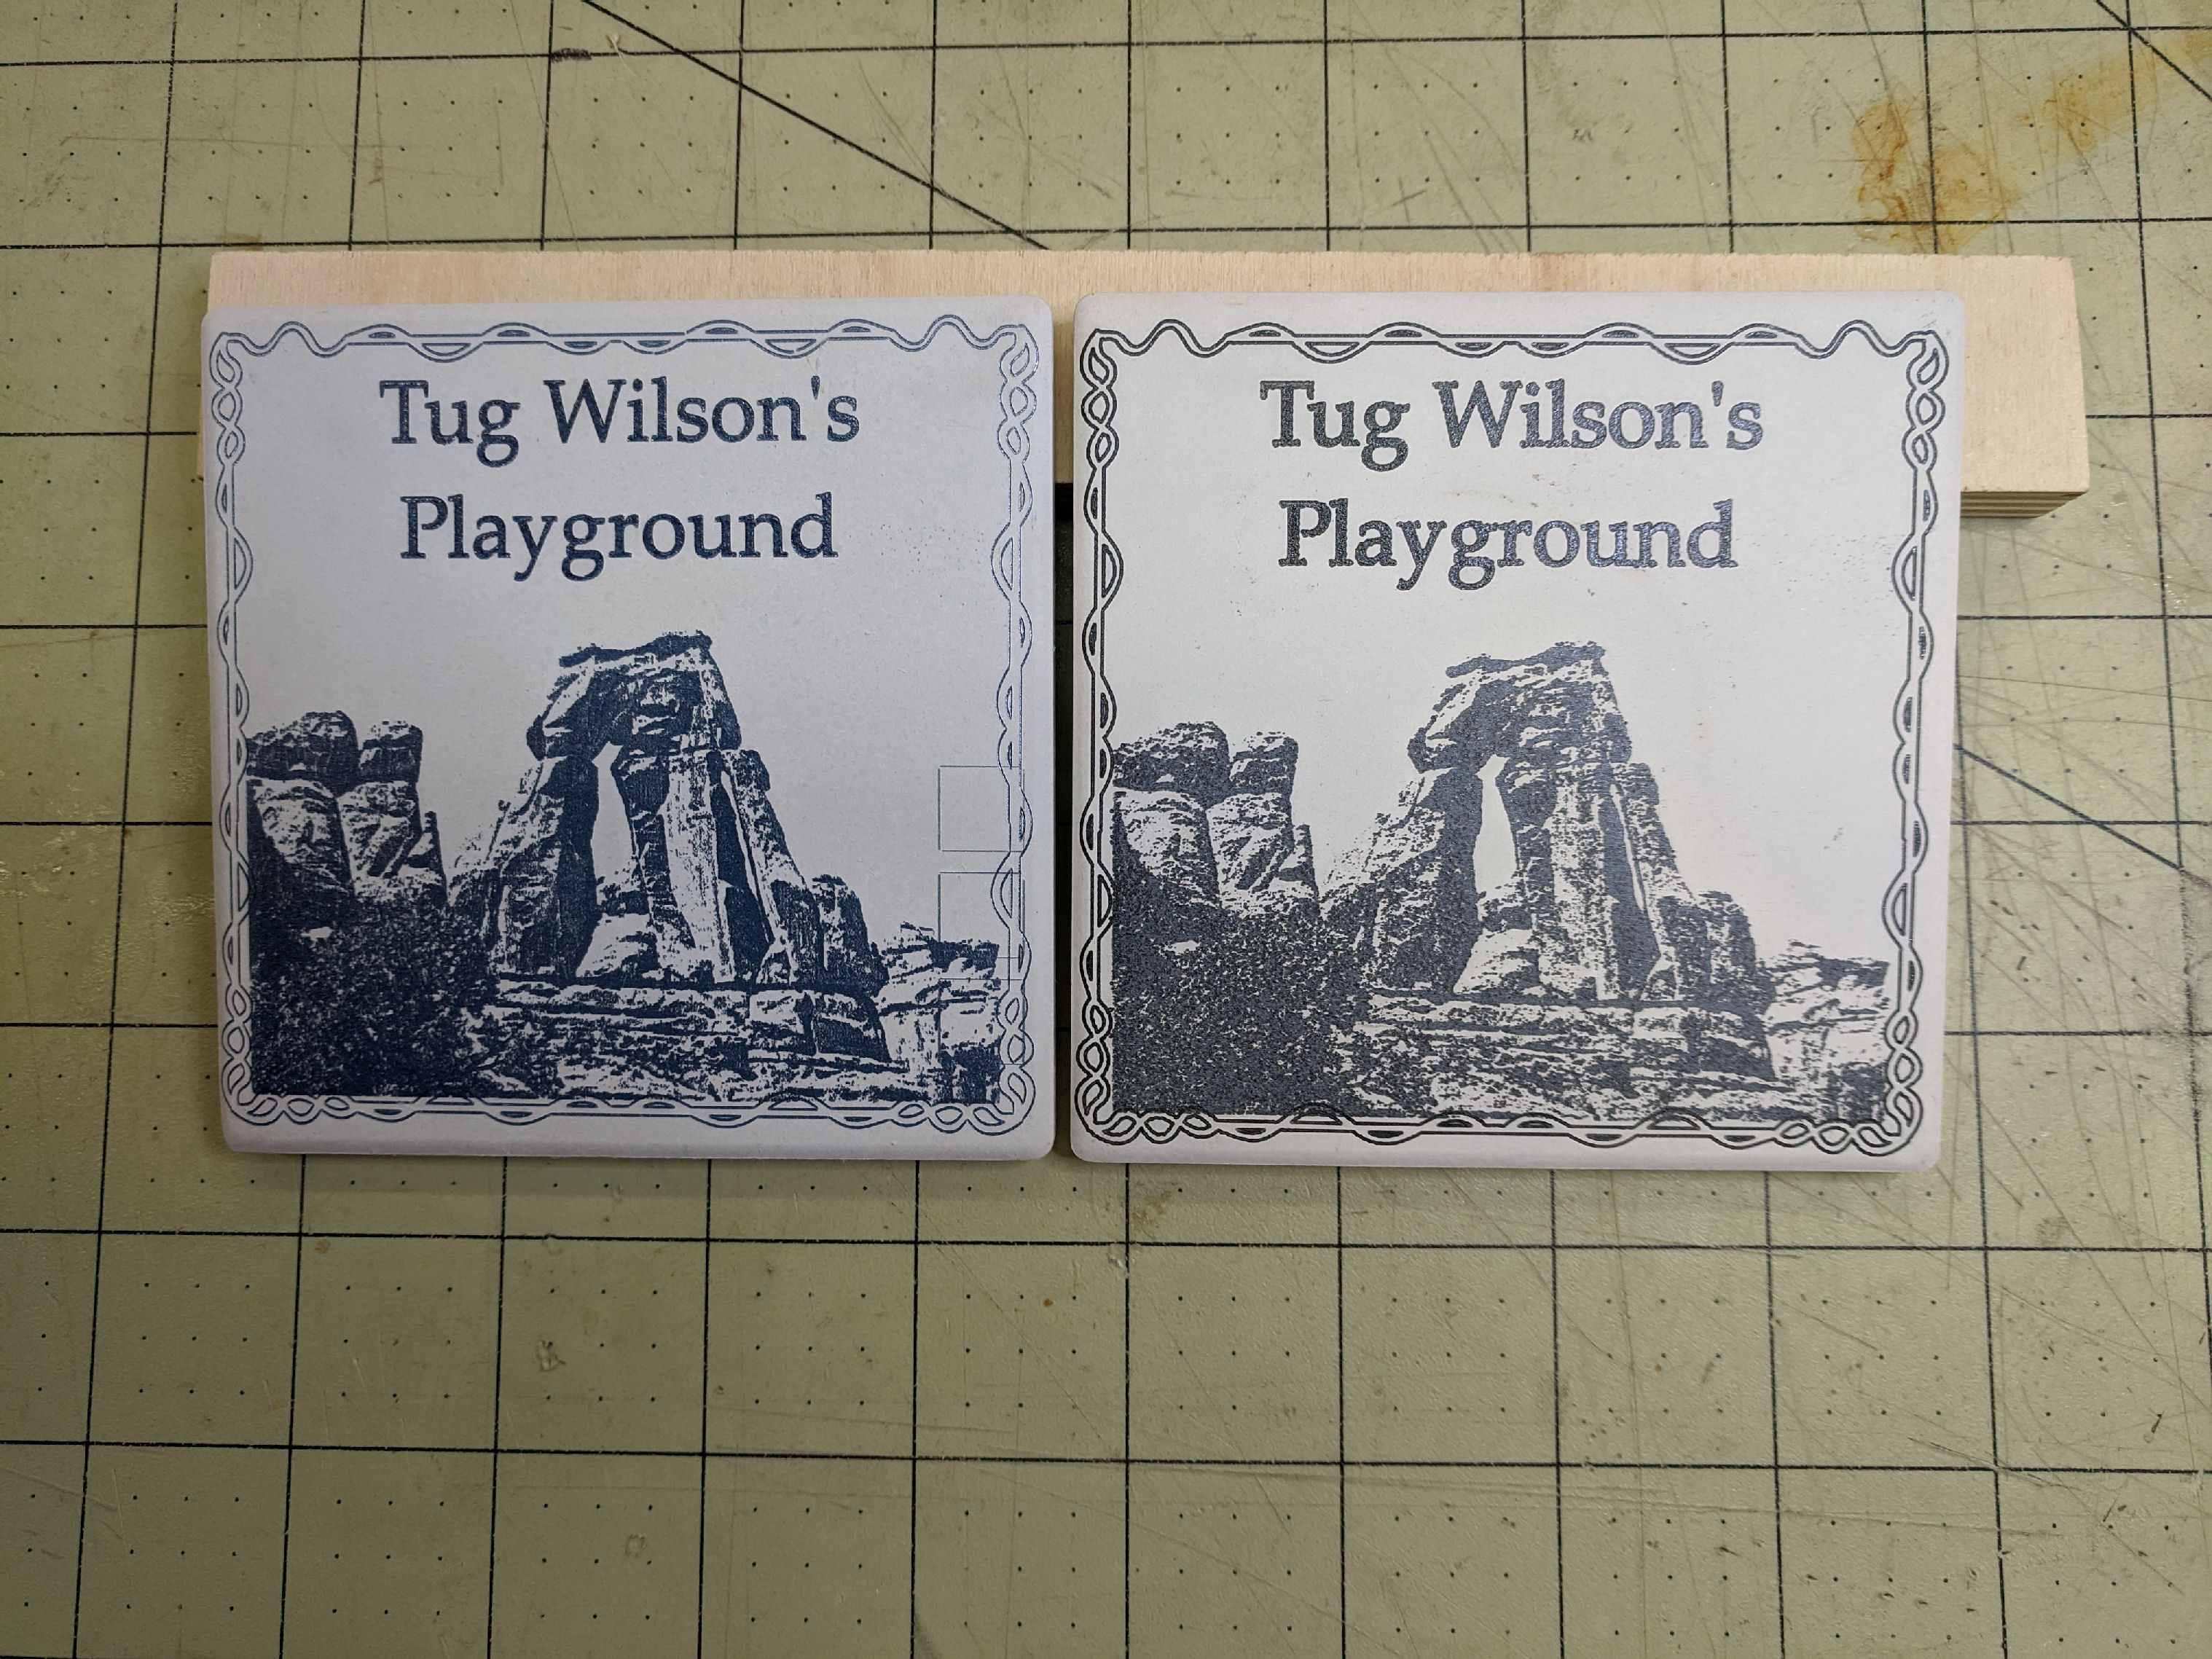
Interestingly, the ‘print’ seems finer on this new exposure. Part of that might be that I under exposed the vectors, but the other part might be some ‘swelling’ in the version where I had used the Rust-Oleum paint as the lines appear thicker. The color is noticeably different, but I can’t say which it ‘better’ as it completely depends on the ambient light source. Outdoors the painted version has better contrast, indoors with fluorescent lighting the ‘powder’ version seems better. In either case, I like both of them and the powder technique is SOOOOO much easier.
Deets:
Text fill/line 909mm/min, 100%, 0.1mm line interval
Vectors: Line 909mm/min, 100%
Image: 1500mm/min, 100%, 0.1mm line interval, Jarvis dither.

Now, for the latest stone exposure, Airbrushing is the ONLY way to go!

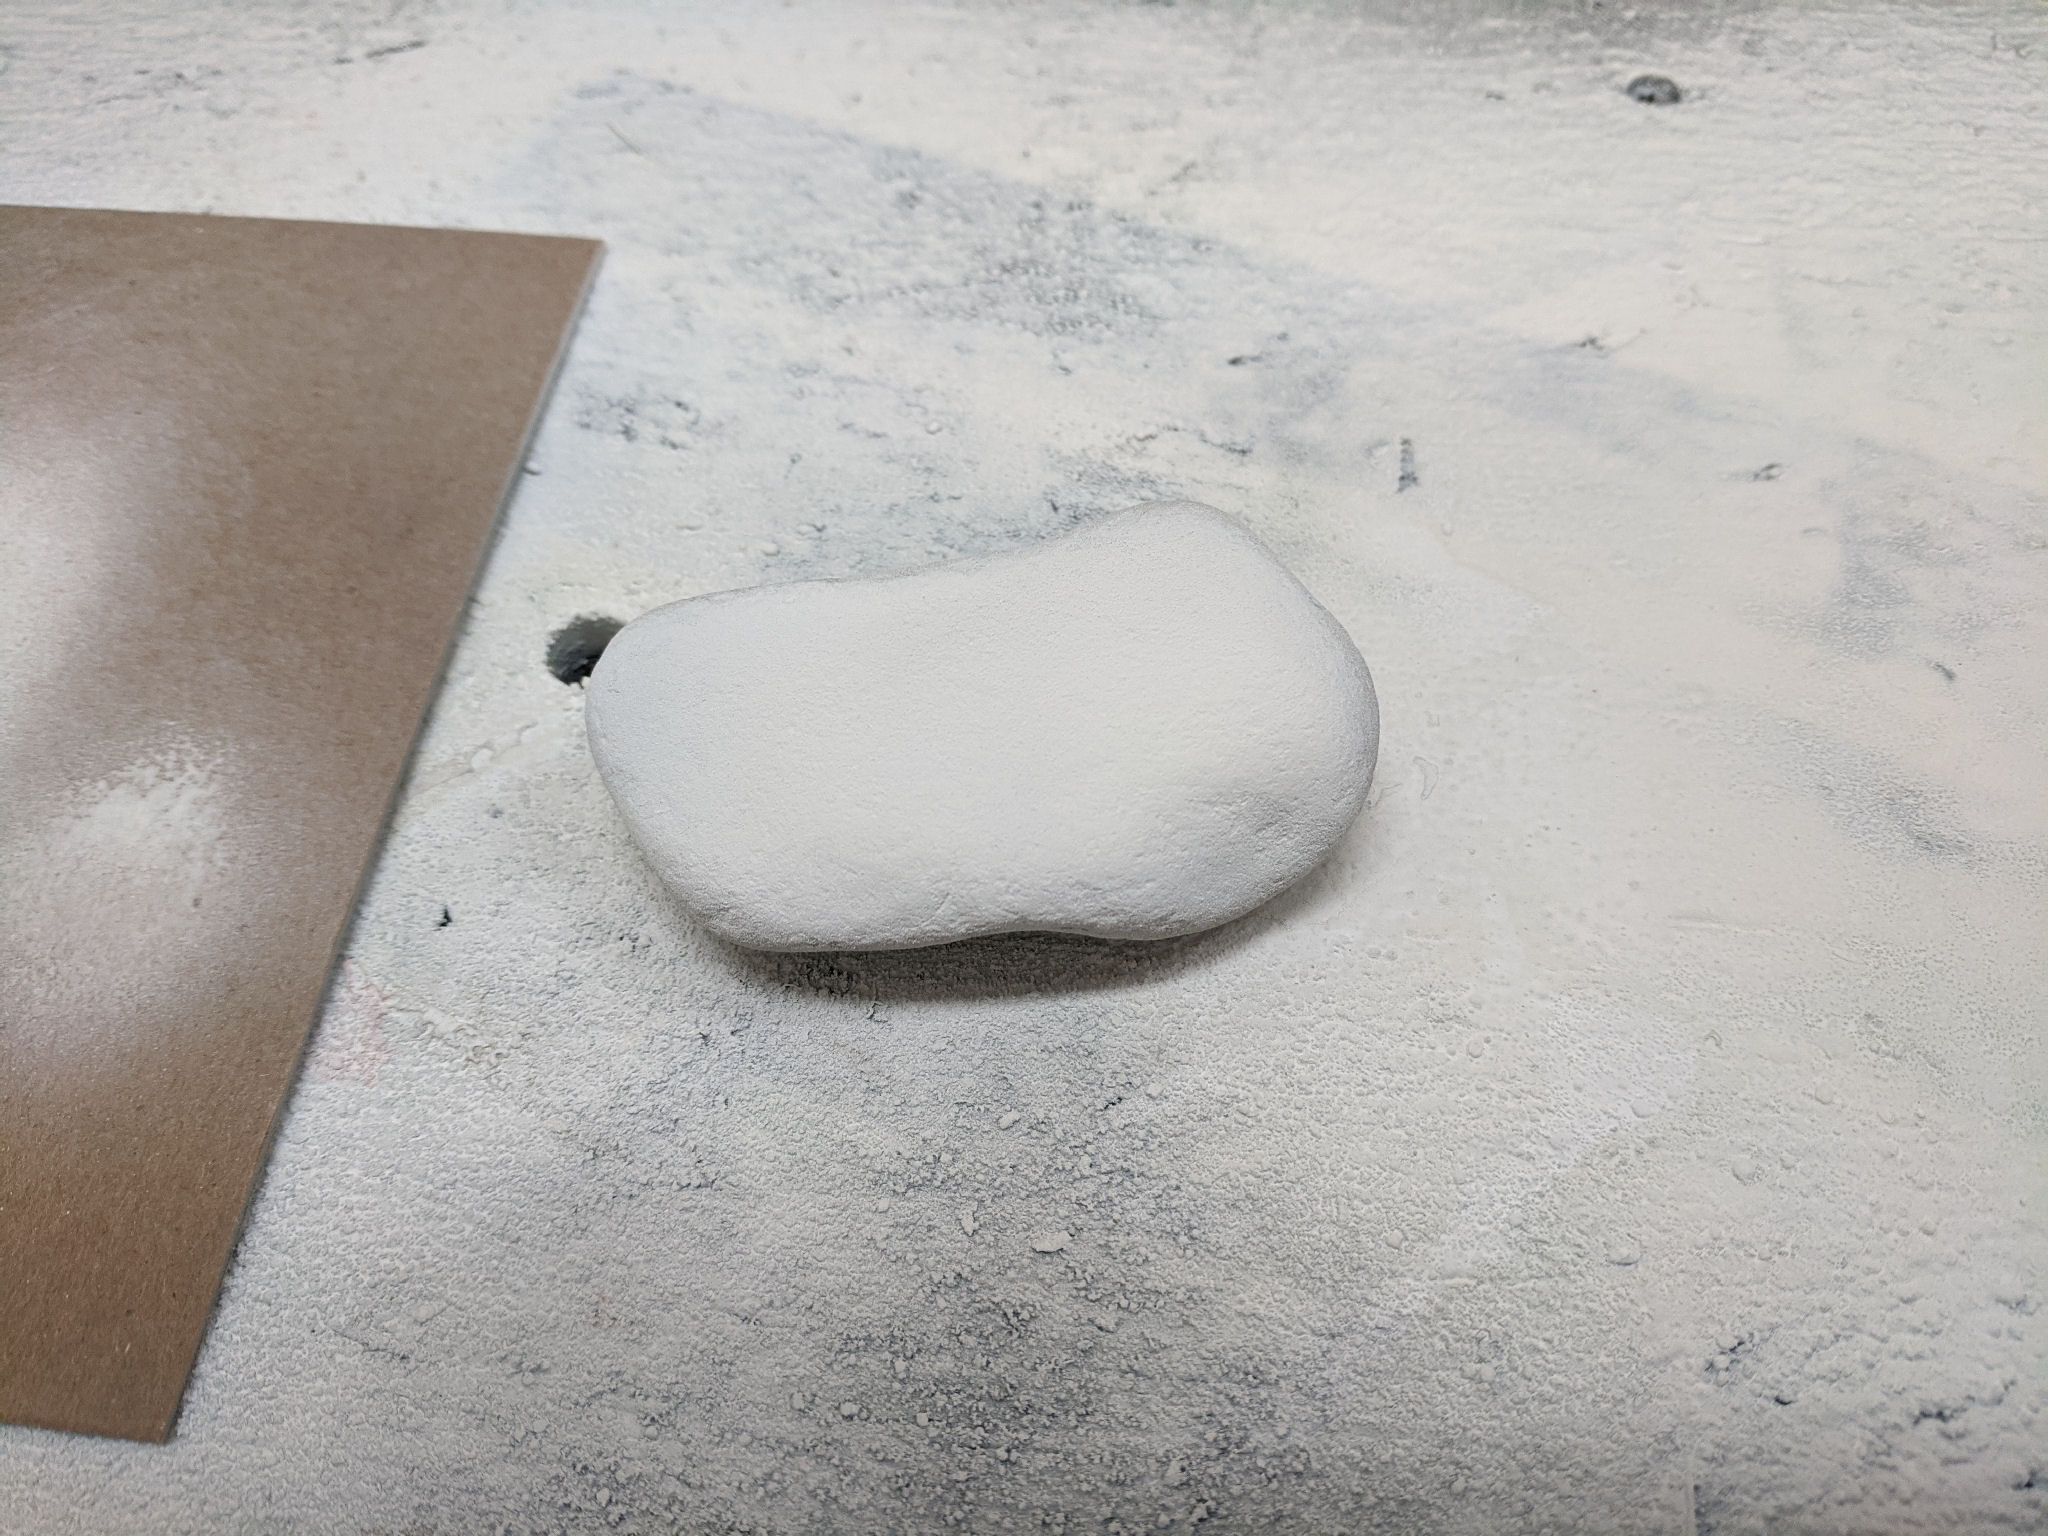
Gecko exposed, but not cleaned:

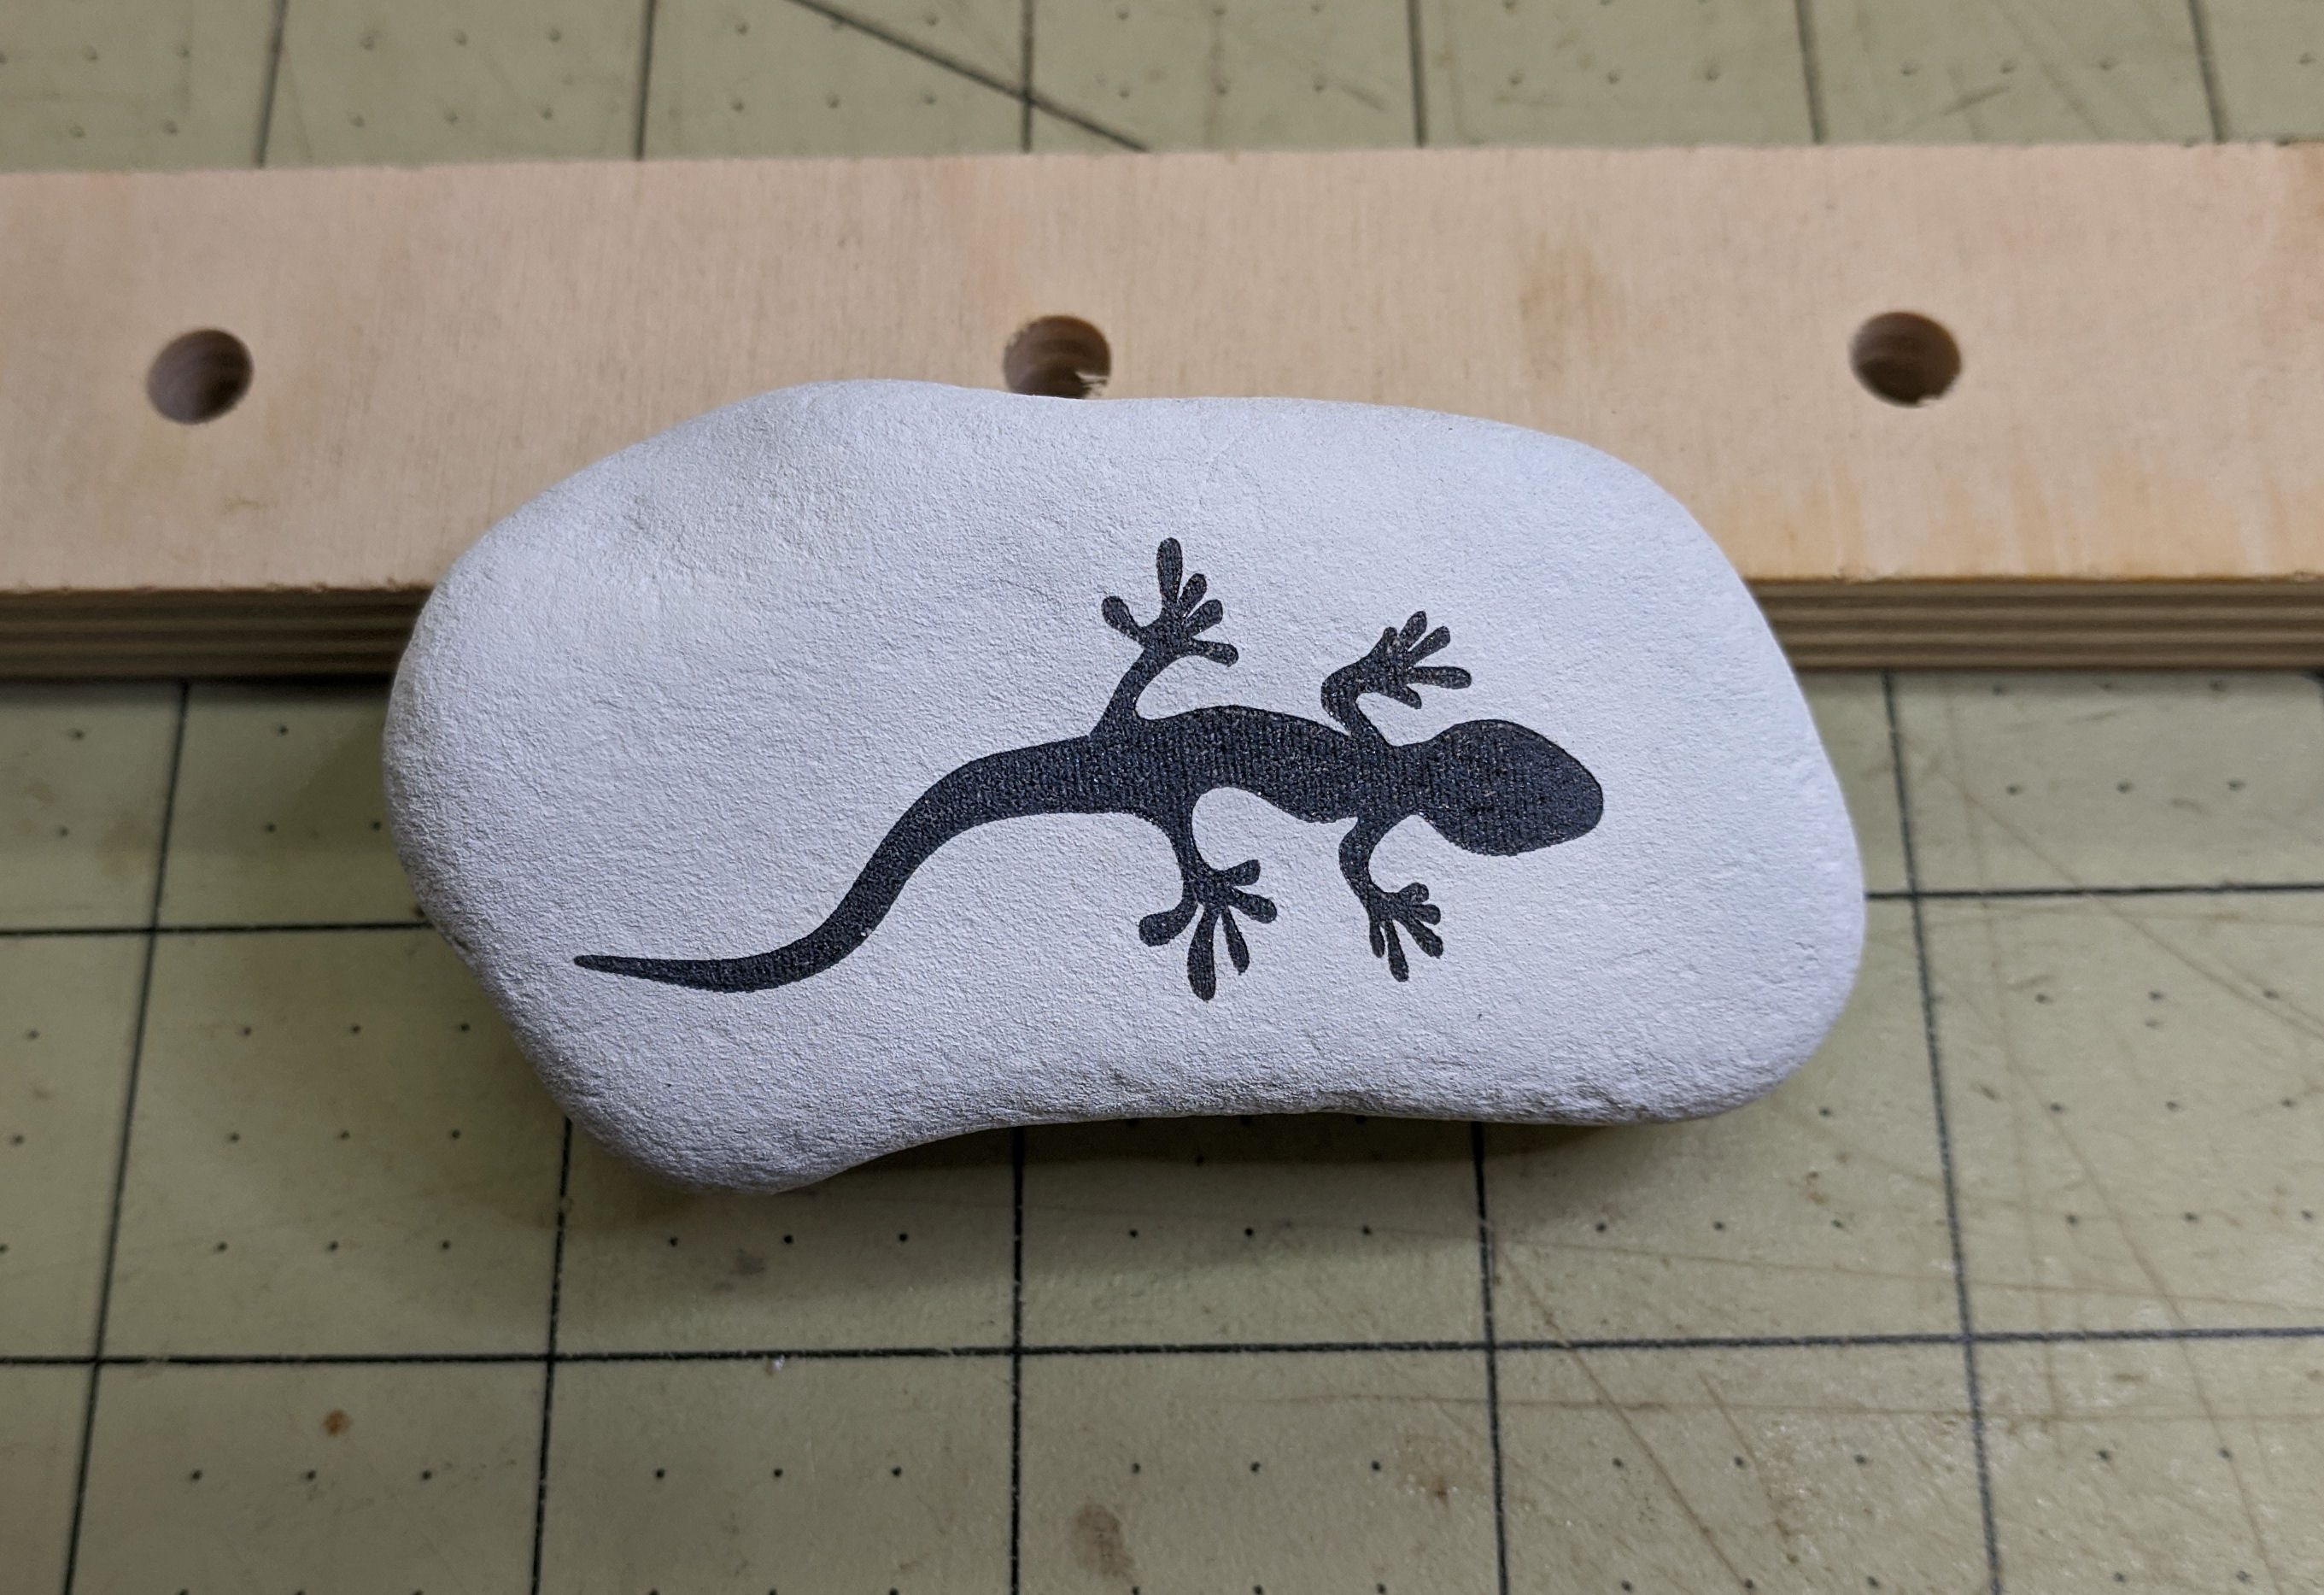
Finally, Gecko cleaned with soap, water, fine toothbrush:
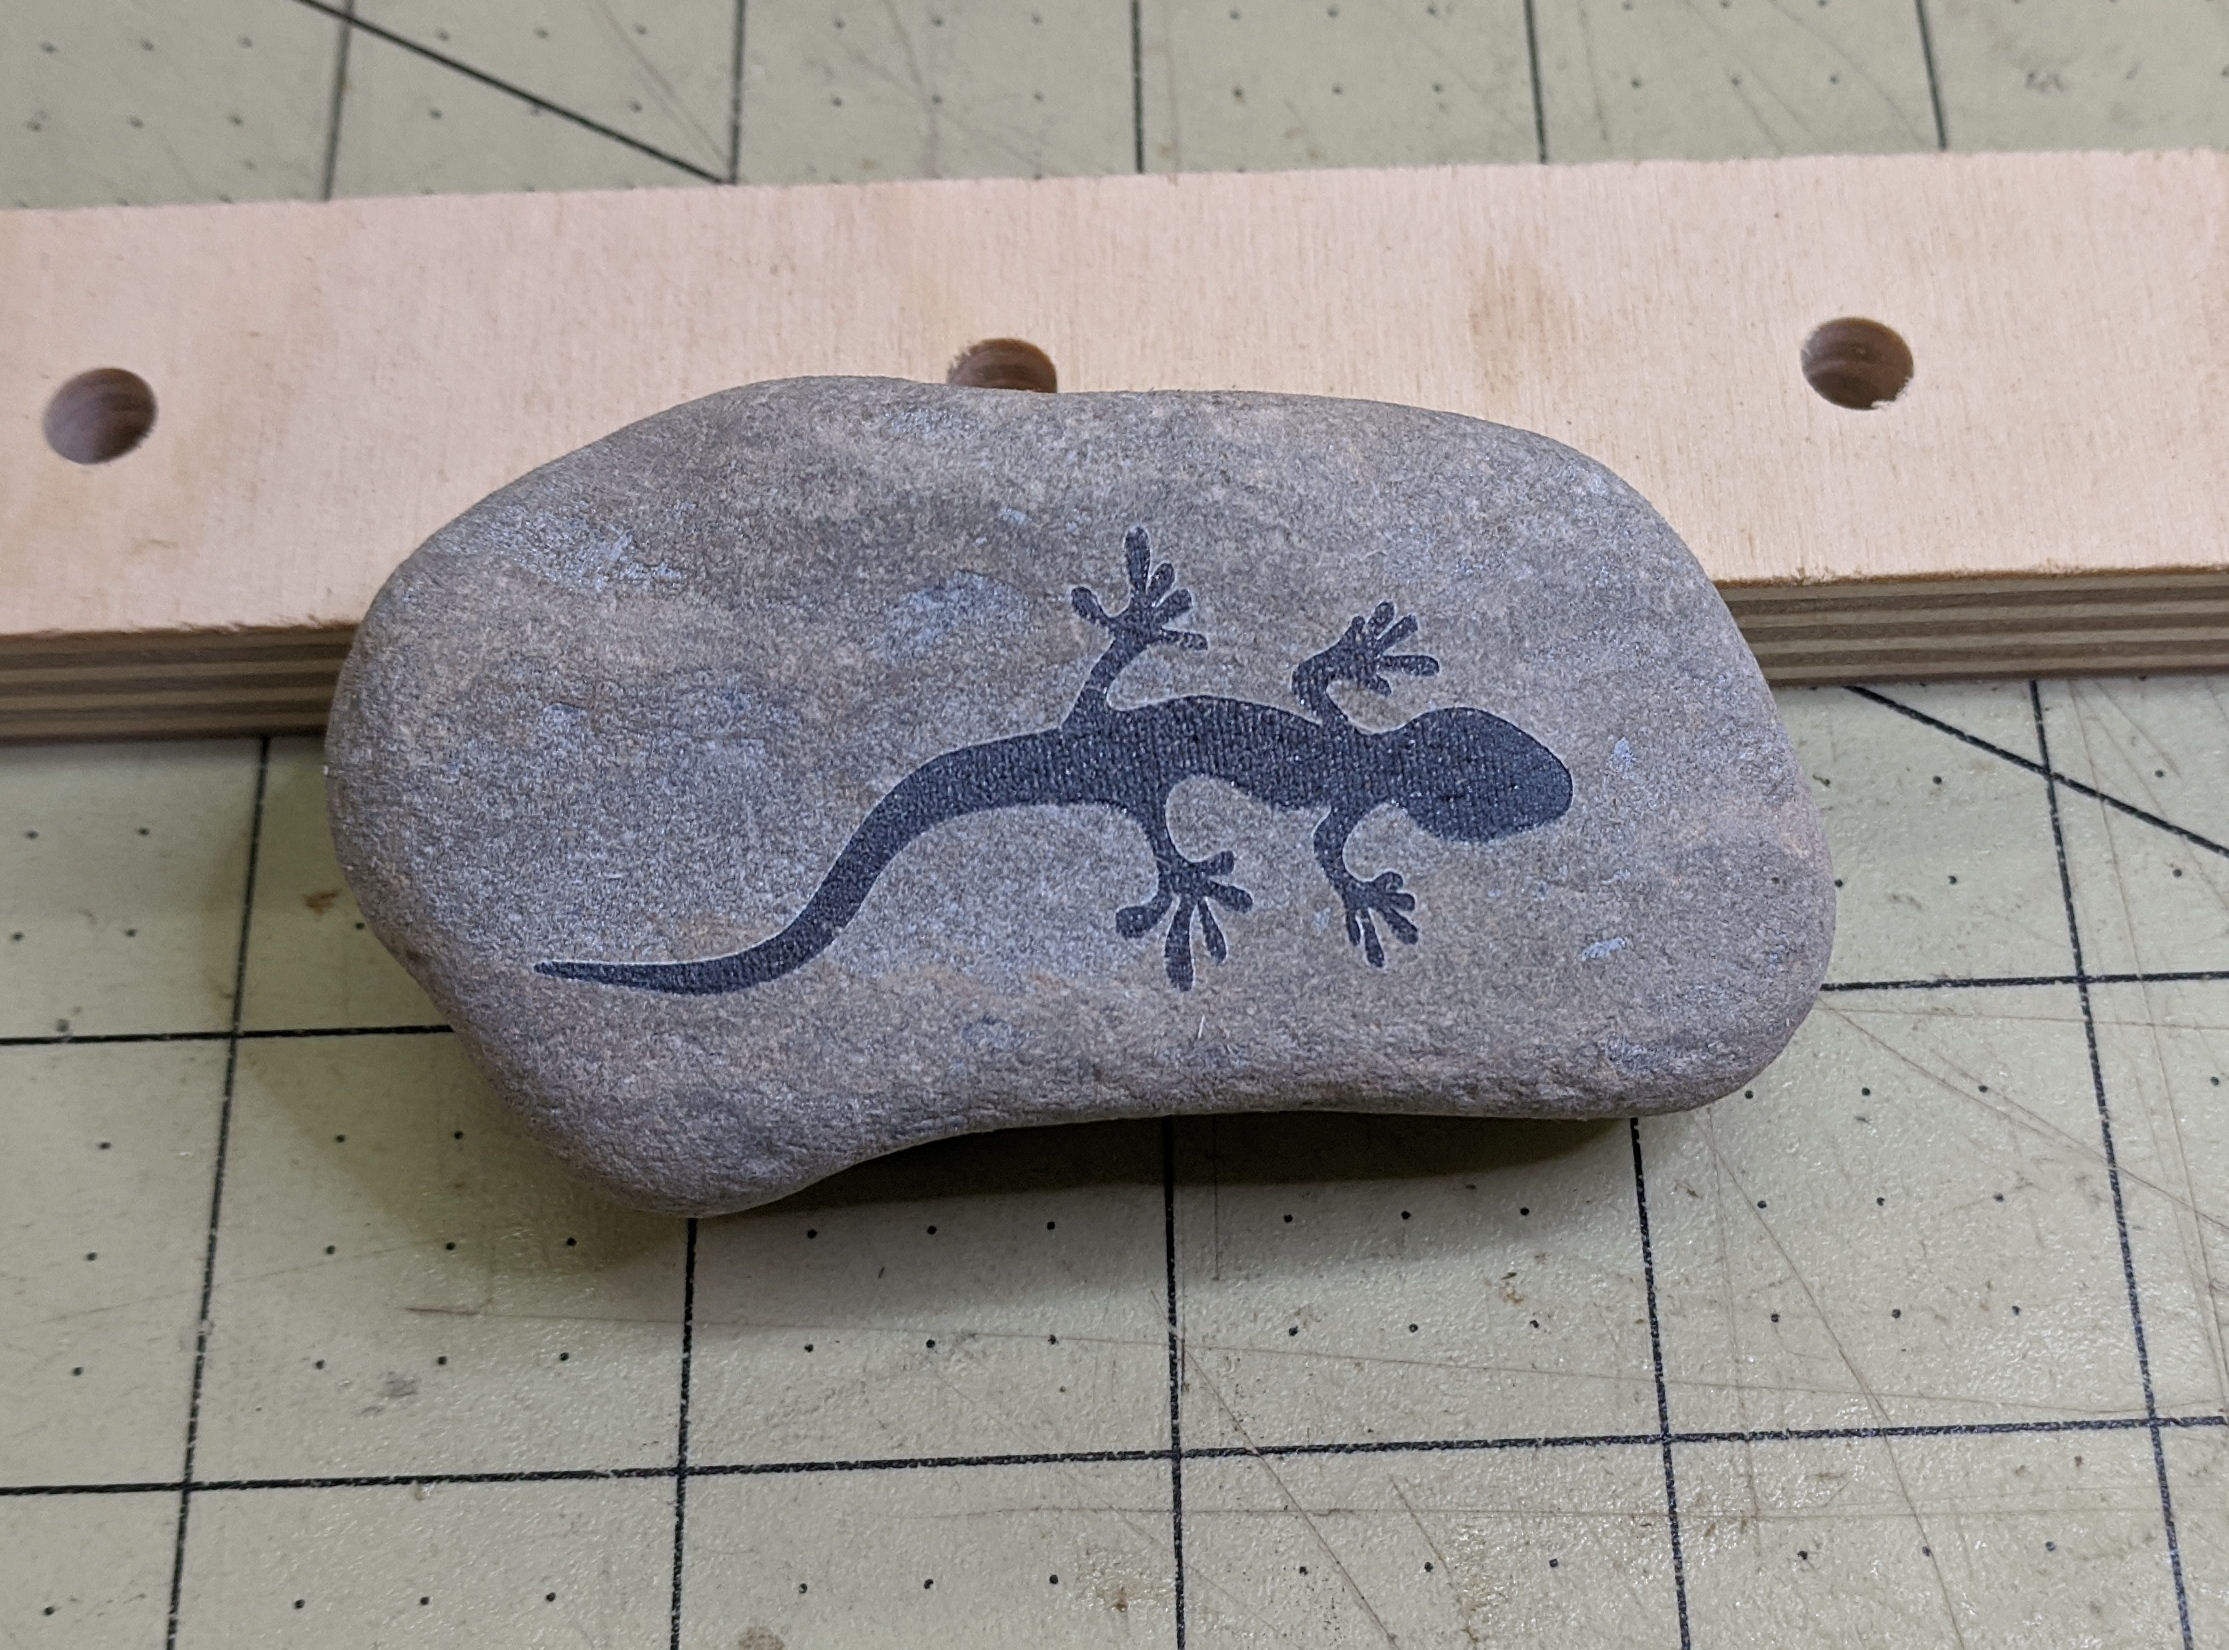
Deets:
Fill+Line:
Fill: 1818mm/min, 100%, 0.1mm line interval
Line: 1000mm/min, 100%

Again, cleaning up afterward is a joy!

2 Likes

Looking very good!
Yeah, clean up sure is easier than the paint method. :slight_smile:

I’m still thinking about alternate coating methods. (need to revisit spin coating again)
Spraying works great, but I really dislike the amount of airborne mist.

1 Like

It’s easy to filter with a mask, but it does coat the workshop. I don’t mind because my finishing room is intended to deal with this (ie, ignore it :grin:
Airbrushing limits the excess spray pretty well. But not scalable to volume production.
I definitely would not spin the rocks!! But still looking forward to spin parameters for tiles.

I guess I should share the stuff I have been doing The most recent is the “home”


5 Likes

Those are very nice! Beautiful job. The one with the roses & rodents is a little disturbing somehow…

2 Likes

Ha! yeah its a modern interpretation of a William Morrris style print using opossums

1 Like

Ooops, marsupials, not rodents. My bad. :smiley:
I like it.

2 Likes

I like the hand, but we’re missing the deets!

1 Like

Ah yeah sorry! I’m running a default ortur lm2 “15w” (~4.5w). Pretty much everything ran at 318dpi 750mm /min 80% power 90 deg scan.

The big difference is the “home” tiles I first ran a scan at 90 deg at 1200mm/min and a second pass at 0deg to fill out some vertical striping that is starting to present. Turned out a second perpendicular pass really helps make those sold blacks super dark.

All the line tracing was ran at 750mm / min 80% power.

As for the photo editing I pre process in GIMP setting the image size & dpi and desaturating. Then I use the shape properties in lightburn to tweak the image for engraving, typically use a Jarvis dithering if raster engraving.

As for shape properties I tend to keep the same machine settings and use the gamma as my primary tool for darkness modulation, images depending on the original I tend to run @ 0.5-0.2 gamma. Contrast typically set to 3 or 5 will make the whites on an image free from shading from lightburn. Often with a 25 enhance radius and 233 enhance value.

After my image is set I export the gcode and actually use LaserGRBL as my sender to the machine. I find the image preview in laserGRBL provides a good “second opinion” on the actual outcome of the workpiece, and the software it’s self is just a bit less resource intensive among other minor things I like about it as a sender for GRBL based diode machines.

I keep forgetting about this control. Thanks for pointing it out. It might be a better choice than denser or slower scanning, especially with the rectangular beam in most diode lasers.

1 Like

I should also note that I use 14% overscanning on everything, it really helps the edges come out more defined. In addition to doing a line trace over all of my vectors before running the fill.

That seems extreme. I use 2.5% and don’t notice any uneveness in the edge. Maybe your accel/decel parameters need tweaking.

Why before? After is built into the profile. You need a new layer to do it before.

Probably could tweak my accel decel parameters but I ended up landing on 14% while running on some Birch plywood, found that was the magic number that kept the edges from getting overburnt. especially as I have been using the fast whitespace scan.

and I run it before as I just seem to get a bit of cleaner results if I run the outline before the scanning.

What size nozzle would work best, maybe a 2mm?

Hi guys, I know this is an older thread, but browsing around I found this article. It seems using some hydrogen peroxide can make ti02 water soluble. Just wondering if anyone wants to give it a go.

2 Likes