Hey! The Makerspace migrated their blog to a new host thanks for reminding me I need to update the hyperlink!
Jamie, How did your raster testing go with your diode laser?
very well, It is comparable to using standard spray paint, since I have gotten into the method I have not gone back to spray paint at all.
With what we are doing, molecular bonding, you need to keep the power/beam and what’s happening to the materials in perspective.
When my machine lases during a pwm period, I put 50 watts on the material, you put 250 watts, same spot, same material…
My brains simple logic tells me five times the energy in one spot has to have different results…
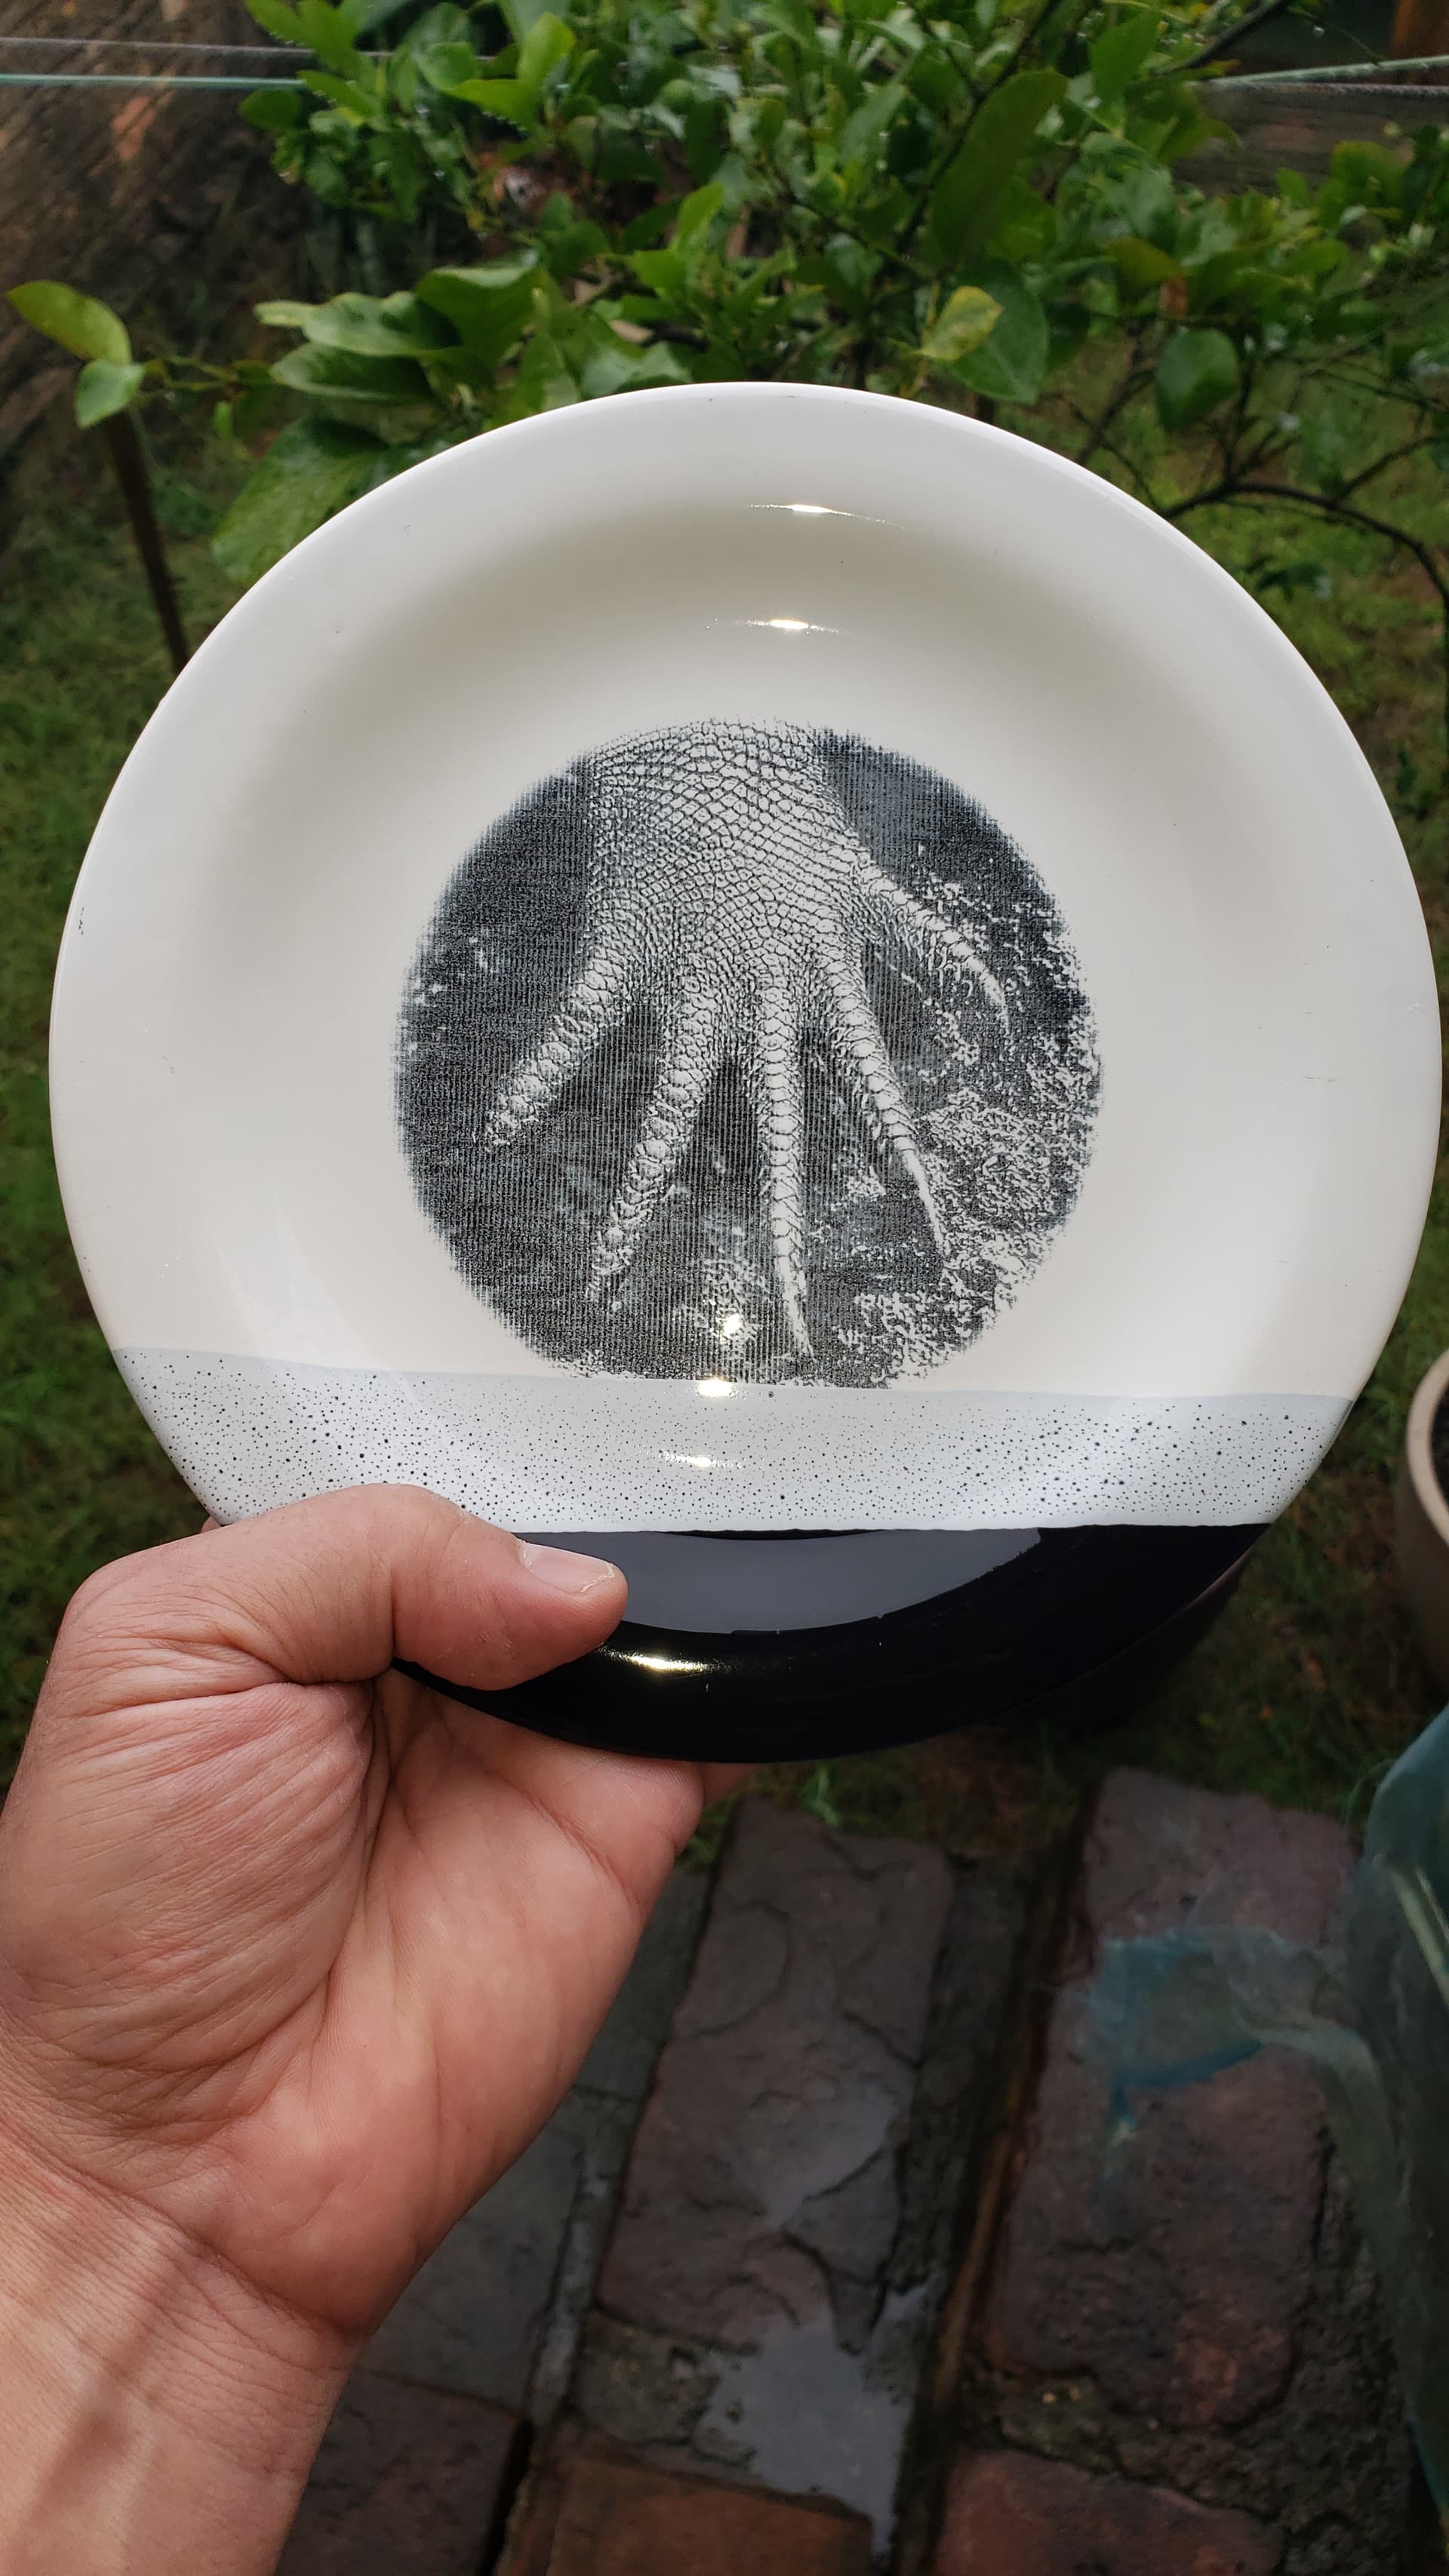
I still have trouble making this tile method working consistently ![]()
I seem to have just as good results mixing the TiO2 with water. Living in the dry desert, the Ethanol evaporates too quickly and everything gets plugged up… Water seems to work and I add a little bit of food coloring so I can see where I’ve put it. Water or Ethanol, if you sit it on the shelf, it separates anyway… as does the food coloring.
![]()
I’ve gotten the titanium process down and repeatable with excellent results. Airbrush application on white tiles was questionable as to good or bad coating until I tried your tip of adding a few drops of ceramic water based paint to my spray mix. Now I can clearly see if my coating is sufficient on any colour of tile. Thanks
I am not sure how much of the Tio2 is in Titanium White oil paint… and not sure if a thin layer would be more flammable than an hour old still tacky spray paint? These guys in here would likely know, but I was trying to think outside of the box. Titanium White in oil paint might be accessible to you? Keep a CO2 or Halotron fire extinguisher handy!
Don’t know about vaporizing an oil based paint…
![]()
So, for some reason I just don’t get good results with a prewetted horsehair brush and 2 tbsp of TiO2 and 3 tbsp of water. The spots are only grey, with periodic black spots where the liquid TiO2 balls up.
I went crazy and dumped like a half a tbsp of TiO2 powder on the tile before pouring the white glue mix onto it, to enrich that one tile. My TiO2 isn’t clumping at all so just a back-and-forth with the brush is mixing it. THIS produced a much better black, like spray primer was doing.
I’m of the opinion that this needs way more TiO2 in the bottle. The glue is only a binder and can be far less. I don’t think TiO2 is falling to the bottom, and in any case I shake the bottle first which appears highly effective.
It’s not easy to get on evenly though, with any of these mixes. It’s easy to brush off too much and/or leave brush marks in any of these formulations I’ve tried. I think the next thing is going to be to try a foam roller, there are little ones, I think 4", that should be a good fit. Also I was getting air bubbles (mostly from the pre-use shaking I did) that the horsehair brush didn’t fix. The foam roller might pop all the larger ones as it goes down.
While the spray primer is easy to be consistent, it takes much longer to lay out and apply more coats, needs a spray area, and it’s more expensive. The white glue component method also appears to be capable of laying more TiO2 under the right conditions.
But the real advantage is the water-only cleanup of PVA glue. It’s slower to clean spray primer off and that requires lacquer thinner or acetone, both expensive and moderately dangerous chemicals.
I attempted foam rollers and brushes but was never able to achieve a consistent coating. Granted I didn’t try too hard it just seemed like a dead end to me. But would be great to see someone with more patience than I get a method down for it.
I was going to tackle this before t he weather turned cold and the weather beat me ![]()
Have you tried spraying the glue+tio2? Maybe water it down?
I’ve been using the PVA glue method with very solid and dark blacks.
I too went “crazy” with adding more TiO2 when all I was getting were speckles
Essentially I added about 4oz PVA to a 12oz plastic cup and added water until the mix was fairly watery, almost 1:1. kept adding TiO2 until it thickened up to a pancake batter viscosity while stirring vigorously with a tongue depressor. I kept the stirring up until felt all the powder had been mixed it with no clumps (maybe several minutes of mixing).
Applied to the tile with a foam brush using just the tip of the brush to leave a full coat. Brushed it out in all four directions lightly. Since the white tile glaze is glossy and the mix dried a flat white, I can easily tell where the coverage is thin and in these cases did another coat.
If the mix is low enough viscosity, any bubbles eventually popped as it dried. In the cases where they needed help, I just “brushed” the surface with the heat from a propane torch held about 6" away. Just quick swipes. The torch does a similar job when popping bubbles on an epoxy fill.
The way I see it, the PVA/water provides the binder that allows for easy painting of the material. The powder is added until the binder is saturated with it. Beyond a saturation of Ti02 and mixing until all clumps are gone, the exact ratios don’t seem to be all that critical.
.
I use PVA craft paint (water based) + 20% TiO2 + 50% alcohol 70, measured for storage, when spraying I triple the volume with more alcohol 70 and apply two coats, drying each coat with a heat gun. PVA paint, in addition to already containing TiO2, acts as a binder and allows handling after drying.
1 Like
I laid some PVA+TiO2+water+2 drops of soap down with a 4" foam paint roller
Gotta say, initially this was looking much better. Consistent. No brush marks. There were bubbles but I just microwaved the whole tile for 90 sec and it all flattened out and came out dry.
But, it’s showing not nearly enough TiO2 to get a black. And adding coats has proven difficult as it quickly dissolves the first coat. And not actually as consistent as I thought- I see a fine texture when wet, after microwaving it flattens out but the burn is showing a fine texture of parts with TiO2 and parts without.
I think the problem is I just have too much water. I think I had 3 tbsp in it by now. I’m going to start over with a new bottle.
OK, I tried some different things and I’m getting this…
I just put like half a tablespoon of TiO2 in the middle and dripped a few drops of water until I had a sticky mud, spread it around with my finger, then added a couple more drops, enough to make the surface slick. I floated my finger around until it was just about to stop being slick and mud up again.
WOW. OK, that’s different! Sample so far shows deep, consistent blacks.
I was doing 20mm/s 80% on my Atomstack A5 Pro+, that ended up REALLY jet black. Looks like too black, actually washing out the image.
I bumped to 40mm/s 100% and still too much.
Went to 80mm/s 100% and the graphics appear looking great!
I did not expect this to be working at this high of a speed!
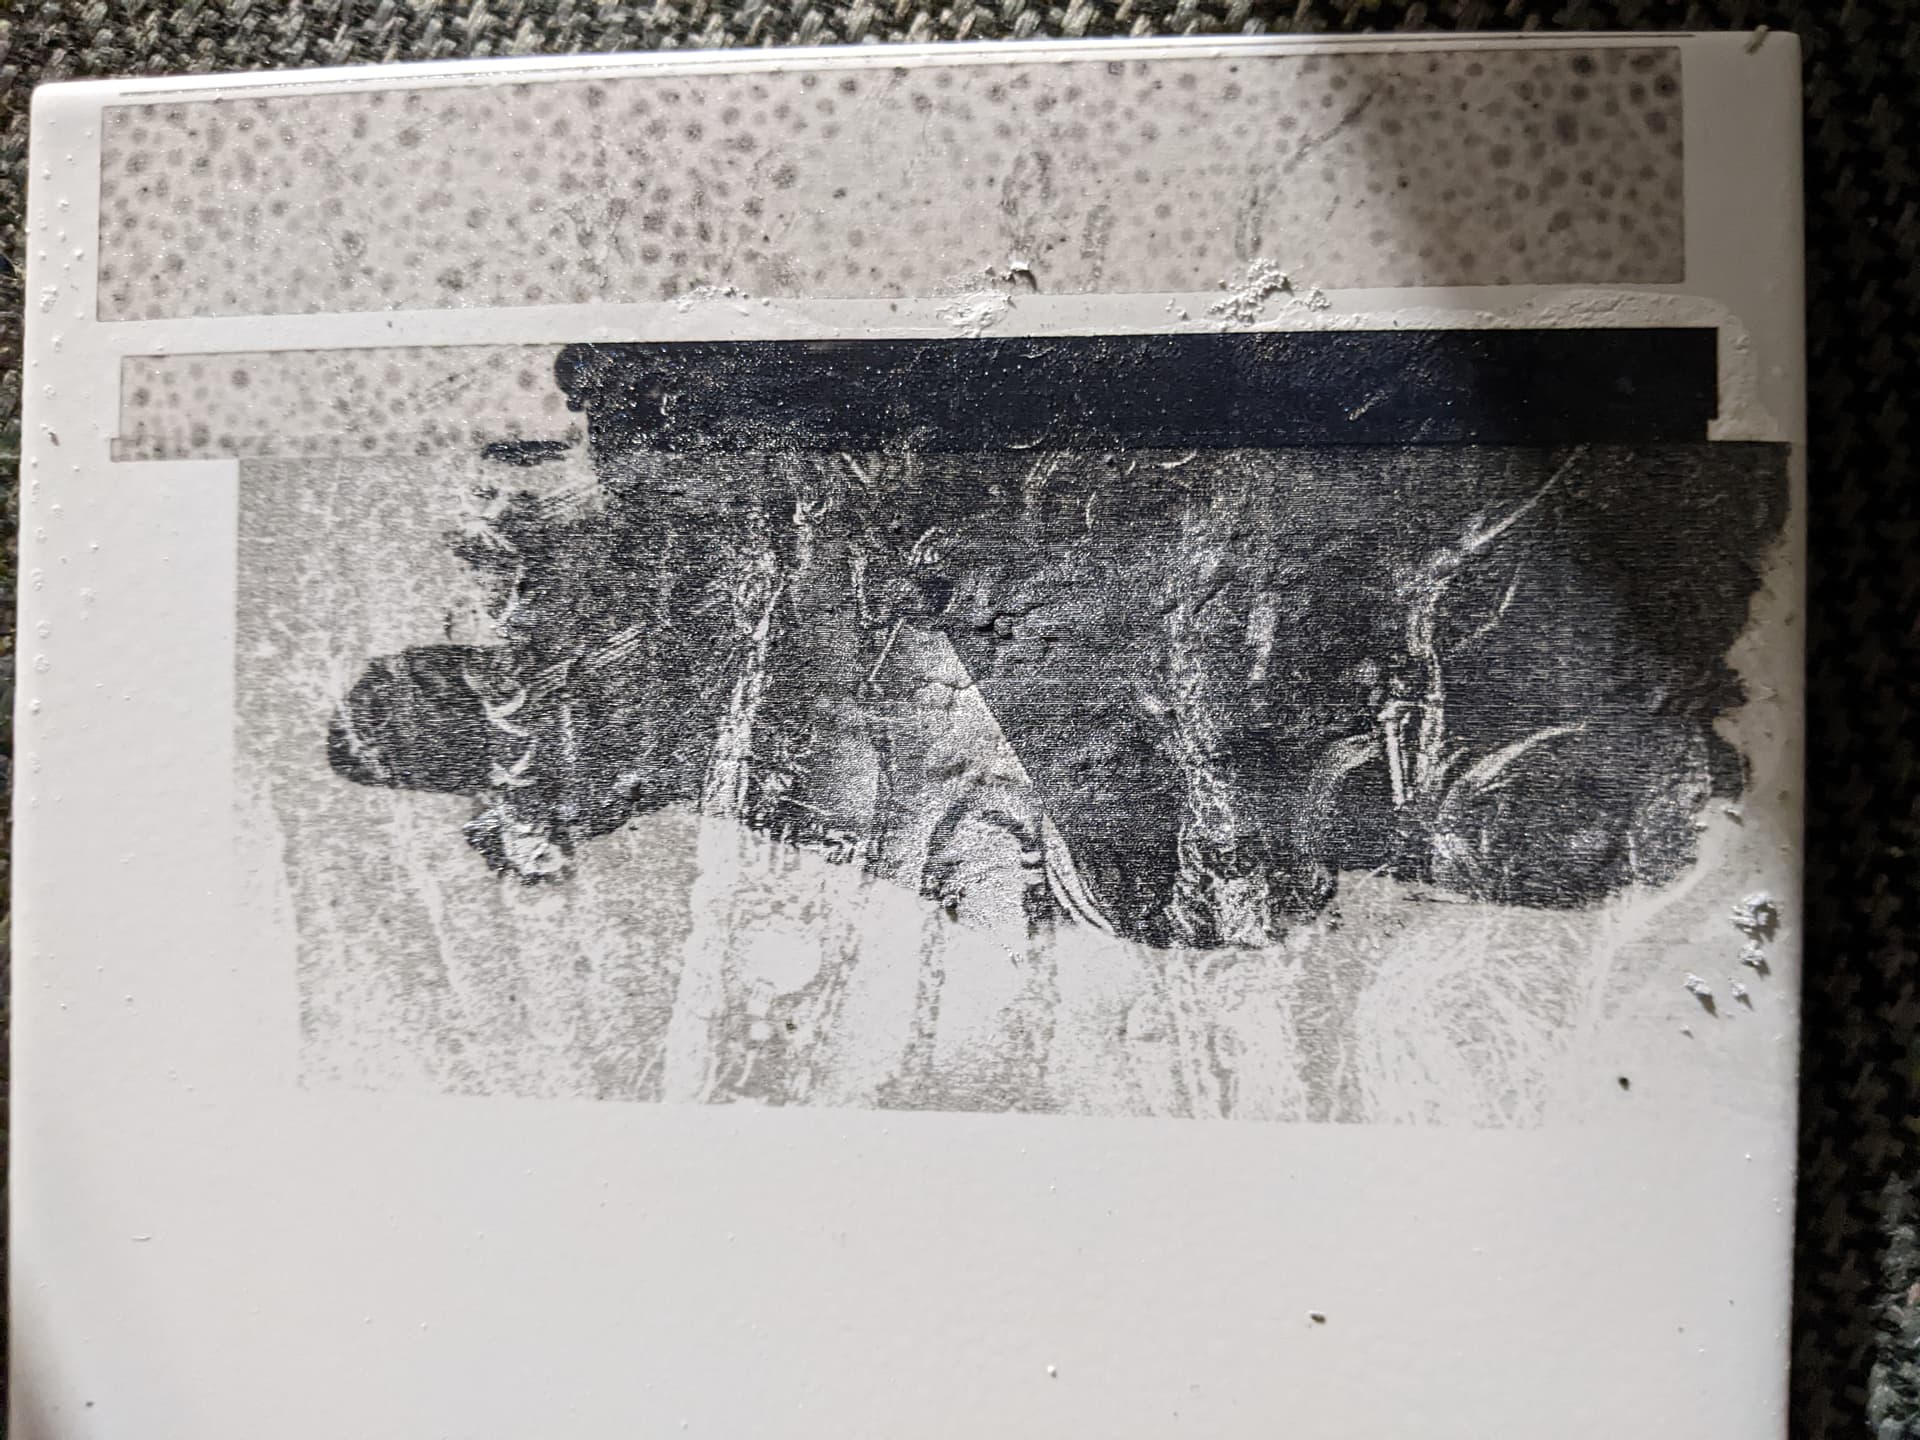
Started with glue-TiO2 laid out with foam roller, where I only got the contentless texture on the top part.
Mudded on raw wetted TiO2 in the middle.
First part was 20mm/s 80%
Cut, went to 40mm/2 100% and it’s almost the same black. That is the slightly offset right edge from another run.
Then 80mm/s 100% and Jack Sparrow looks to be resolving. But I only finger-painted the mud in a splotch in the middle, the image quickly runs off the edge and just running on the prior glue-TiO2 layer
I’ll do a proper speed vs power test in a bit
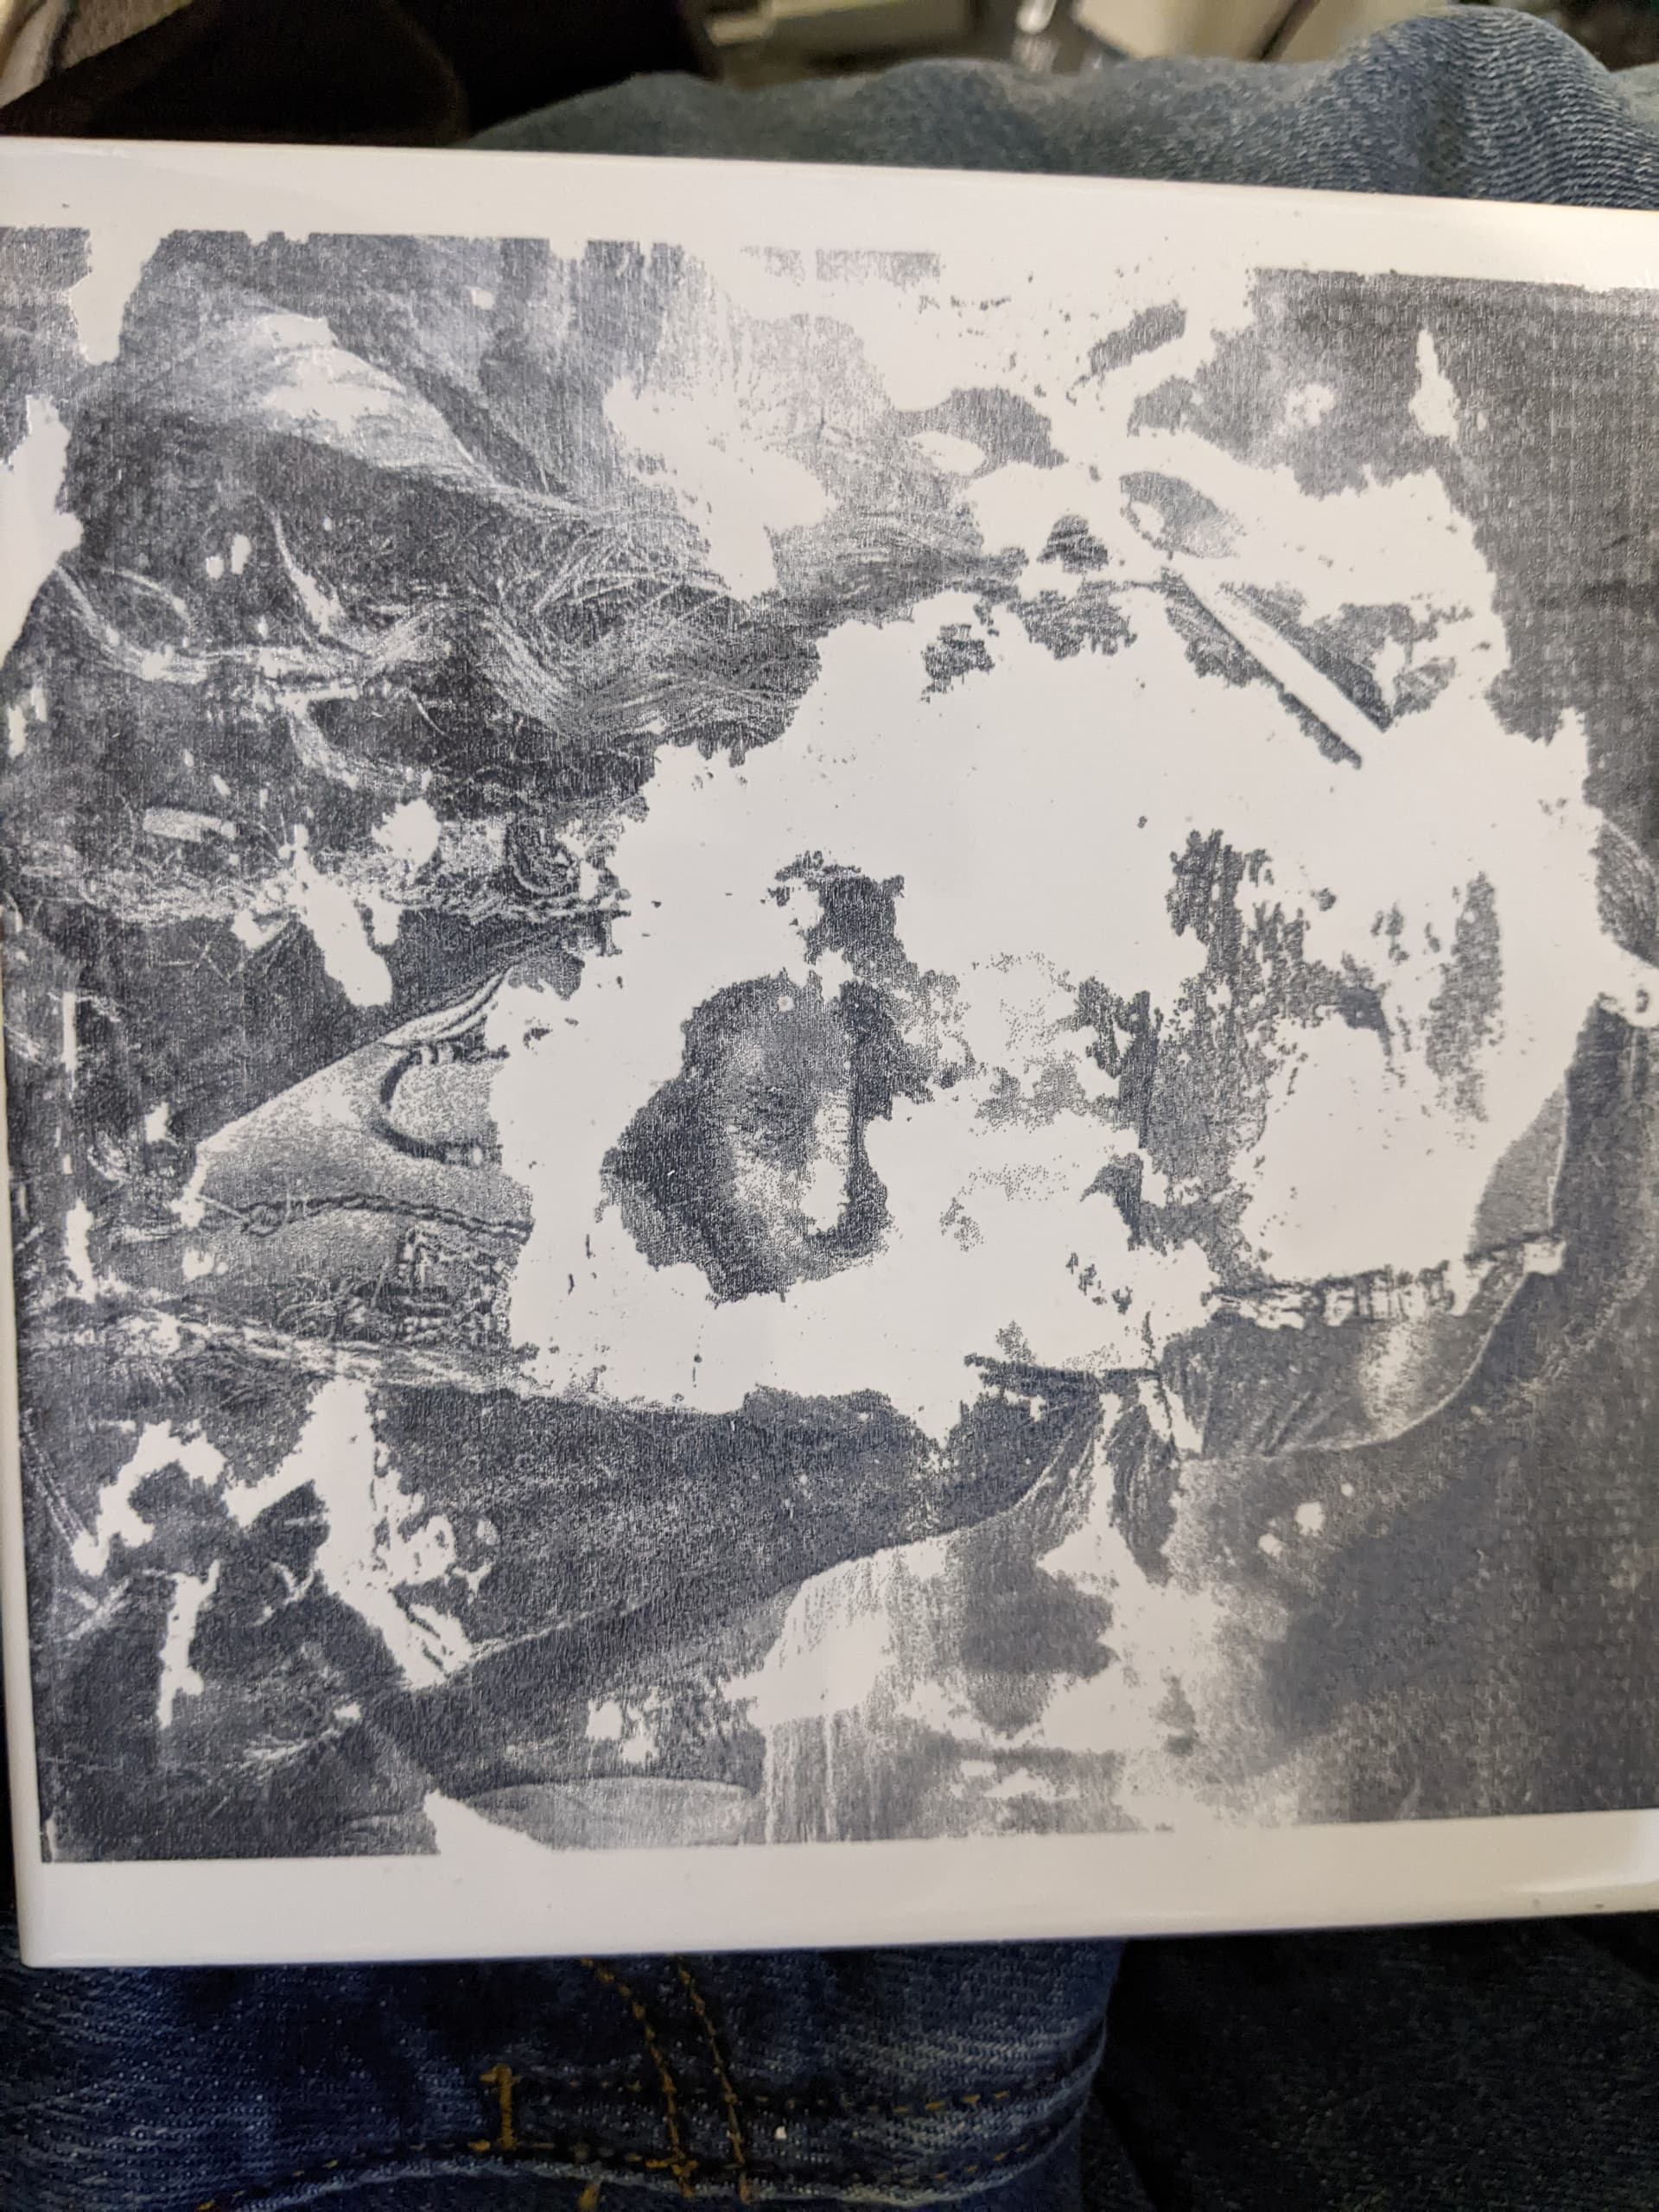
SO close!
The fresh burn at 80mm/s 100% looked great, very consistent! I thought this was going to be the best looking so far!
However, when washed, the middle 20% or so flaked off. It melted in place but didn’t get far enough to use into the ceramic there. The center where it mostly flaked at is where I was adding the TiO2, I think it was a bit too thick there for the beam to get through.
I scrubbed it a bit. Even though it looked so evenly perfect and high-res, it’s all-or-nothing- either the black layer is fused, or not
I have used both Rustoleum 2X Flat white and Bullseye 123 white primer.
The Rustoleum 2X Flat white did not consistently create a black puddle on single pixels with a 0.1mm LI.
Only with adjacent black pixels does it go black. This was true even with 4-5 coats.
The Bullseye 123 primer REALLY likes to clog and needs to be turned upside down and purged after every use to keep it usable. But it produces black puddles on single pixels.
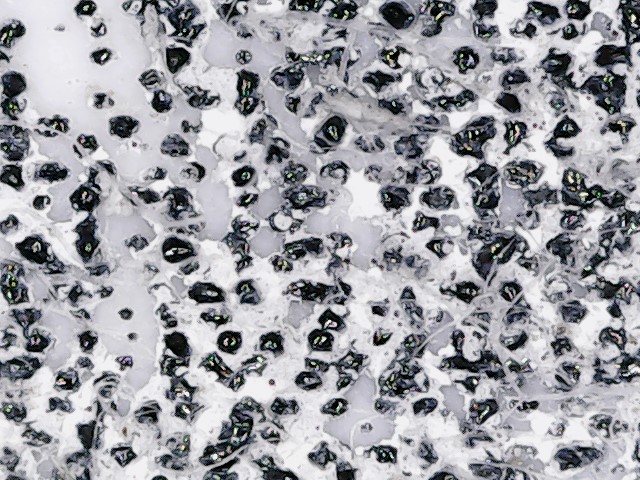
The difficulty I’m having now is, with a lot of black area, it came out looking lighter than expected. However, microscope shows this is due to white TiO2 not cleaning off and also getting stuck in the rough area. I’ve used lacquer thinner and acetone and scrubbing off with clean paper towels, which do readily shred but I think that’s just consuming a lot of paper towels but shouldn’t keep them from picking up the TiO2. And a plastic pot scrubber and power toothbrush. Still have this.
Any ideas on removing it better?
This is one thing I was hoping to address by brushing/rollering/finger painting TiO2 and water or water+glue. But that had different problems with either being poor thickness consistency or being too thick to fuse.
What method is the photo?
Rustoleum 2X Flat white, Bullseye 123 or the TiO2/water?
How do you know it’s the TiO2 that stuck between the black dots… ?
My experience with plain TiO2 is it doesn’t stick… what would hold it to the tile afterwards?
![]()
That’s Bullseye 123. The Rustoleum 2x did clean up mostly good enough with a lot of work, but I could still see bits of TiO2 in the crevices. The Bullseye 123 just refuses to clean up adequately even with an excessive amount of work.
It’s clearly the TiO2 primer, with the binder (presumably acrylic?)
Plain TiO2 and water was WONDERFUL to clean off, and adding white glue only made it moderately more difficult. Just not handling expensive lacquer thinner and its accompanying hazards is a huge plus.
But, like I say, I could not consistently get a usable layer with brush, roller, finger paint, and/or with tilting back and forth to watch the front of buildup on the low side to sweep back the other side. An airbrush will probably do it. But I also want to instruct casual users who may only ever do a few and getting an airbrush setup is probably not on the table.
I think the real trick is a consistent layer thickness …
I have this issue with LBT100 spray… the manufacturer also points out the failures variations of thickness along with how it performs under the laser…
![]()
That’s why I think it would help to add a small amount of tint to gauge the coverage, as white-on-white is not amenable to inspection. But I can’t do that with spray cans. I’m not sure will work as intended with principle components because TiO2 is so opaque that the shade may become constant before reaching the necessary thickness so visual checking of shade will not be helpful.
Since this is tile, I’m wondering about Dremel brushing it. There may be a window where a metal brush will remove the primer but not scratch the tile or remove the black. Or, maybe it will remove some black and polish it down to a flatter, more consistent layer. Gonna try that.
I can already foresee a buffer wheel, if it removes anything, is going to clog with the paint it’s removing.
There’s 3M abrasive wheels (like green pot scrubbers) but I’m pretty sure that will scratch the tile glaze into a matte finish. Maybe that will be a good aesthetic though, I’ll see.
OK, I tried it. The steel wire wheel doesn’t scratch the tile, but it did lighten it a bit, and it varies a bit with time and pressure. But this may be good and yield more consistent spot size.
Then, the felt buffer- surprisingly, this DOES remove the dry paint easily without solvent and might not be clogging. It looks like it has a fixed effect and more pressure and time doesn’t deepen it.
Will try more