Just bought a new OMTech 100w blue machine and air assist turns on with the power button and I cant seem to shut it off in light burn. I even tried disabling air assist output under machine settings. Any ideas?
Hi Jesse, if it’s a small pump fitted inside the machine, it stays on constantly while the machine is turned on.
I have the 80w, it’s a little annoying but you get used to it.
Kind of like the fan 
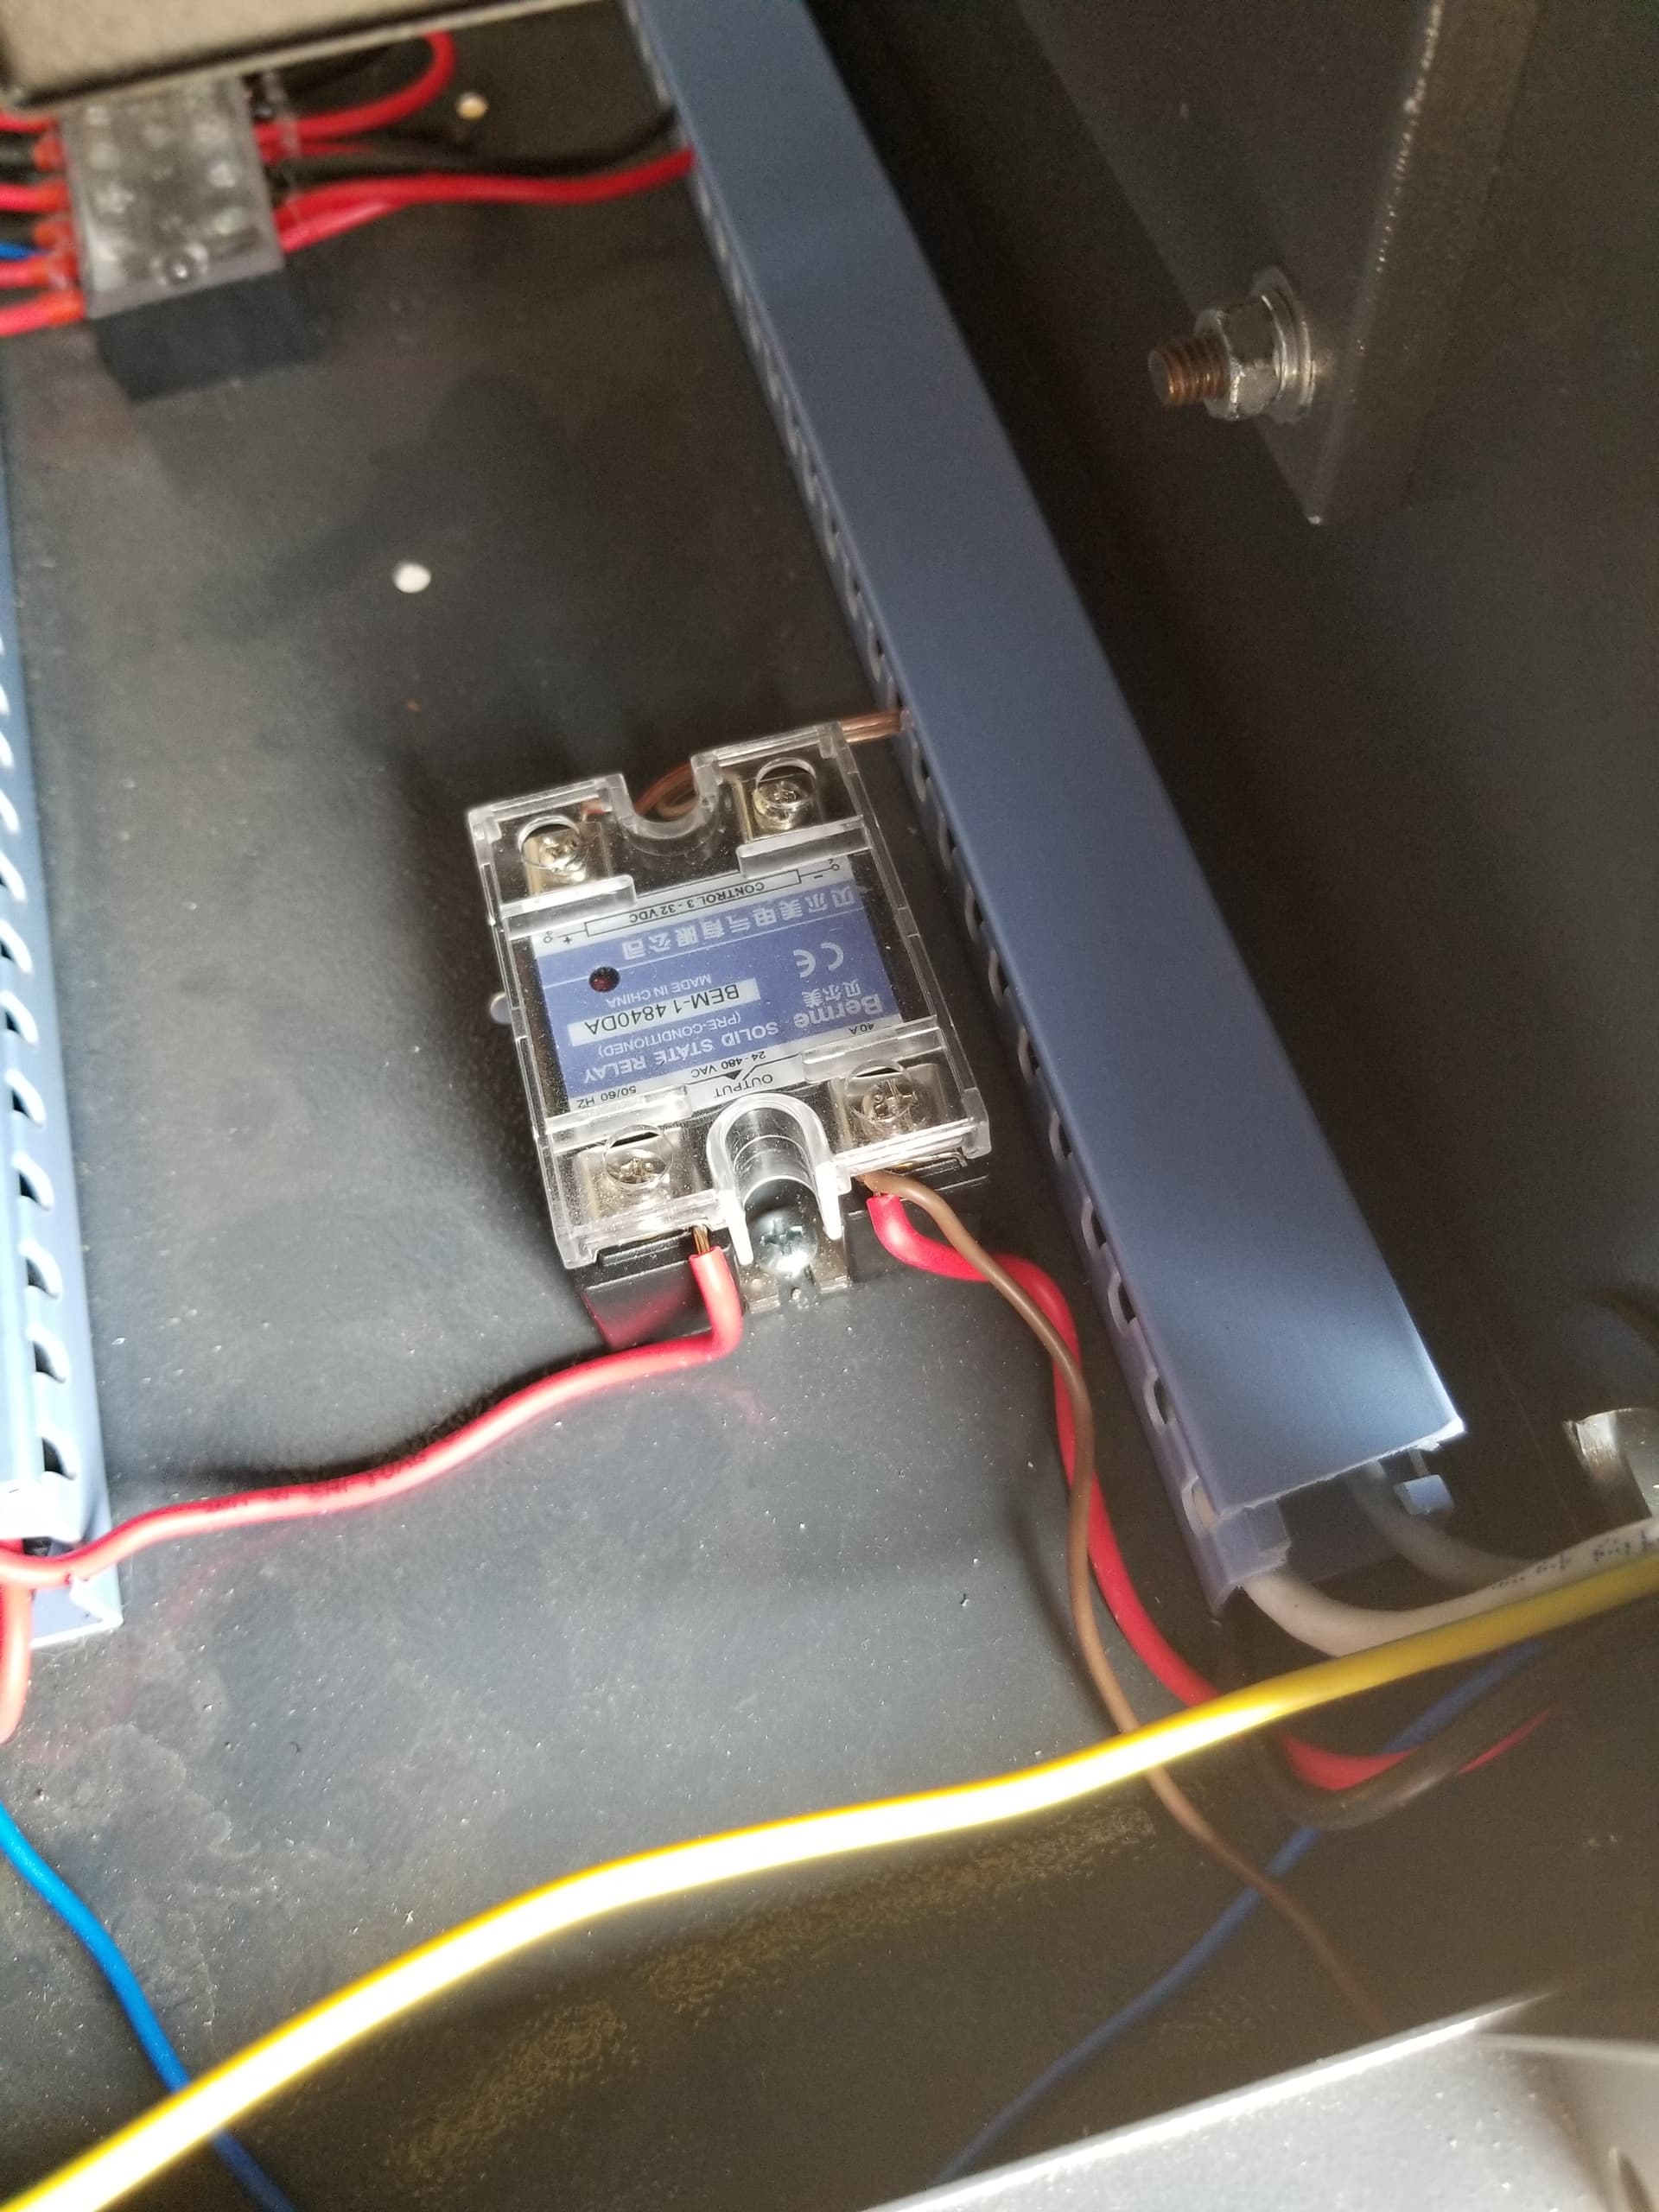
I hooked mine up with a SSR to the ‘Status’ of the Ruida. When the machine goes into run mode it turns on the compressor and the exhaust fan.
Meanwhile, if I’m fiddling with it, I don’t have to listen to that racket…
Good luck 
Looking at upgrading with a silent compressor.
found this simple to follow video.

Thanks for the quick replies! Seems like alot of unnecessary and tear but I guess that is why they are 1/4 the price of some of the other ones. Mine isnt obnoxious loud at all actually I just didnt want to burn it up.
There are plenty of places to mount that solenoid other than dangling out of the machines by it’s wires and tube. No protection where it goes through the frame. Sad.
I have high and low pressure done in a much simpler way, his scheme only has on and off.
When you engrave you only want enough air to keep the lens clean. Not so much that it forces the debris back onto the work surface. When you’re cutting, many suggest 30 lbs psi. Don’t have mine hooked up yet to be able to say yes, but the sources are reliable.
Have fun…
Interesting how is your high and low activated?
Unless the Ruida is in run mode, the ‘Status’ output is high. Going low (‘run’ mode ) turns the air pump and fan on. The air pump runs supplying air to a solenoid. The solenoid is bypassed by a restrictor valve to control low pressure.
The solenoid is controlled by the “wind” sink of the Ruida. If I select ‘air assist’ in a layer, it sinks ‘wind’ when that layer is run, enabling the solenoid and bypassing the restrictor. Thus allowing full pressure to the nozzle.
Simple
Genius! Thank you for this!
Supposedly I have a 2021 version. With the new style air pump, the old pumps mounting bracket is still on mine, so I use it to secure the solenoids.
It also had a honeycomb bed. It’s laying against the wall, what a pain to use and clean up. I swapped it out for a cold rolled sheet steel that fits in my bed, costs $12 and wipes off with alcohol… Gives you much better air flow control.
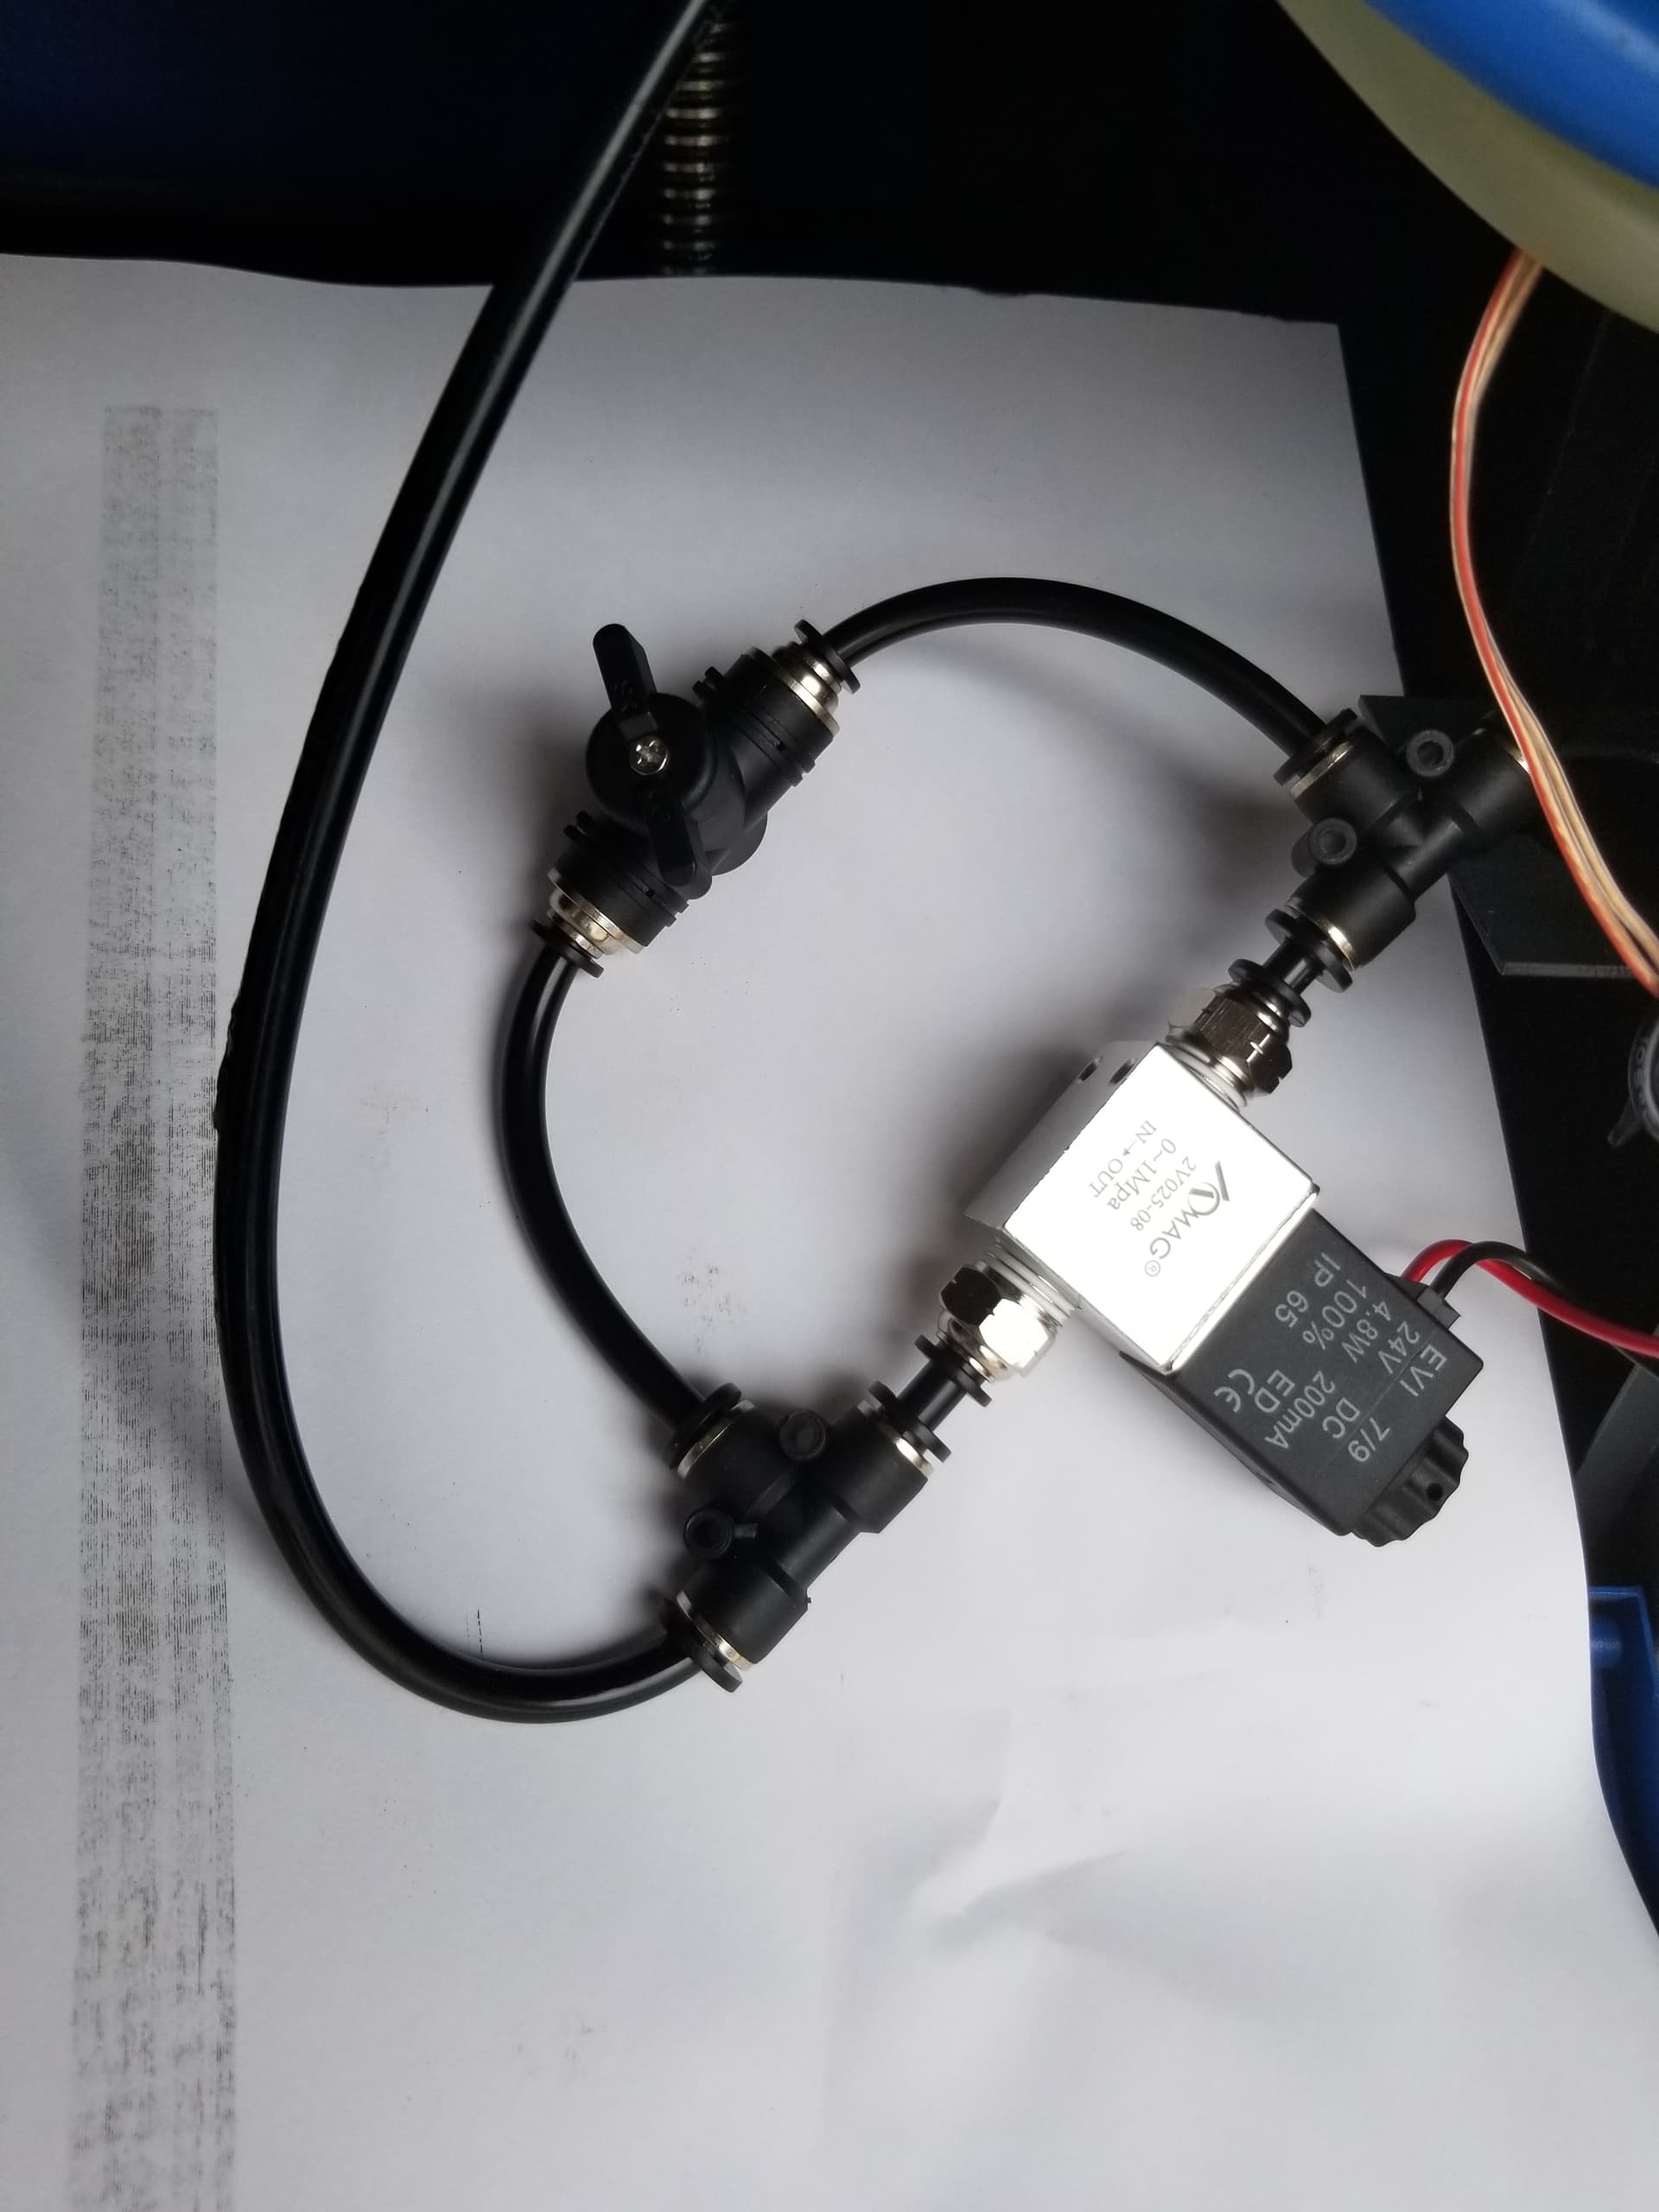
I connected two 24v DC solenoids to control the air from an external compressor.
First I disconnected the included air pump and removed it.
I connected the red wires from both solenoids to CN1-6 (24v).
Connect the black wire from the right solenoid to CN1-4 (Status) and the black wife from the left solenoid to CN1-5 (Wind).
Connect the air line from the compressor to the input port on the right solenoid.
Cut to length and connect the air hose going to the nozzle to the wye connector coming from the output port on the left solenoid and the manual valve.
On your controller, go into settings, navigate down to vendor settings and turn Air Assist on. DO NOT FORGET THIS STEP! None of this will work if you forget to do this.
When you start a job, the Status port will open the right solenoid allowing air into the line. The amount of air that gets through is controlled by the manual valve, since the left solenoid is still closed, which should be almost closed allowing just a trickle.
If in Lightburn you turned Air Assist on in one or more layers, the Wind post opens the left solenoid and allows full flow of air through to the nozzle. When cutting any layers when Air Assist wasn’t turned on, Wind closes the left solenoid and only the air getting through the manual valve gets to the nozzle.
If your compressor is set to higher than about 30psi then somewhere in the air line coming from the compressor to the input port on the right solenoid you will need an air pressure regulator set to 30psi. You should also have a water/oil separator to help keep impurities from getting to the nozzle and lens. Most regulators come with one attached.
Here is the one I built for under $30 in parts from Amazon.


Neat, designed just like the Chinese, right to left flow… lol
I didn’t buy their kit either. Now you (and I) have 8 to 10 of each of the valves, tees and splitters left over at a lower overall cost.
He just needs to check his solenoid. He seems to have it set up properly, it just isn’t working that way.
I gotten some real weird stuff from China in the way of solenoids and how they are marked and work.
I just installed a similar 2 valve setup. I used 2 24vdc relays and 2 110v valves. I grabbed the power wire off the garbage universal plug in the back of the machine to run through the relays and power the valves.