Been at this for an hour searching and working and can’t seem to figure this out. I downloaded the pictured file. It is in SVG, JPG, PNG, etc…I want to engrave the image onto a 94mmx94mm coaster. However when I resize the image, it resizes the rectangle around the image. I need just the image itself to be a circular 94x94 so it engraves perfectly on the coaster. Is there a way to get the software to do this
so that the laser frames the circle with the image or do I have to just frame with the rectangle and try to put the coaster perfectly inside that rectangular frame to engrave the image? Thanks in advance!
I’m sure you have to trace it first, but as I’m fairly new at this I could be wrong, the file wood help…
Sorry. Really new at this. How do I upload the actual file here?
at the top of the reply page that I’m typing this on is an up arrow, click on that and you should be taken to your computer where you can locate your file… follow the instructions…

LOL. So when I click the up arrow and select the svg, it comes up blank I think?

Looks like I can send the jpg but not the svg
The easiest way to do this would be to mask the image.
2 Likes
Thanks for the reply David…I had heard of Masking but never tried it…Now Brian can give it a try himself…
the laser will only engrave the image only whether its square or not so you could also just set it to the centre and go
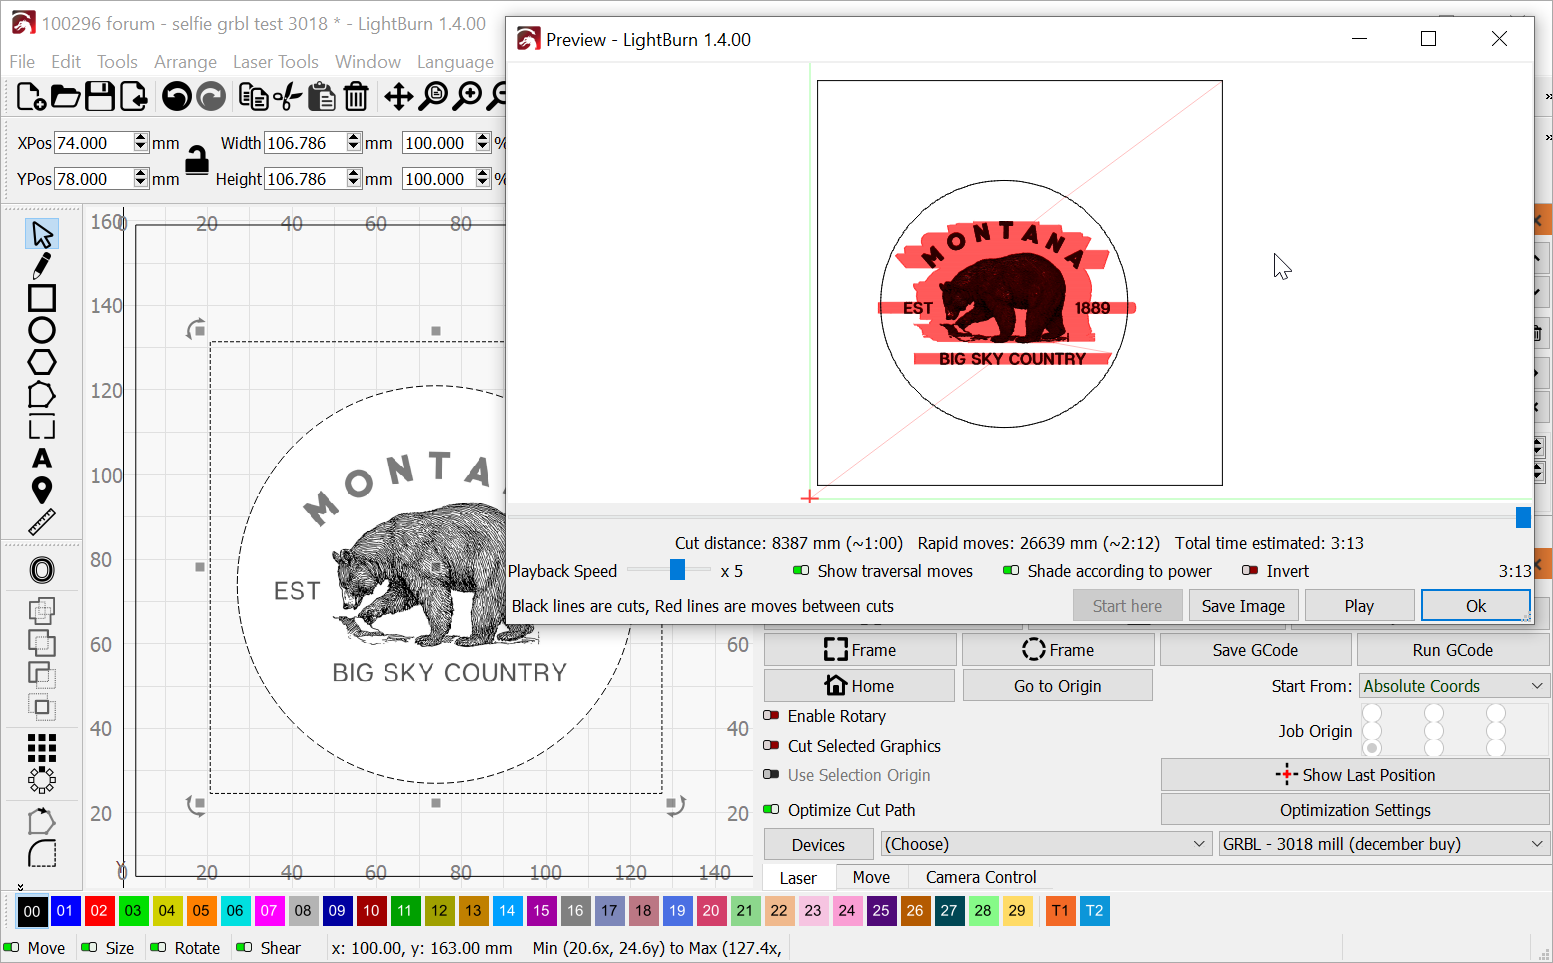
Here is one suggestion ![]()
First you trace it, use the bear and wright in the words and use the new warp tool on the text.

Montana Bear.lbrn2 (811.4 KB)
Like that idea!! Thanks!
I thought you could drag/drop an svg on the edit window also …
If you have something you can’t upload, you can put it on something like Google Drive and just provide a link here… it works well for videos of mechanical problems… or anything over the standard 4mB upload limit.
@space670 has a great suggestion… the alphanumeric parts are the only thing that isn’t strictly b&w… Trace image works well for this. You can trace the letters on a separate layer and have different adjustments for these…
I don’t follow as to why/how he’d need the warp tool?
I commonly use a tool layer and have the laser trace the tool outline…
I also make use of a jig, when possible, for the co2 machine to ensure the object is positioned correctly and do the alignment with Lightburn.
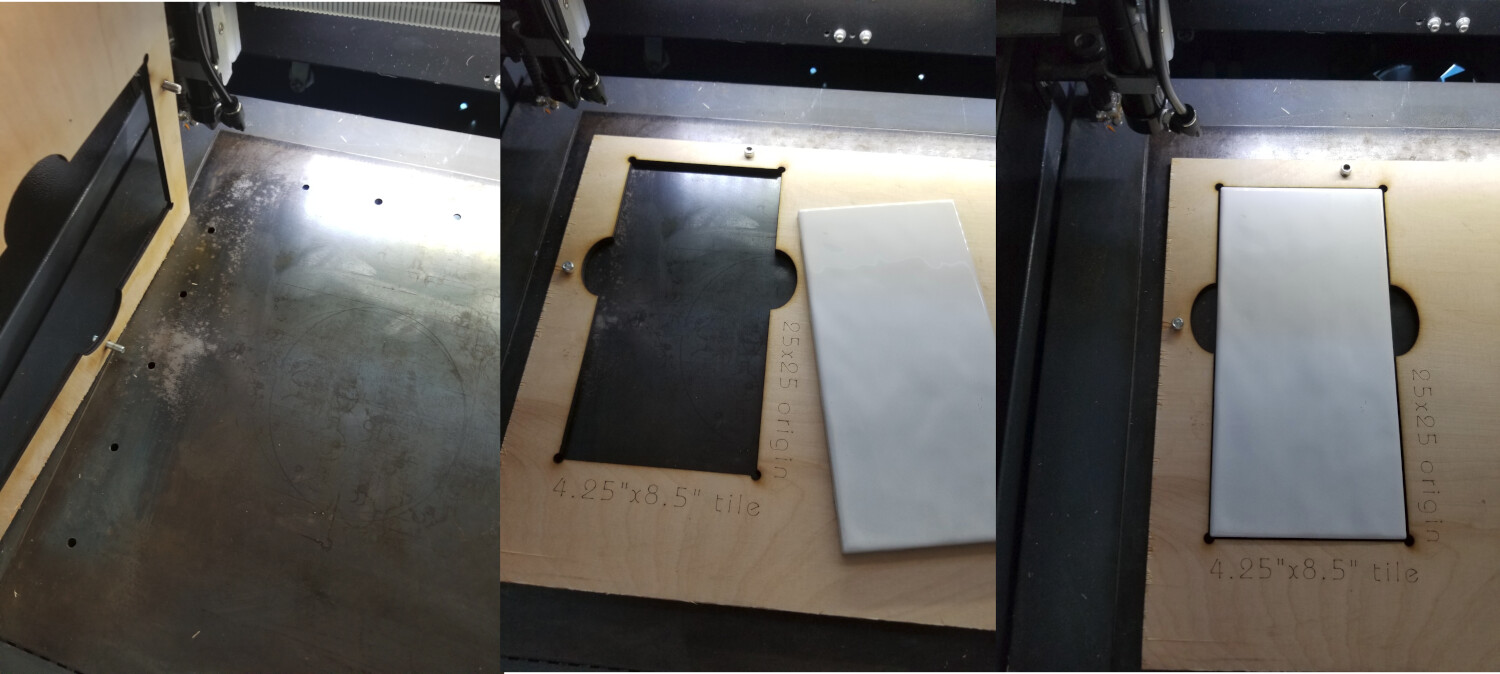
Sometimes you want the outline, not of the target by a little larger for alignment purposes…
Another option is to do the image with some kind of dither…
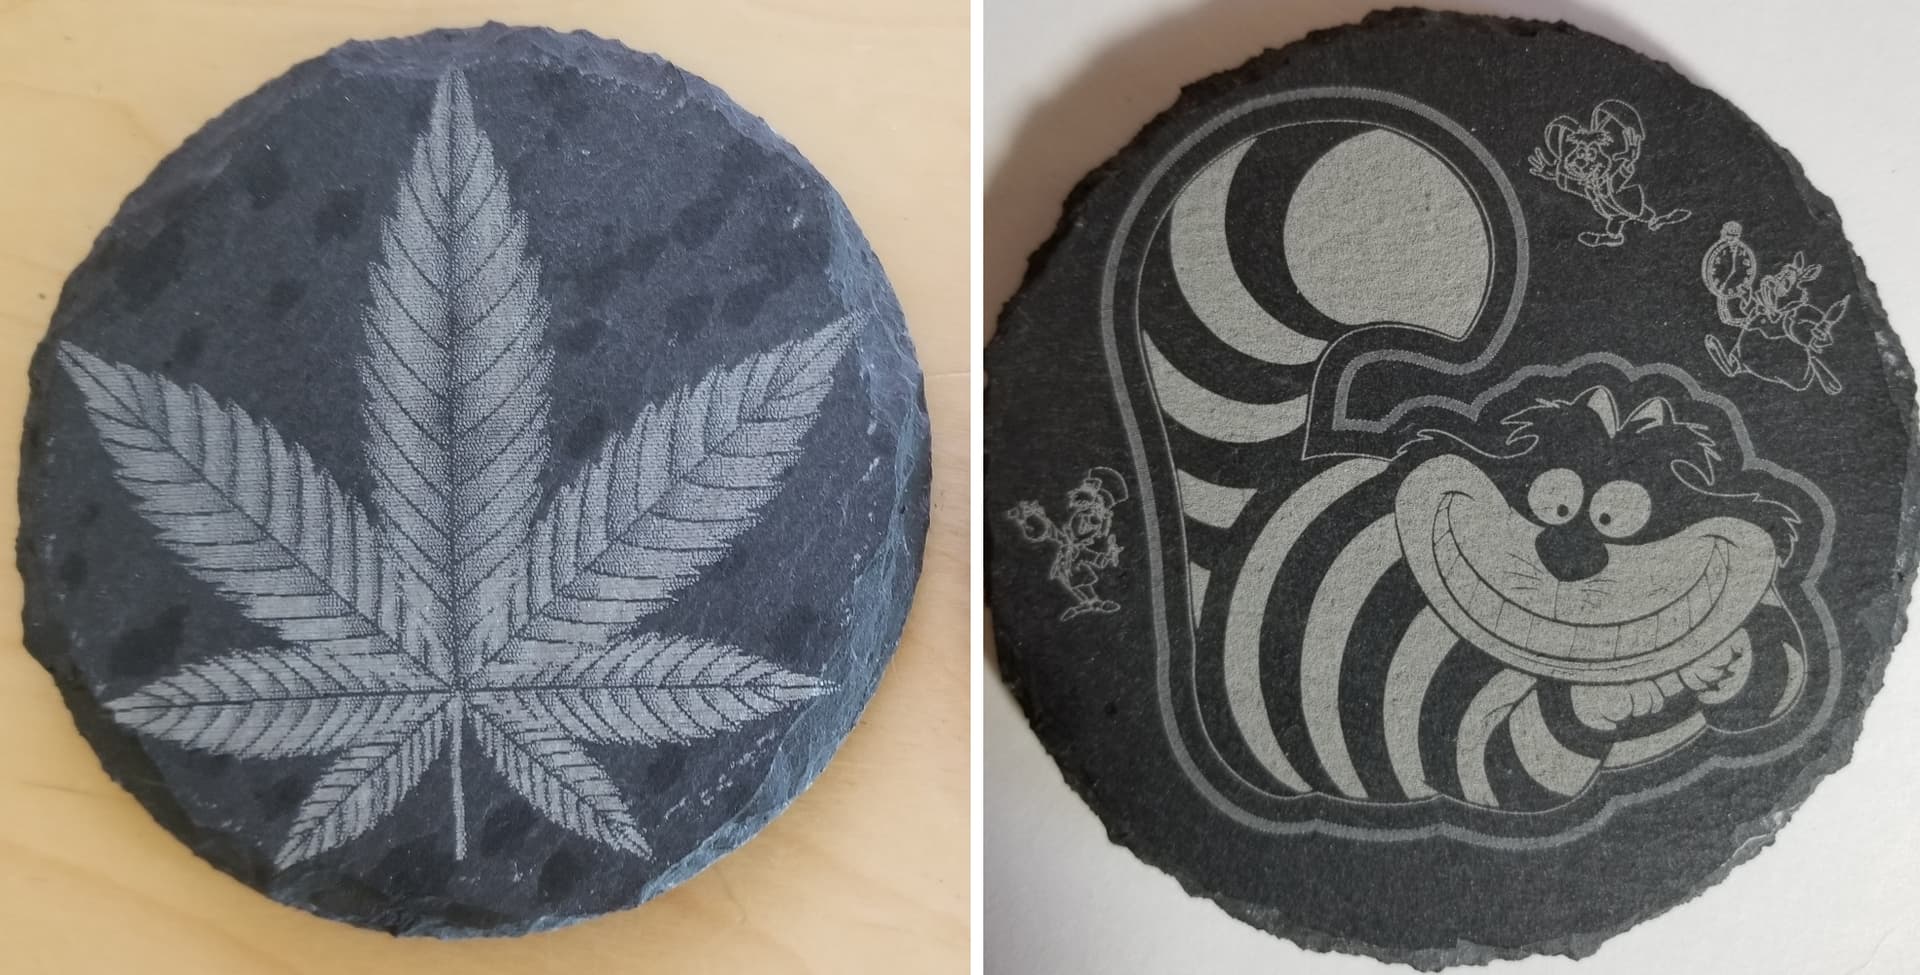
Slate coasters, 4" I think… the leaf used a Stucki dither (co2)… the Cheshire Cat (fiber) was a traced, vector filled… the outline was done at about 1/2 power for a more gray result…
Keep in mind the KISS principle and keep what you are doing easy to do/follow as possible…
![]()
I used the text warp tool because it is not possible to “bend” the letters you trace in a nice way. So I delete them and wright new text that I can control in a nice and fast way, instead of struggling with one and one letter.
I didn’t think he wanted to rewrite it, just duplicate the image… Seems the trace function works very well…
I see your reasoning… thanks…
![]()
I second this option.
1 Like
Sure once you’ve done it a couple of times… ![]()
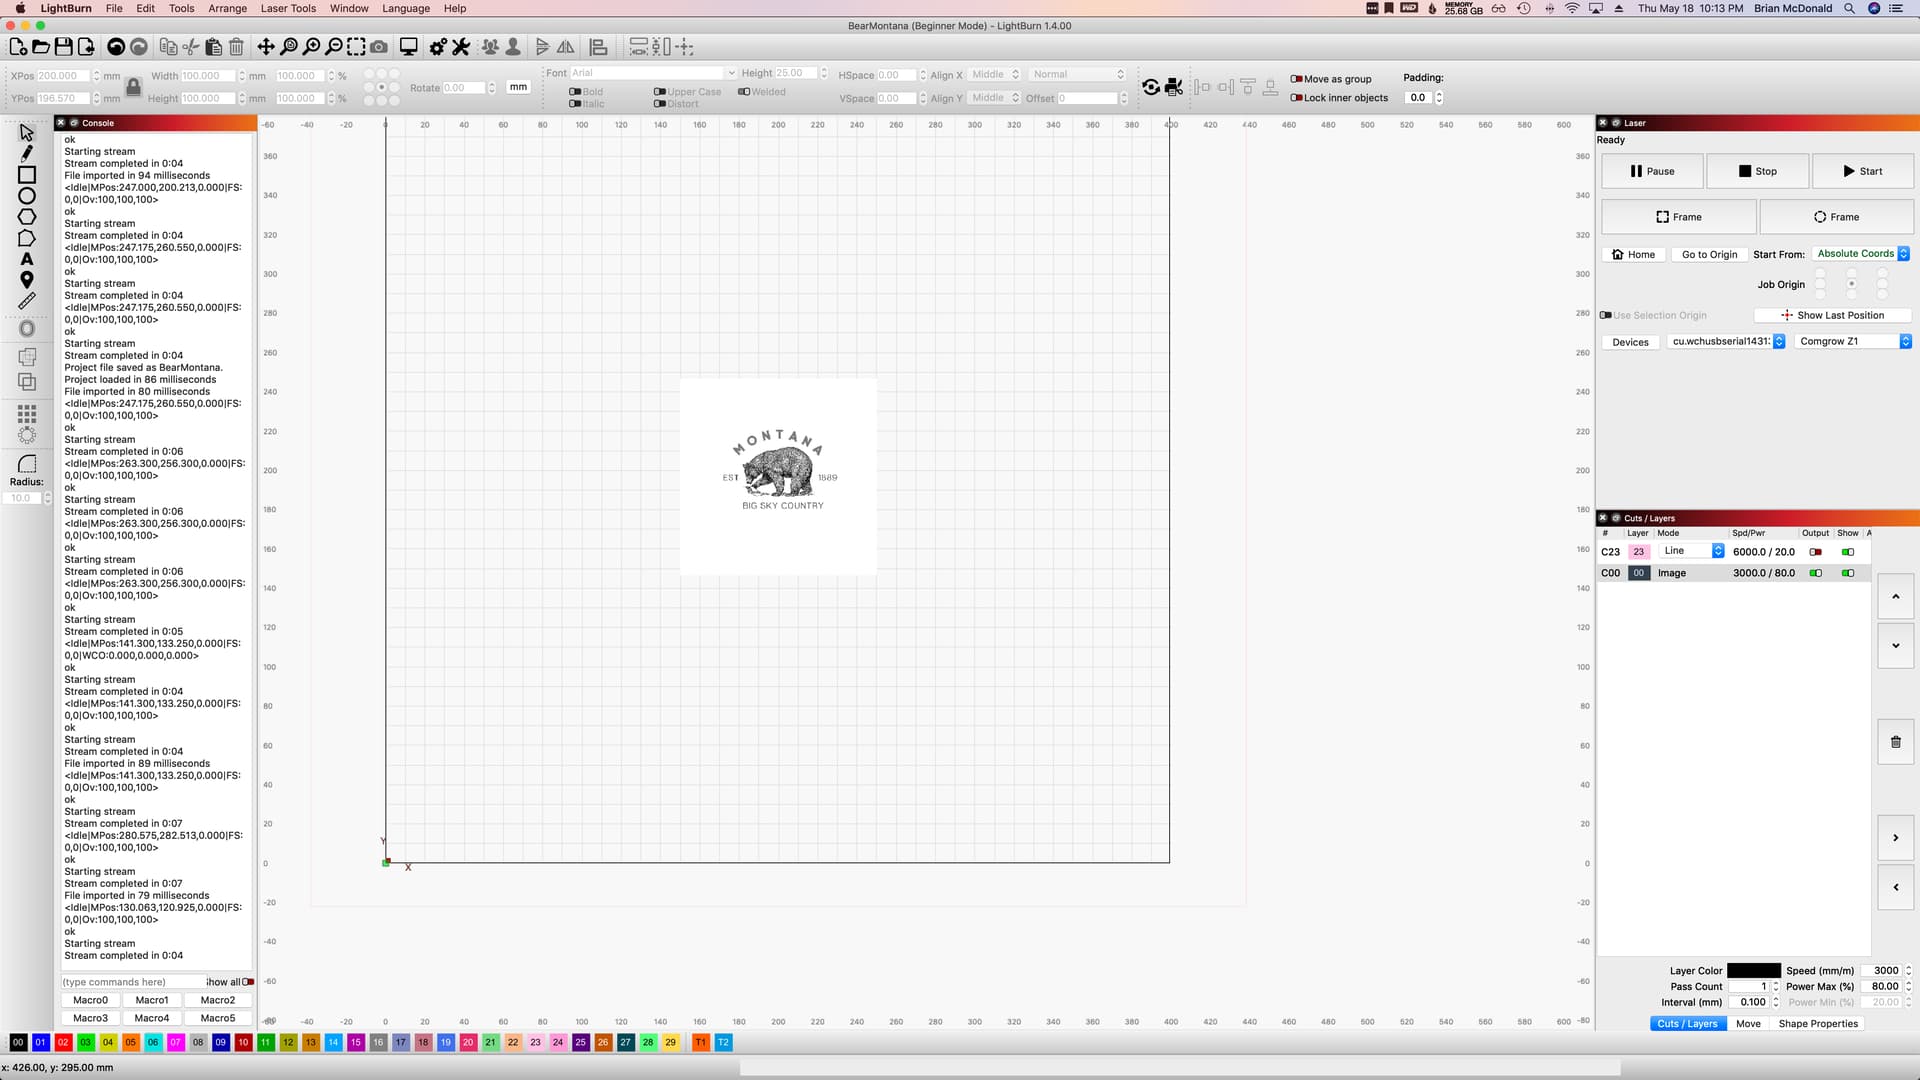
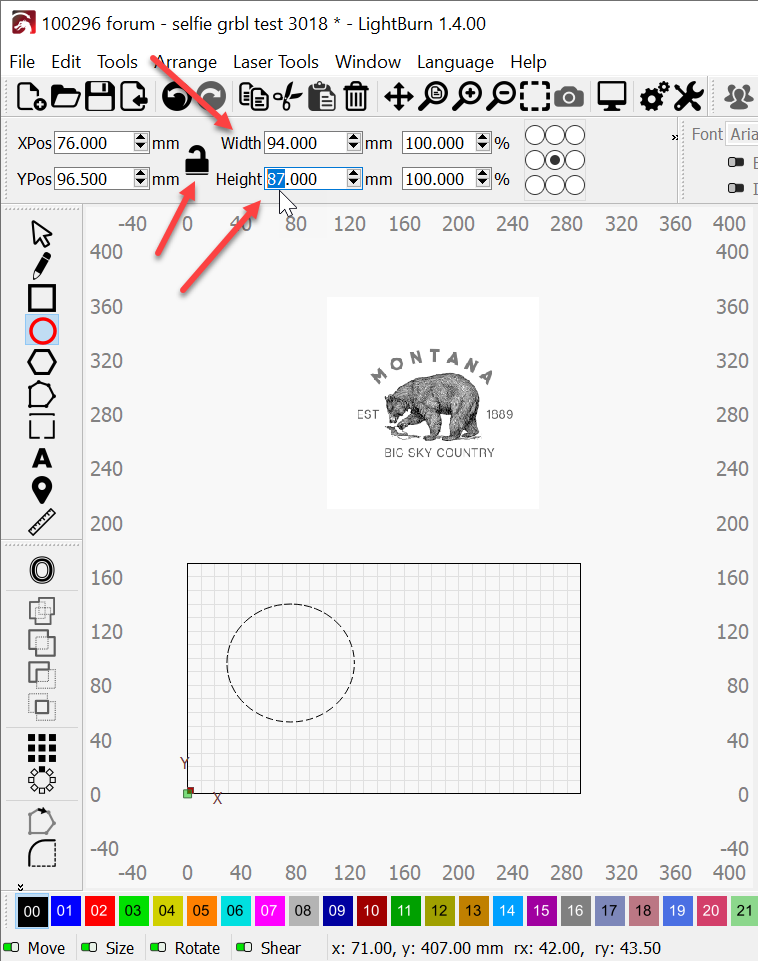
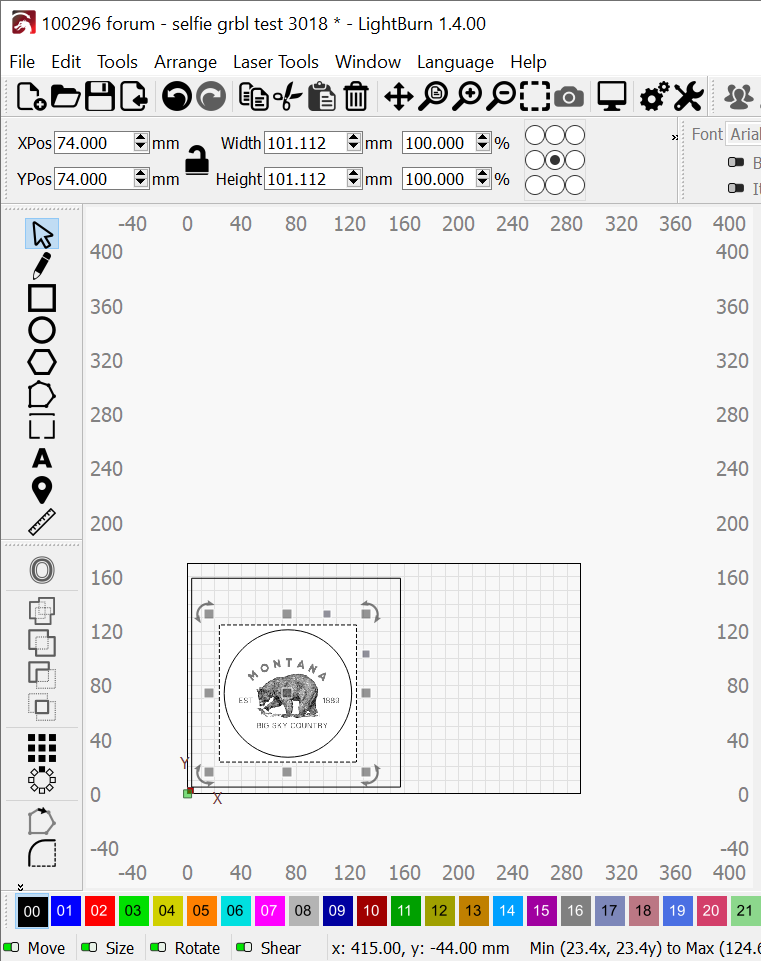
First, Draw an absolutely nonsense circle or ellipse with the Ellipse tool on the left. Have zero regard for the accuracy. Just get one on the grid. The most important step is the first one - just start.
Next - with the circle selected, unlock it and change the numbers to your specification 94 tall and 94 wide.
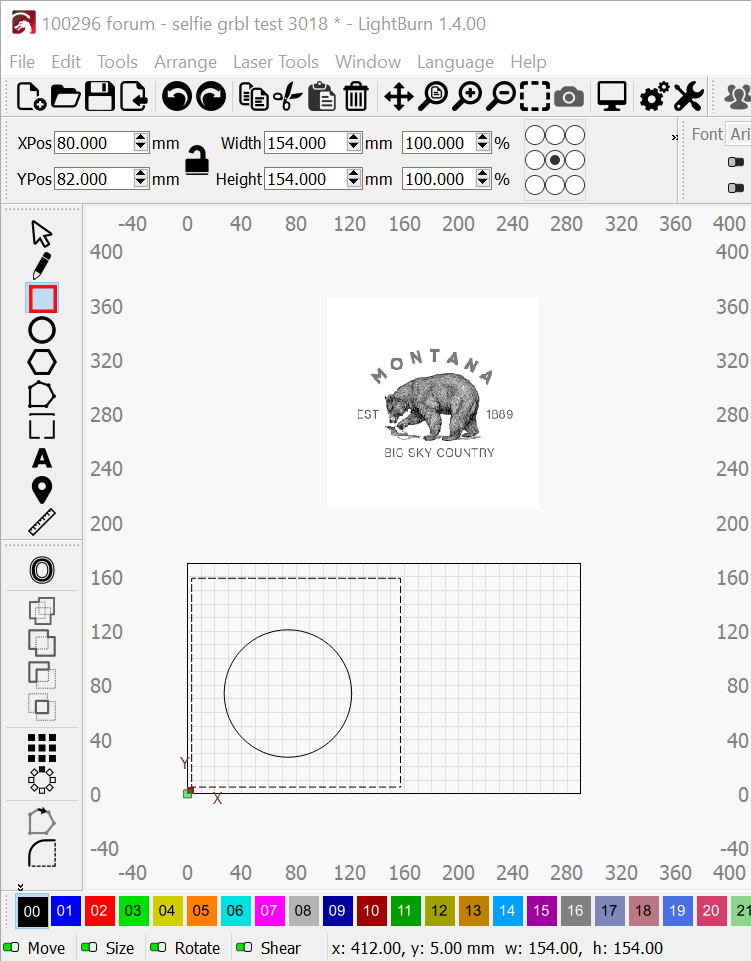
Then, use the rectangle tool to draw an almost passable rectangle that will fully cover the square background of the image and allow a little bit of adjustment. Note. I moved the circle down using the XPos and YPos numbers to the left of the size tool.
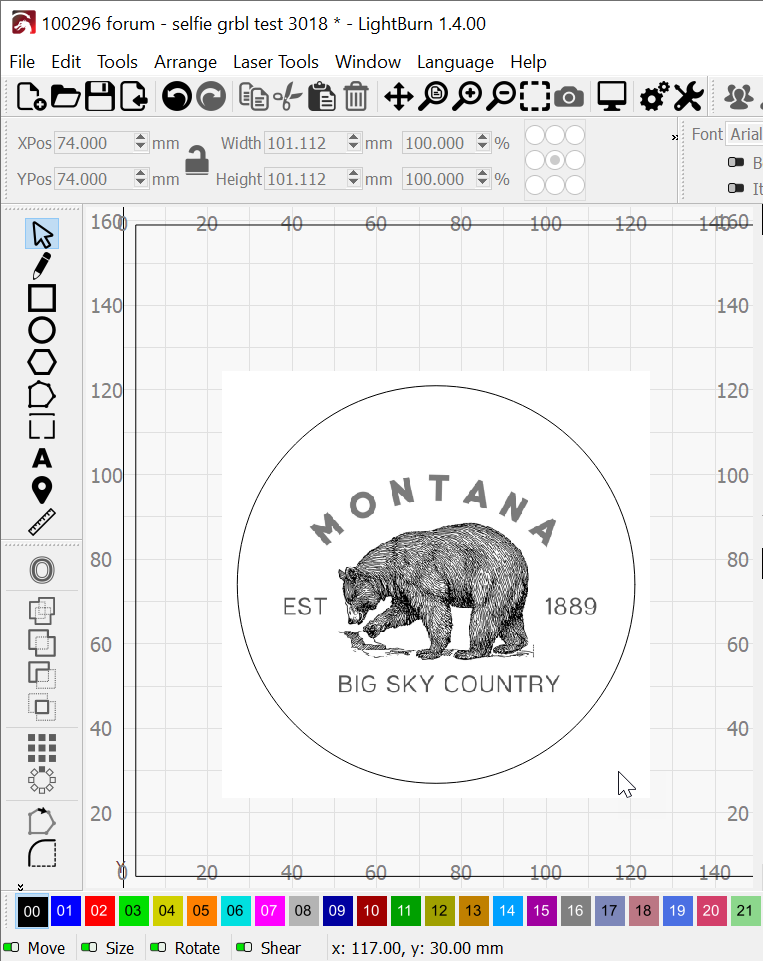
Select the image of the bear and the words (It’s important to remember this is an image. The shapes that look like text are just part of the image. The image won’t respond to the text tool.)
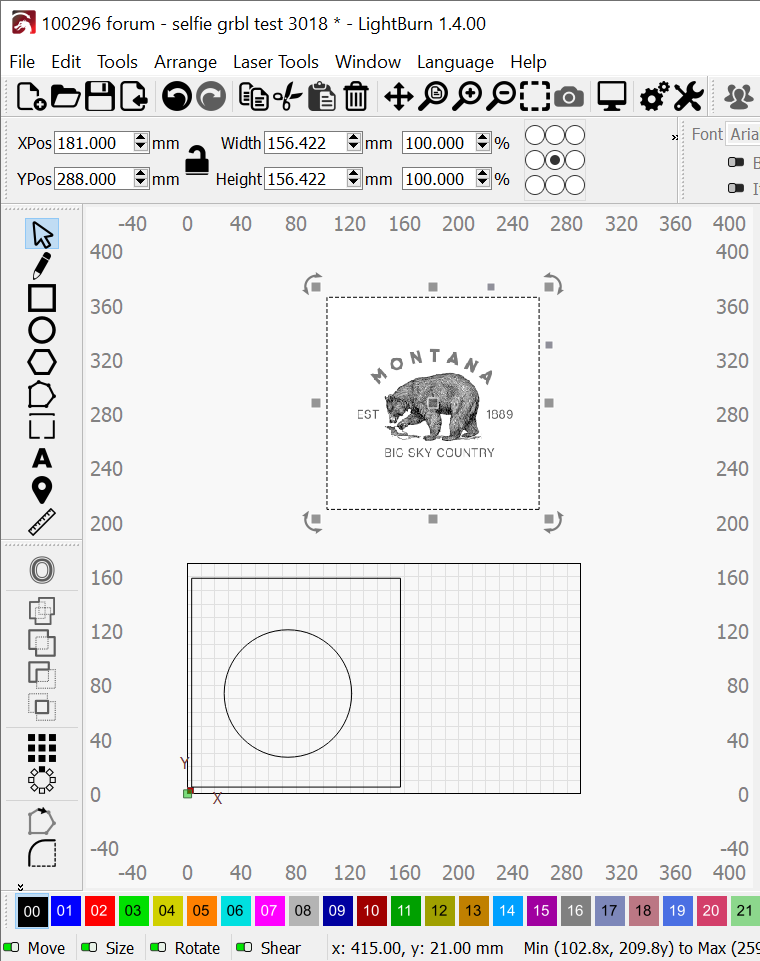
Select and Shrink the image enough to fit - again… this doesn’t need to be precise.
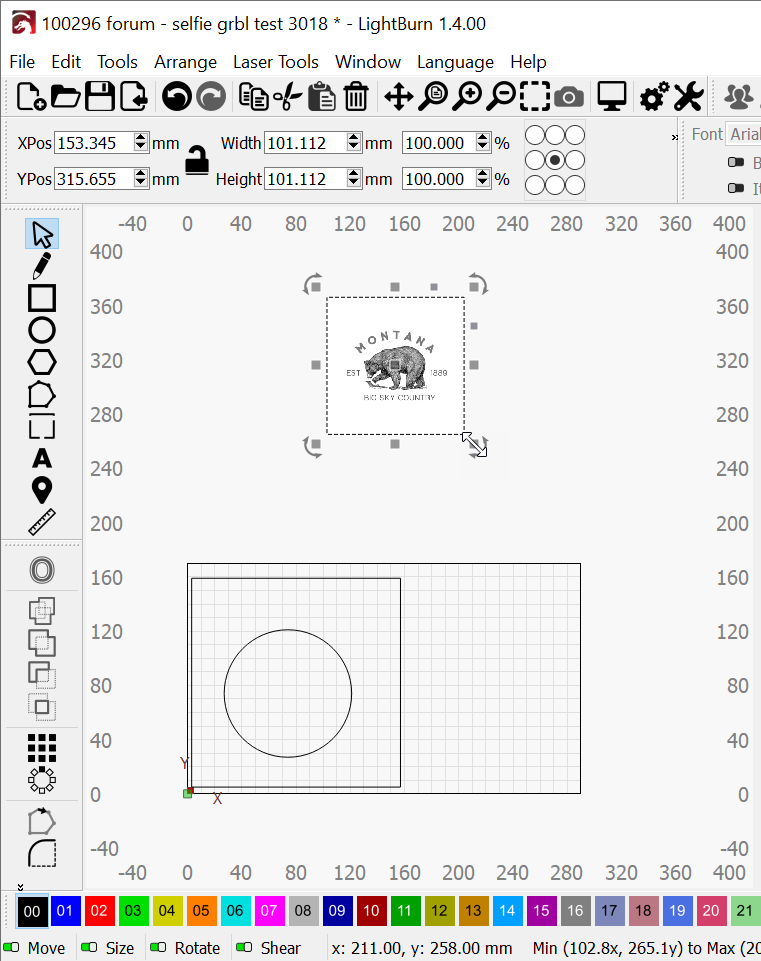
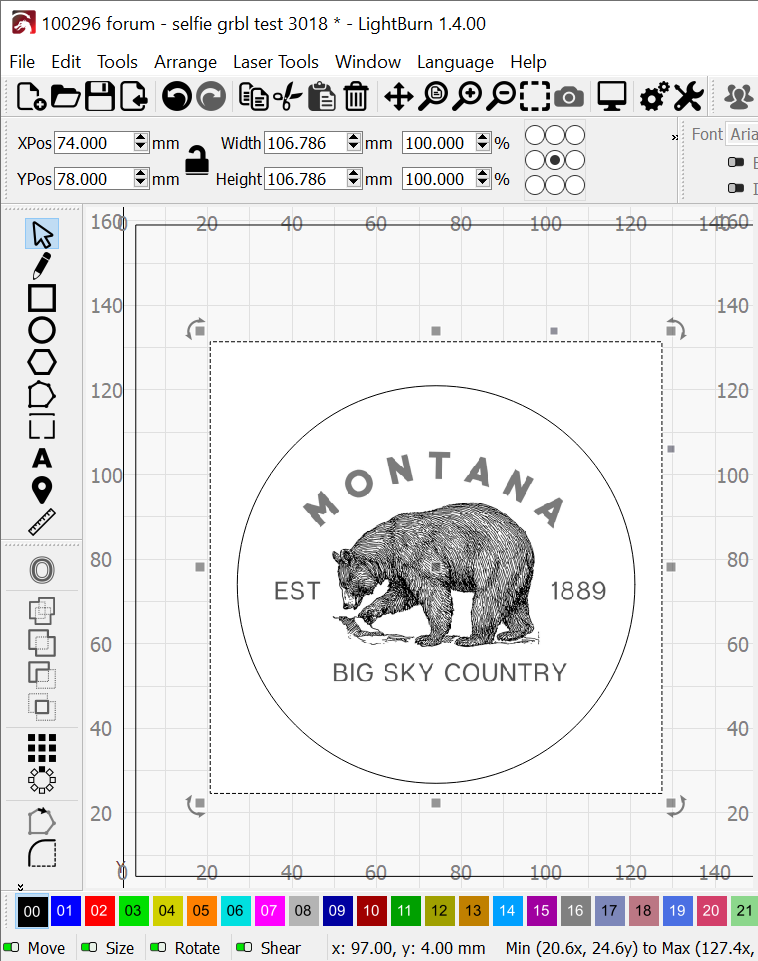
Then drag image into the circle.
Put the cursor on the image and use the wheel in the middle of the mouse to zoom the area. If you’re using a mousepad or the red ThinkPad button consider investing in a wheel mouse.
When framing photography the Matboard (or whitespace) below the image is almost always taller than it is above the image. So, ‘Centered’ doesn’t always look right, and it’s hard to detect.
Now, select all three objects and Apply Mask to Image
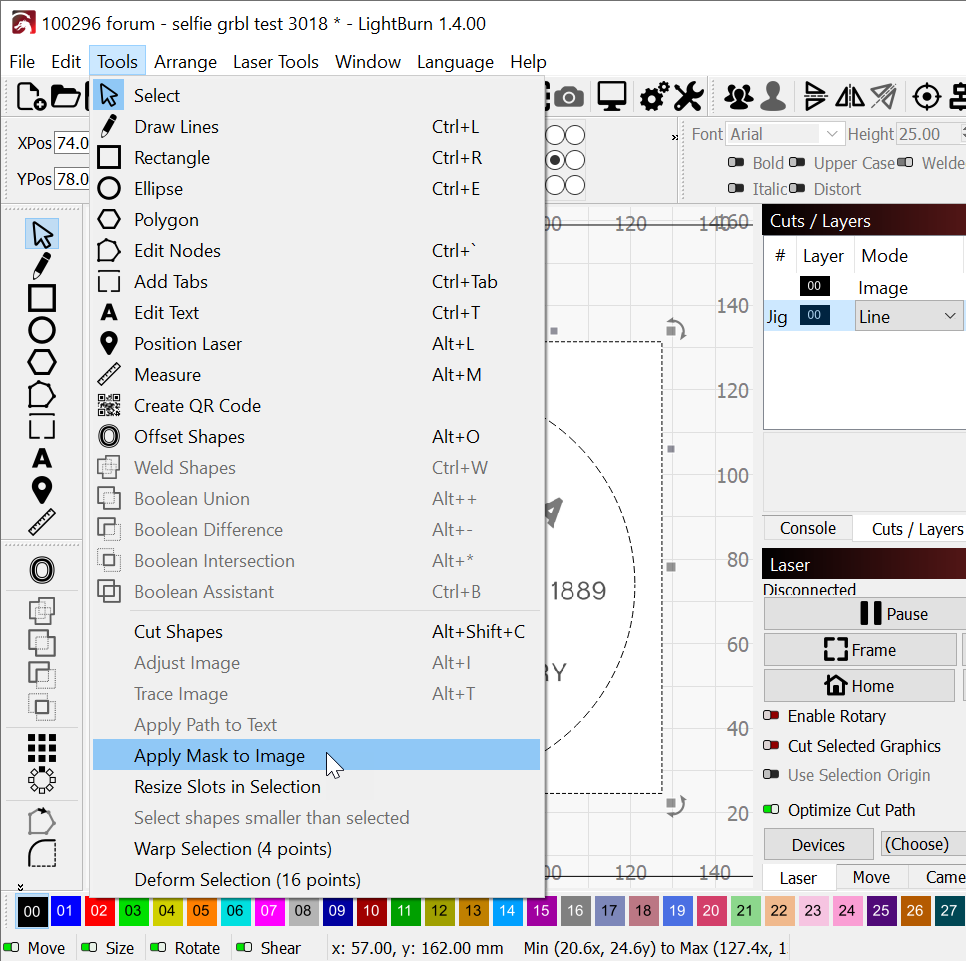
This is a really clean image. Not much in the background for noise.
If you have an image that has a lot of background noise - using the trace tool then the mask is a great approach. There’s a great video in the link below.
Use Inkscape to fix it first.
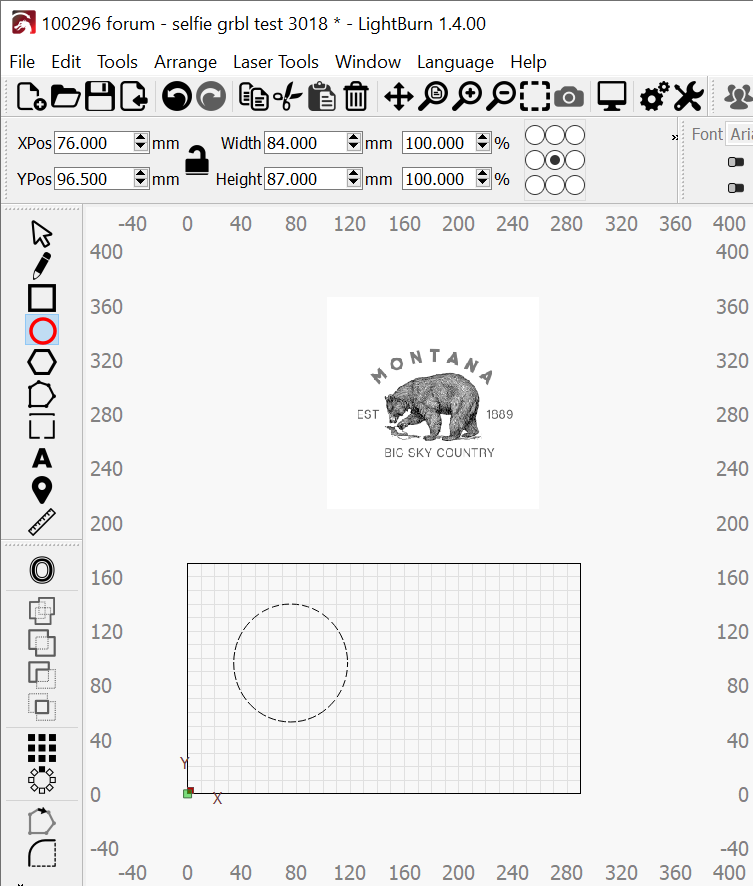
If you’re only worried about framing, you can just use the circle tool to draw a 94mm circle. Then mark the circle as a tool only line so it doesn’t burn. The tool layer would be the T1 orange block at the bottom of the Lightburn window. Just select the circle you draw and click T1. To make sure your image is centered in the tool circle, you can use Arrange/move selected object to center for both the image and circle. That said, it looks like your picture has a square white background. If it was me, I would first use an image editor to remove the white background.