typically when i havce that issues is there was not enough Ti02 and the black you saw was what little bit was there but not enough to fuse to the tile. when I personally have that issues i put another coat on. I can tell you I had many many issues trying these and the prep is jsut as important and the picture and speed and power. I have run a 100 test for speed and power and that is why i know the prep is so important. what I do is I do a batch of tiles and make one a test if i get good black color then the rest should have the same results if I prepped them in the same way. photo preparation is very important too and line and dot size. I instantly had better results after doing a ramp test. I do not want to discourage you but i do want to be honest it take some time. you might have intermittent luck but be prepared. once you get it your golden be patient and methodical in your practices. I got discourage watchin videos make it look so easy and saying all you need is one test of power and speed bull! you need a photo that will actually work you need to have it prepped right and you need your tiles peppered consistent to you testing tile and last but not lease a good running laser.
ps i stated reusing tiles to save money for testing it helps a little you can see where your old burns are usually.
Been working at it, tried paints with a higher titanium dioxide % ran tests using test grid in lightburn using the settings it has and still most of the marks wash off with acetone, but am getting a few to kind of stick better
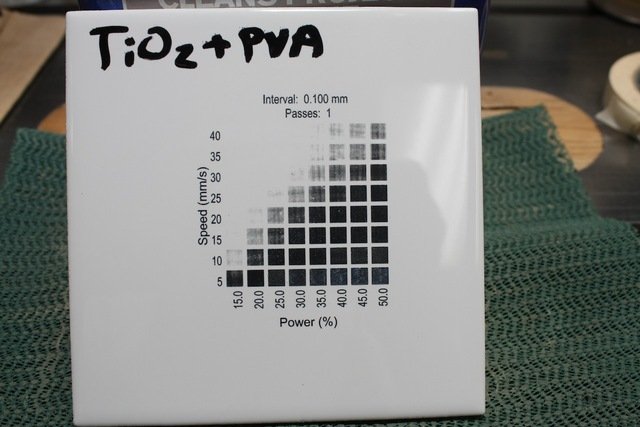
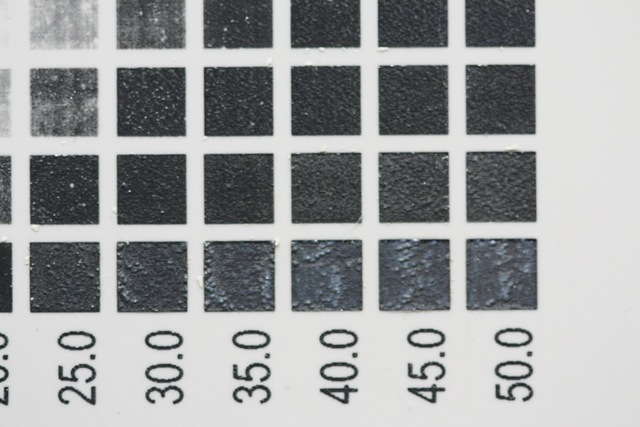
All the test squares look similar, as if your power is not changing. There should be a distinct diagonal line between too low of heat and fusing to the glaze heat.
In my experience, the TiO2 power will fuse black at much lower power that that power required to fuse to the tile glaze. These unfused sections will easily flake off.
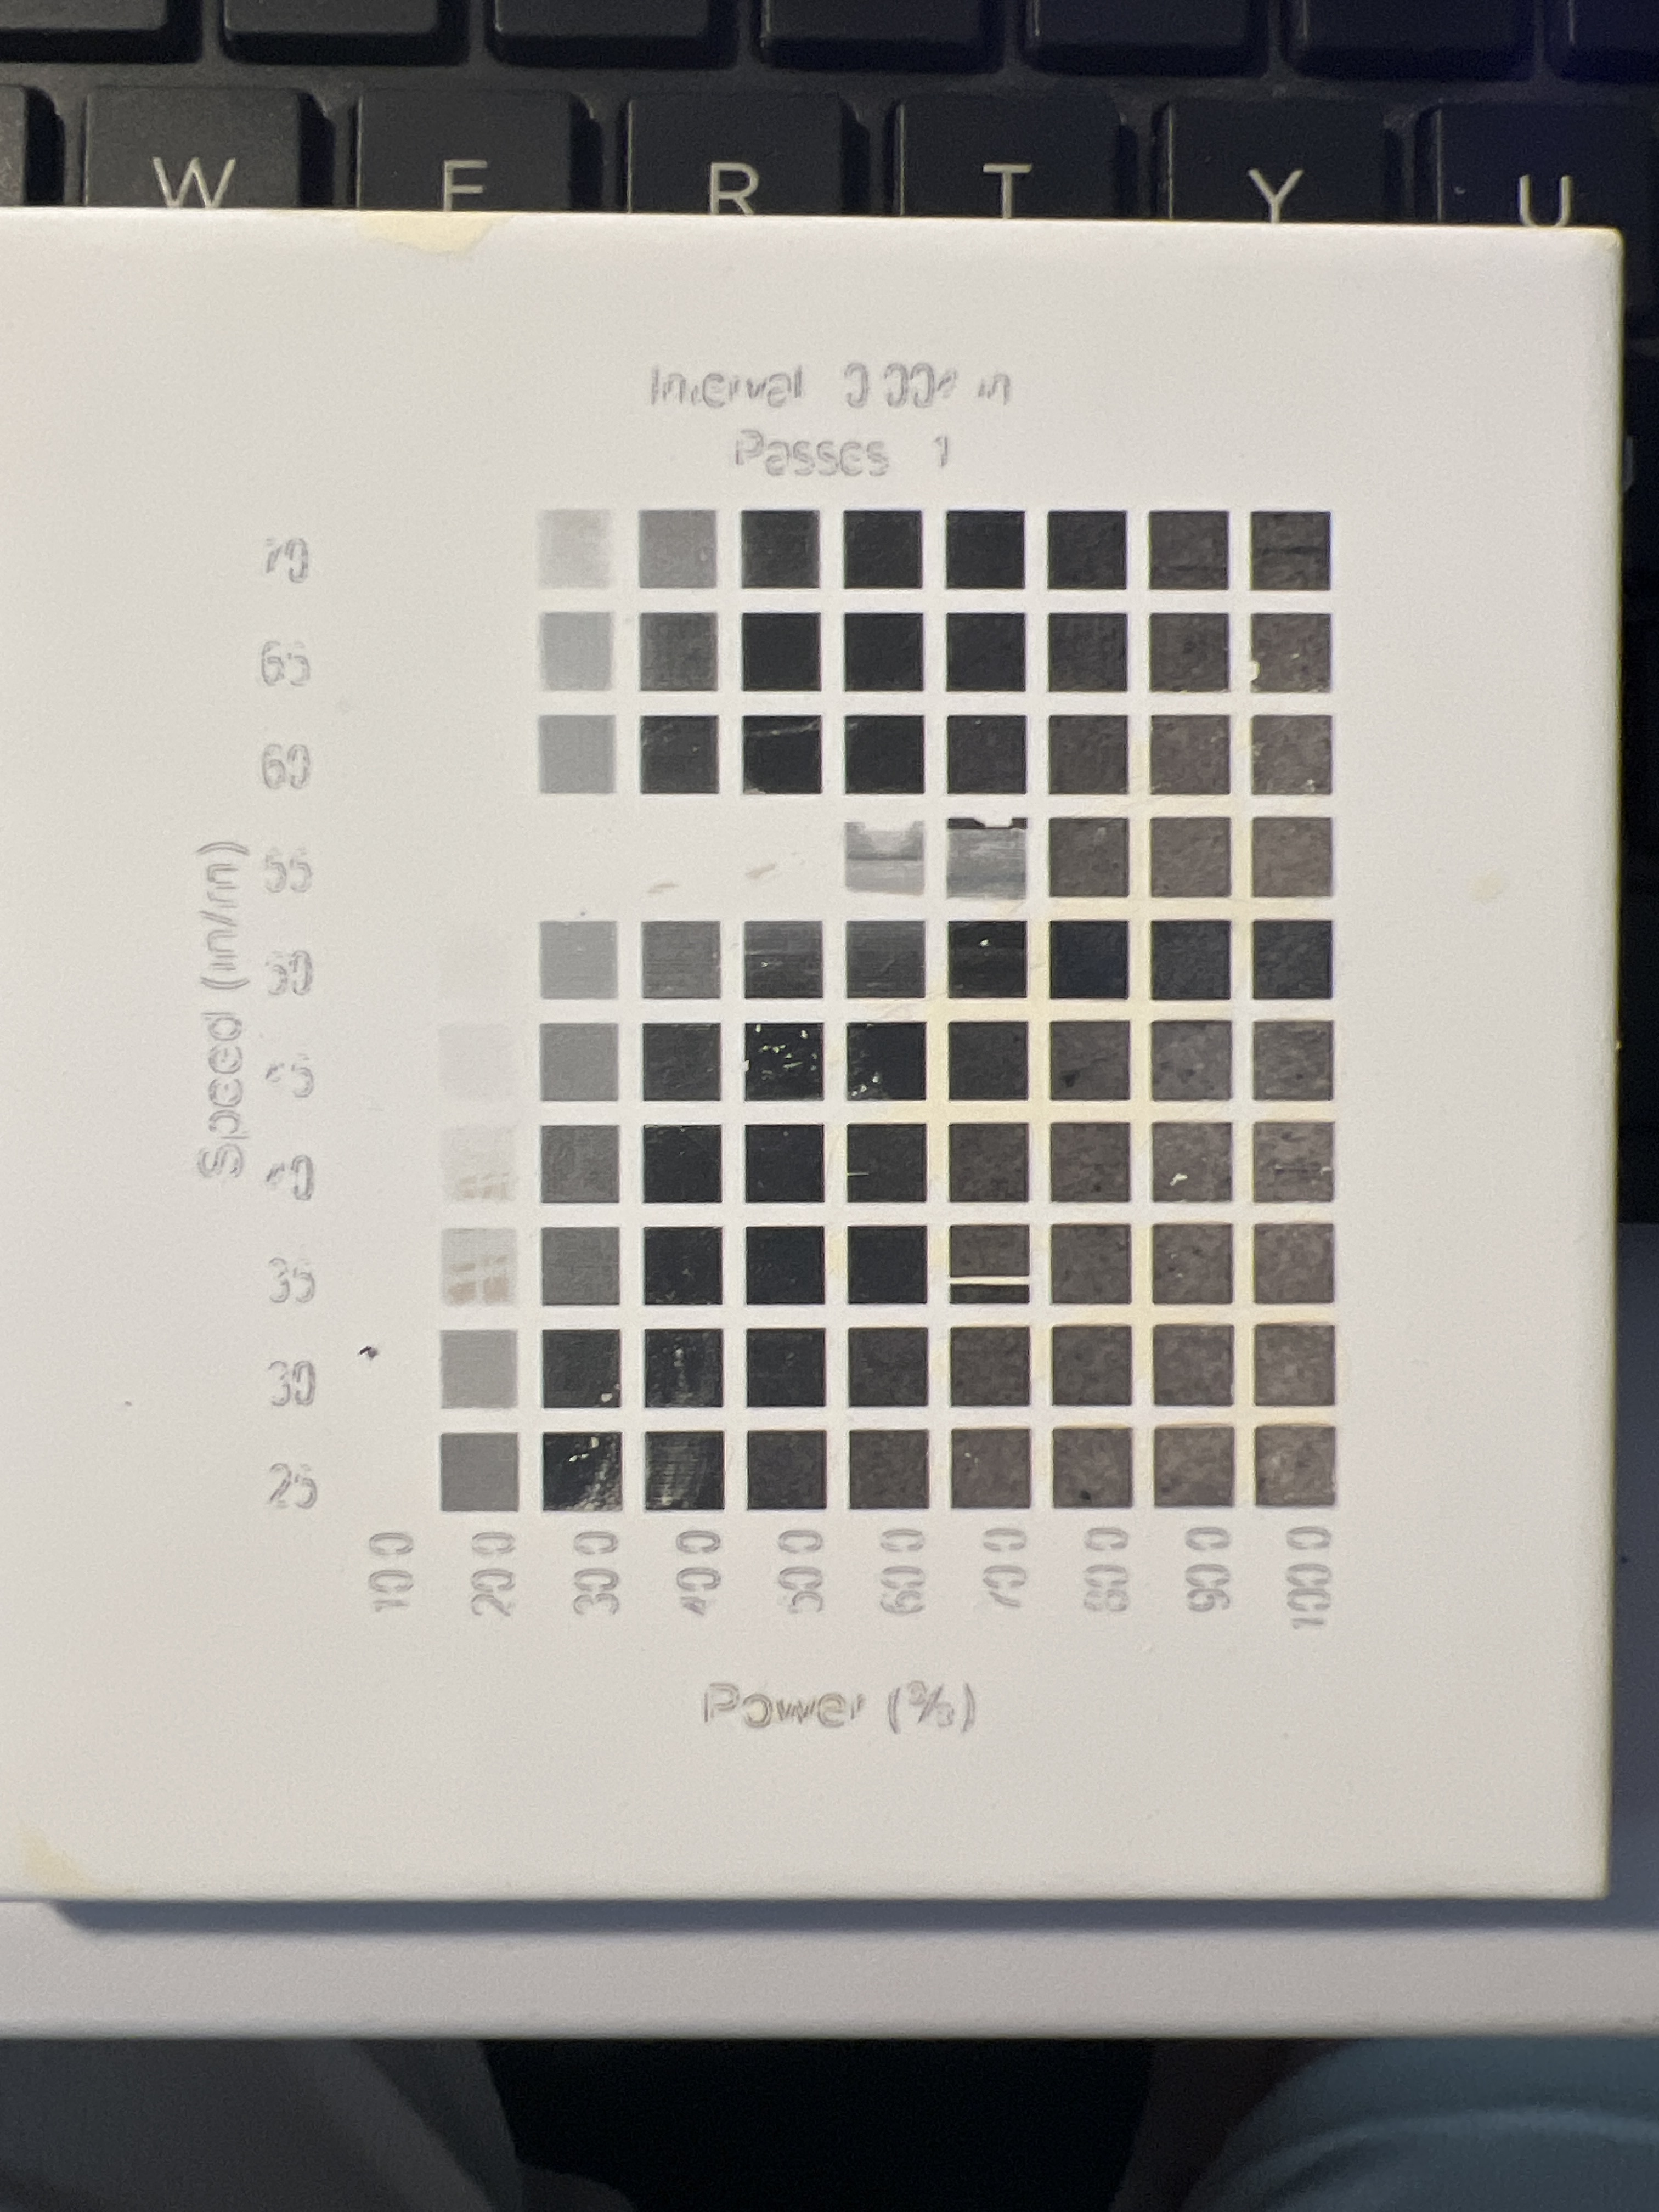
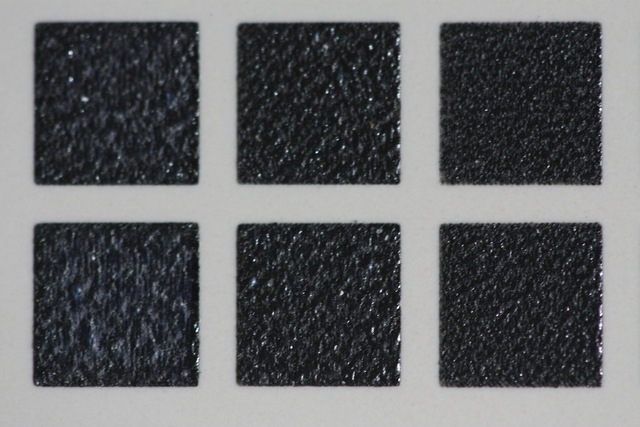
Before cleaning you can see that every square has blackened TiO2 (home center white tile, 10W optical power diode).
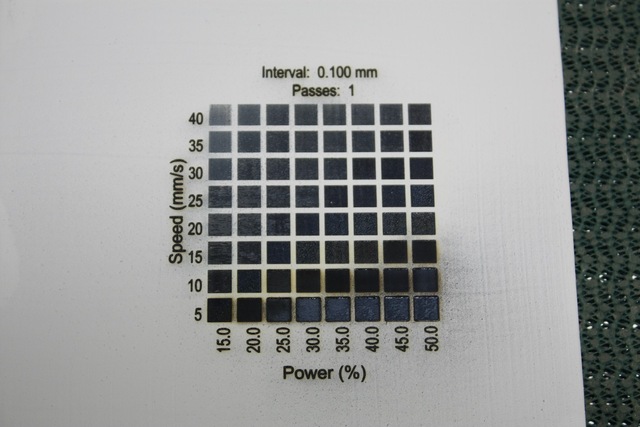
Here is that same tile after cleaning. You can see on the lower row where the speed is slowest that the laser has begun to cut a pit into the tile.
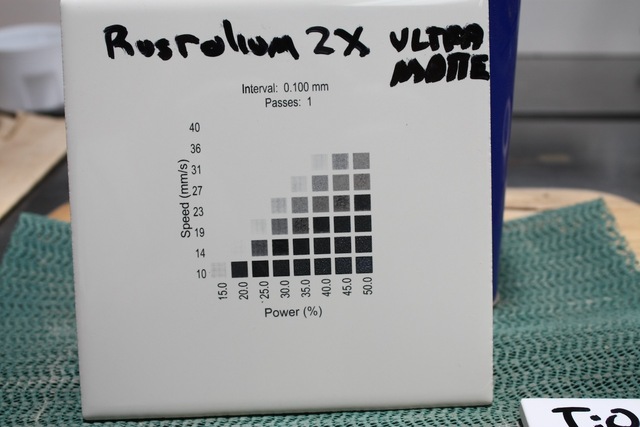
Similar results with spray can primer (3 coats, Rustolium 2X)
The “sweet spot” on both tests has TiO2 bonded to the glaze without excessive heat burning a pit.
While I do not use paint my best and most blackest color is 1200 mm/m with 40% power. this is a 10W diode laser so its not very powerful. I found you have too look close as you can see in the picture and see which is the blackest with the least damage. do much power and you will just etch off the Ti02 and ceramic and just leave stone left behind. I have done this when I do not prep my tiles correctly or forget a second coat. additionally you want the lowest setting that gives you the black you wont because it will really effect your shading if you are using any.