Norton White Tile Method Problems

Hi, I am having trouble engraving white tiles. I have been using the Norton white tile method and I can’t quite get it right. I have been following the method from the YouTube channel, 3D Print farm, and I have seen this same video posted on other topics in this forum. I have been using the Ortur Laser Master 2 20w and I just started using Lightburn a few days ago.

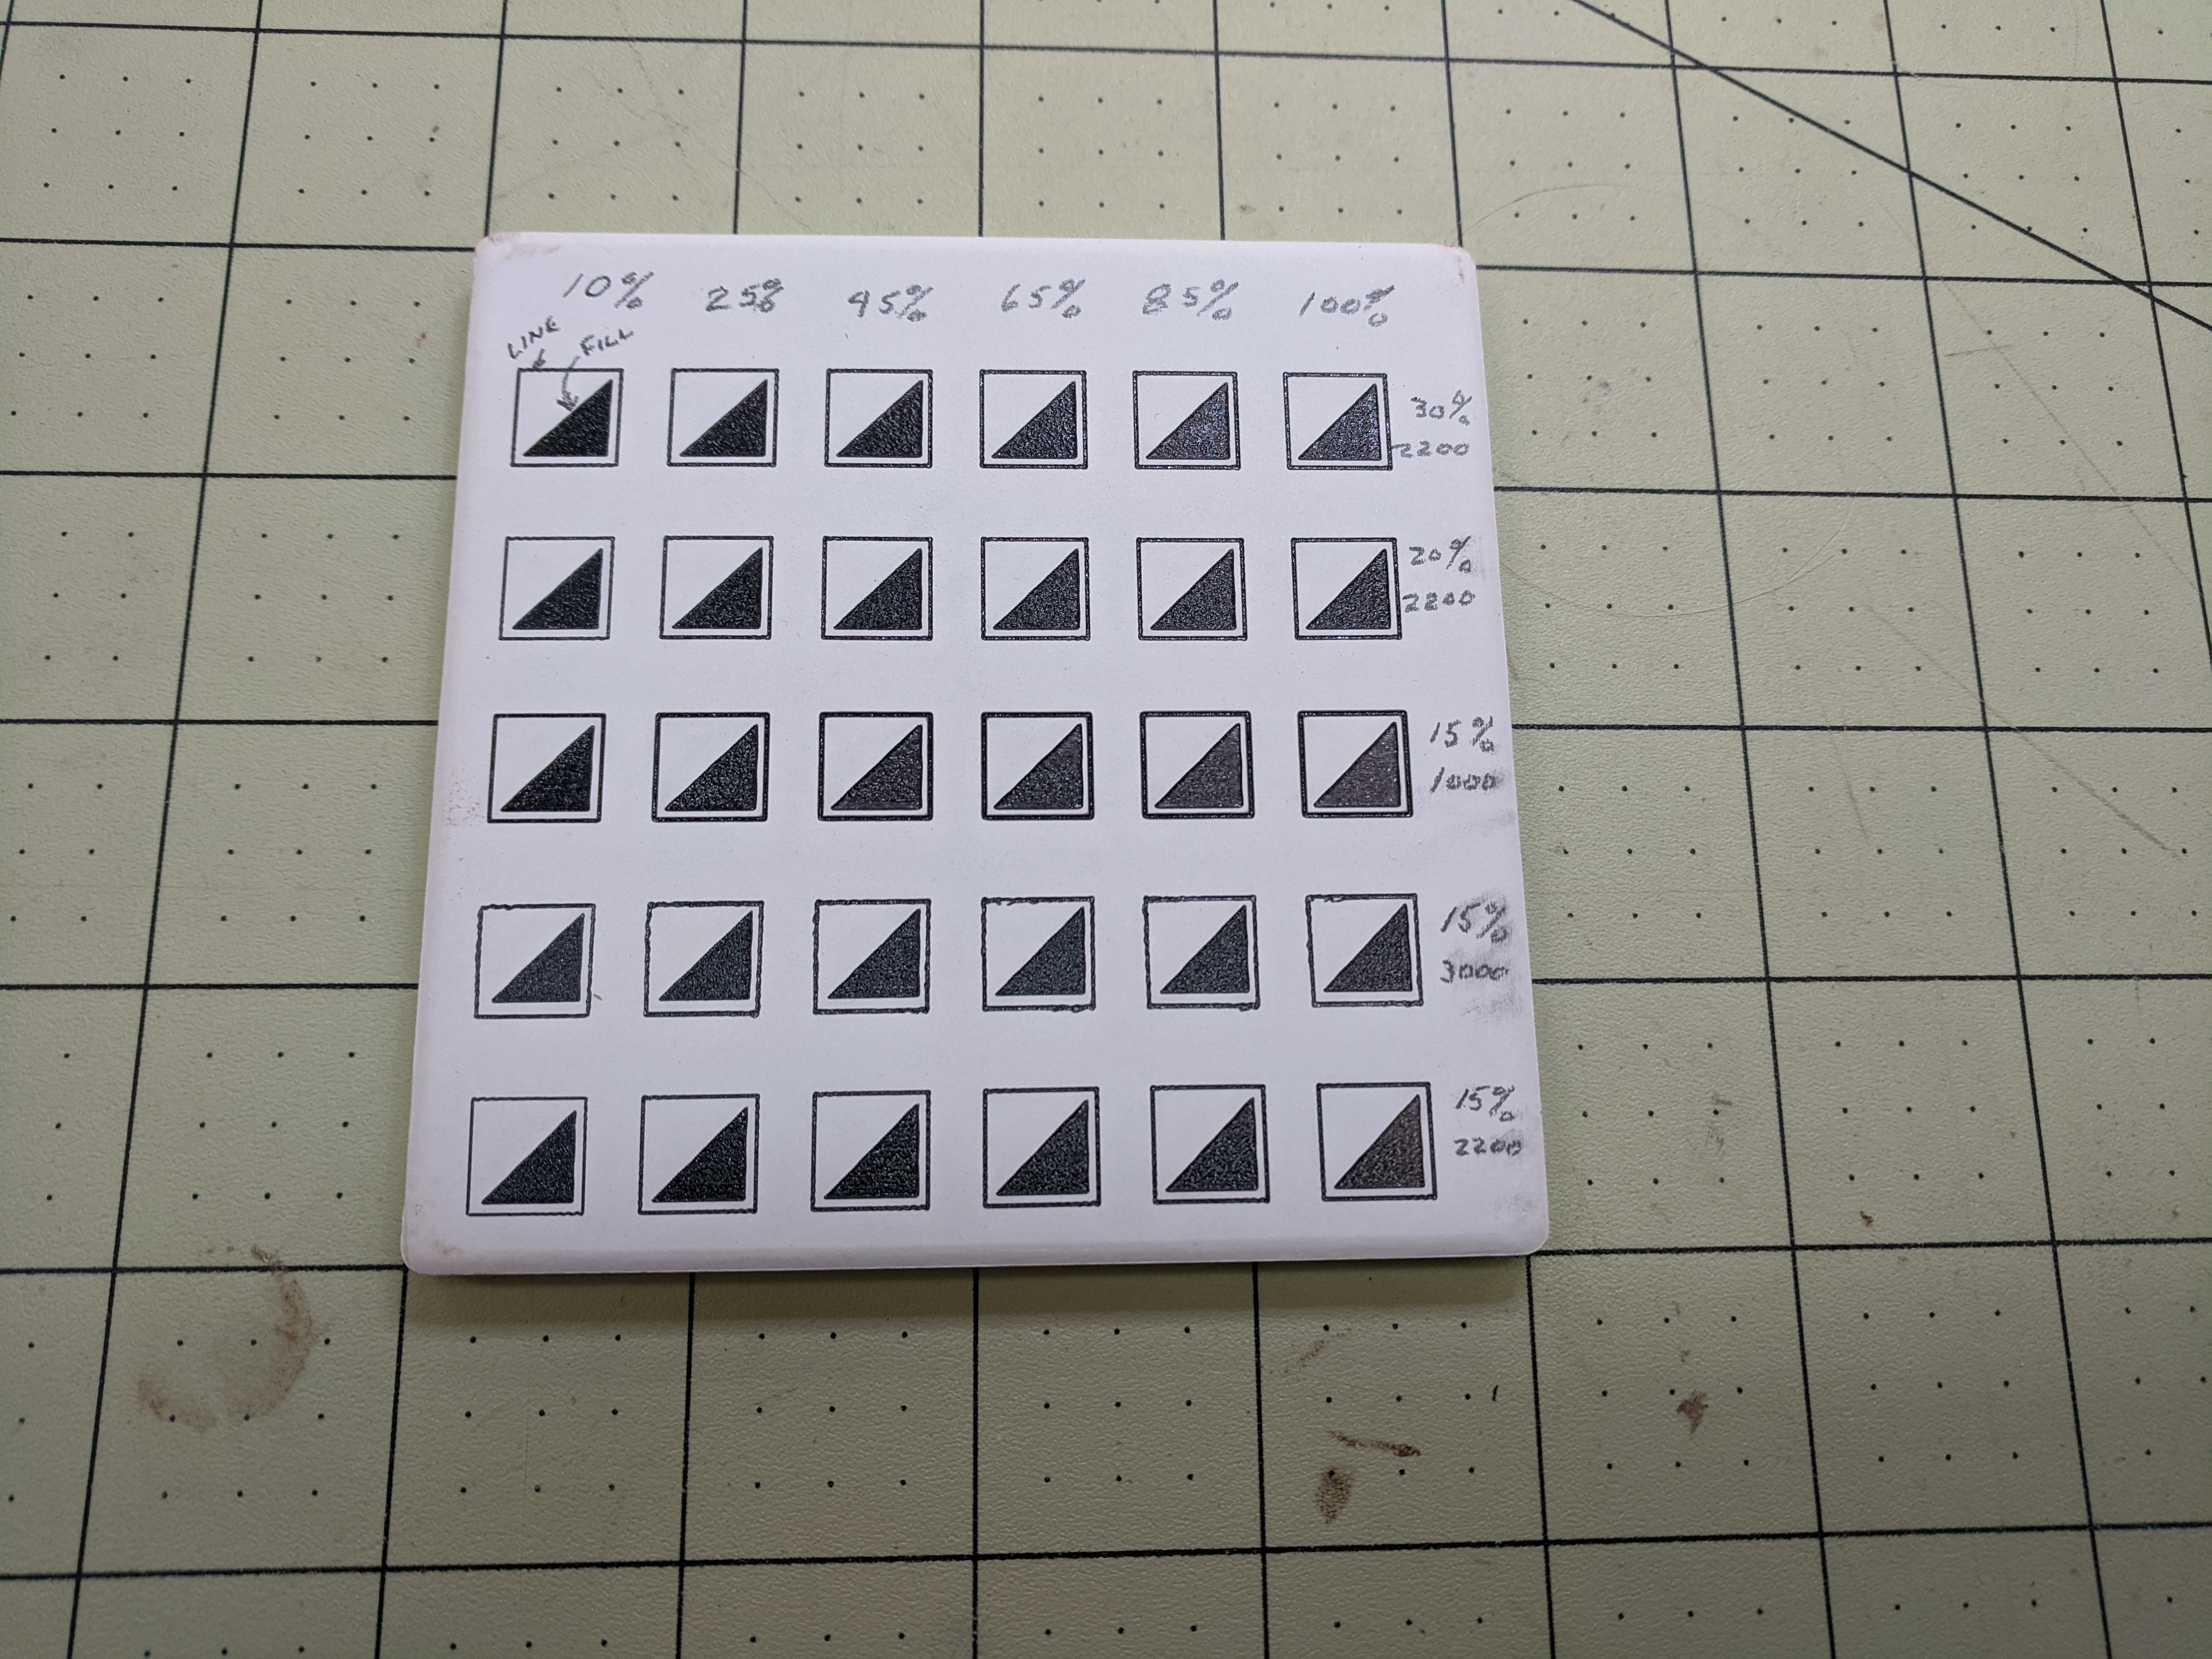
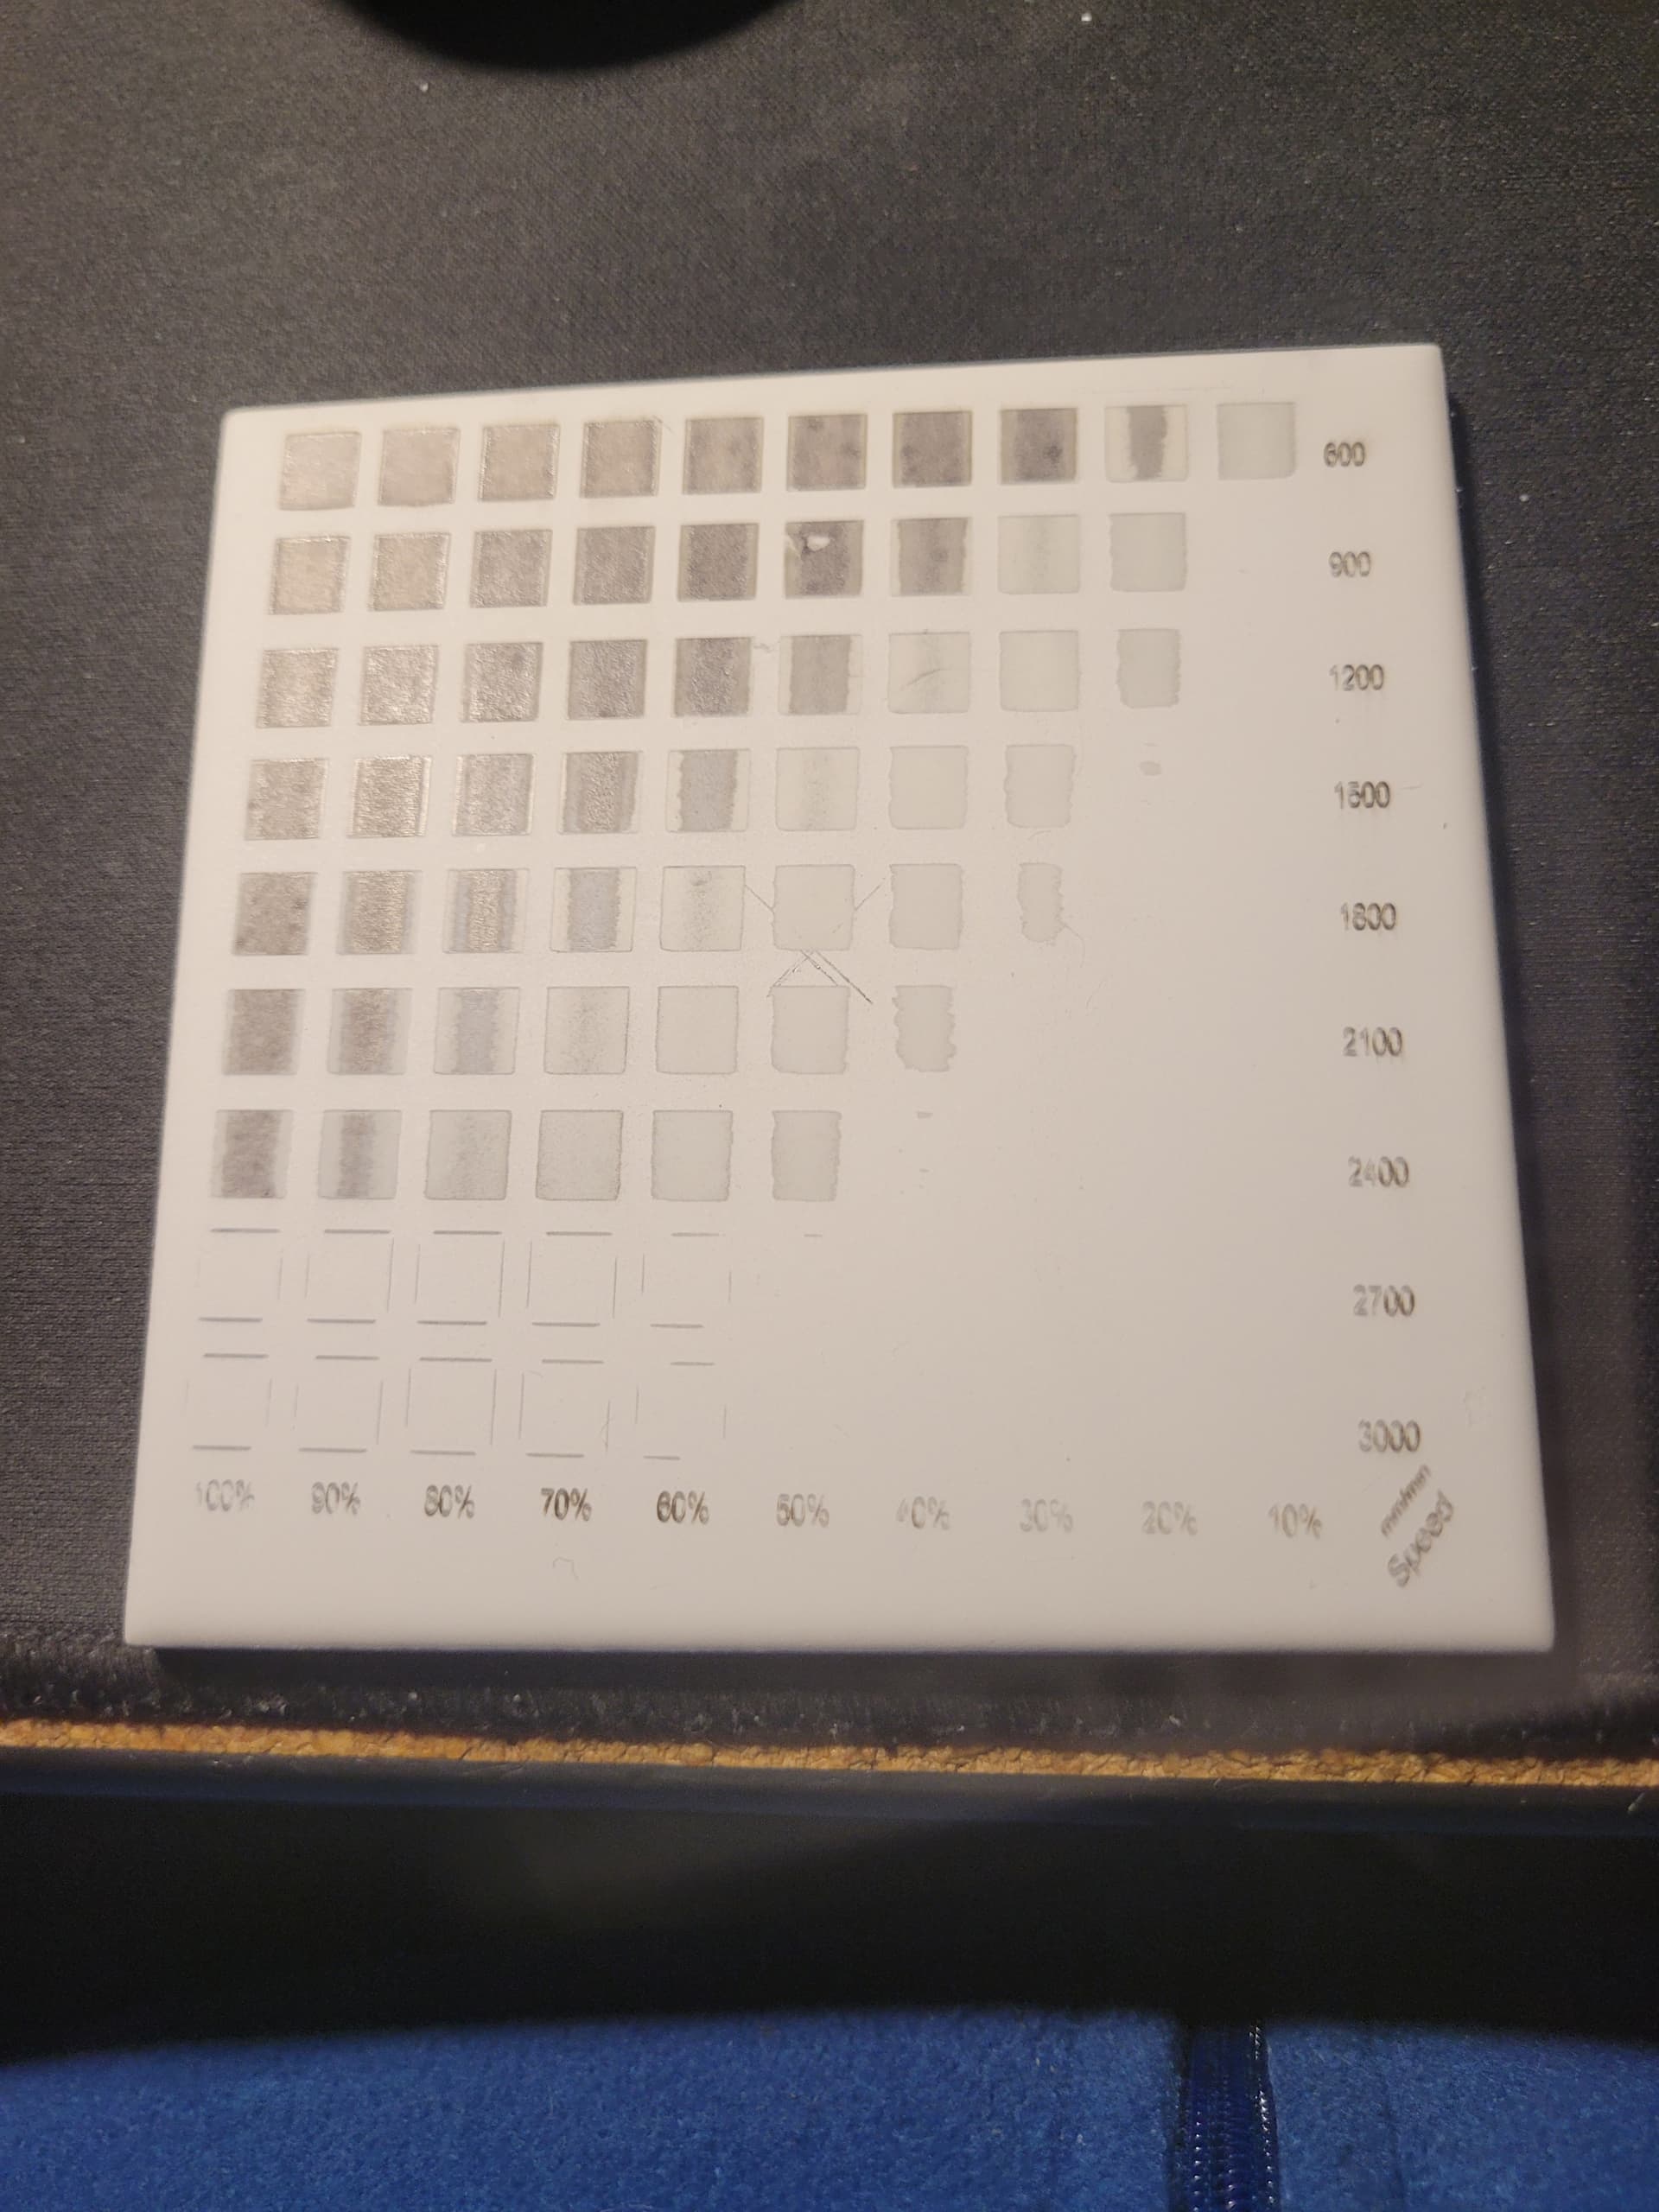
The problem I have been having is the laser is only burning the paint, and after the burn I can rub the engraving off with my thumb. The laser will not fuse the paint to the tile and I’m not sure why not. My settings were 1200mm/m @ 85% and a line interval of 0.100, and that barely burned the paint off. I slowed it down and raised the power just to see something burn. I don’t know if my settings in Lightburn are correct, since I just started using it a few days ago. Let me run you through my process.

First, I buy the 4x4 ceramic tiles with the glazing from Lowes or home depot. (Home depot had them at 8 cents each.)

Second, I put a good amount of acetone on an old t-shirt, and wipe the tiles down good and let them sit for 5 min. (Please tell me if I need to take the glazing off with razor blade or a scraper)

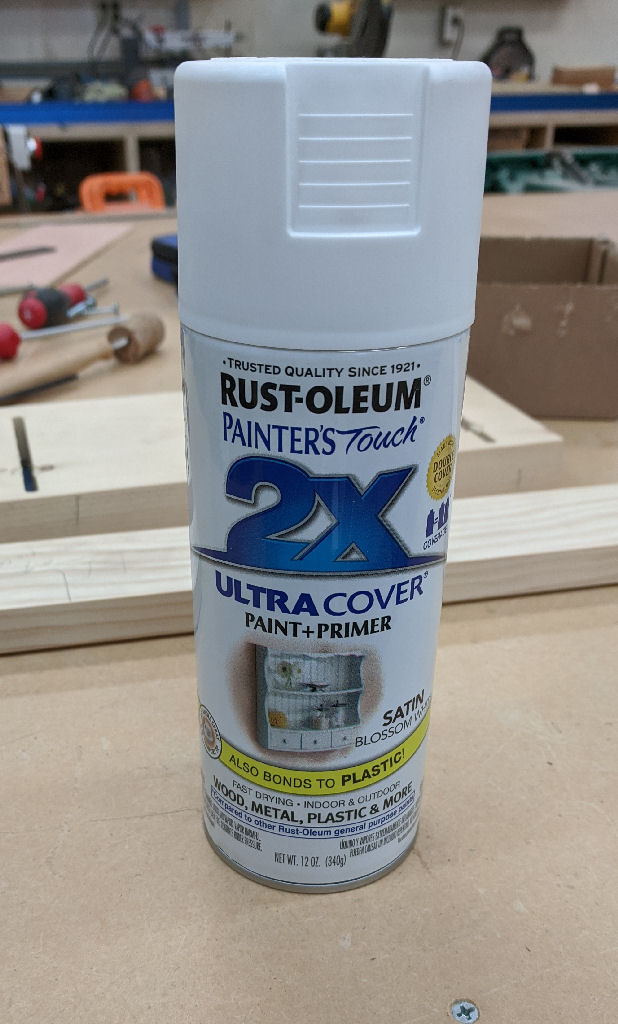
Next, I spray a good coat of Rustoleum Gloss White, making sure everything is warm so the paint doesn’t crack. (Will Gloss white reflect the laser?I can buy flat white if need be.) And I let it dry overnight.

Next, I bring it to the laser bed to engrave it. I have been using 1200mm/m @ 85% power and 0.100 line spacing with the mode pass through. This is the same settings the guy from 3D Print Farm was using.

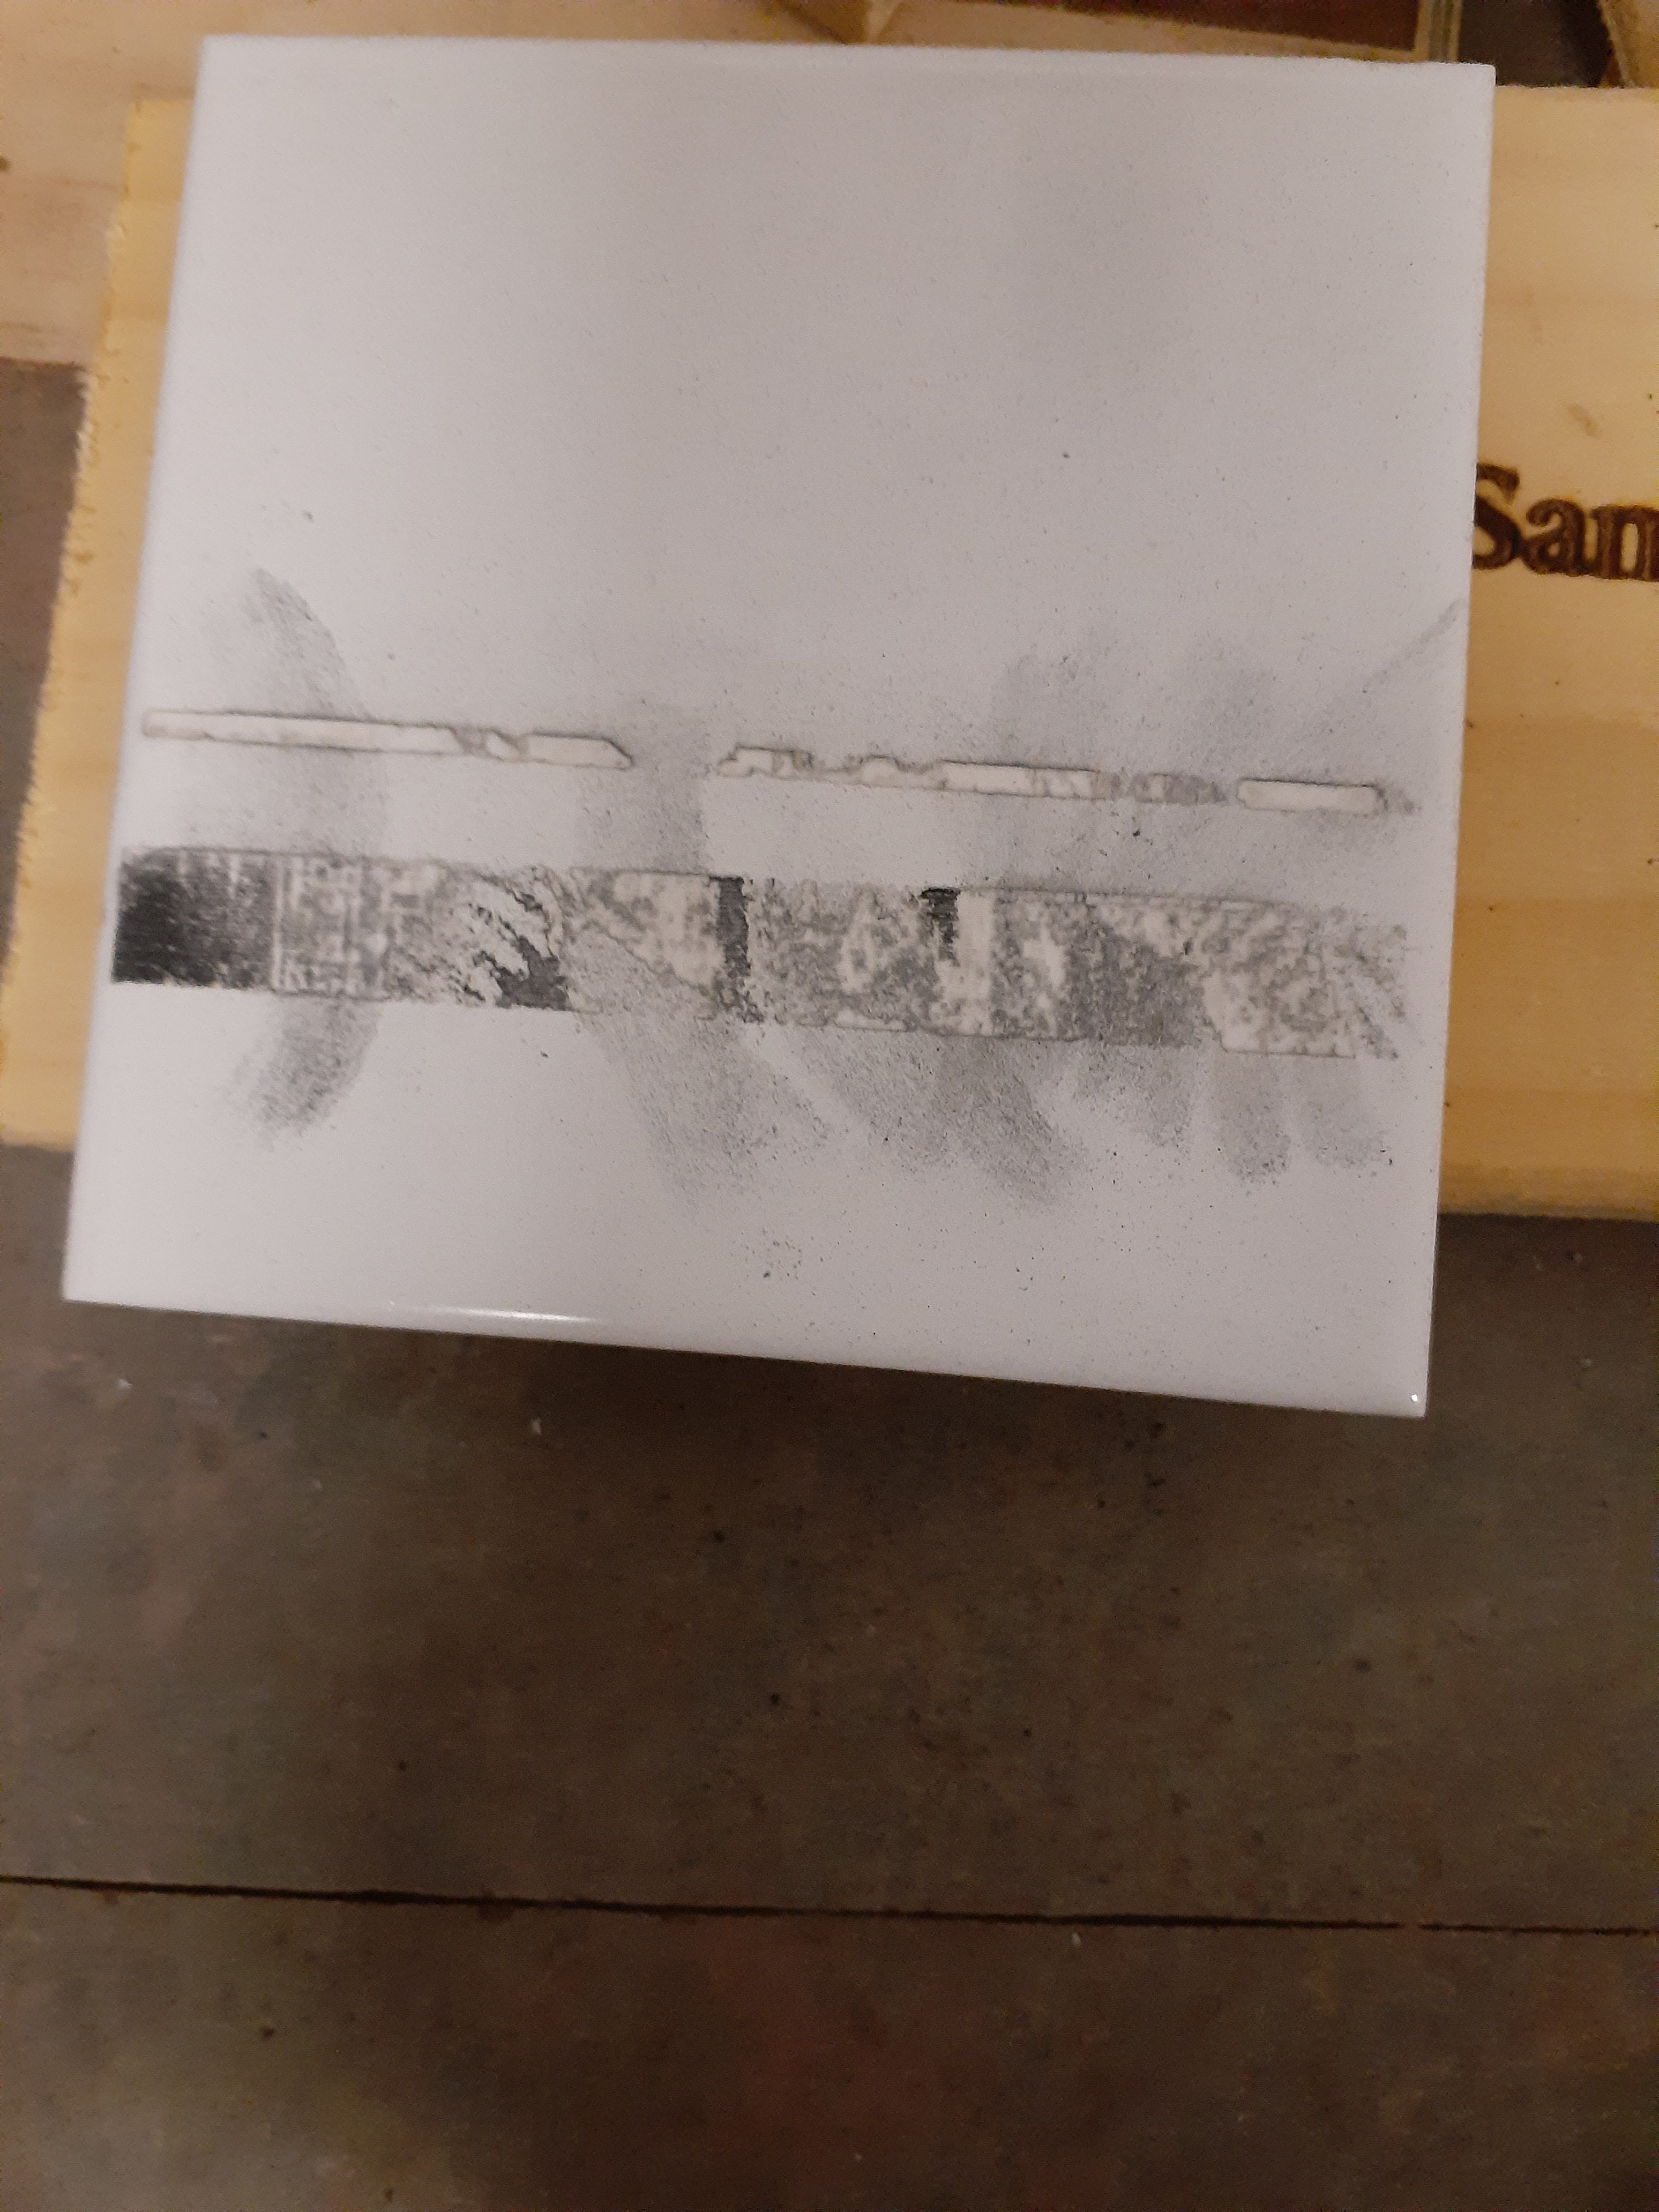
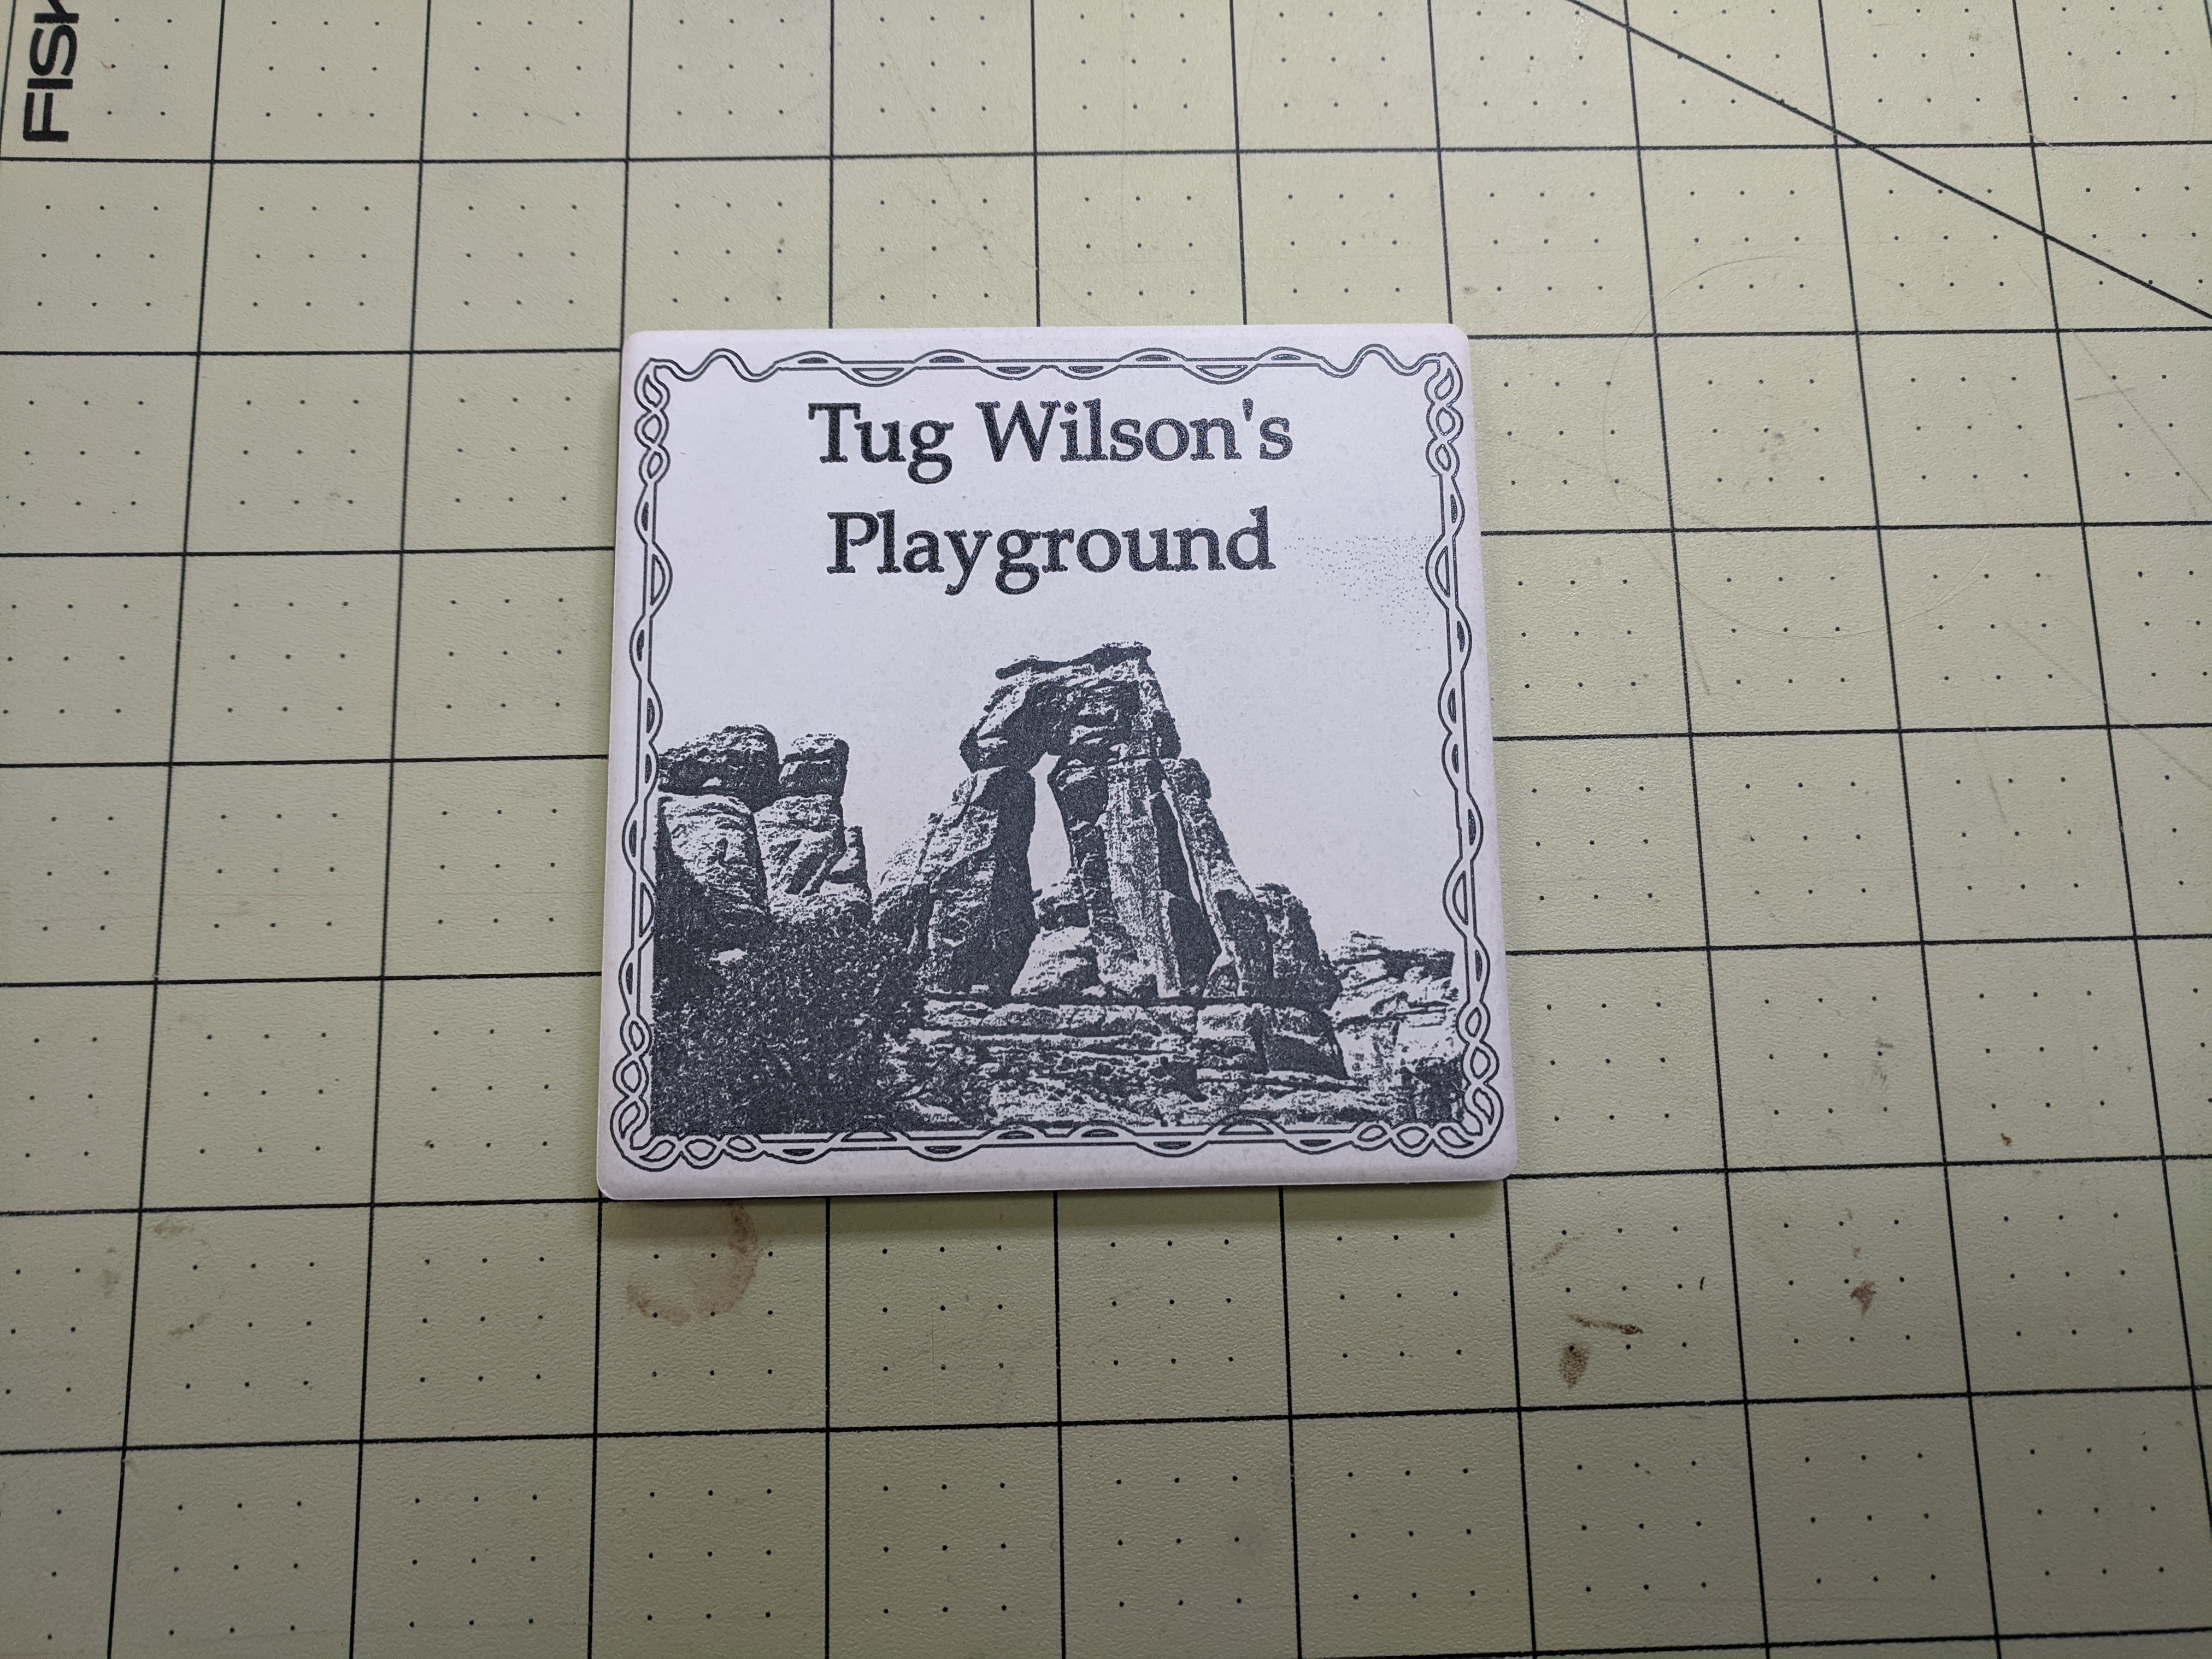
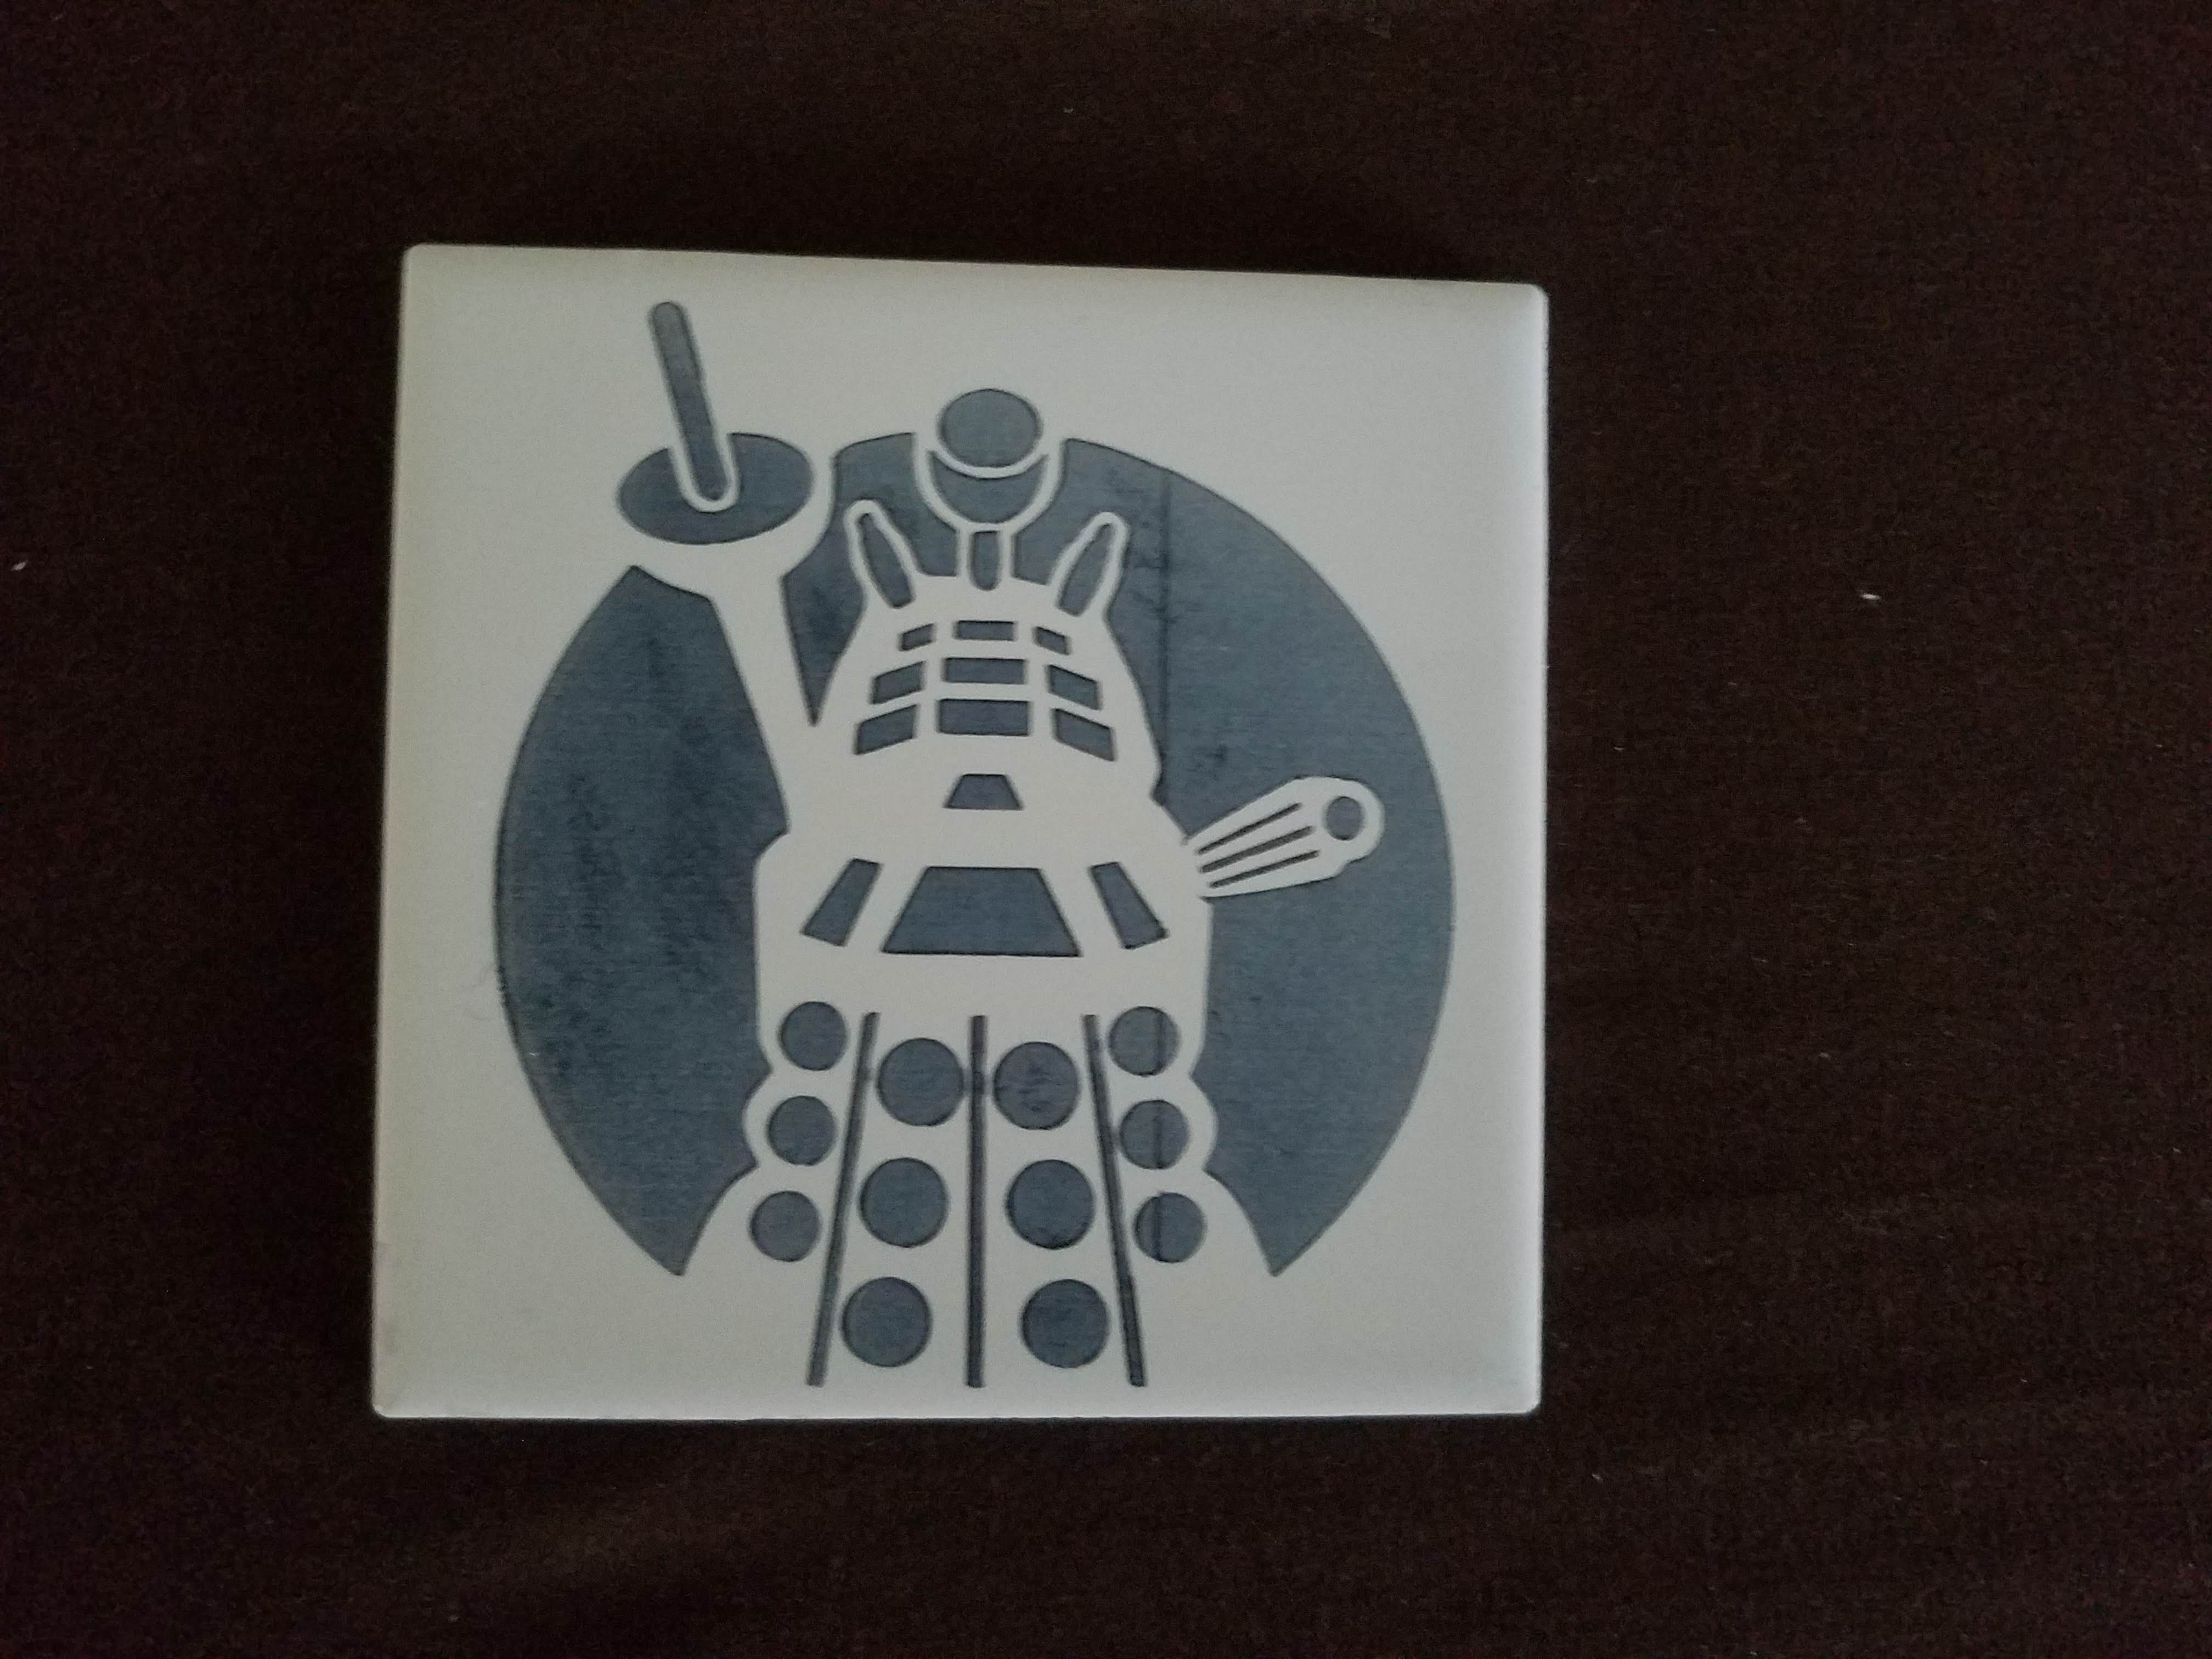
Finally, after trying to engraving just a small black box, It either doesn’t burn at all or it it engraves and immediately rubs off.

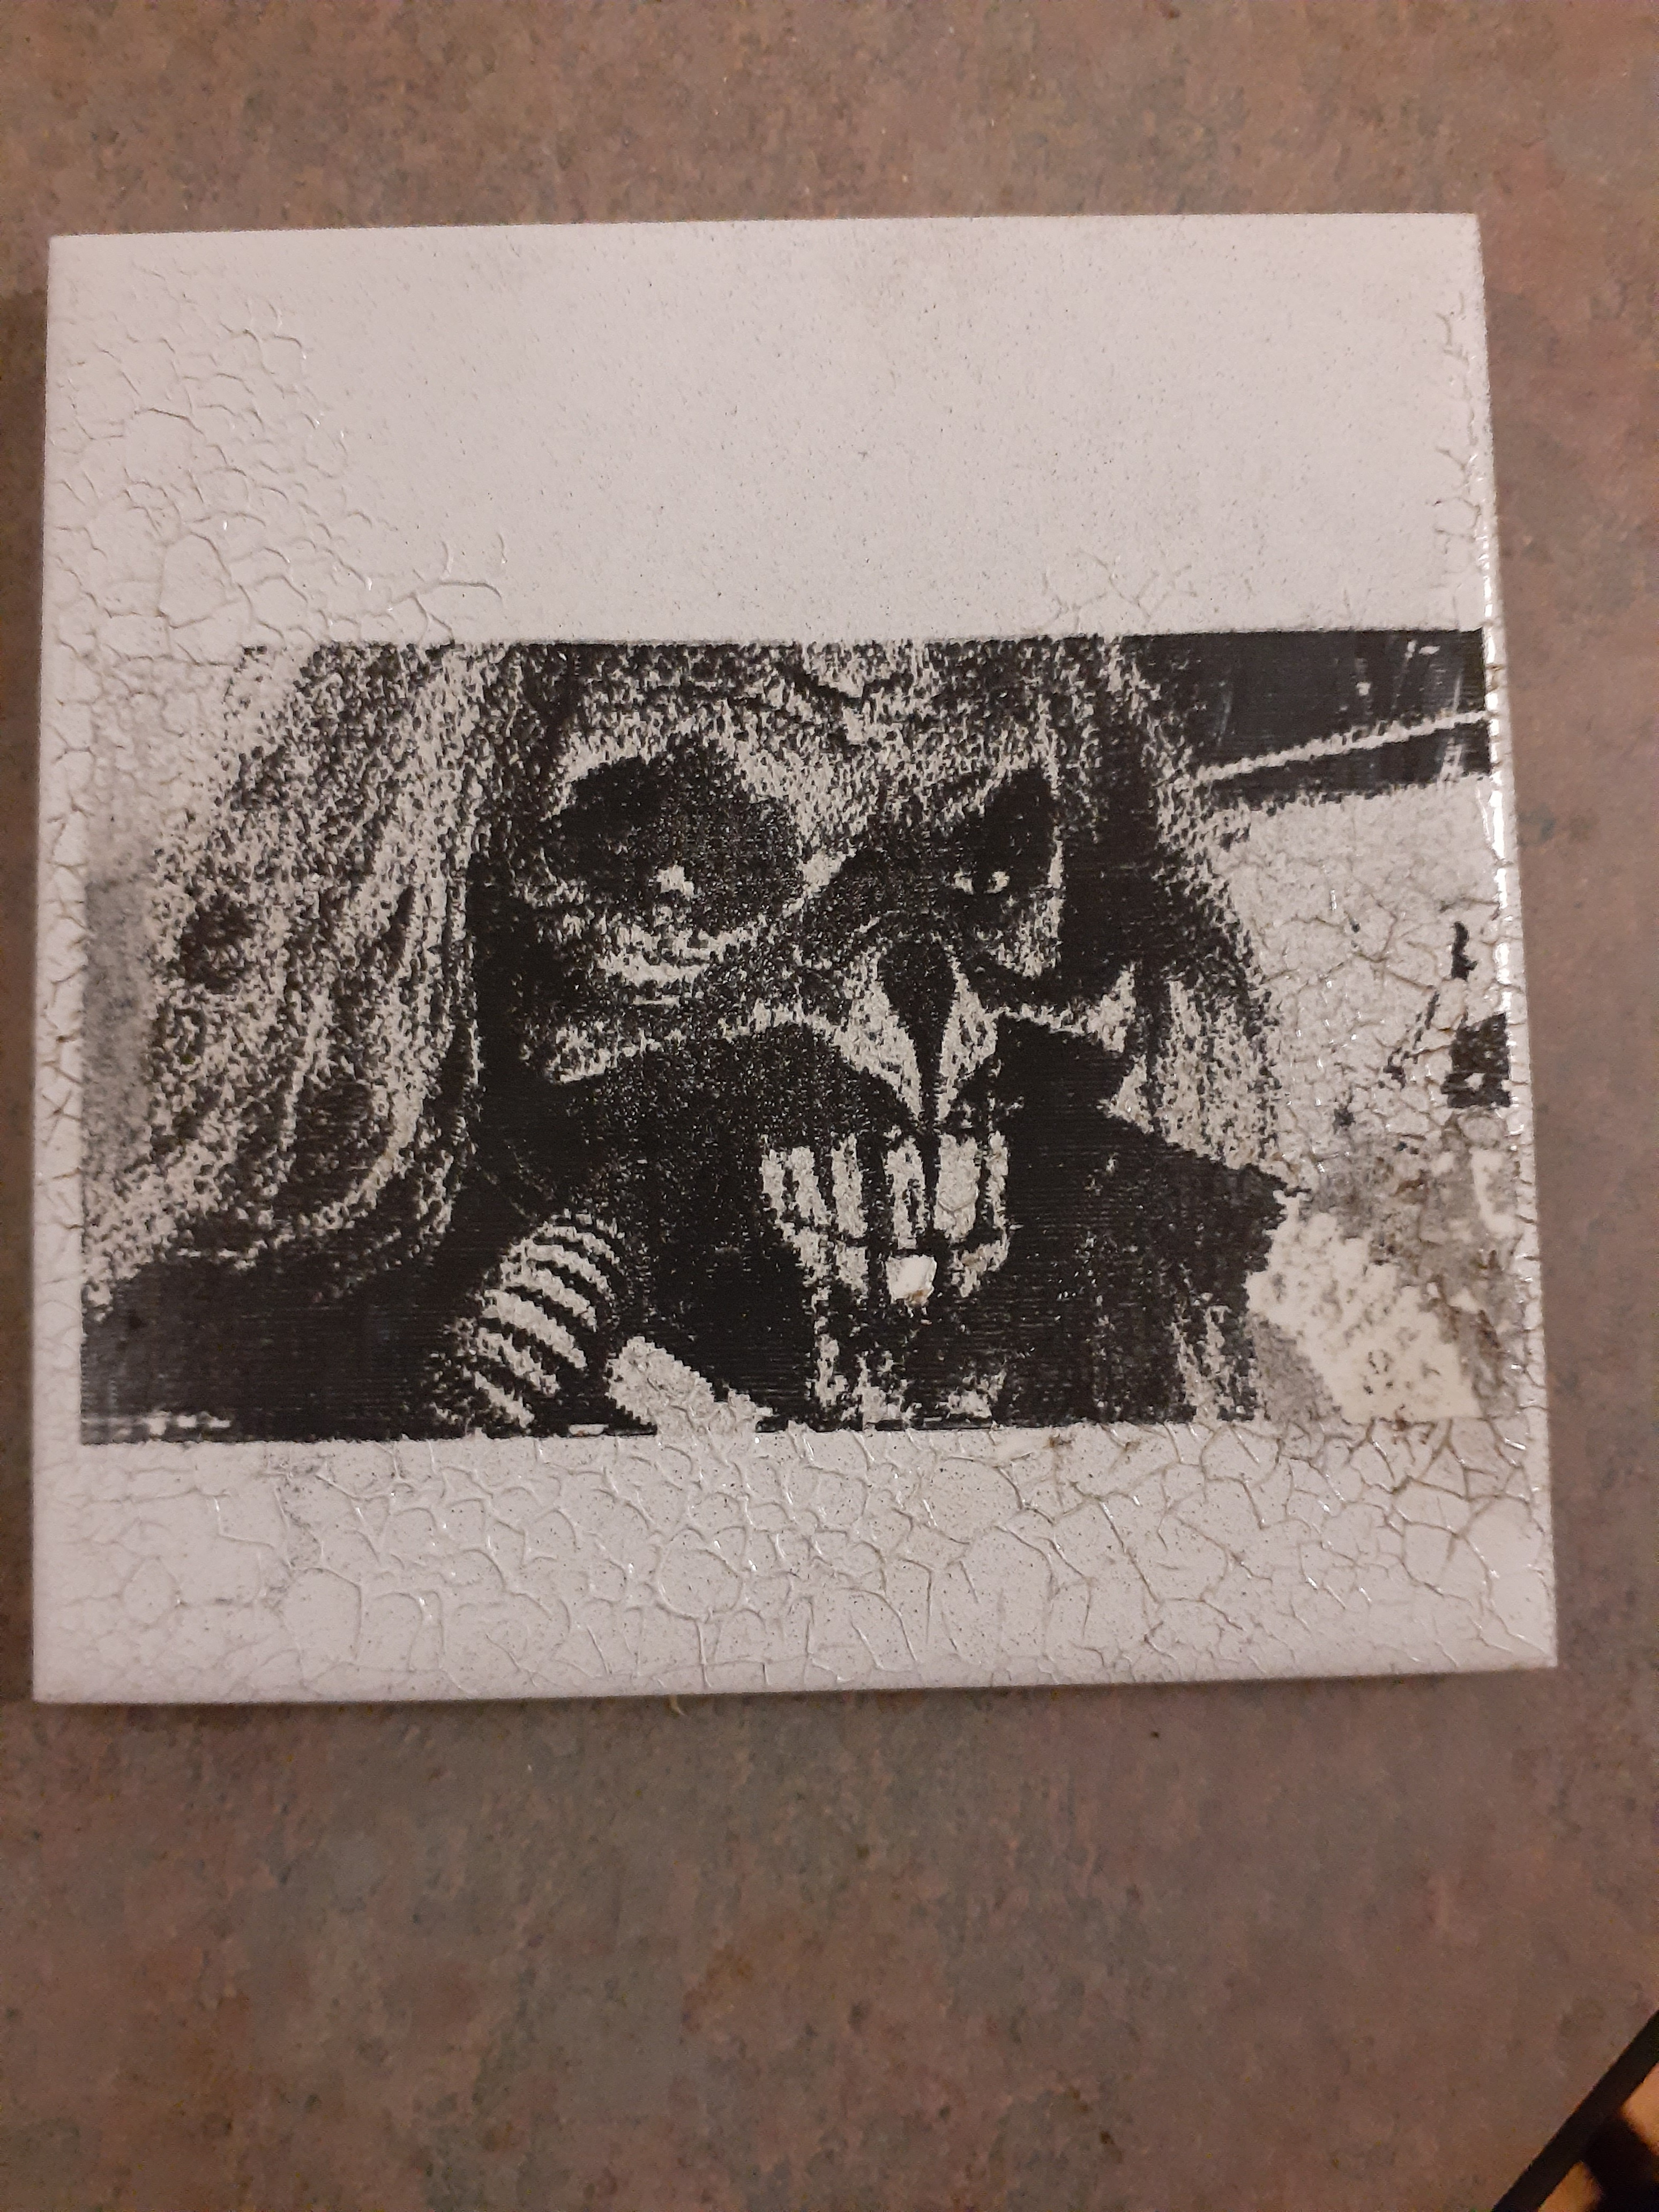
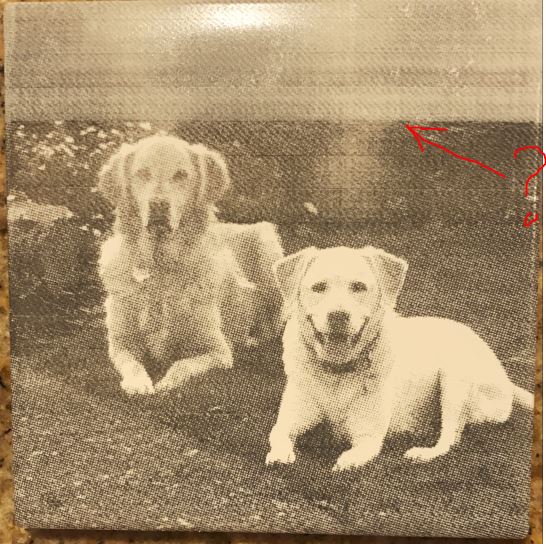
I haven’t even tried to rub acetone on the engraving after its done because I can’t keep the burn on the tile. I did one engraving of the Immortan Joe, and instead of trying to keep it on, I clear coated it and it stays on pretty nice. The problem with that is the tiles can be easily scratched and it takes the picture off. I should also say that I have been using image-r to prepare the picture, and that my laser is in a barn with no heat and it gets to 25 degrees at night. Any assistance would be appreciated.

My opinion is to slow down more make sure your laser is focused correctly and use flat white paint. I am no expert by any means but i have found around 35in/minute and flat white paint works good for me.

This is useful, but incomplete. At what power setting and what is your laser output power?

Did you paint the tiles indoors and leave them indoors to cure or have them in a 25 degree barn overnight? That paint requires temps to be 65-85 degrees to cure.

I have a Jtech 7watt and run 100% power. Piant will not dry well at 25 degrees so it needs to be applied to the warm tile and left inside to dry and cure. After it is dry you can use it anywhere i would think.

Thanks, I have tile coming in tomorrow and I’m looking forward to trying it.

1 Like

Well first off, Thank you all for your replies. I do want to say that I have been painting and curing the tile in my basement. However, I think its around 55 degrees in there. My laser has a power output of 5 - 5.5w.

Ok, I got my tile and tried it out. I have to say this has to be the most forgiving process in all of my lasering experience! Here is my test tile that I thought would be a first pass to guide me to tune the process:


It has graduated power level values from 10% to 100% at different speeds and power settings. There are two objects being exposed, a simple vector square and then a filled triangle without line around it. I was hard pressed to decide which one I liked, but settled on 20% power gradient at 20% laser power (I have a K40).
So… this was SOOOO good that I decided it was time to go for broke! I messed around a bit with image settings, but on the 3rd try I ended up with this:

This was the paint I used.

I used unglazed tile which are actually pretty good quality:
https://www.amazon.com/gp/product/B07SHWSNPT
Cleaned with Acetone before spraying, sprayed at room temp of 74 degrees F, and let it cure for at least 2 hours.
After exposure I cleaned the paint off with Lacquer Thinner and, voila!
Really this was sooooo easy!
Thanks to @wayne1 for his exposure info. My settings were derived from his numbers with only a minor tweak to increase power a bit.
UPDATE: I should mention that I now bake the tiles at 125C for an hour to get the Lacquer thinner VOCs out of the tile. I found a spot on my office desk where the finish was totally ‘melted’ due to the residual lacquer thinner in one of my earlier pieces.

1 Like

20mms @ 90% power
ortur LM2 20W

1 Like

Those both look very good

Does anyone have a solution as to why the laser power is not consistent across the pass. The Is there a setting that I don’t have correct? (see photos)

Thanks.
5.5W laser module Sainsmart 3018-Prover GRBL
Rustoleum 2X Flat white
Test tile and Photo attempt.


i can say too much speed

Hi, is this correct? did you mean that you did this in a CO2 Laser K40?

Yes, that’s what I used for that exposure.
I’ve since used a 30W (5.5W optical) diode laser to do the same thing, with different settings, of course.

Ok, Thank You… Very nice Job.

I have been trying to do this on a CO2. I can get the black glassification to appear at 20mm/s, but nothing faster. This is really slow to be running rasters at for the big machine, so I’d say it’s a technical success but actually a failure. Also had to disable air assist which we don’t normally allow.

I did try added a lot more Bullseye 123 primer. Also added tape over that before firing. Was hoping I could fire more on greater power, but nope, it just left a tiny column of primer around the laser pulse

I’m engraving white tile using the Norton White method and everything seems to be going okay and then all of sudden it seems like the laser power dips. I’ve seen this several times. Sometimes it occurs at more at the beginning than at the end. At first I thought it was my painting, but after a few different paint methods and varying levels of success it seems to be something else going on.

I’m running a K40 with LightBurn, VMS LX2b board, Engrave settings 80mm/s 40% power. Air assist running, lens / mirrors clean before start.

Any thoughts on what might be going on… where to look etc…?

Much thanks!

Did anyone ever answer you? I’m having the same issue I have the FoxAlien 20w (5-5.5woutput) and most of what I attempt to etch on washes off with the acetone

I think you will find a lot of help with your problems if you read this thread I started a long time ago. New tile engraving method - Community Laser Talk [UNOFFICIAL] - LightBurn Software Forum

All of my tile designs have been done at 45% power and 500 mm/minute. I’m having banding issues but when it isn’t banding, the etch is beautiful. Make yourself a test tile and see what works best. I believe your speed is much too fast. I use a atomstack S 20 Pro.
Good luck