Hi, started trying to etch anodized aluminium dog tags with my Sainsmart 5.5w diode laser.
For some reason the etching is not complete at the extremeties of the lettering.
I tried altering feed speed but to no avail.
I’ve attached some images including settings.
Thanks.
[ ](<a
](<a
(


I always enable ‘overscanning’ to a minimum of 3mm, probably overkill, but it works for me
well I had overscanning on but the result was worse with it off so I don’t know what to make of it although it was only set to 3.5% or 0.29mm.
Oh Ok, your screen shot showed it as disabled. Try upping it to see if it makes any difference
will do. have to be tomorrow now, will get back with results.
thanks.
A couple of things:
635dpi is ridiculously high. Try half of that.
I would also use ‘fill shapes individually’.
You will nearly quarter the time you spend and each individual letter should be crisp.
thank you, new to this and just finding my feet.
Half the fun is the experimentation.
And on that subject, you can never get away from doing a power/speed matrix.
I run one on every new material, even if I already have a similar product in the library.
With such finely-tuned settings, a different batch can behave differently.
And one other point, unlike a lot of engraving, anodised aluminium isn’t ablated away, the plate is bleached of the dye deposited in the anodising process.
If you find it goes down to bare metal, it’s likely that it’s a coating, not anodising, like Trotec Ultra Laser aluminium sheet.
Only half? I’m kidding. I strongly agree, discovery - learning. The more it visits, the happier this kid is. ![]()
Okay so I cut the lpi, selected ‘fill shapes individually’, put ‘overscanning’ back on to 3mm, although I can’t find out anywhere what that does, et voila! Success!
So bearing in mind these blanks were made in China then I suspect you are right and they are not anodized, regardless of which they work well for me.
Is there a speed/power matrix file I can download anywhere?
wrt speed then yes the process was quicker by about 50%. My speed is not massive as I’m not sure the 3018 Pro will be able to accelerate up to and back down from over such a small area, I wonder if there is too much mass in the x-y axis due to the aluminium platten.
I wonder if someything belt driven like an Eleksmaker would be more speedy?
[

Nice results! ![]()
Overscan causes the laser to move past the last burn spot, by the set amount, allowing the head to slow, prior to reversing direction. This helps to not over-burn the edges as the laser turns around and the head starts to move in the other direction. This direction change takes time. Without overscanning, the beam deposits more energy at that turn point if the laser is not turned off first, then given room to make the turn.
1 Like
Congratulations. Glad it worked out.
Just make one using the matrix layout tool in LB. Nobody has your machine or knows what your speed/power is.
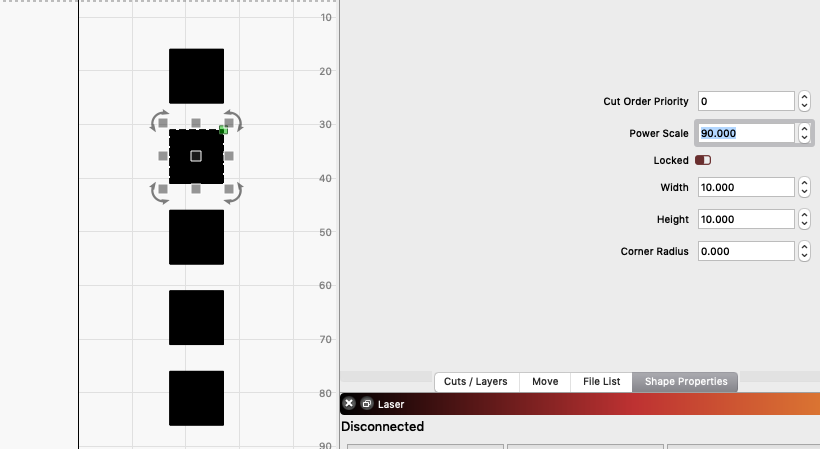
Make a 10mm x 10mm square. Assign a colour/power/speed to that object.
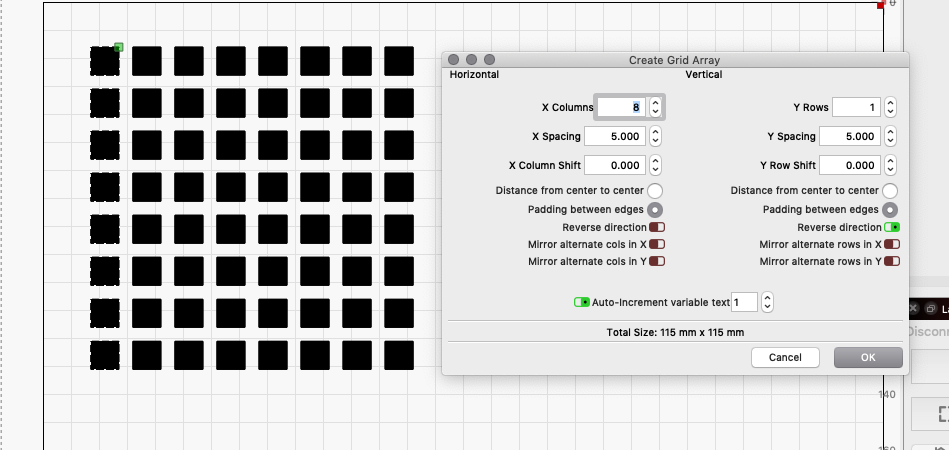
Using the matrix tool, make 8 rows of 10mm squares, separated by a couple of mm.
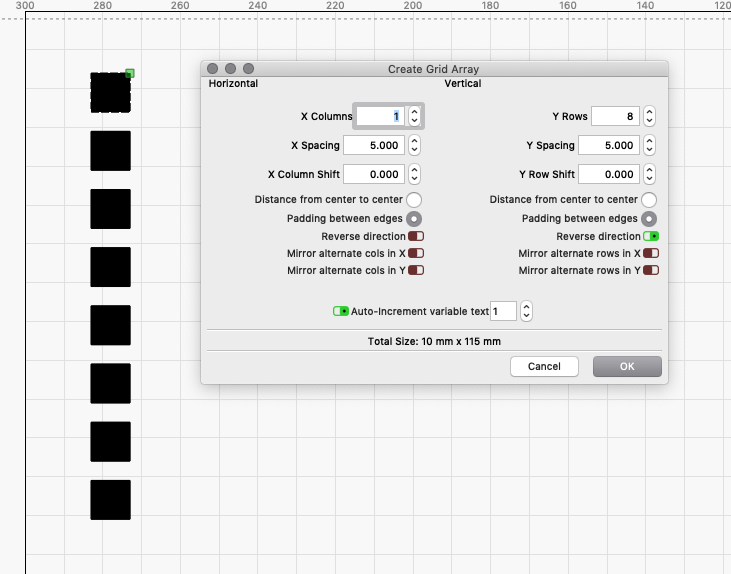
Go to the 'shape properties panel.
Select the second object (you don’t need to select the first, it’s at 100%) and in shape properties set the power scale to 90% - do the same with the others at 80, 70, 60, 50, 40, 30%
Then select the whole column and using the matrix tool, make 8 columns
Select each column in turn and apply a color/speed/power to that column - the percentage power scales will remain set at 100/90/80, etc.
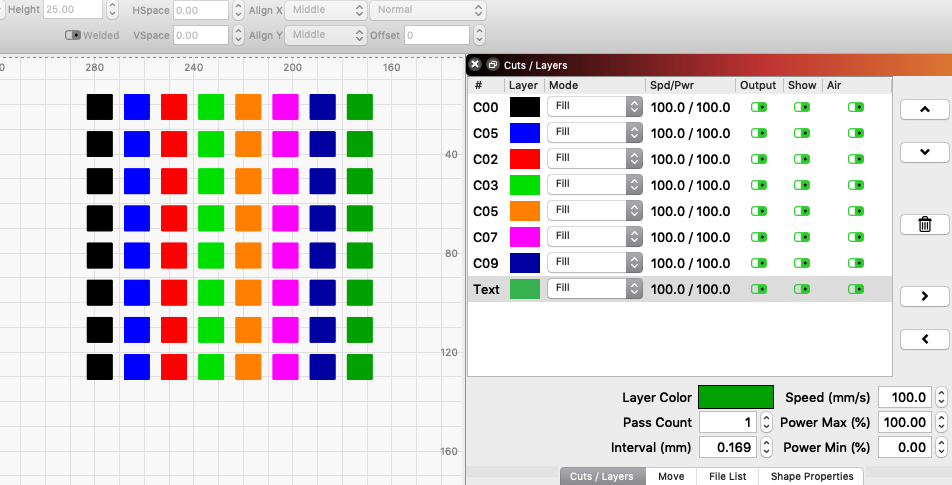
(I did a quick and dirty for illustration - you wouldn’t have the speed all the same. But the power for each column needs to be 100% to 0%, or you don’t get a proper scale).
You can check that it’s doing it by doing a preview with ‘shade according to power’ turned on

Here, heavy lifting done - you will need to decide what figures you use to best suit your material and machine:
matrix.lbrn (32.1 KB)
wrt speed then yes the process was quicker by about 50%…
I wonder if someything belt driven like an Eleksmaker would be more speedy?
The lighter your gantry, the faster the response. Belts are faster than screws, and faster accelerating and decelerating. If this is something you’re going to do a lot of, the time saving (and thus the $$$ increase/minute) will pay for itself.
I’m surprised you only got a 50% speed increase - I got that just changing to ‘fill shapes individually’ - and you cut your LPI - again, once you have your power matrix done, you can do a matrix to vary LPI until you get the best result for that material.
4 Likes
Fantastic! many, many thanks for your help, much appreciated!
Thank you, I was pondering something similar. Much appreciated.
For a simple B&W like this, 254dpi would be sufficient.
Many thanks Jim.
This topic was automatically closed 30 days after the last reply. New replies are no longer allowed.