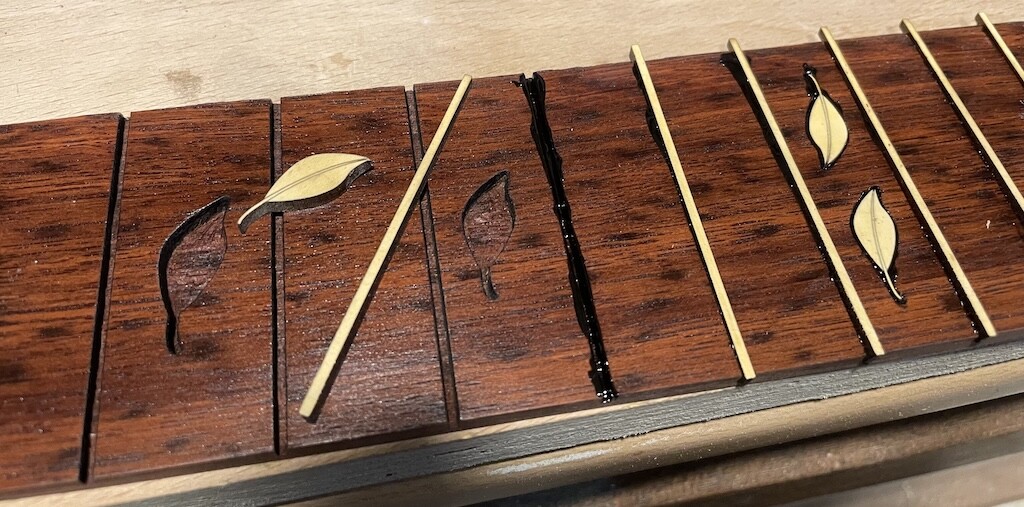
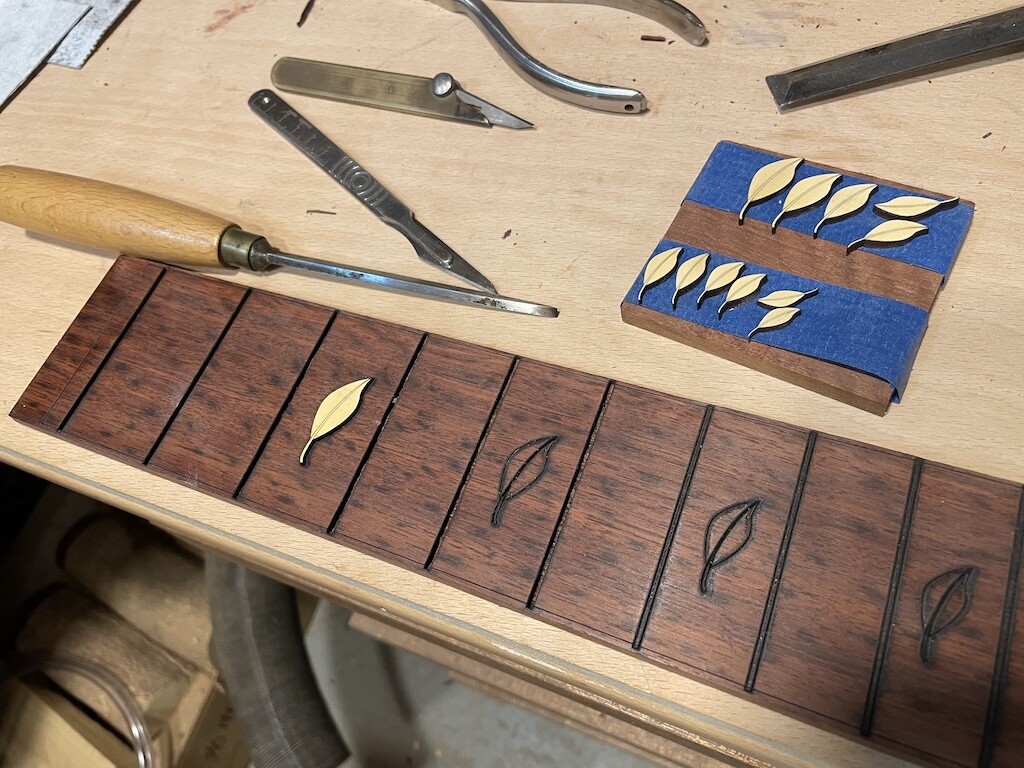
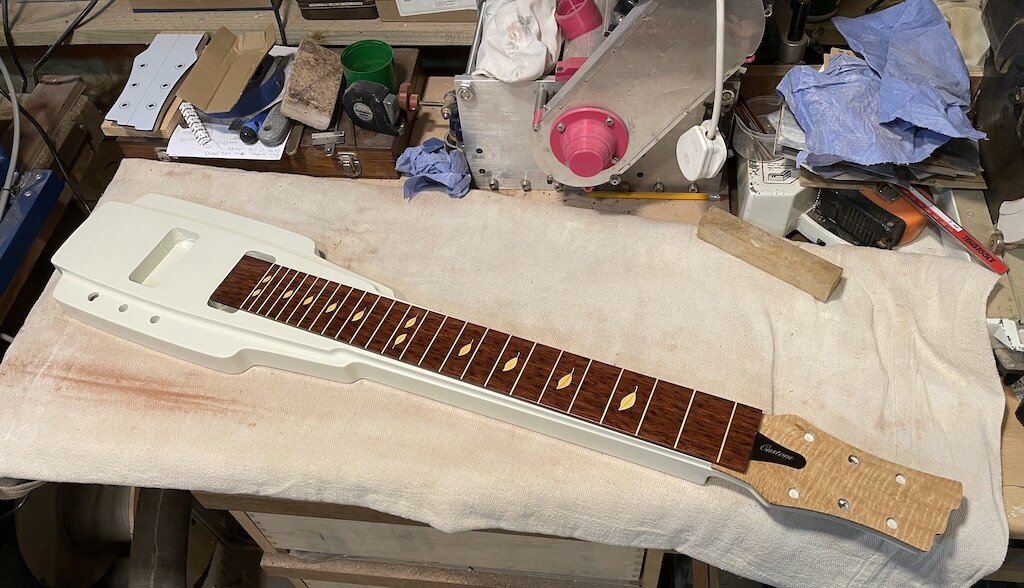
I’m currently building a lapsteel guitar. Most of it has been done on the CNC router (I’m a Mach4 user, if I dare mention that here!) but I used the laser to help on the fingerboard. Unlike a conventional guitar which has a fretboard with metal frets, the lapsteel has a finger board which is not used to fret the strings, and the fret positions are merely a visual guide for the player. But as on a conventional guitar they are an opportunity to do something a bit creative and attractive. This one is made with jarrah from SW Australia which has nice spotted markings, and boxwood inlays which are a nice yellowy-cream colour. Inlaid with black pigmented epoxy, plus hours of sanding and many coats of lacquer.
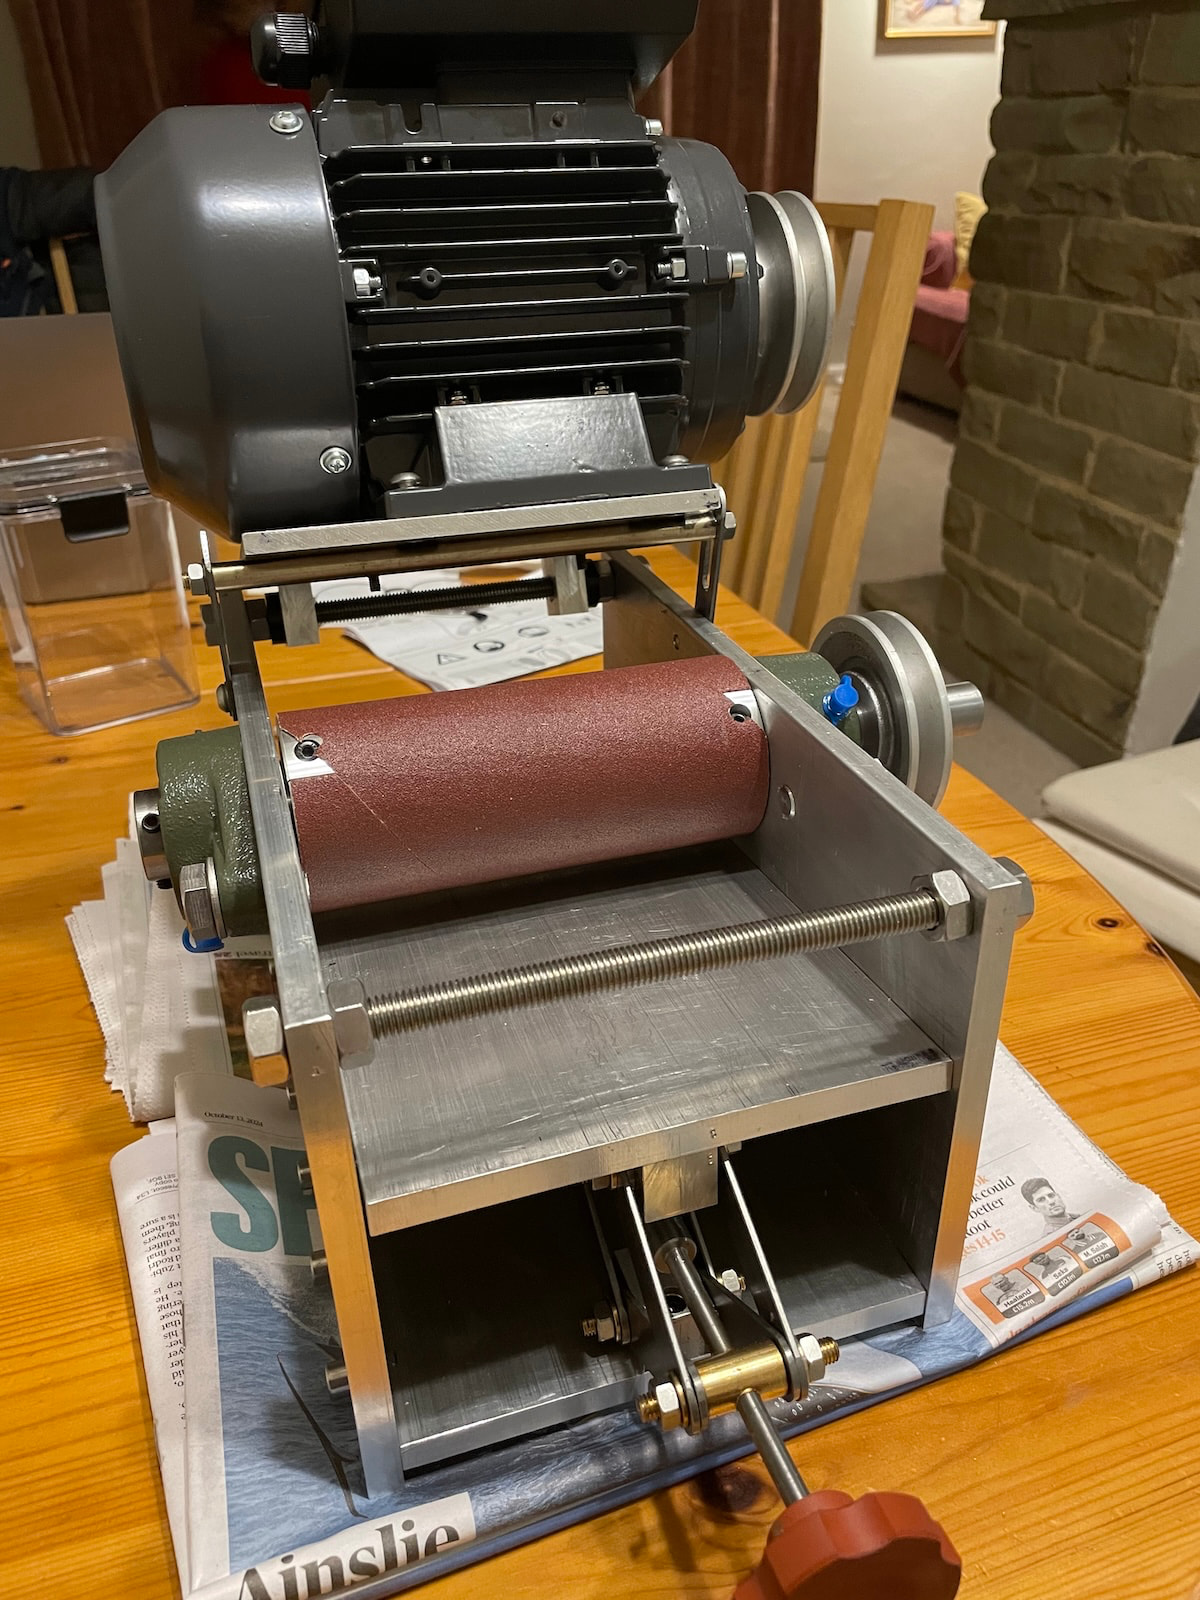
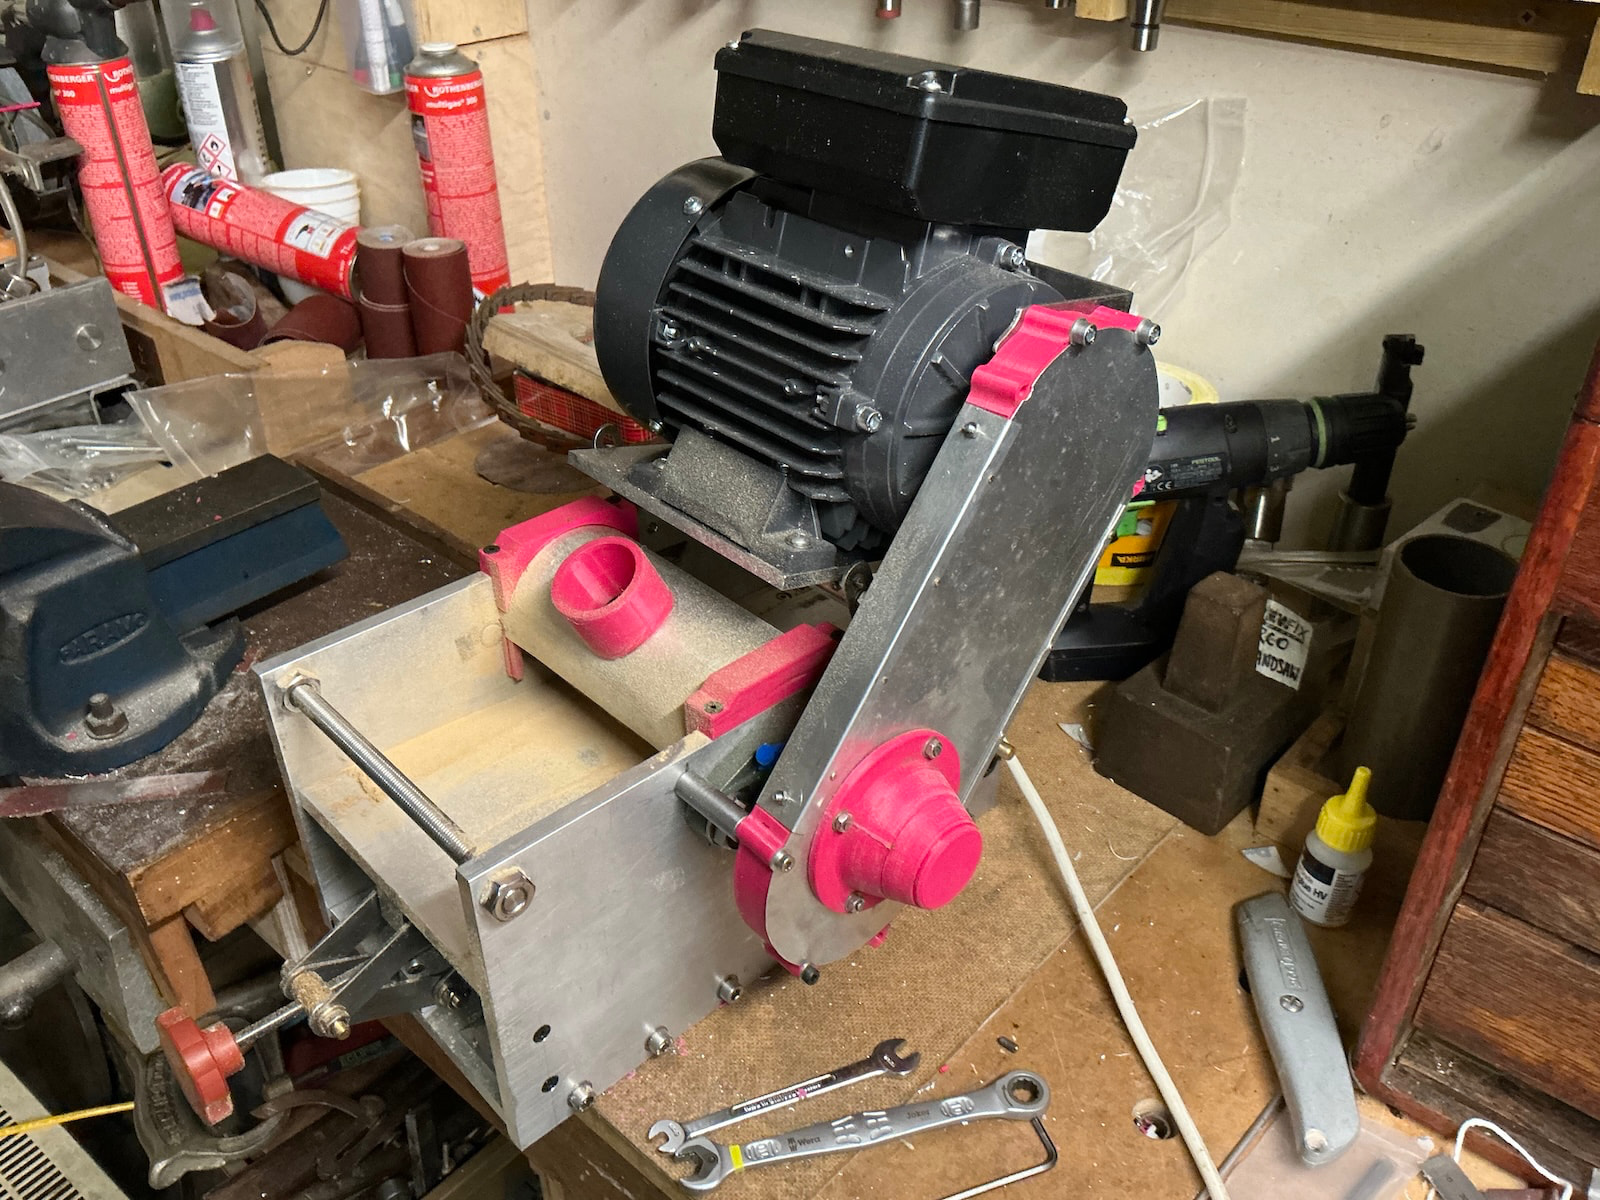
The stalks on the smallest of the leaves measures 0.3 mm. The last picture is just a sort of mock up just to see what the fingerboard looked like with the body and headstock veneer. And the aluminium thing with pink plastic bits lurking under rags and tissues is my home-made thickness sander which I use to prepare material for the laser.
@Newlands, this is looking great! Do you cut the outlines with the laser, chisel out the unwanted areas, glue the inserts slightly proud, then run it through your thickness sander?
BTW, did you design your thickness sander or did you find a design online? If online, do you mind sharing a link? I’ve been wanting to make one for some time.
Yes. I tried a test piece burning it all out but it just made too much mess and took longer.
It’s a bit of a stretch to say I designed it - it was one of those projects where each piece gets cut to fit the previous one. So no plans - just four bits of extruded aluminium plate from eBay, some 10mm studding and nuts and a piece of 70mm diameter Ali from the local metal recyclers.
It works reasonably well, although my solution for fitting the abrasive strip is painfully awful. There’s no feed mechanism of course, but it’s easy to feed by hand. The motor is probably overkill, but was the right price..
Instead of making your sanding material lay over other end…..
I used to make all of my sander belts and rolls. Cut ends on about 30 degree angle. I used a handheld sander to remove grit about 3/4” to 1” from one end then put contact cement on sanded portion and backside of other end. Let the glue dry for half an hour and apply another coat allowing to set-up. Wrap it on your drum and rub the two glued edges together and allow to stand overnight if you can. This make a smooth sanding drum.