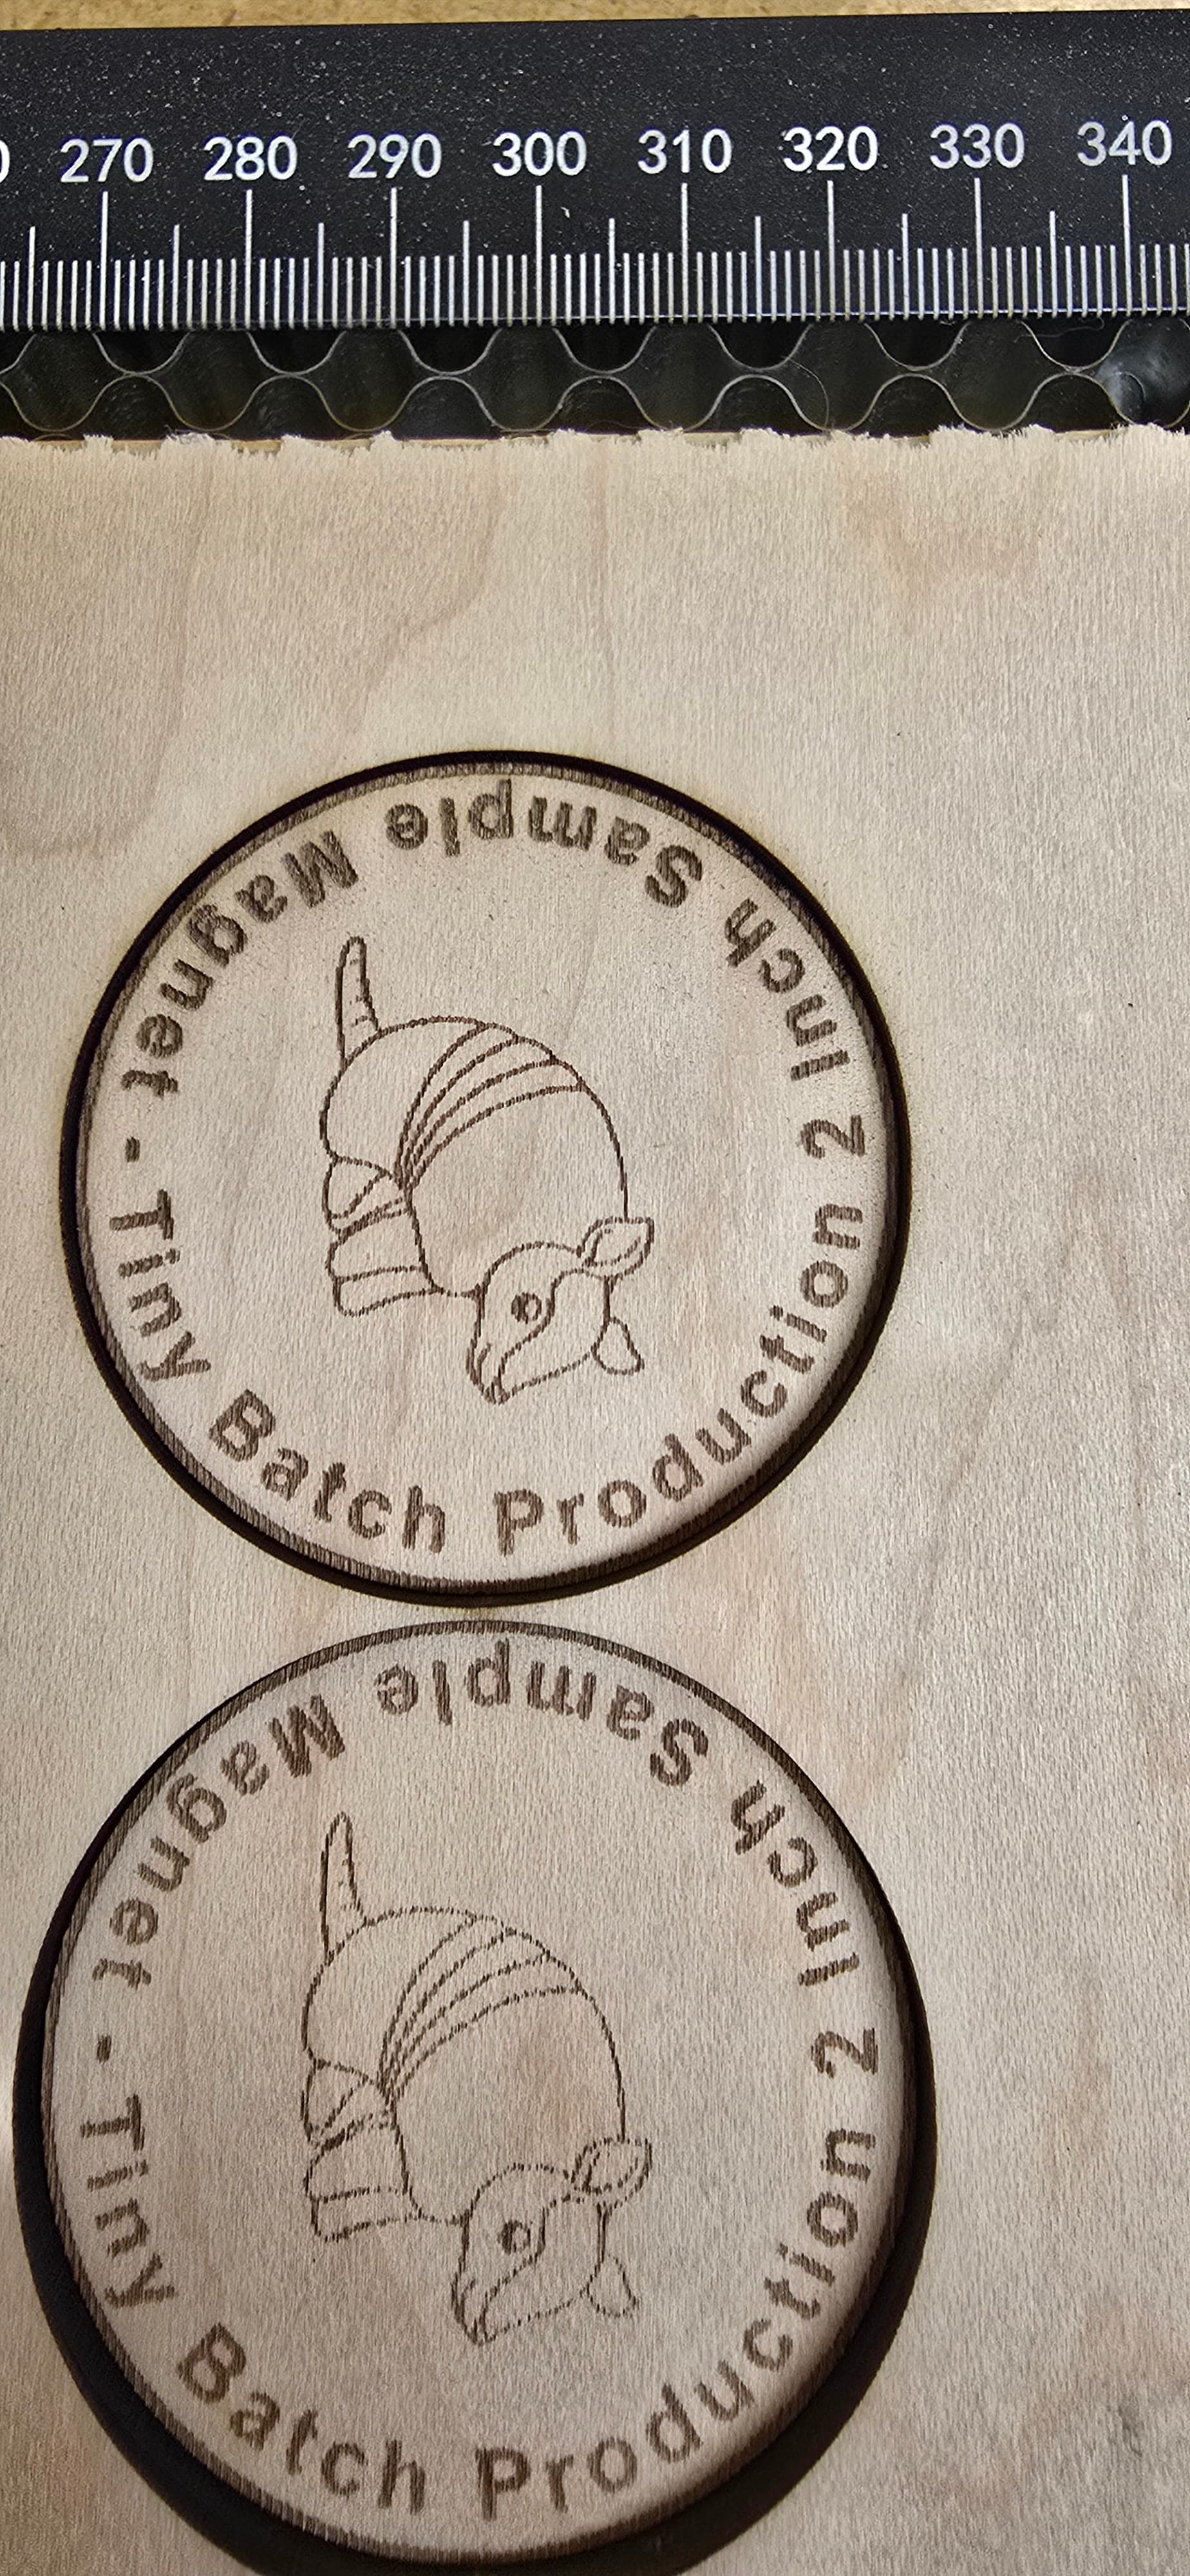
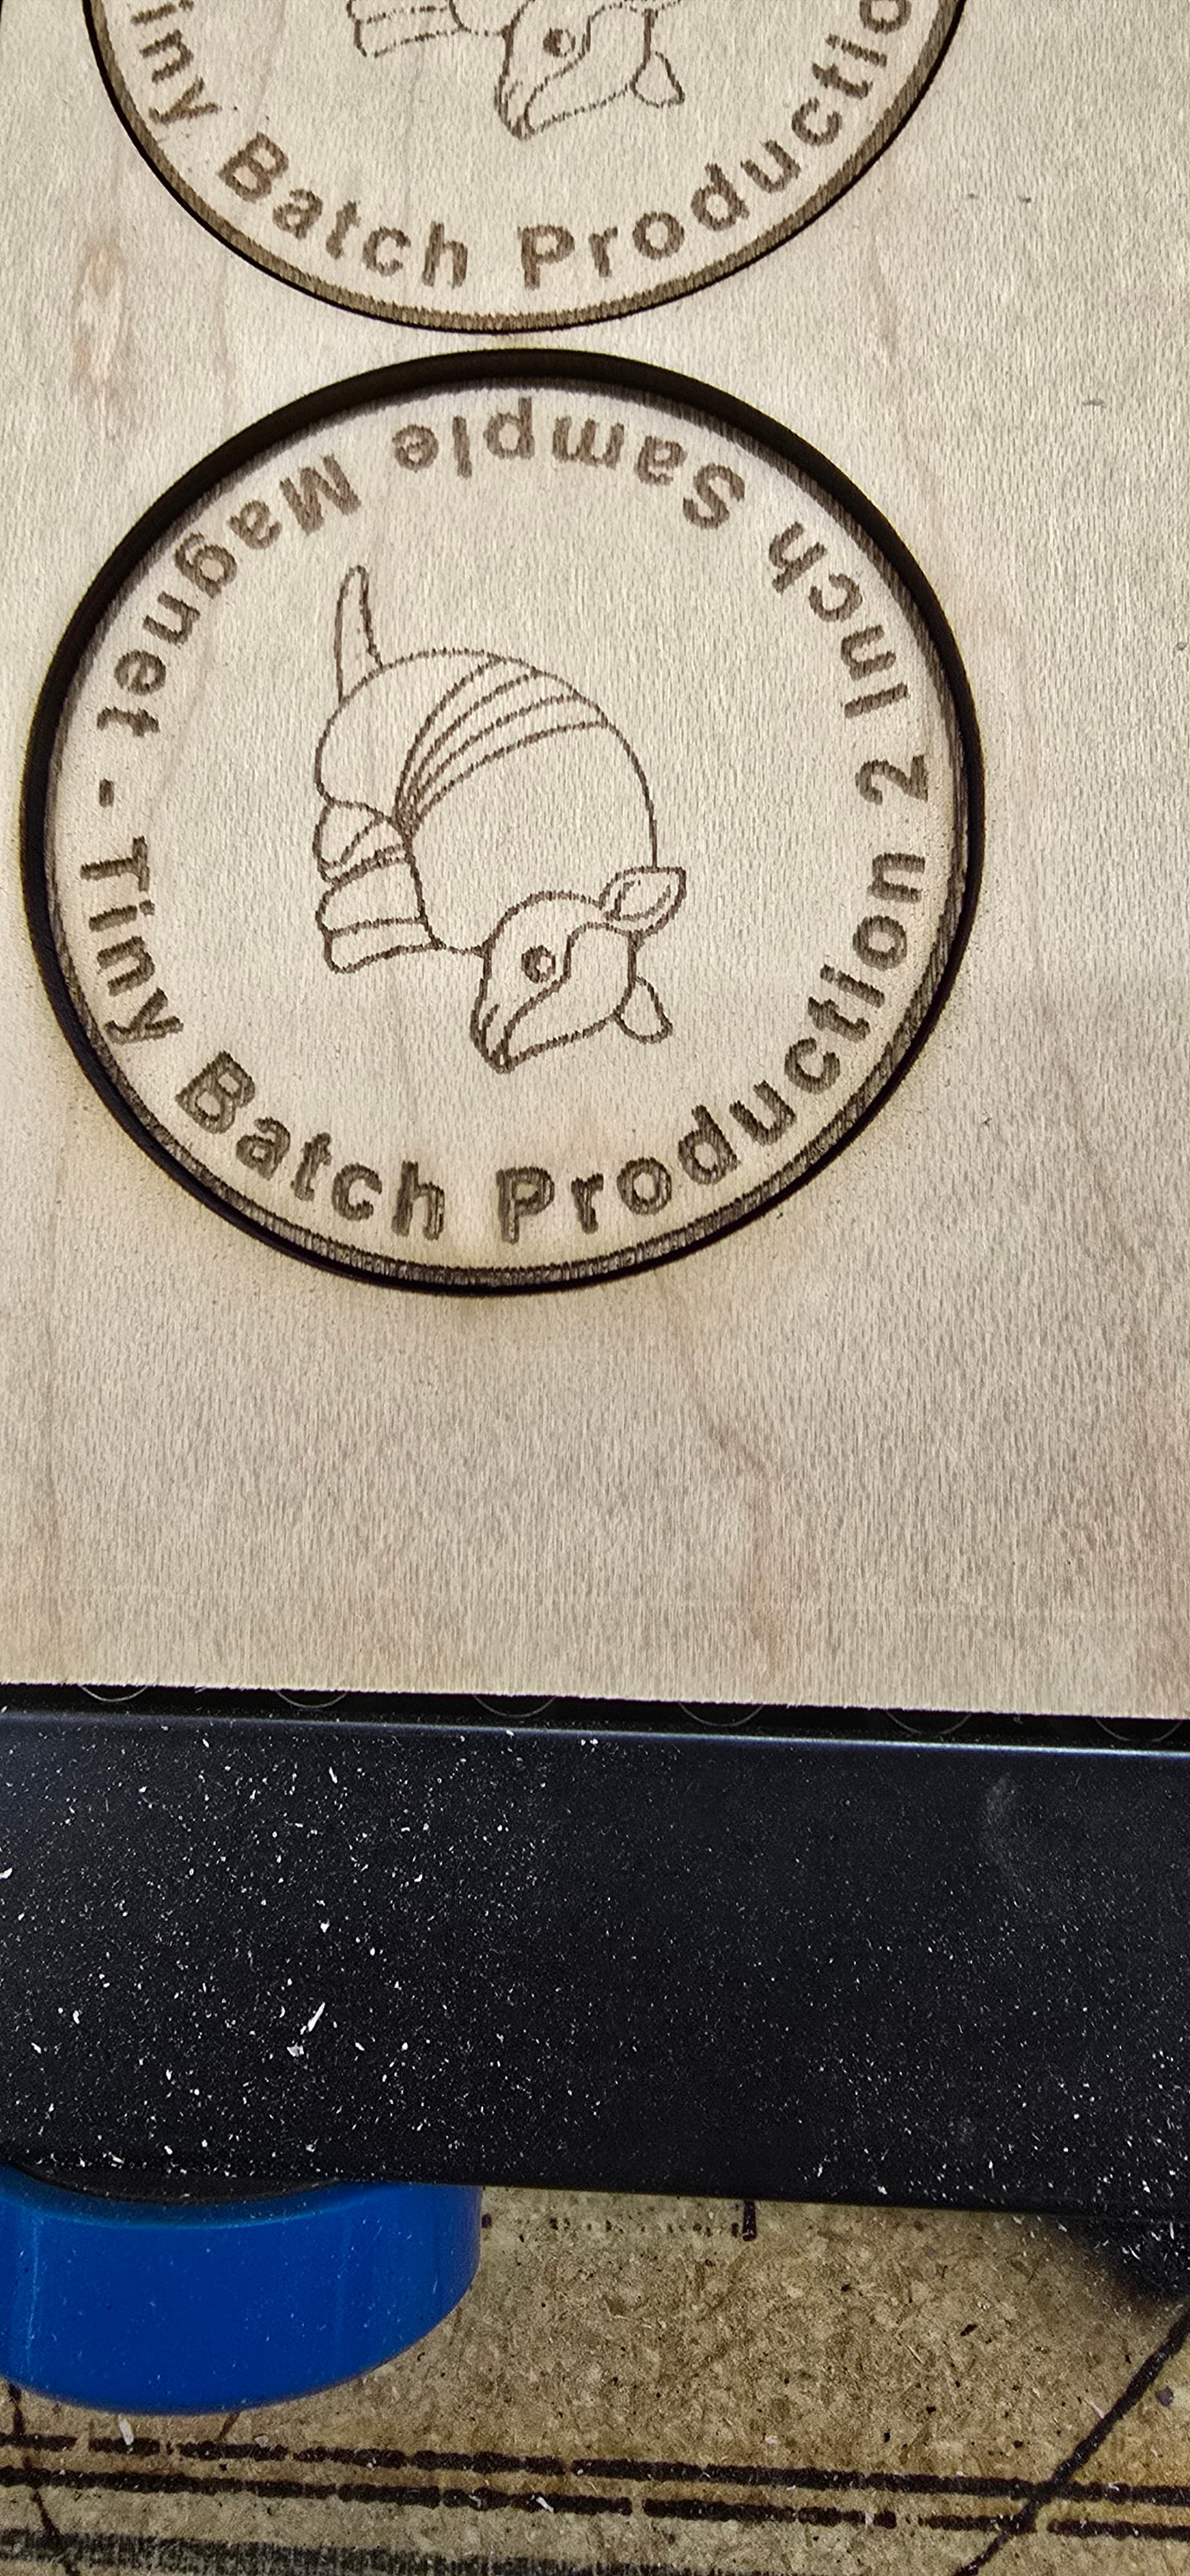
so as you can see, when doing a fill, the objects on the left and the right are clear, but the ones in the middle are light.
Longer B1 40
Longer B1 40
The only thing that comes to mind is your focal distance changing. Is there a dip or hump in your workbed? For the engrave to change like that it has to be a loss of power or focus change in my mind. I would think if there was a wiring problem it wouldn’t get better at the other end.
Humor me, try running it again, but turn off bidirectional fill. I want to see if it still gets better at the other end or if power tails off as it goes across. I would have you run it on cardboard so not to waste material, but reducing the power for cardboard might mask the issue.
running another test… found the focus off, but even after a re-focus, and starting the test, it looks like the same, i did also slow down the fill… might be a little better
[https://drive.google.com/file/d/1tRs11uBE361xUANxGh2NVtxXAcDFwPTP/view?usp=drive_link](https://quick video)
https://drive.google.com/file/d/1tTieWTI_XXEb7MKP_UB7qa6BI3IBeOBQ/view?usp=drive_link
second video is further along in the project
Had to send an access request for the video
just updated - so access to anyone with the link.
photos coming next
Did you try turning off bidirectional for any of these?
I once had a problem with my old diode laser, the cables and compressed air hose in the cable channel were too stiff and led to uneven results. If your machine bed/material is even and straight, then this could be a source of error.
not yet. trying to do full sheets of these, and by turning that off, will increase my time by 100%
bed is level, and hoses/wires are not pinched.
If both ends match, then yes, it is level. But as @thelmuth suggested, there is likely a hump in the middle between the ends.
If you are putting your parts on a strip of wood to burn them, it might have a bow in it.
I’m pretty much a newbie, but the videos appear to show that the speed tapers offateach end, and speeds up during the middle section drastically. you could maybe try going over the edges (not sure how to word this) so that it reaches full speed before cutting. this would also mean that the speed could be lowered a little to match…
This might be a clue. If it is set for constant power and no overscan, this is the burn pattern you would get. Overcooked on the ends.
Overscan; that was the word I was looking for…
Is your material completely flat? I use clips and sometimes weights to make sure that the material is not bowed up or down in the middle / edges.
If there is a bit of difference in the height of the material across the job then you will get different engraving intensity.
the board might have had a slight warp… i usually engrave, then cut… i tried it again by first cutting, then making sure the cutout is flat on the bed, then engrave, this helped a lot.
I’ve been having simiar problems when using a Creality 1.6 watt laser for engraving. It seams like the fine dust is getting on the lens and the engraving fades further down the line. I’ve had to revert to doing a few engravings then stopping to clean the lens then carrying on..
Might help.
This topic was automatically closed 30 days after the last reply. New replies are no longer allowed.