I have an OMTECH MF1220-50 with a Ruida RDC6442G, and a custom-built lathe style rotary. The drive system is a NEMA 23 with a 12mm GT2 gear driving a 100mm main pulley. In rotary setup I ended up with 17000 ppr, a diameter of 100mm and a circumference of 314.16mm. When I press test it rotates 360 degrees and back again (I used two pieces of tape as reference points, edges aligned). This seemed like a successful test. When I screwed on the tumbler adapters and mounted a 32oz cup I tried to engrave a 10mm by 157mm rectangle onto the tumbler, it should have gone half way around and back. Instead, it went about 15mm farther.
I finally ended up at 15700 ppr to get a 10 by 157 rectangle to go 180 degrees. I replaced the rectangle with text that was 15mm by 157mm and it measured exactly that 15 by 157, going half way around the cup. What I don’t understand is why two very different settings generate similar results. The ratio between the drive and main pullies remained the same and the diameter of the tumbler is 100mm as well. 17000 ppr gets me 360 degrees of rotation when I click test in rotary setup, but 15700 ppr gets me 180 degrees of accurate rotation (and a full 360 if I asked for it) in the real world.
The other issue is excessive heat from the stepper motors. Both of my rotaries have NEMA 23’s and they both get much hotter than the motors installed on my OMTECH 50w. I’m considering changing SW4 from full standby current to half (switching SW4 to off) and perhaps going from 3.31 amps peak to 2.84 amps peak when I’m using the rotaries. I don’t know if this would have a detrimental effect on the laser when operating it in “normal” flat work mode. Any comments or suggestions would be welcome.
Once setup, the steps/rotation (ppr?) should not have to be modified for either type of rotary.
The steps/rotation are set on the motor driver and you should use those.
This is my PiBurn setup… Read the steps/rotation from the switches and match the switch settings to the steps/rotation ‘chart’.
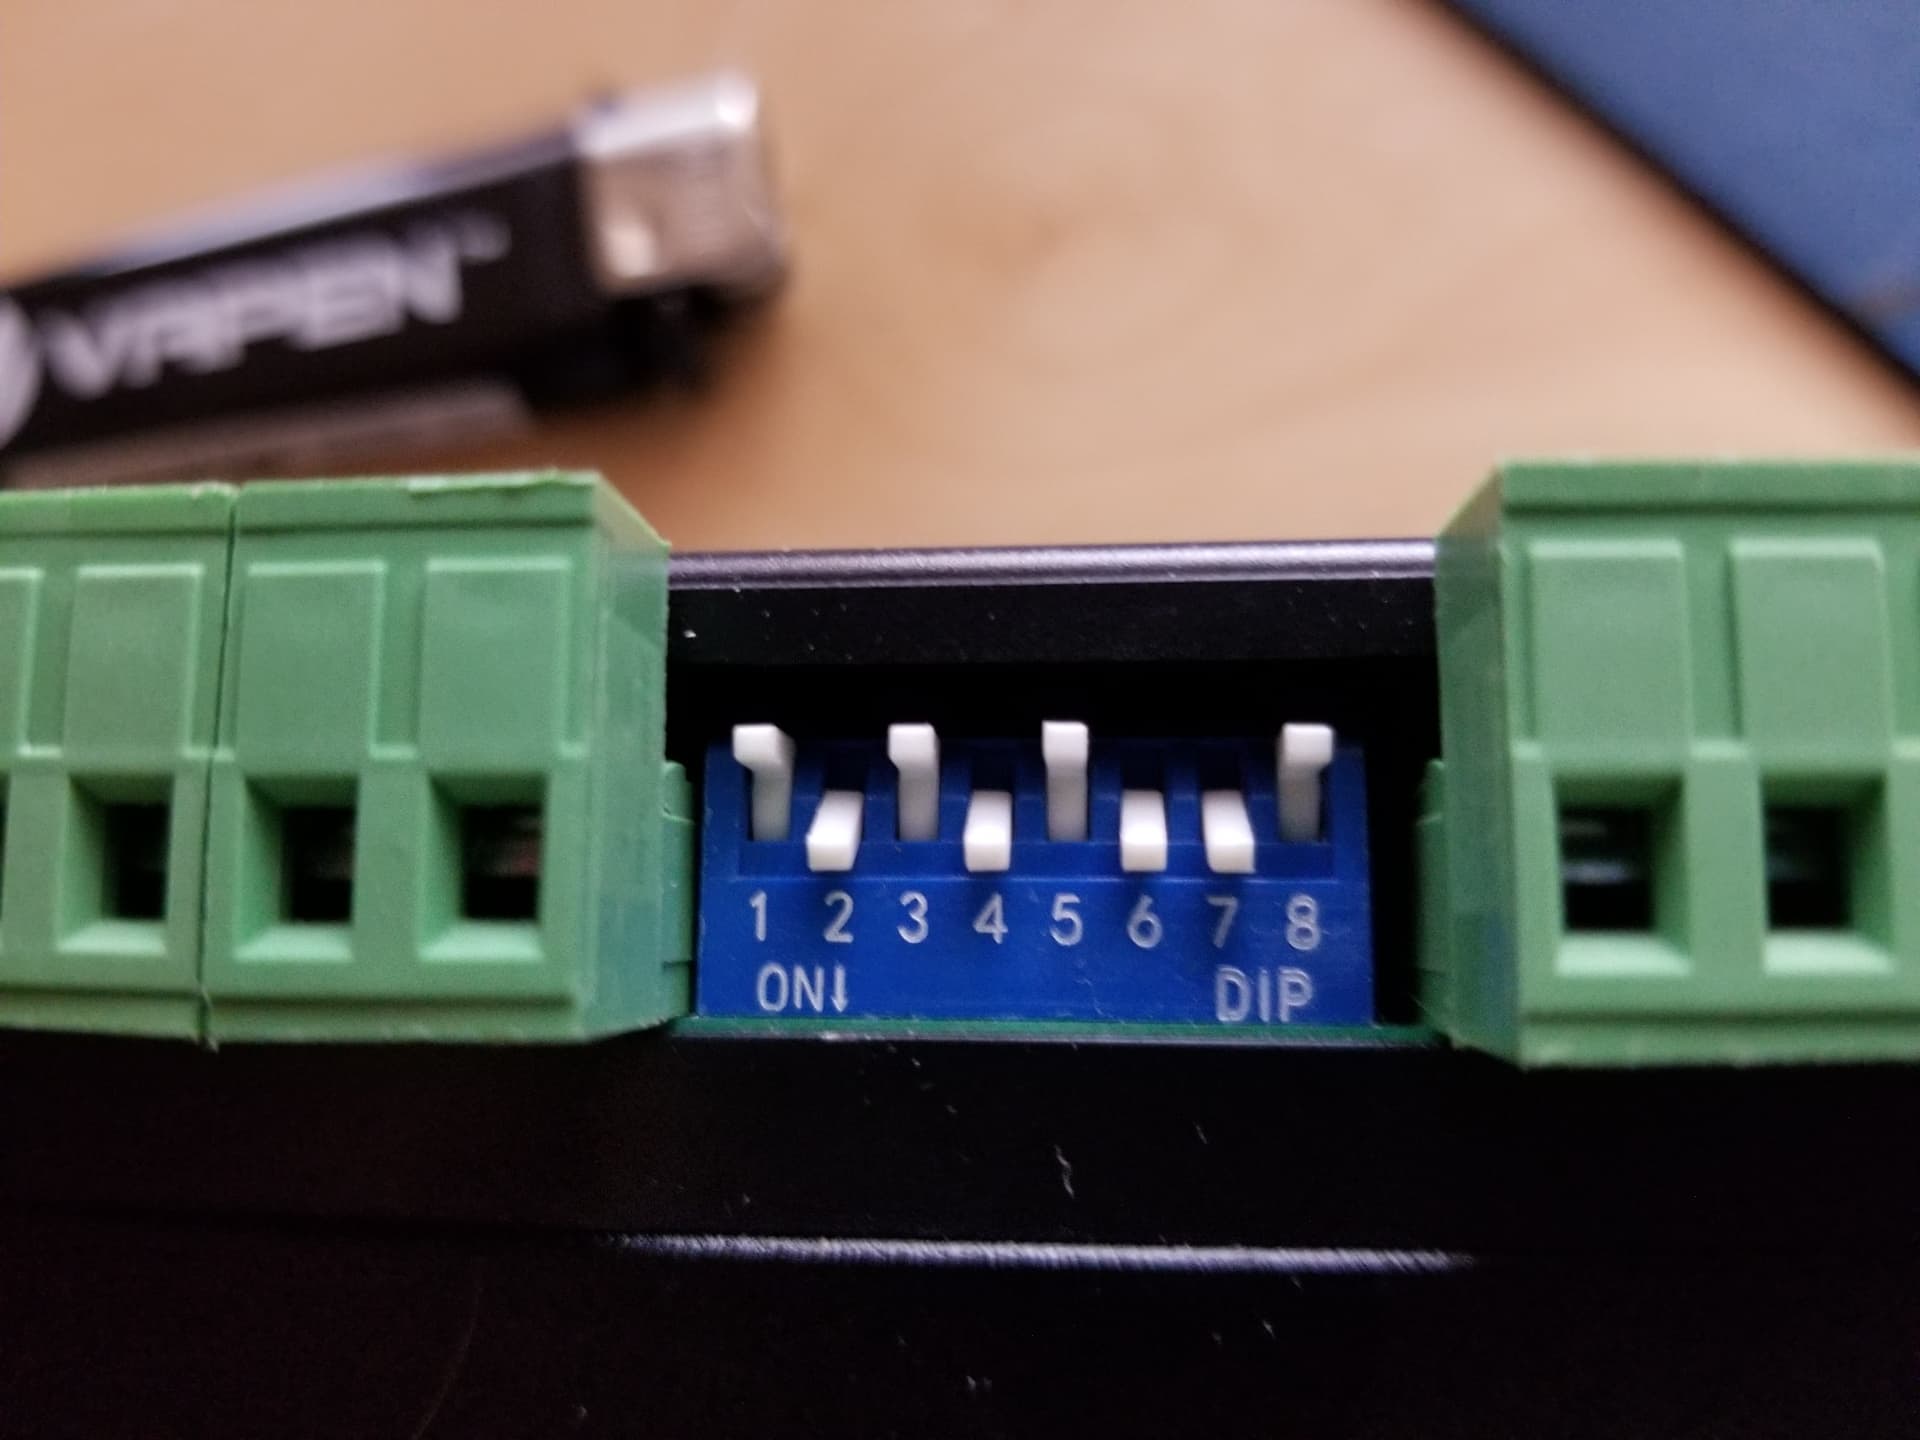
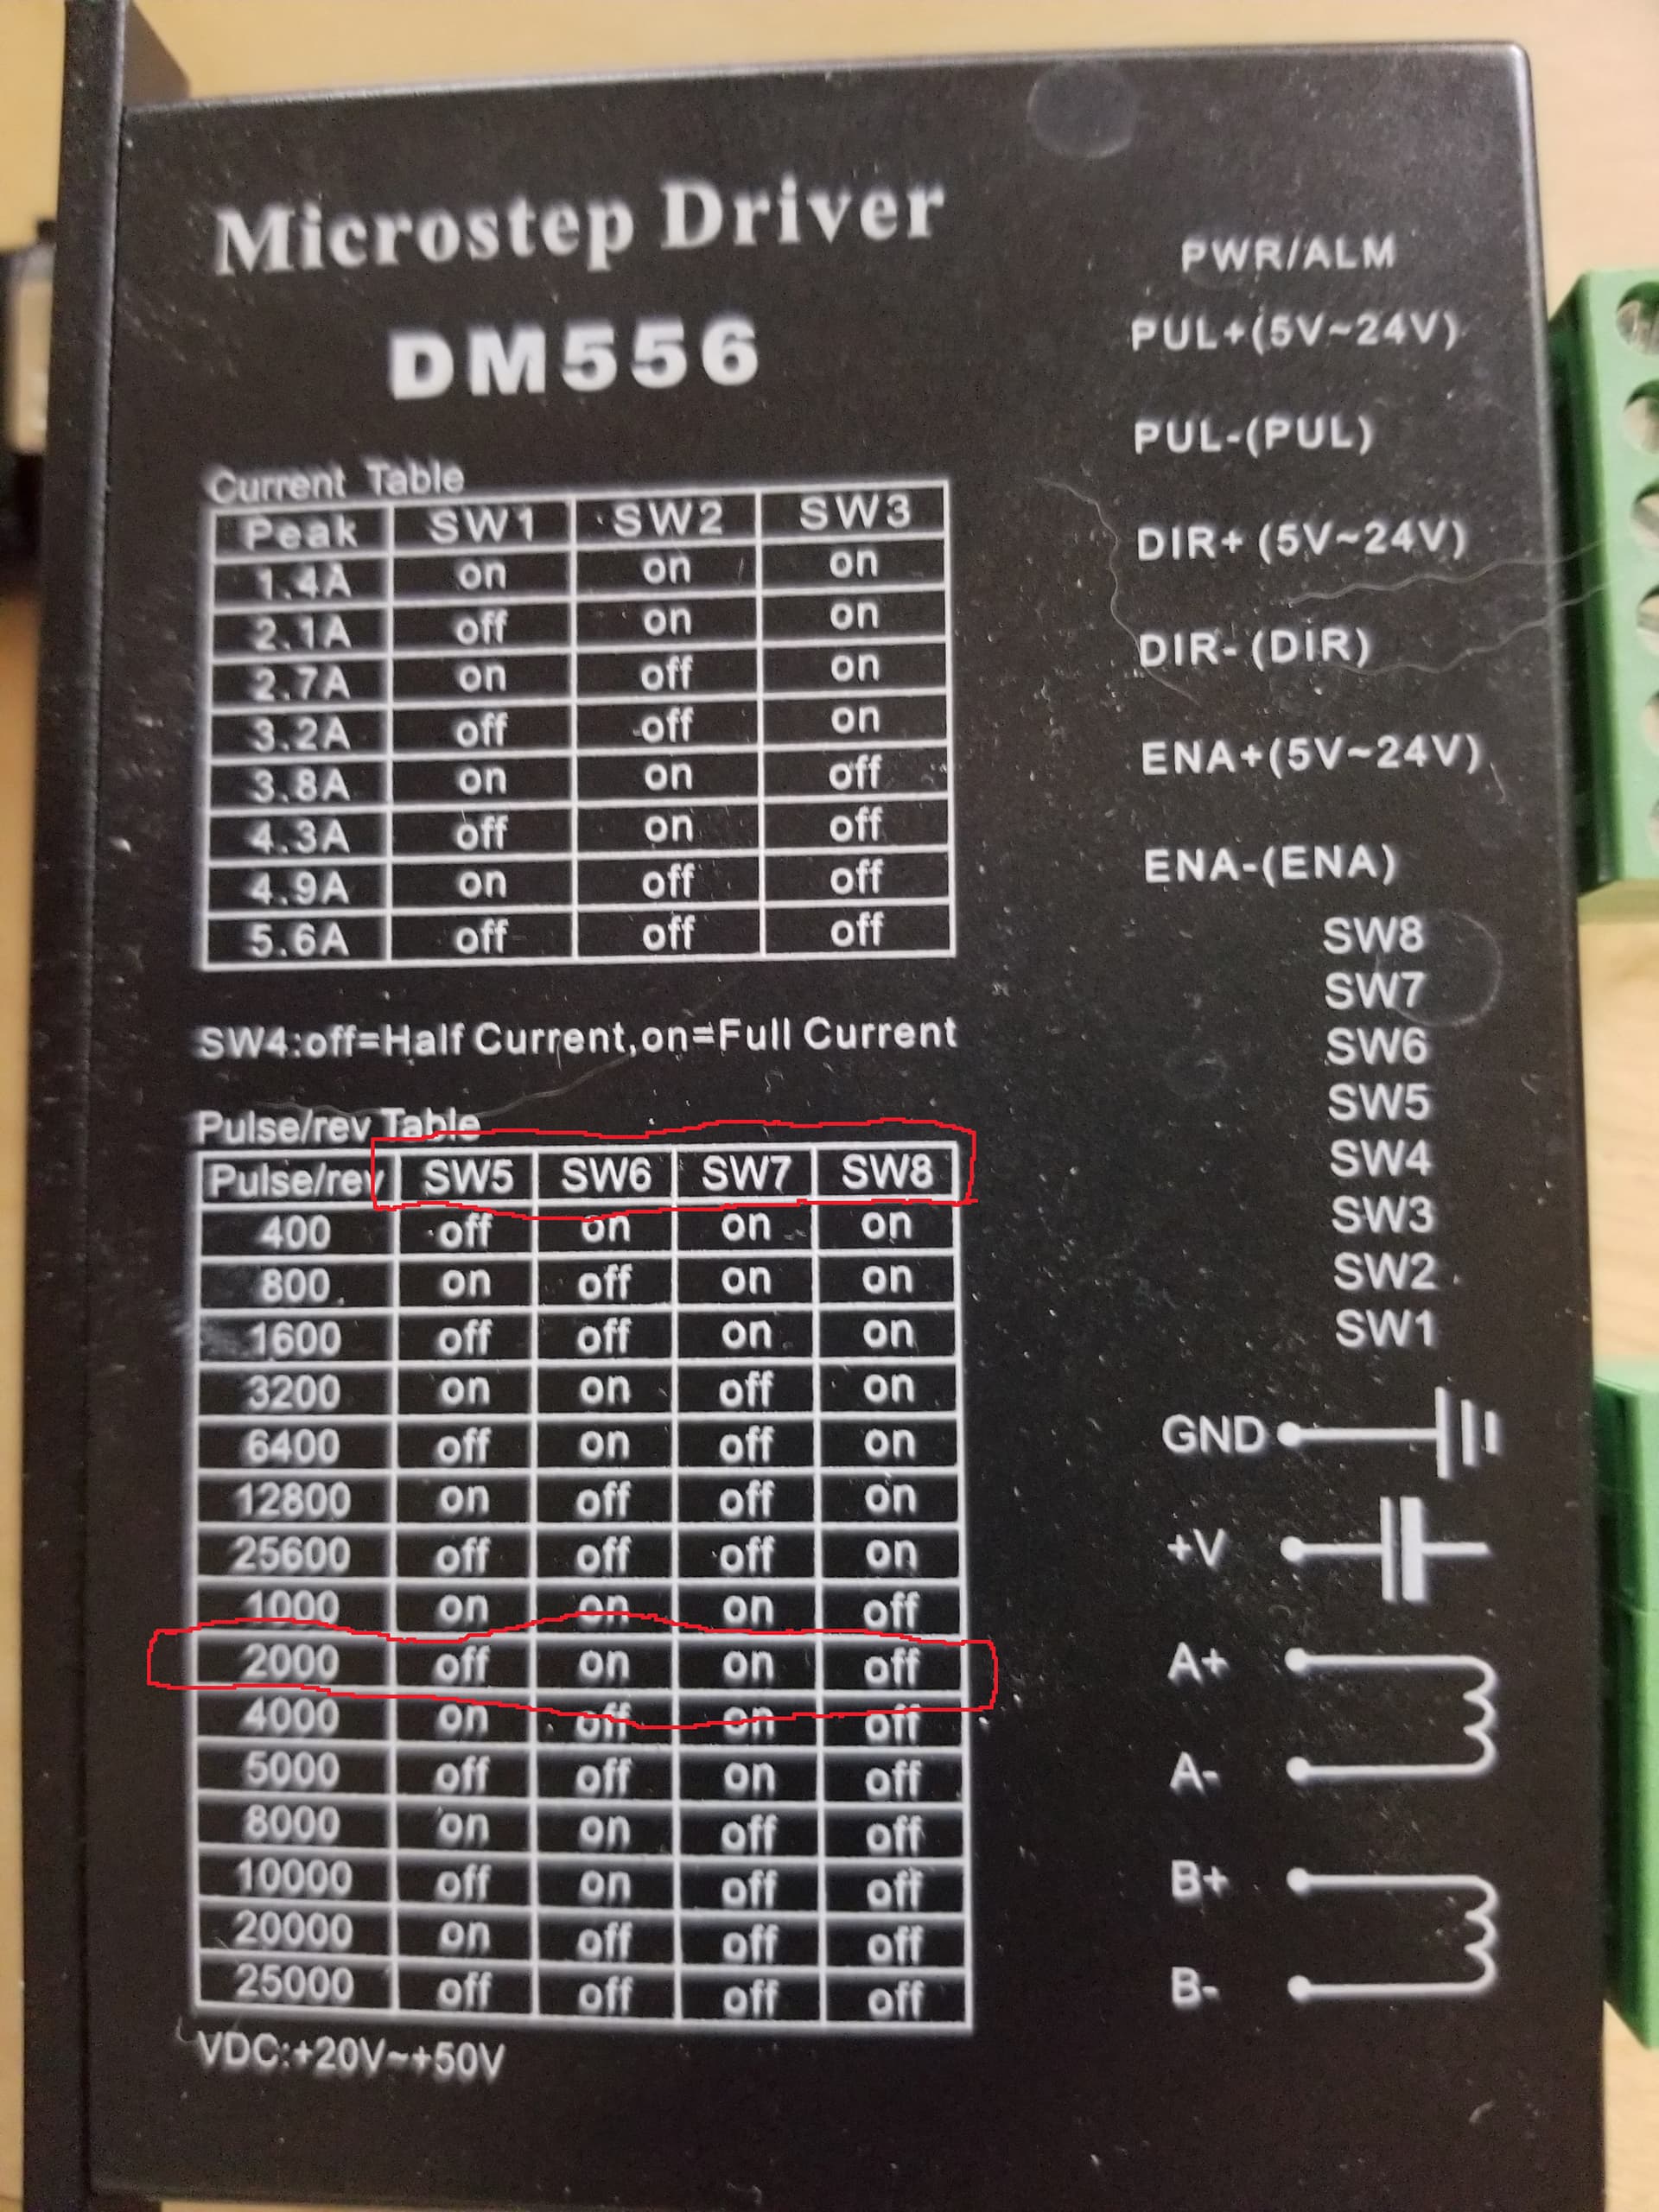
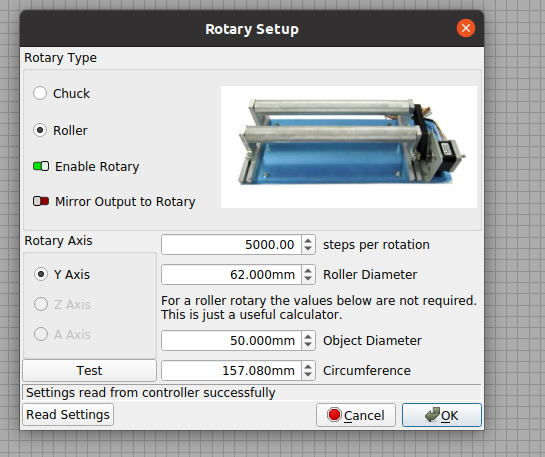
Mine has 2000 steps/rotation. I have to multiply it by the ratio to the driving wheel. 2.5 (ratio) * 2000 = 5000 for the value entered in the gui…
I’m assuming a ‘chuck’ type when you state it ‘lathe’ like. Generally these are direct drive without any kind of ‘ratio’ that needs to be applied. So a picture would be nice…
If I’m reading you right, then your steps/rotation should be equal to the ratio of the drive times the steps/rotation of the motor. The same as mine. I don’t have to worry about diameter, you do.
How did you come about your steps/rotation?
When it works with the test button, put the tumbler in and retry the ‘test’. Does it work?
Don’t know what your ‘tumbler adapters’ are…
![]()
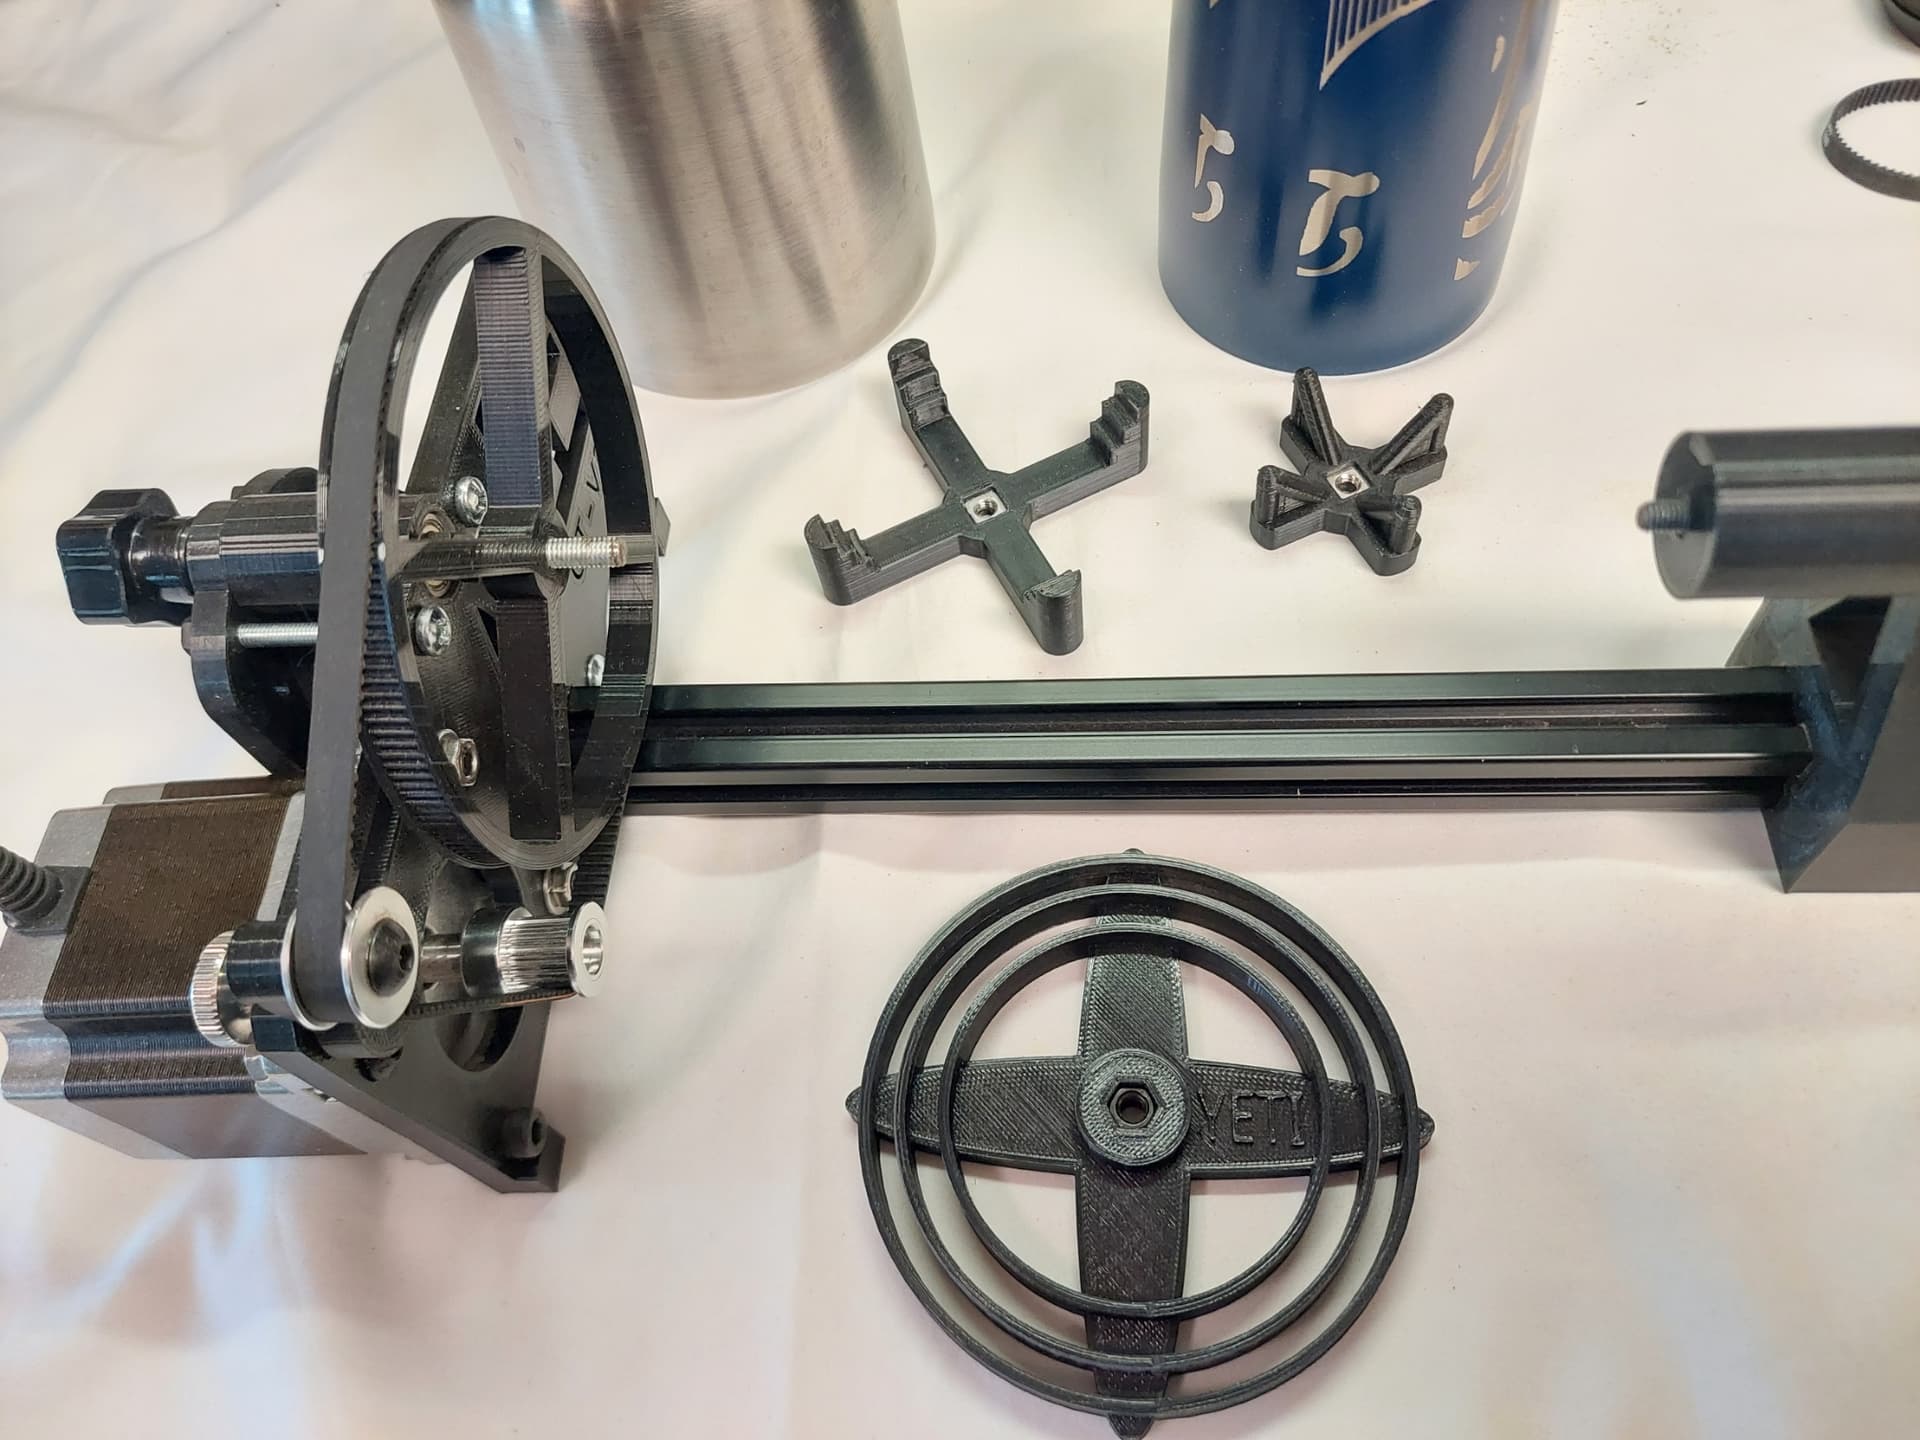
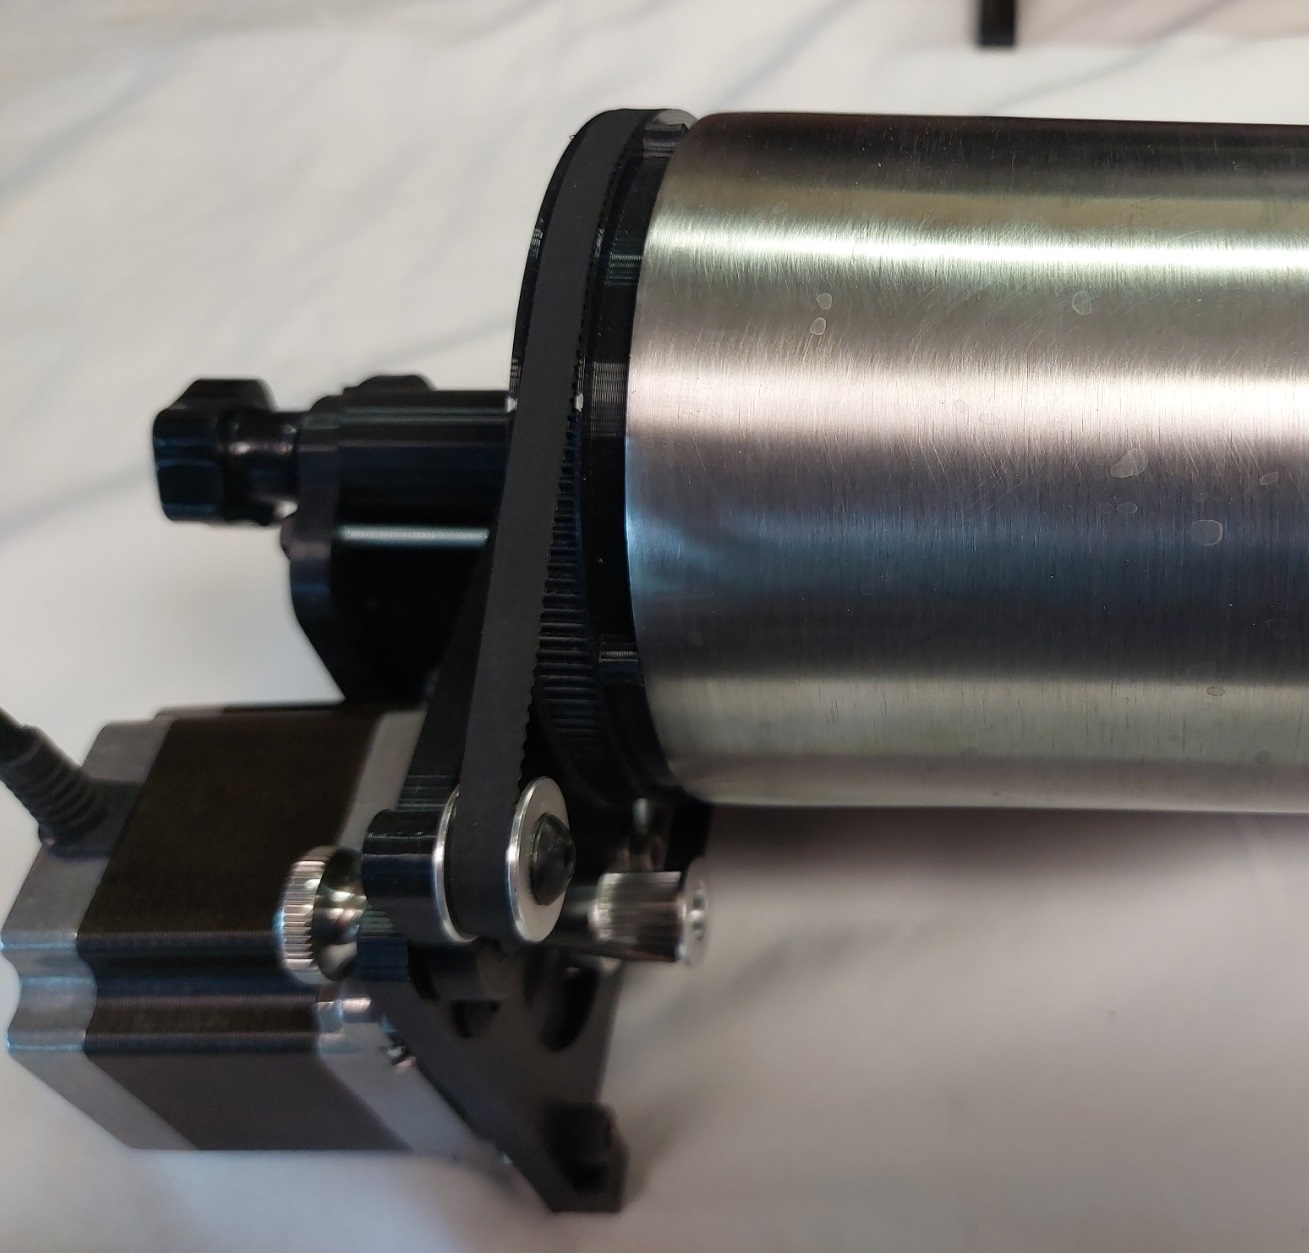
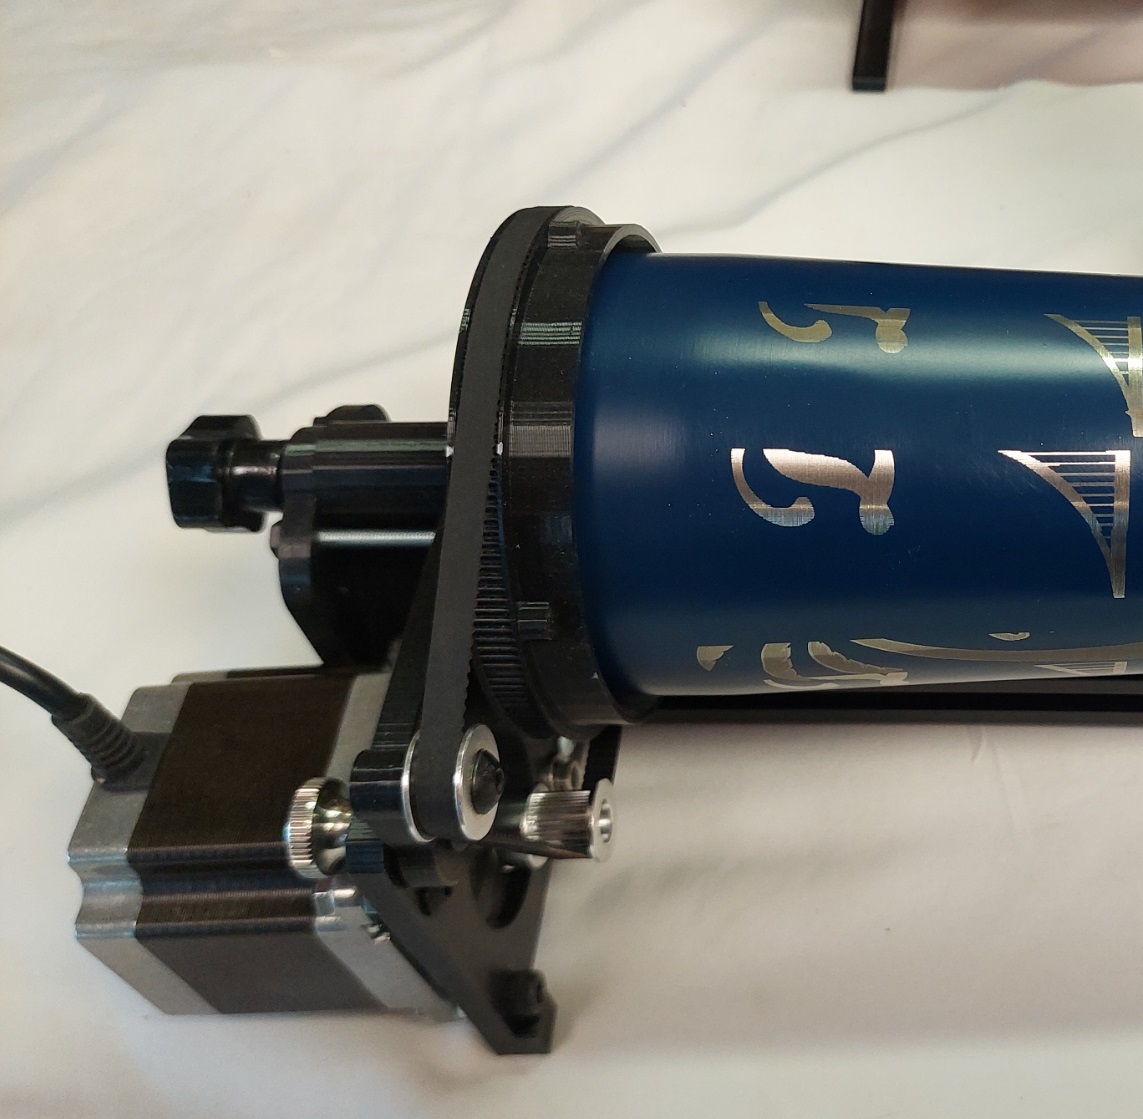
First of all, thank you for responding. I posted on the various OMTECH groups and got nothing. I shouldn’t be surprised; I’ve noticed that you provided guidance and information on just about every post I’ve read. The pictures should help explain how my “lathe” rotary is set up.
I’m confused because I got one result in rotary setup when I clicked TEST, and another when I actually tried to engrave something. The only thing that changed was the fact that there was a tumbler on the rotary. I am going to take your suggestion, first thing tomorrow, and go into rotary setup with a tumbler on and see what happens.
The 3-ring adapter (the one with YETI on it) allows me to put different diameter tumblers on without changing the rotary setup, I just change the size of the artwork to fit the size of the tumbler I’m engraving. I have a similar rotary that I use on my Ortur OLM2 Pro, and it works great. I built this one to use a NEMA 23 stepper to match what is already on my MF1220-50.
I think you are complicating the process.
Once the rotary is setup, the only thing you should change is the ‘diameter’ in the rotary setup for the specific cup/mug.
It rotates one revolution and back then the cup will rotate one revolution and back…
The ‘large gear’ is the ‘chuck’ if it rotates one turn, whatever you put on it rotates one turn…?
The reason that it needs the diameter is that it needs to compute ‘surface speed’ as a larger object will have a higher surface speed than a smaller object. It simply has to travel further.
Set your steps/rotation based on the motor driver settings and the gear ratio. Enter that value for steps/rotation.
Then you should be able to enter the diameter of the mug in the gui. You only have so much ‘real estate’ on a mug, the larger the diameter the more space. This is the only reason you would need to change artwork size, not to make up for diameter.
Make sense?
Thanks for the photos, clears up any misconceptions.
Nice job on the rotary. It’s impressive, especially in the simplicity. All 3d printed?
I’ve found this site to be one of the best and I try to help out. Appreciate the comment ![]()
Good luck
![]()
This topic was automatically closed 30 days after the last reply. New replies are no longer allowed.