How about some pictures and screenshots. More the better.
This is where gweike had me adjust the steps to 500 then run it. It took a long rectangle and compressed it.
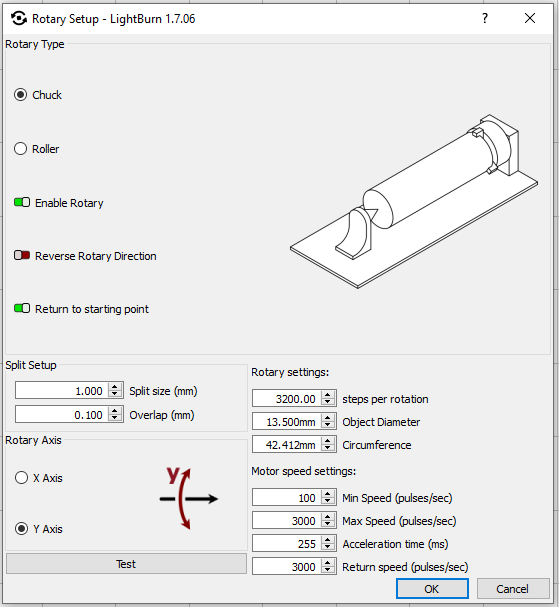
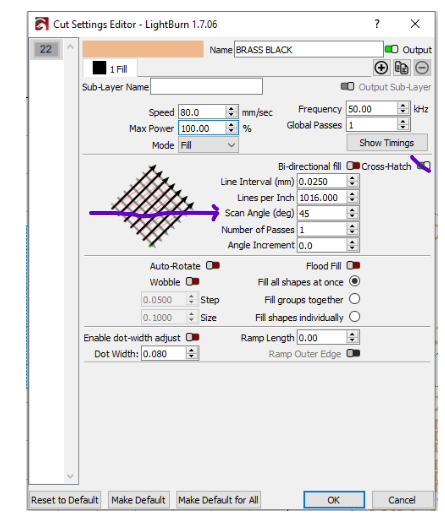
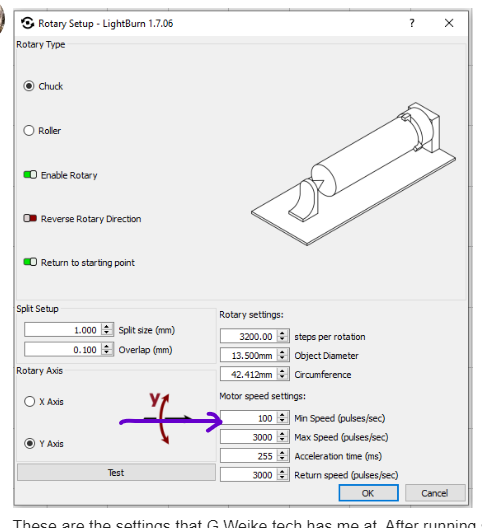
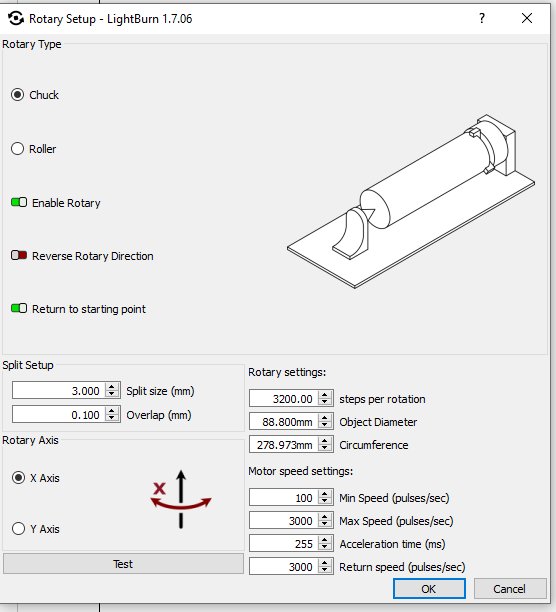
These are the settings that G.Weike tech has me at. After running several tests, they insist I run in their Glaser program but I would rather…not. I suppose it would help eliminate lightburn as a potential issue compared to glaser but I have no time available to me to re learn another software at the moment.
Here I ran with the above settings, but lied about the diameter. I plugged in 12.5mm when it actually is 12.0 - 12.1
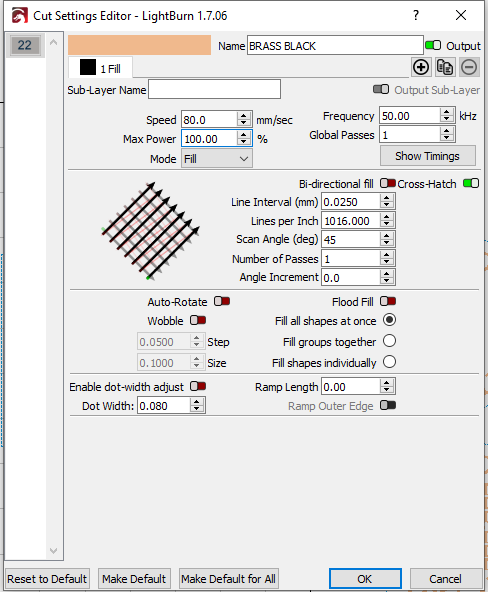
How about a screen shot of your cuts/layers parameters.
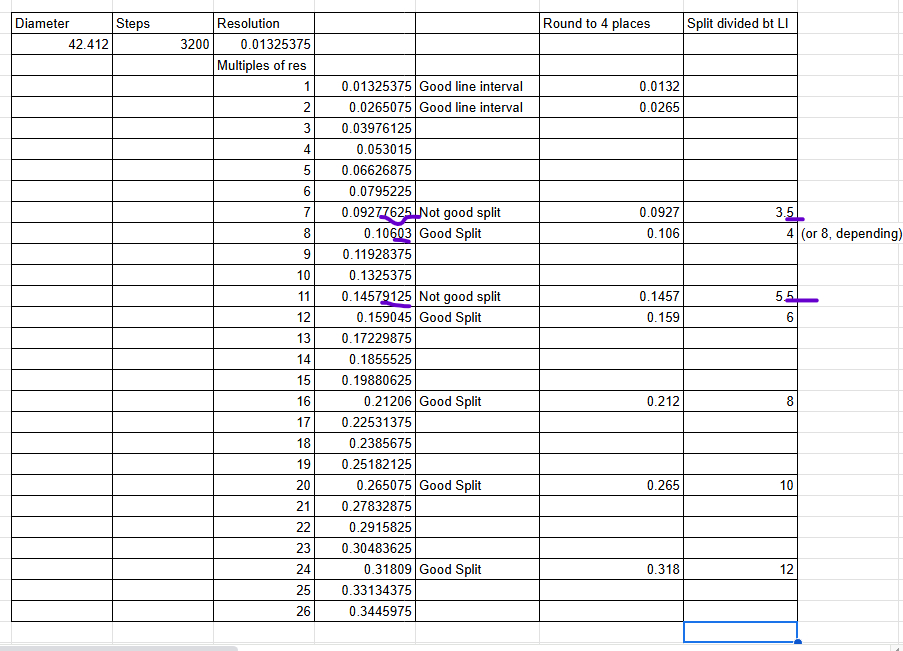
Split is probably big for that small of a diameter, try split .265, or .159 keep diameter at 13.5.

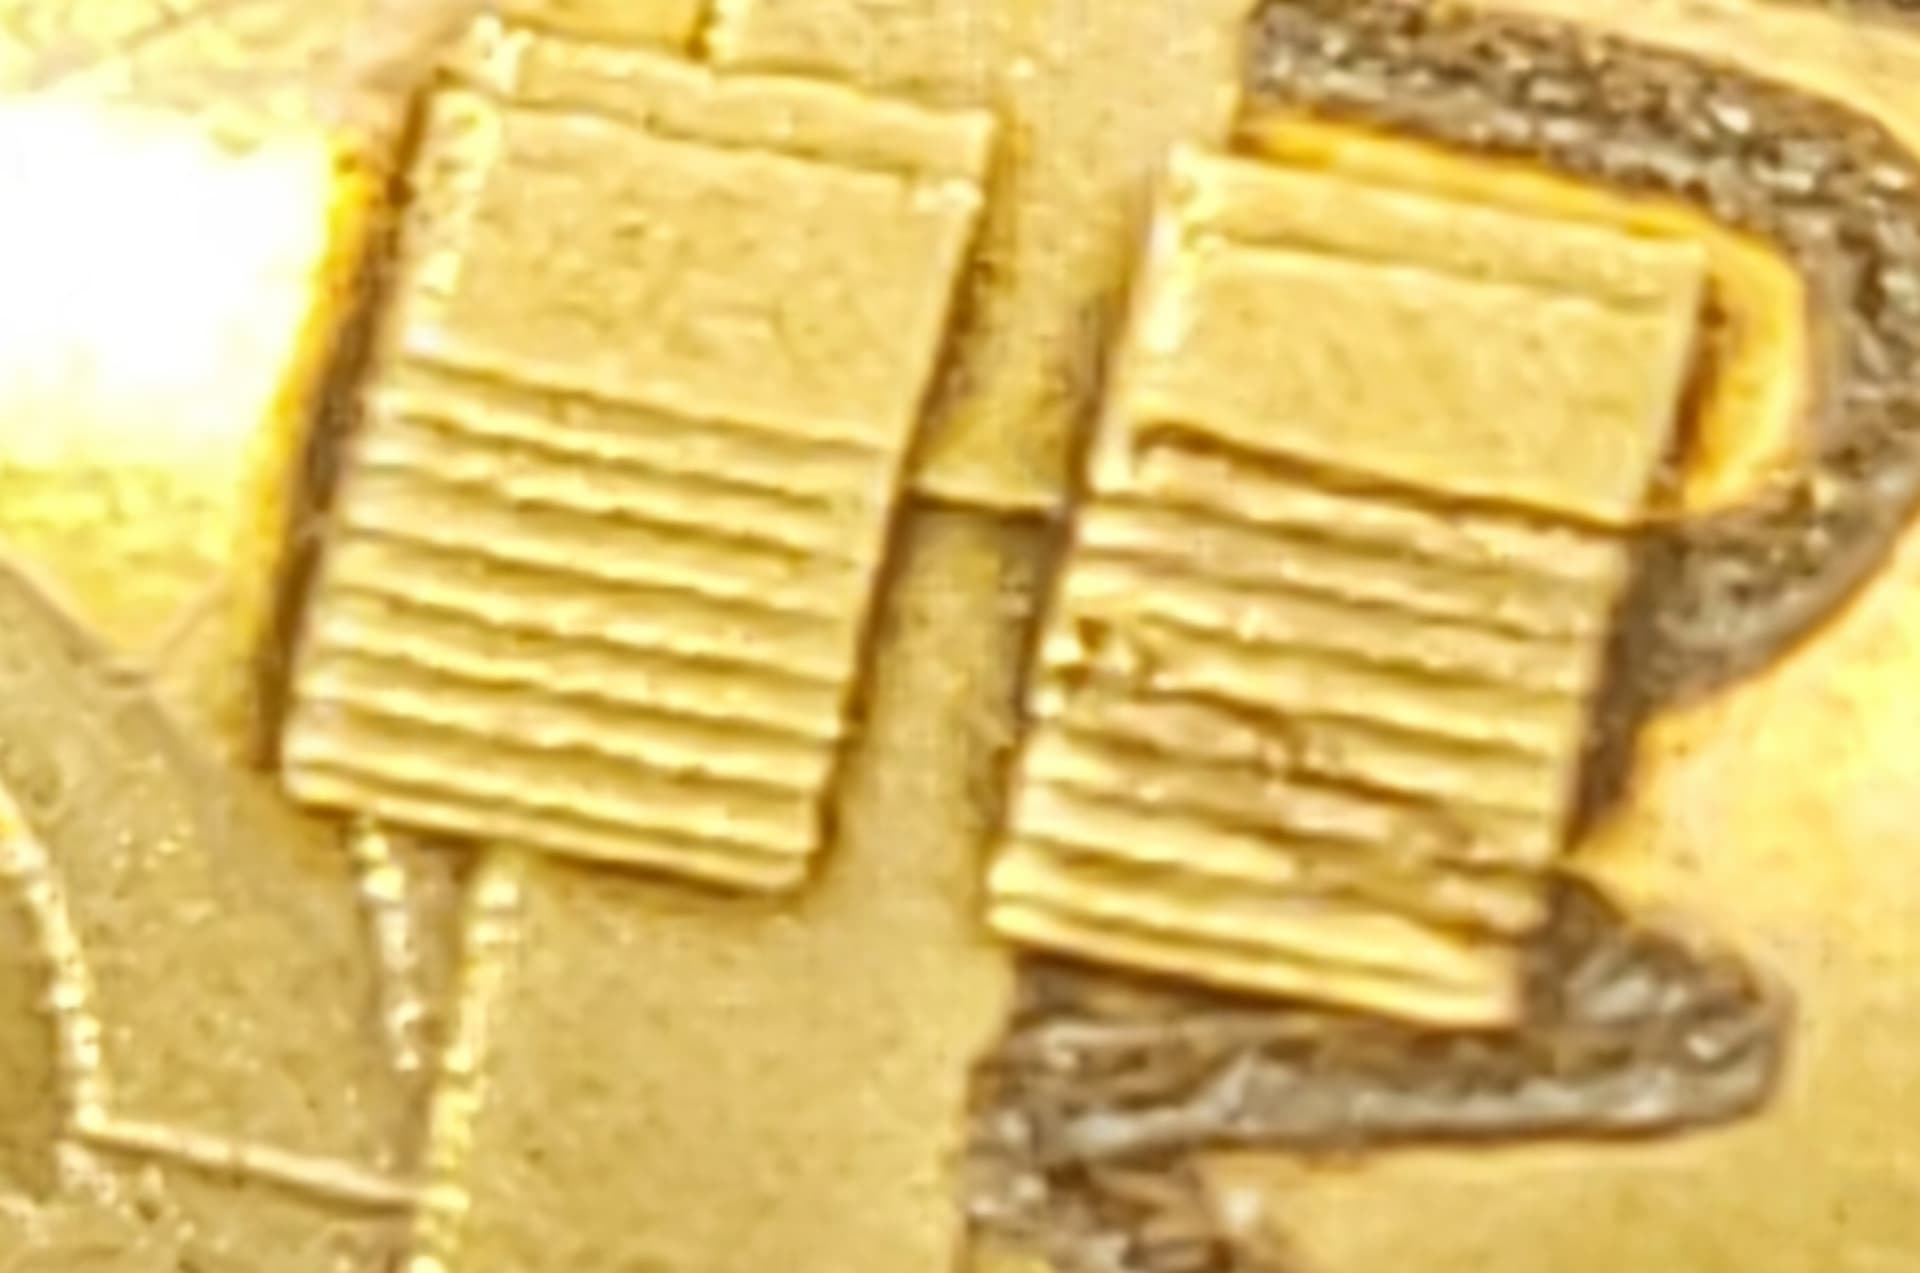
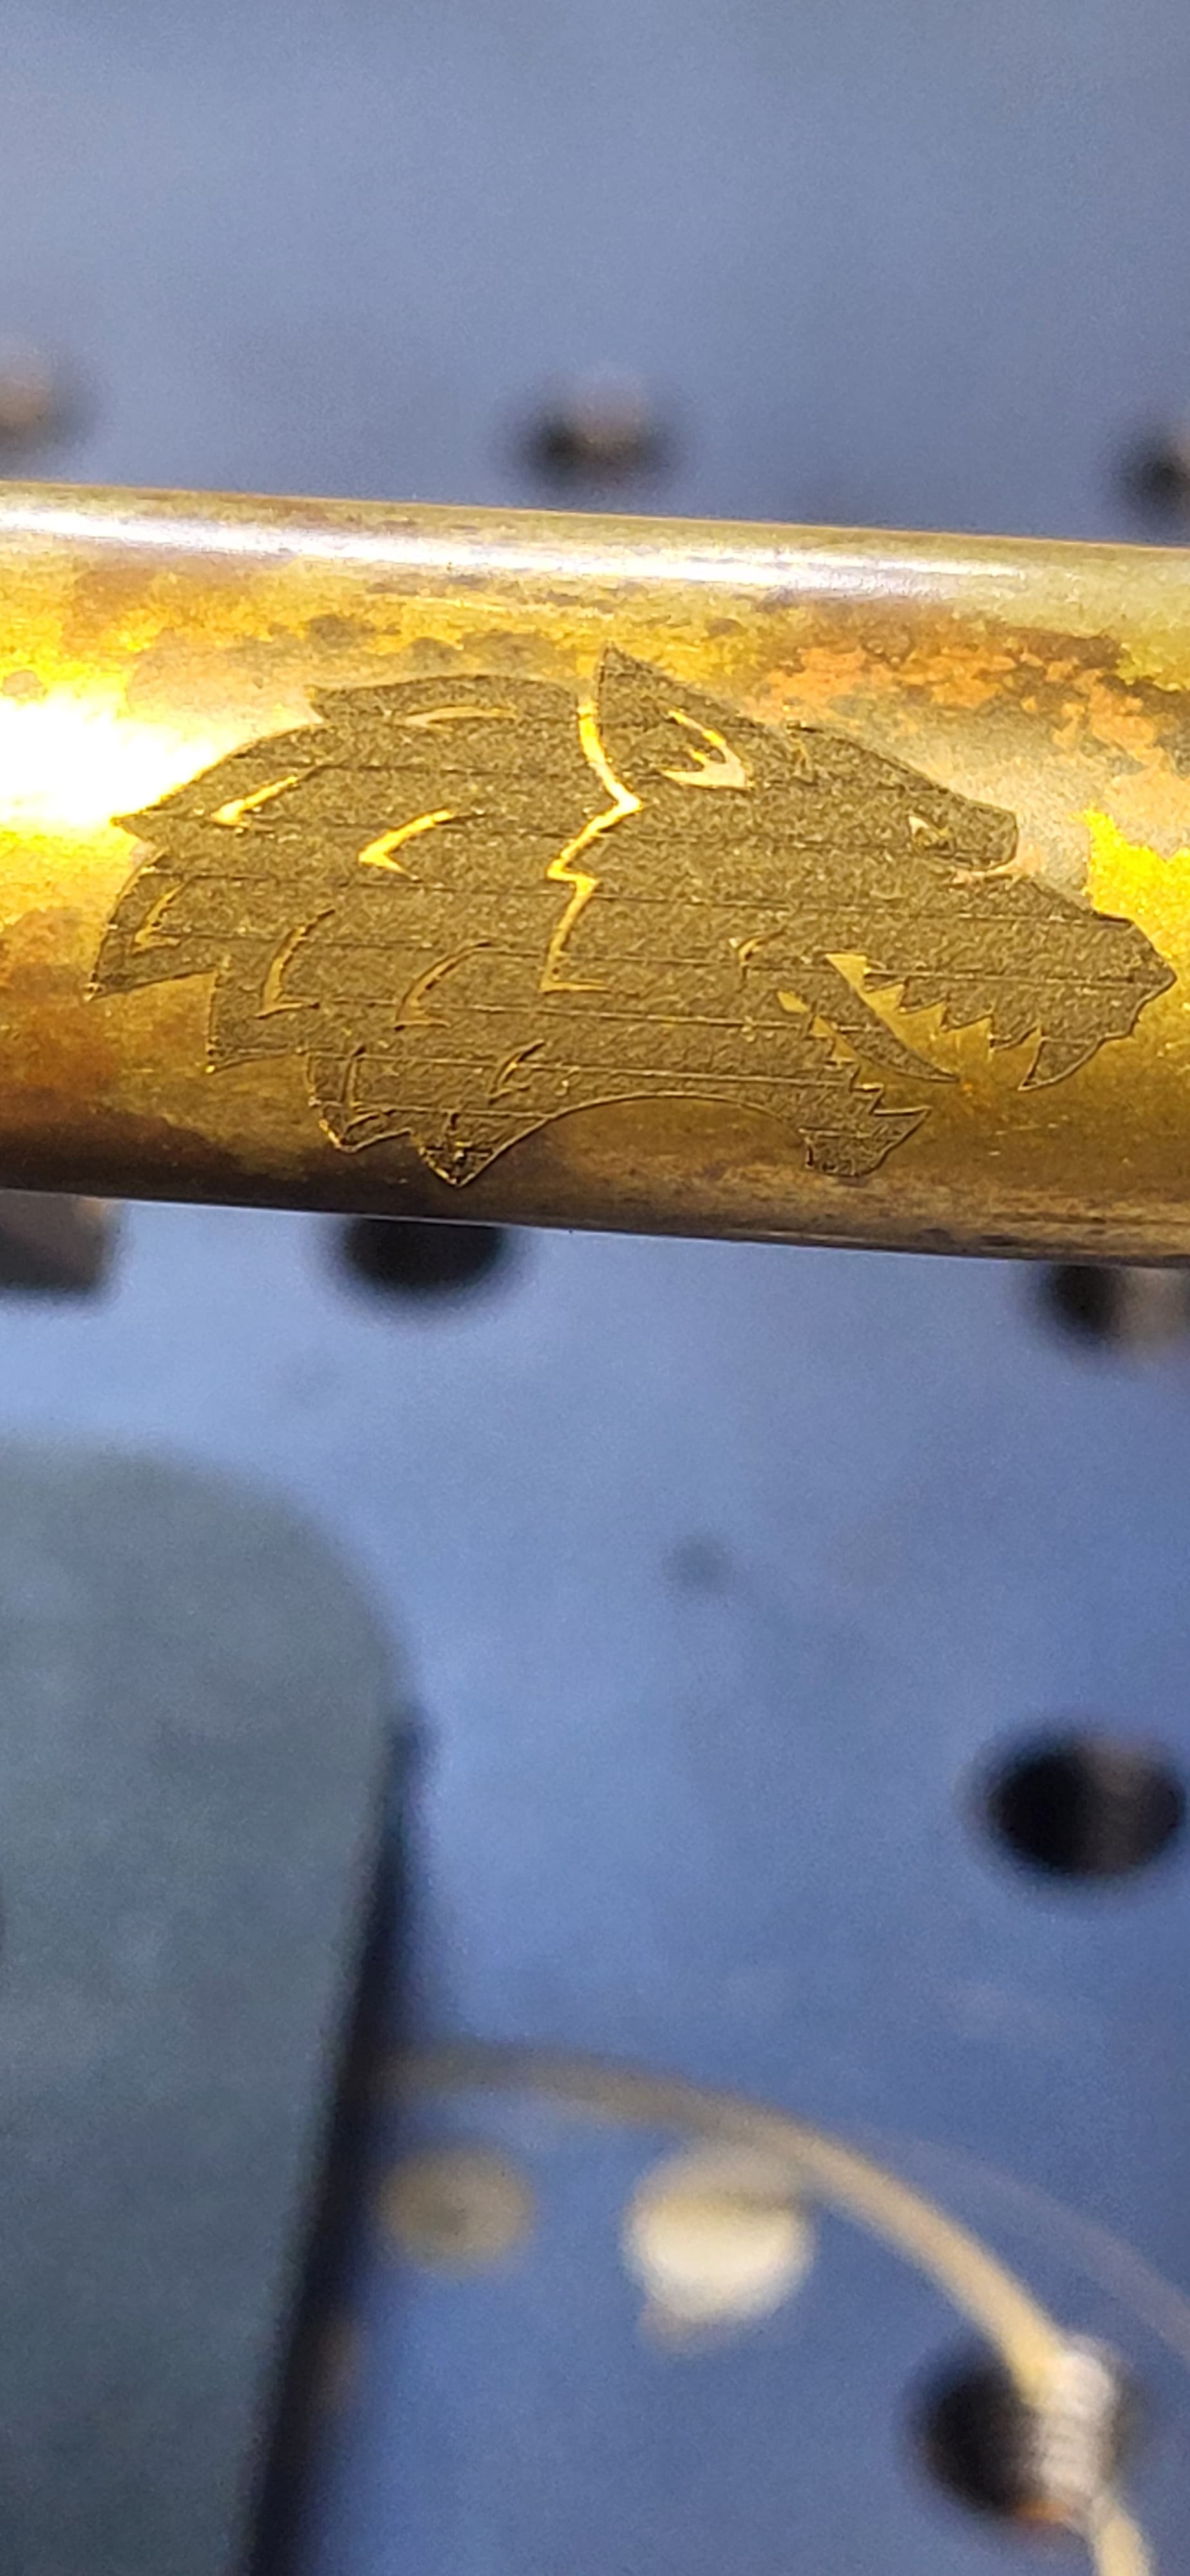
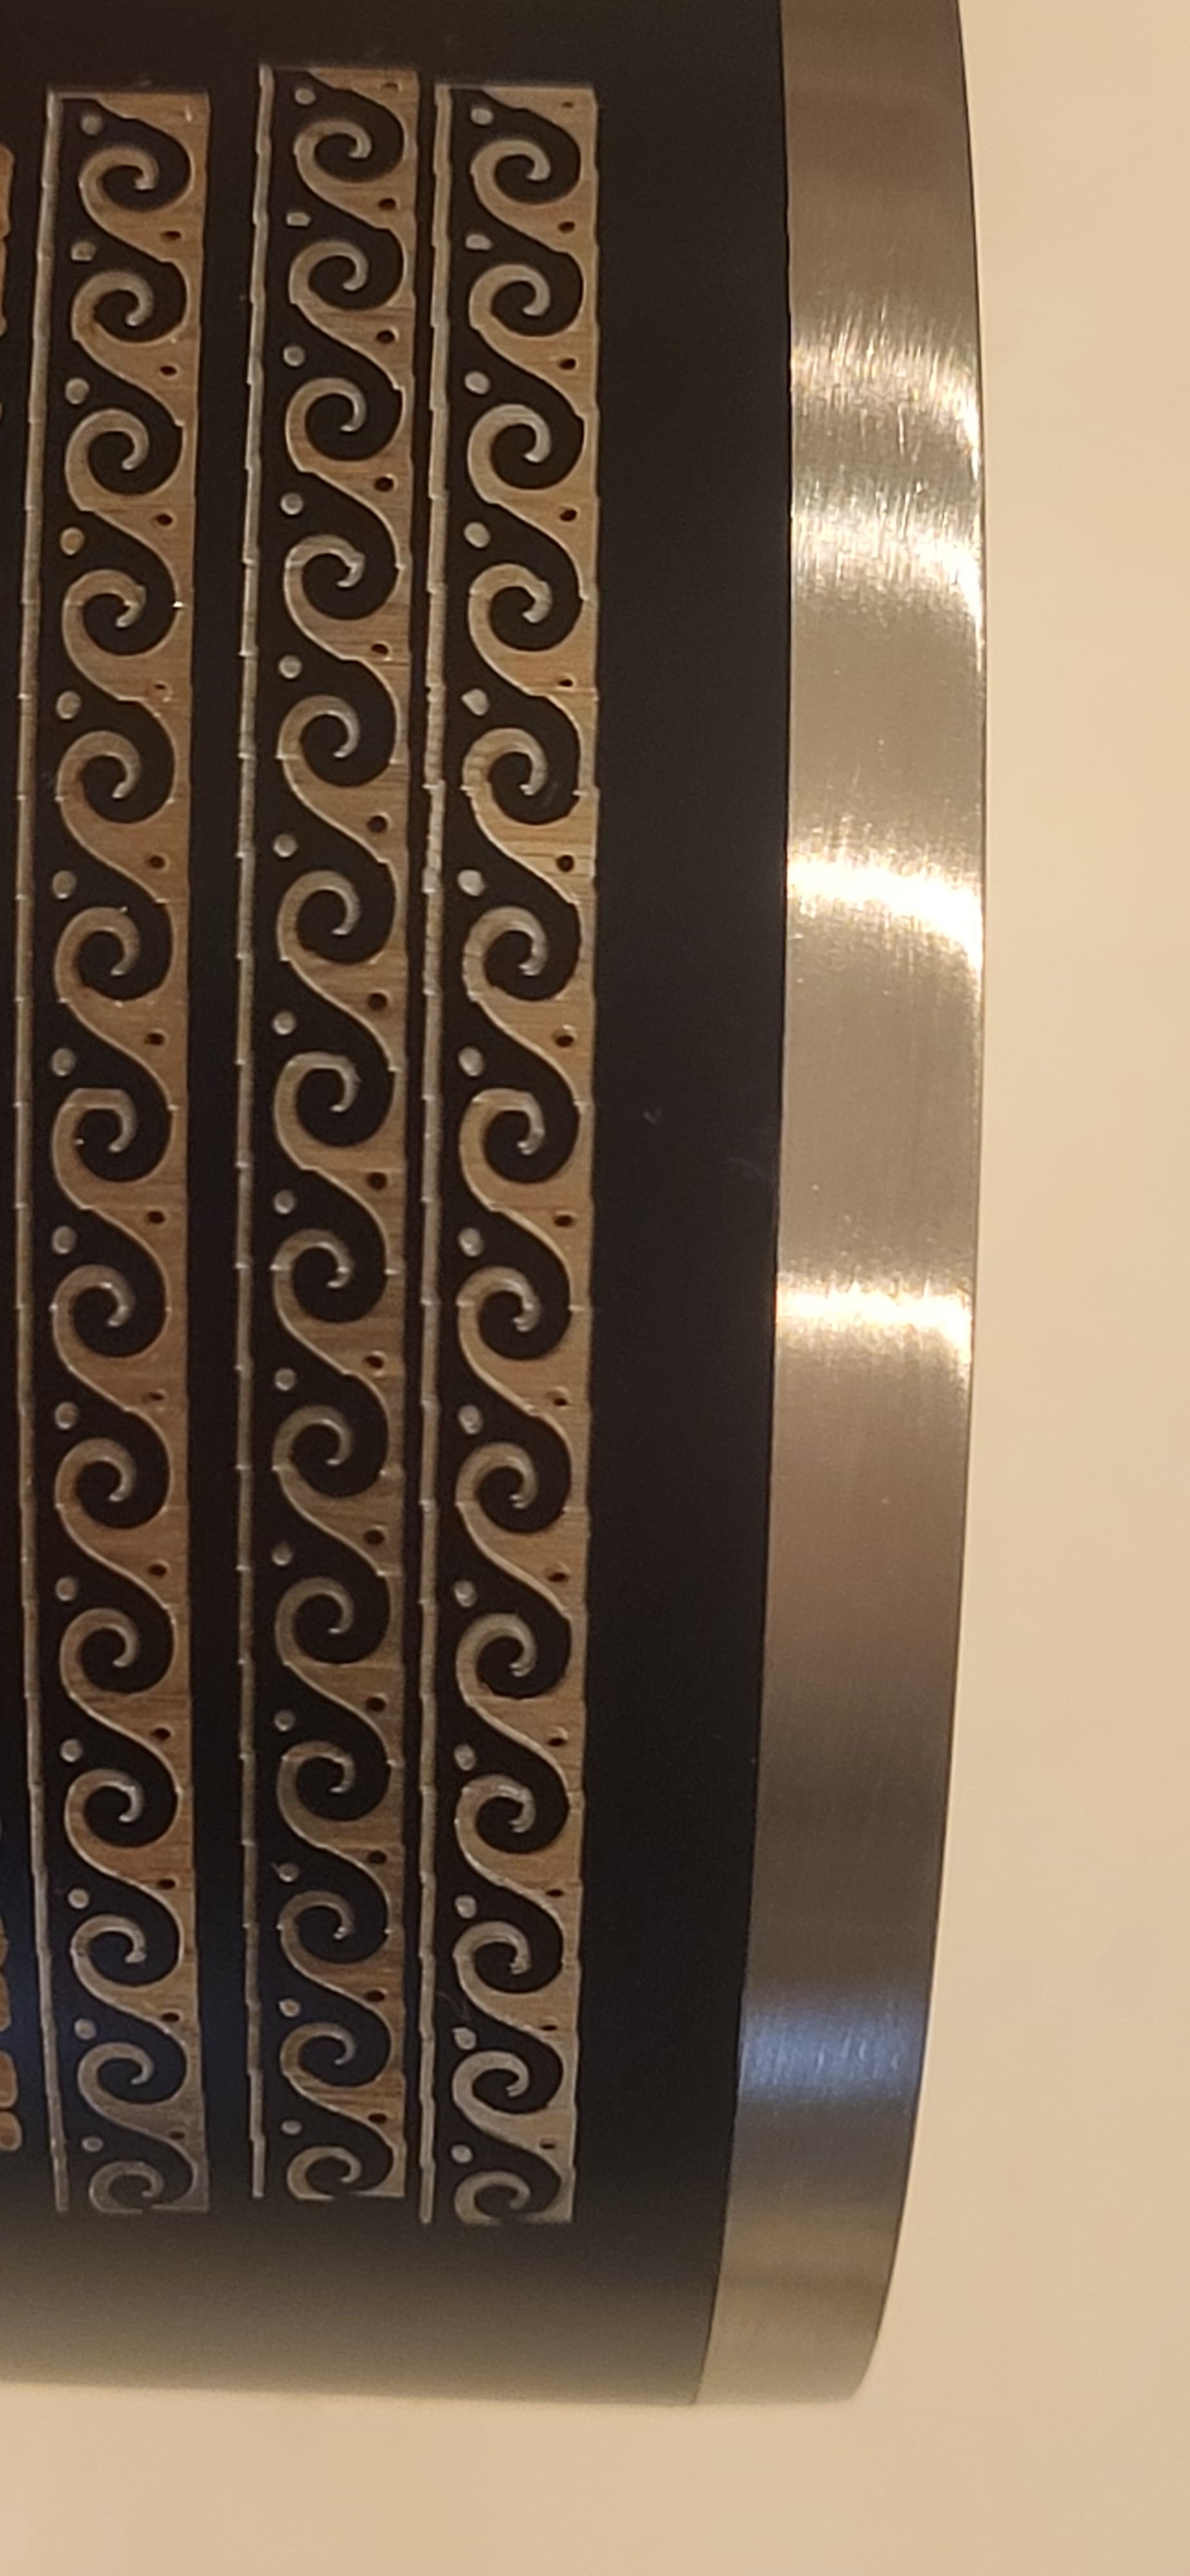
On this image there are some stair stepping which is a dimeter, steps, or split issue.
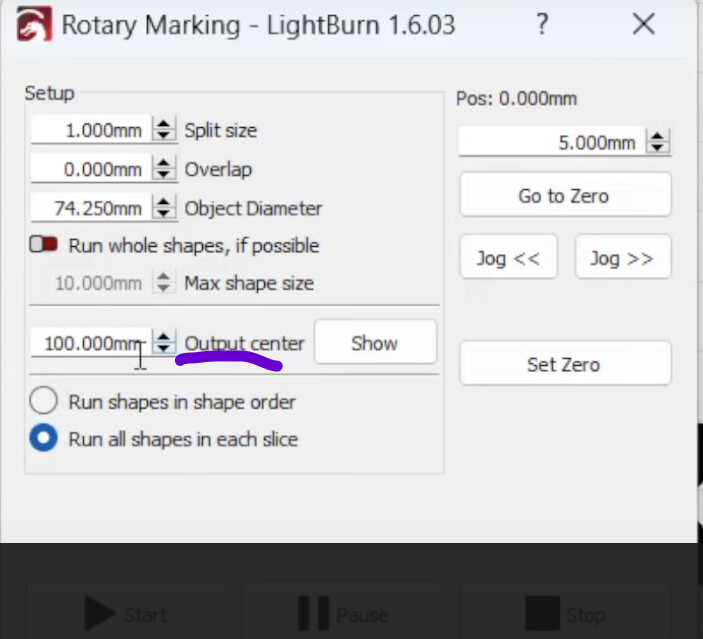
Also, looks like it might be the laser is not lined up with the center. Brass is real sensitive to focus. There is an adjustment for that. Output Center. If your rotary is exactly under the center it would be 1/2 the field size, like 200x200 lens Output center would be 100. If you are 3mm north, it would be 103.
LB documentation and video;
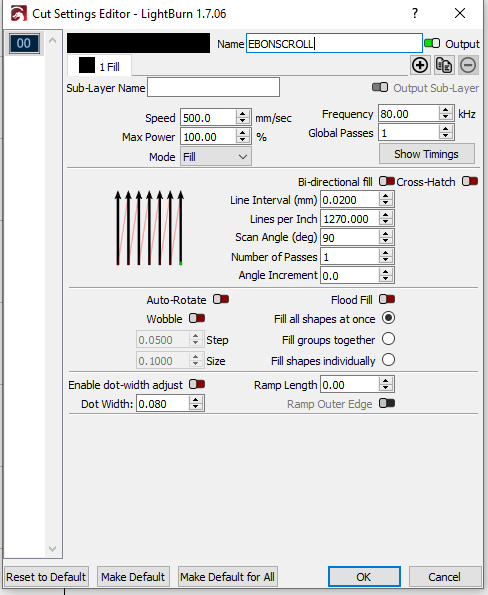
Also, back to cuts/ layers parameters, something this small is going to be more of a challenge then a tumbler sized project. Make sure you are scanning parallel to the axis only, turn Bi off to eliminate any timing issues, post a screenshot of cut settings.
Here is how I approach split and LI:
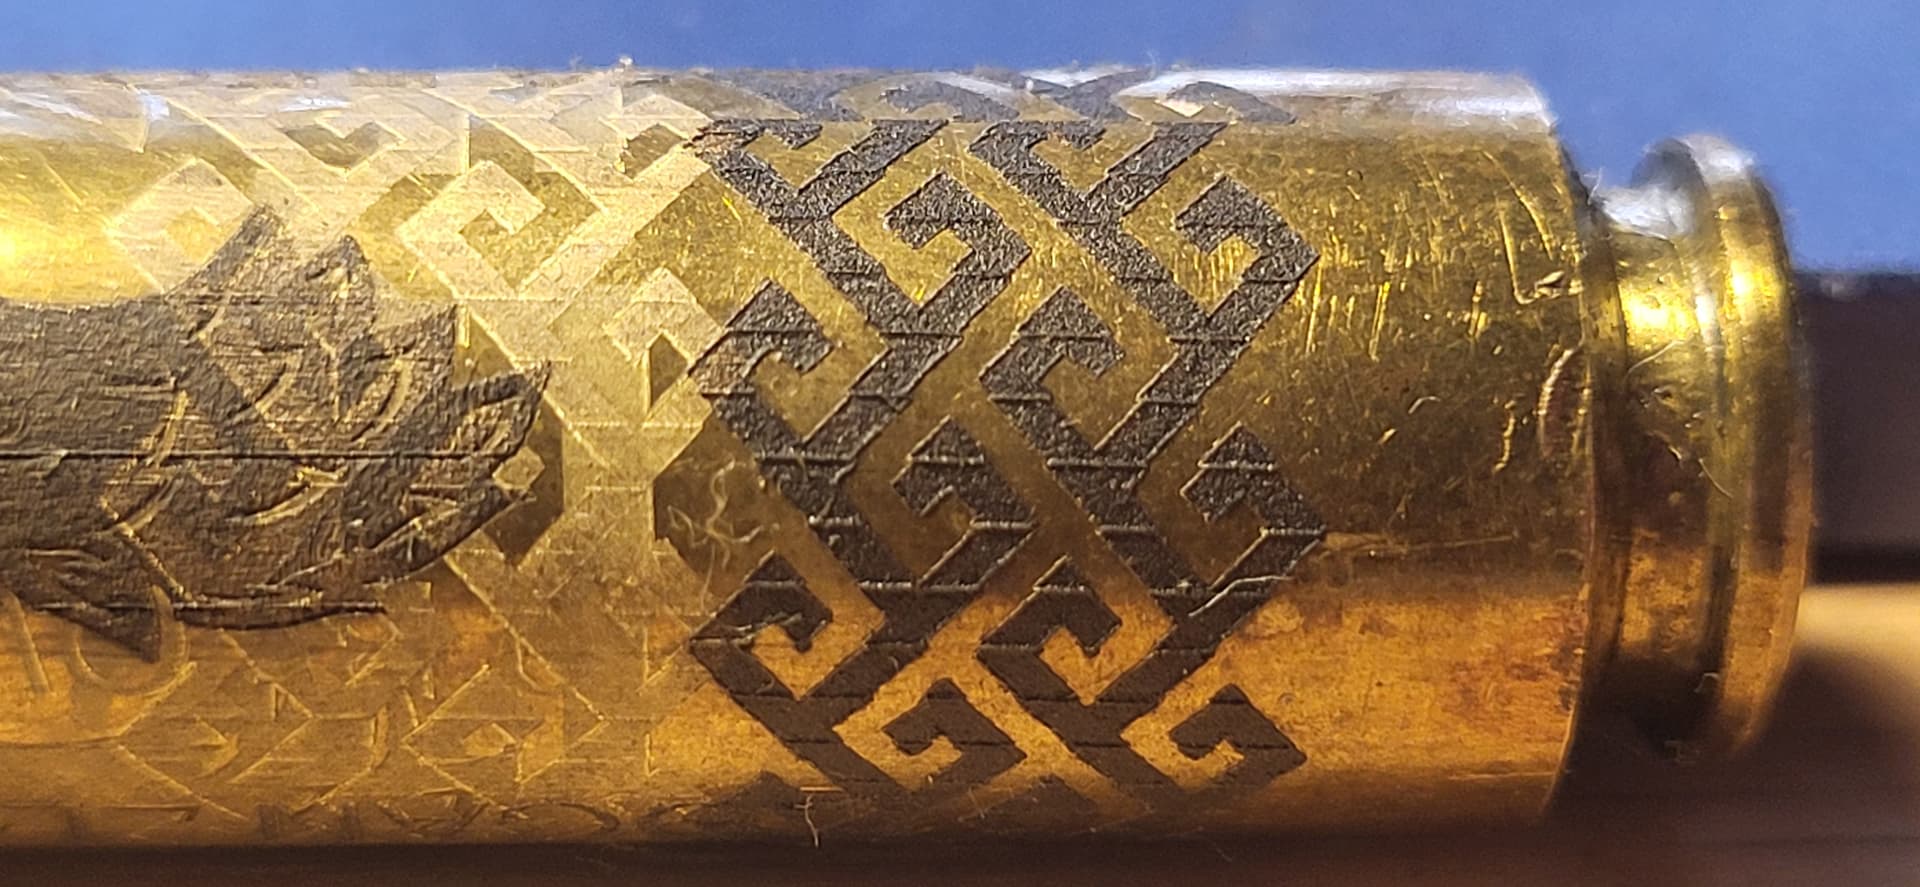
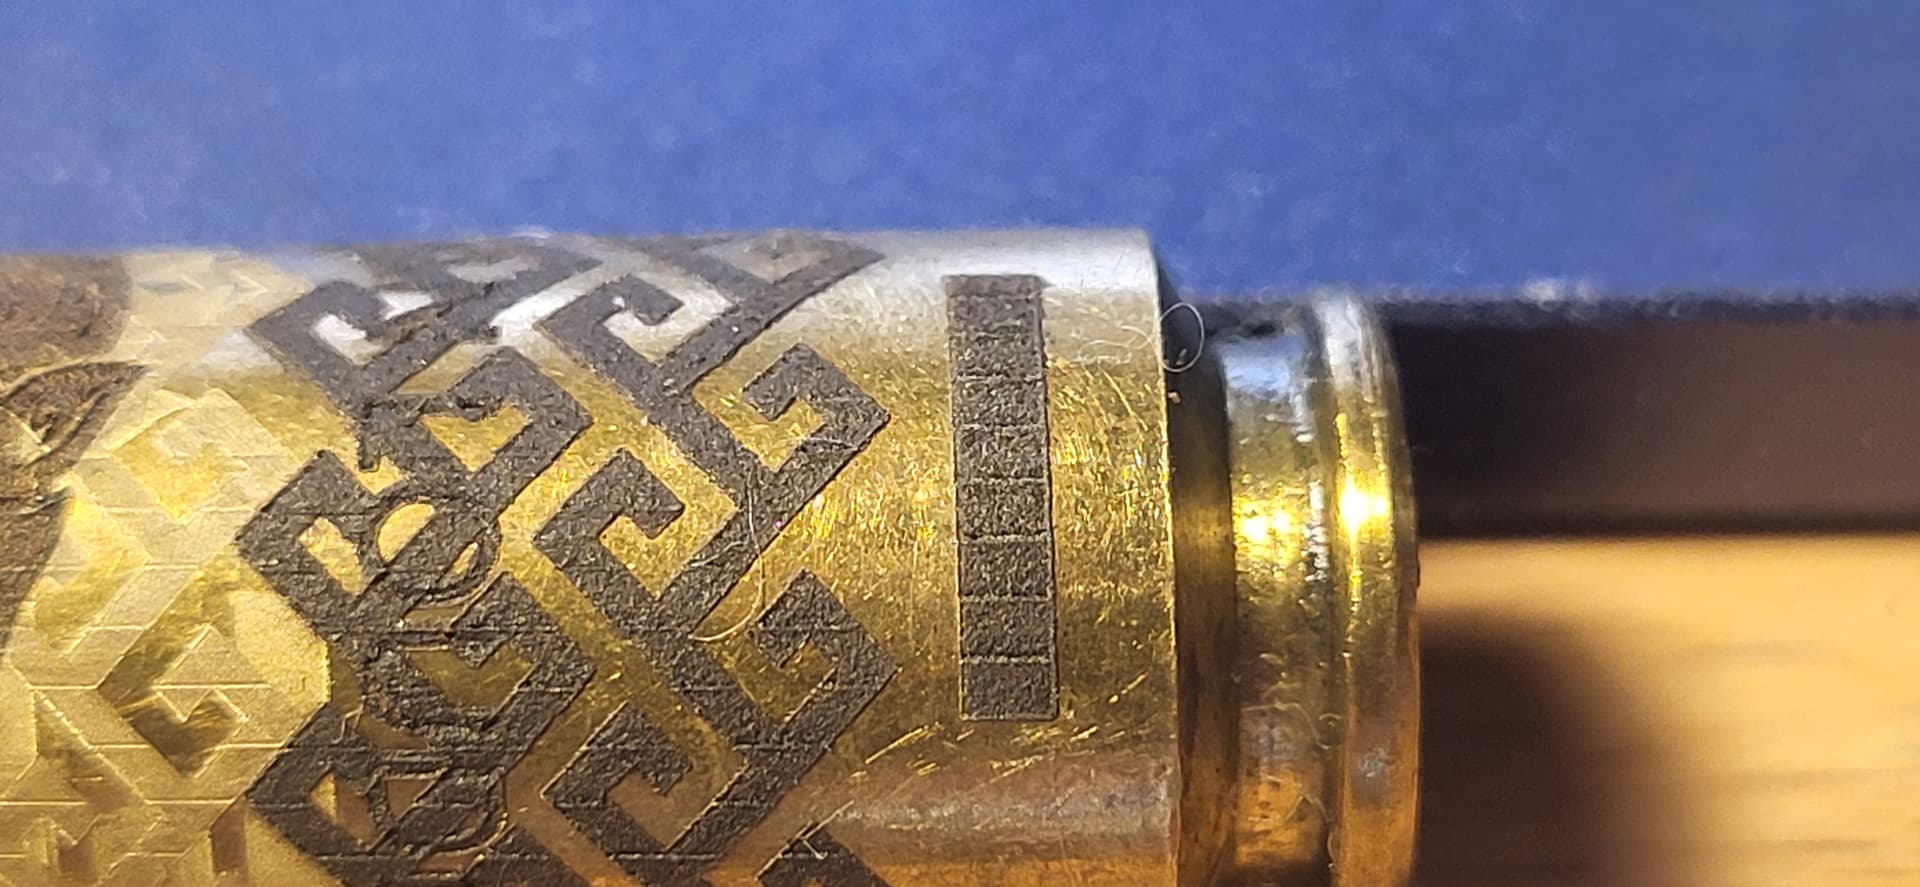
(Looks like a 50 cal with a rebated rim, 458 SOCOM? .50 beowulf? 450 Bushmaster?)
1 Like
Good eye! 50 beowulf ![]()
Thank you so much for your help on this. I am having to pack my fiber for my flight but I will be back to testing Friday evening sometime as time allows. I see how a smaller diameter is tougher to dial in, and that table looks very helpful.
You are absolutely correct on the not being exactly at center on one of the earlier brass pieces. I had a slight gap along the back side of my fence that a piece of playdough (kids…) had caused a mishap that wasn’t large enough to be immediately noticeable… I am trying to fabricate eventually some sort of indexing jig that will exactly align the centerline of rotation of the rotary with the 55x,55y center of the bed.
Alright back at it. I am attempting a tumbler with a diameter of 88.8mm at this time as I did not feel confident bringing casings with me to continue testing where I am locally.
Right now I am trying to jig up one with a handle and can’t seem to set a ‘max swing’ of sorts where I rotate the object from current spot only 180 degrees clockwise…possibly ‘set home’ under rotary. This causes the handle to bump and jump the rotary, sort of like someone trying to drive off with a city boot on their car.
Seems to have some vertical stair stepping this time. I assume that is some sort of off-center. Getting these all squared up is becoming quite challenging. The striations or staggering from the split is not NEARLY as noticeable as in the casing, as y’all predicted.
I have had to re position the rotary to be at the rear top of machine rather than on the left side due to the dimensional constraints of my work area. Other than that, nothing has changed.
Looks much more forgiving on larger items for sure.
Stair stepping on a straight edge perp to your axis could indicate you don’t have your axis aligned with the lasers axis. Project a straight line top to bottom, chuck a piece of pipe or other nice round straight material up, make sure it’s spinning true, and frame. Toggle the line back and fourth until it just touches an edge. Maybe offset the line to the other edge so you have 2 references. Adjust your rotary mounting until it lines up perfectly.
If you want a split around 3mm try 3.05. Or try 0.305. If you want a line interval around 0.02 try 0.0204. Make overlap 0.
Good luck!
1 Like
Wouldnt this line up with the 5.5 on the not good split recommendation from your spreadsheet? Trying to wrap my head around this, sorry.
I think I used diameter instead of circumference in the sheet the first time, screwed something up. Did you change your diameter? Not by my computer now.
Anyway, divide the circumference by the steps and use multiples of that for split. Divisions of the split for Line interval. First you need to get your alignment better.
1 Like
Try jacking up your rotary? I did a teapot had the rotary up 3-1/2"
How the rotary works:
Say your object width is 1/2 the circumference, and centered in your work area, the rotary should rotate backwards 90 degrees, spin forward 180 degrees while engraving, and then return back 90 degrees to center. If you put all your art starting at the center of the screen, it will rotate 180 degrees forward while engraving, then return. It will be hard to do artwork opposite the spout without the clearance.
1 Like
Just picked up 2 squares and another rule. Will work on alignment now before preceeding.
2 cutting boards and a deck of cards clears it. Back to basics!
1 Like
This topic was automatically closed 30 days after the last reply. New replies are no longer allowed.