Very good.
I have made it with engraving twotimes and airpressure 1 bar.

Ramp is the half of diameter.
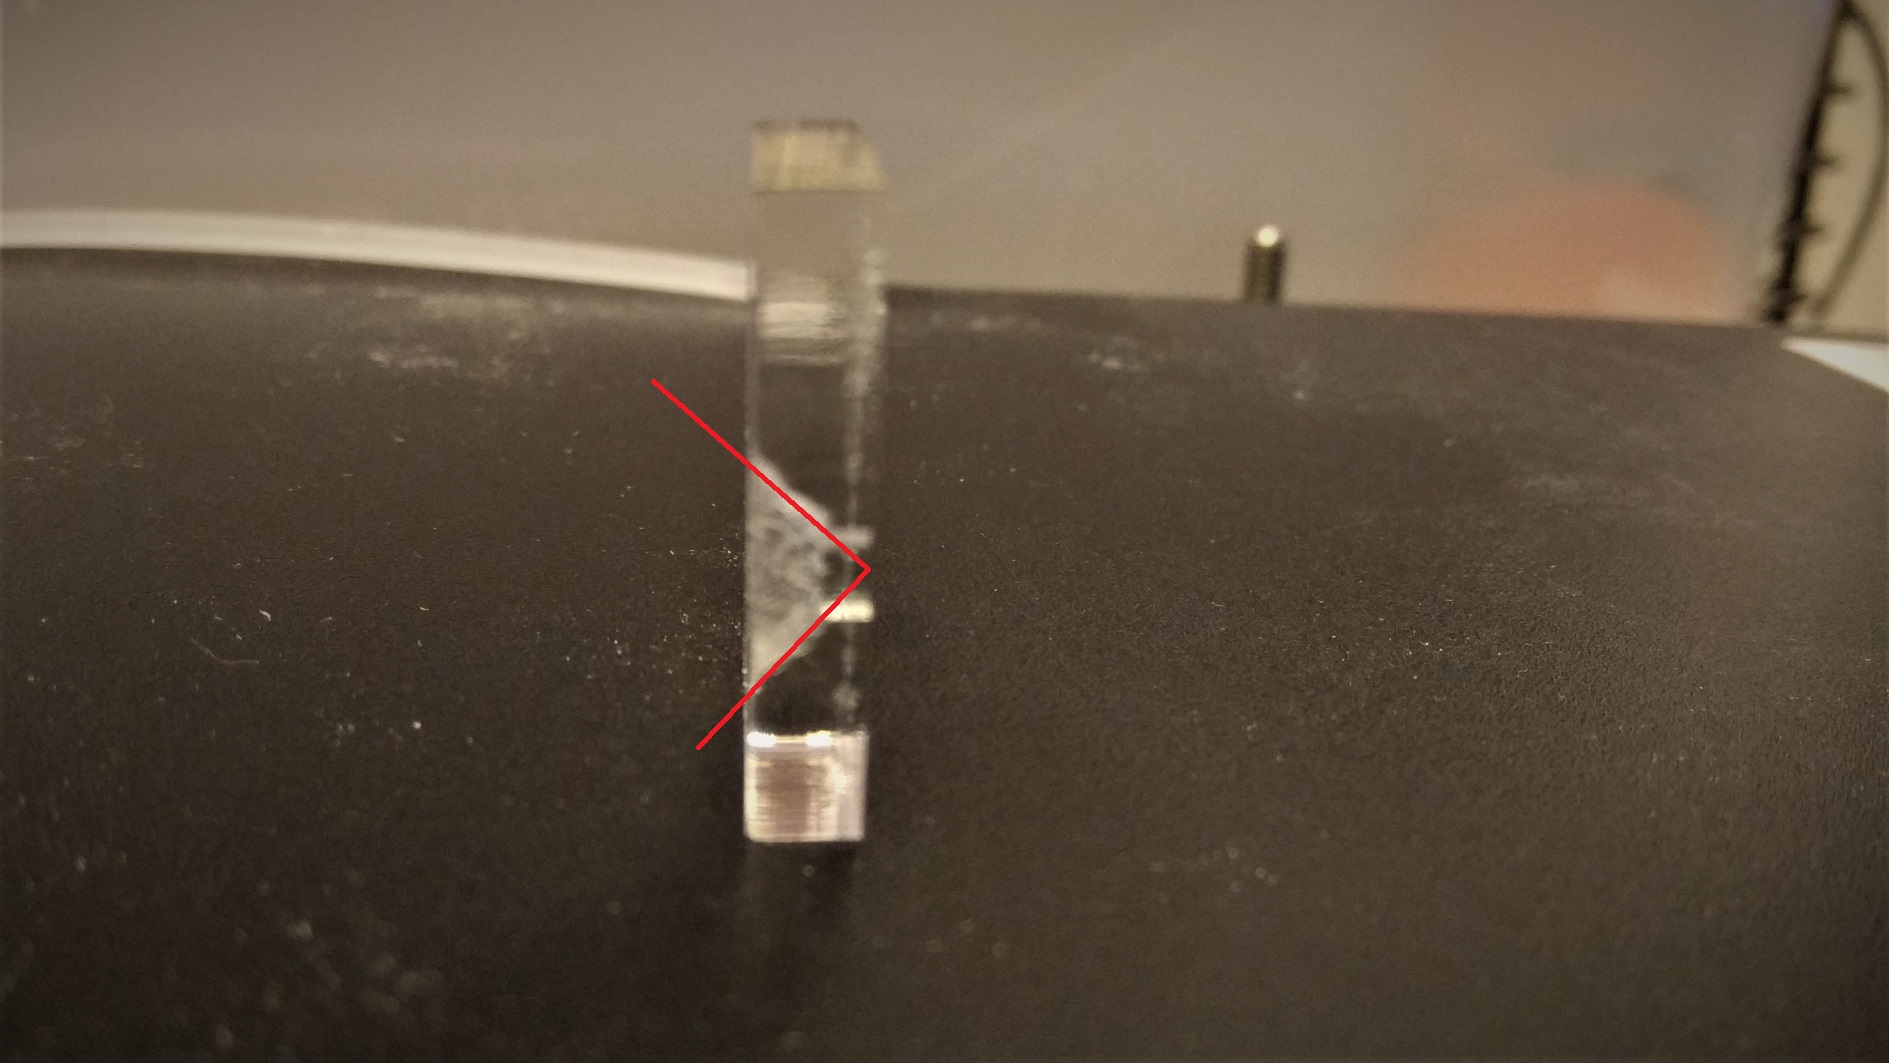
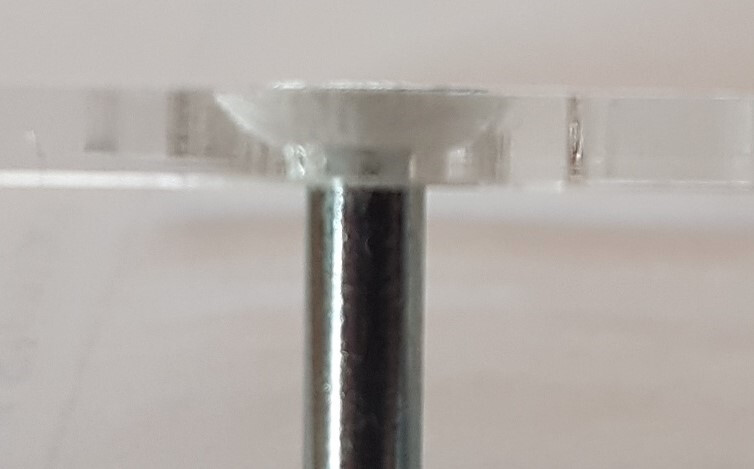
Result is not 90° 
Very good.
I have made it with engraving twotimes and airpressure 1 bar.
Ramp is the half of diameter.
Result is not 90°
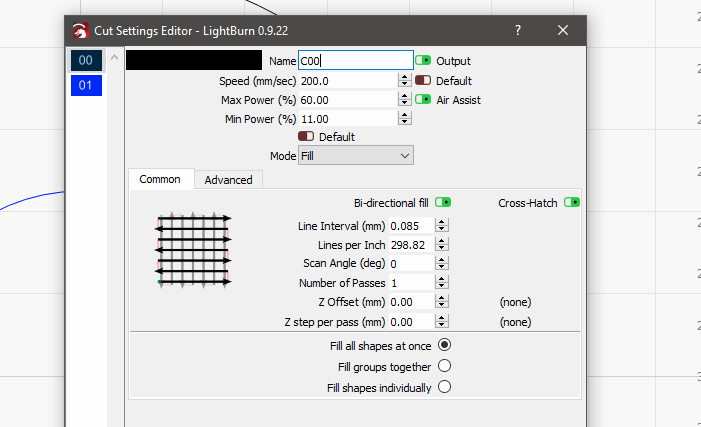
For best results I used Cross-Hatch mode. for that you need to either lower the power or increase speed. quality looks much better in real than in a photo.
You can tweak your settings for better results.
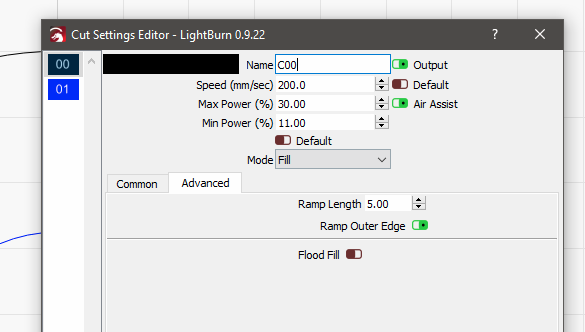
I used ramp of 5 (which I’m guessing is equal to 50%) and playing with both length/power/speed you can, i want to believe, reach 90deg.
Absolutely fantastic
it’s the LightBurn Forum at its best - 
Really interesting stuff, definitely on my to try list. Thanks for sharing!
Cheers
David
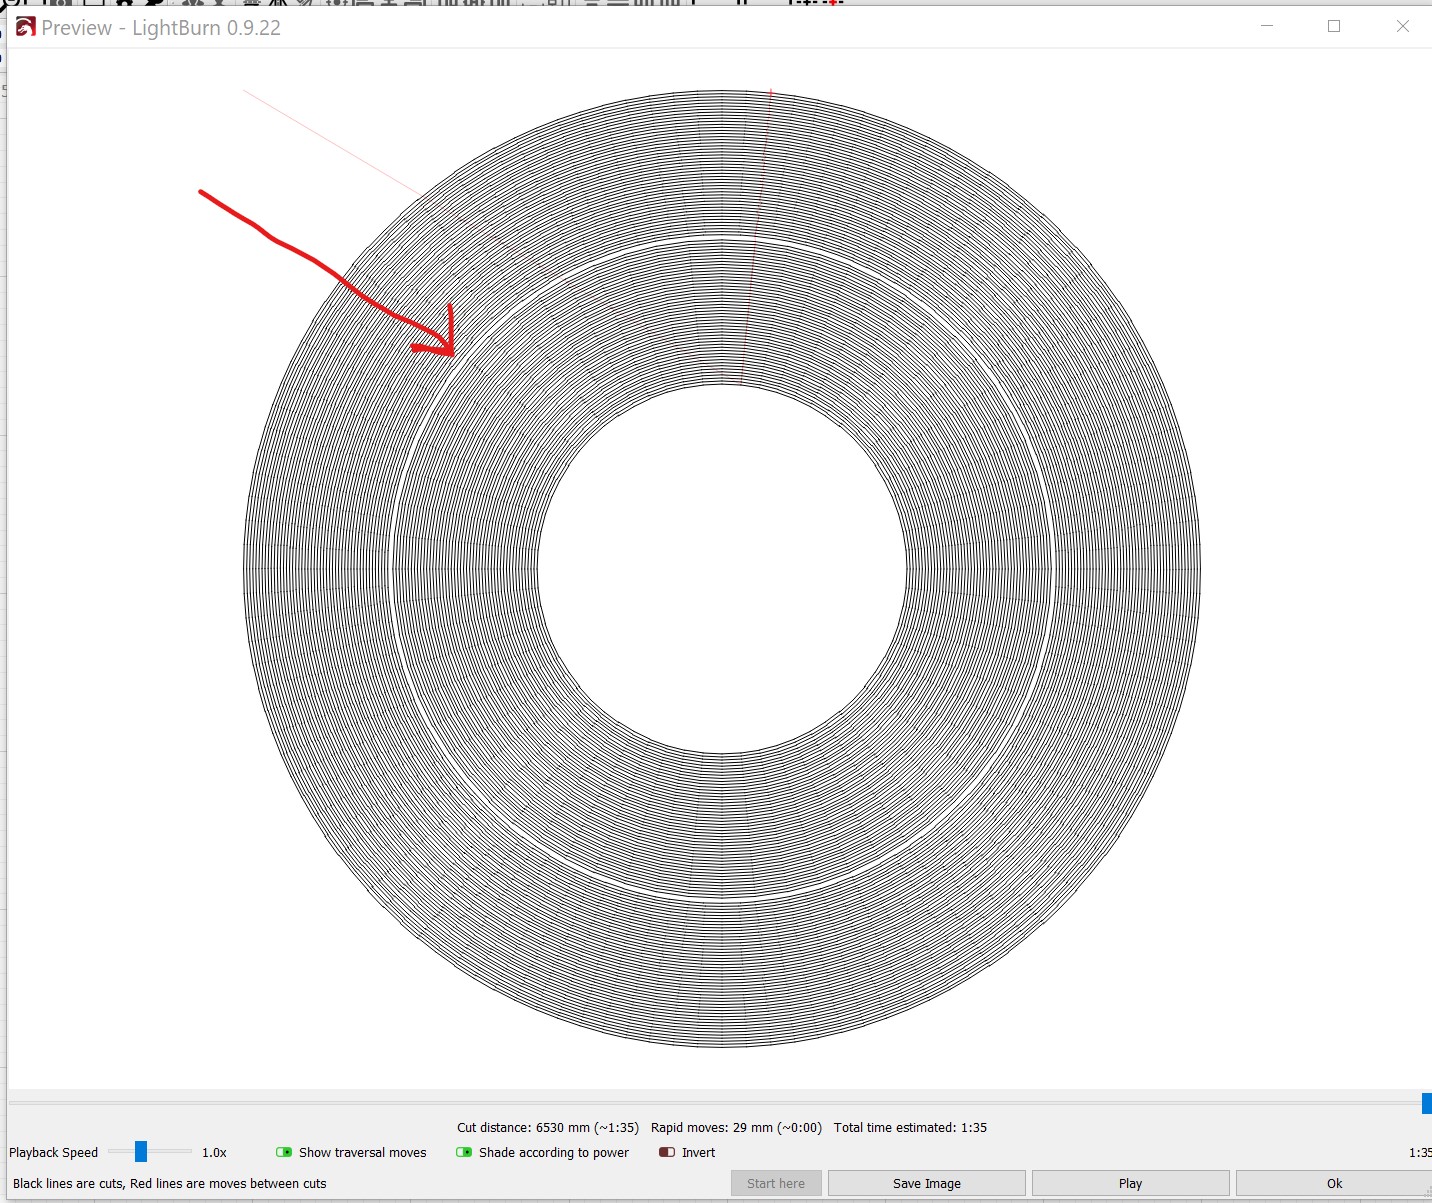
Is it normal for the machine to reverse direction when it is burning/cutting a circular offset fill? I was just experimenting with the feature and noticed an oddity each time I looked at the preview. Sometimes you can’t see this oddity very easily, other times like the example below, it is very obvious. If you manually advance the preview very slowly (sometimes you also need to zoom in), you will see that the “cutting” direction reverses right at the point of the visual abnormality. It usually appears about halfway through the width of the offset fill “cut.”
Using Ruida 6442G, LB 0.9.22, Windows 10
That’s where the outer offsets meet the inner offsets. I’m thinking of doing a pass through the shapes to make them all a consistent direction, but yes, that’s normal - inner shapes and outer shapes often reverse direction (winding order) as a way to identify them, and the offsetting library behaves this way.
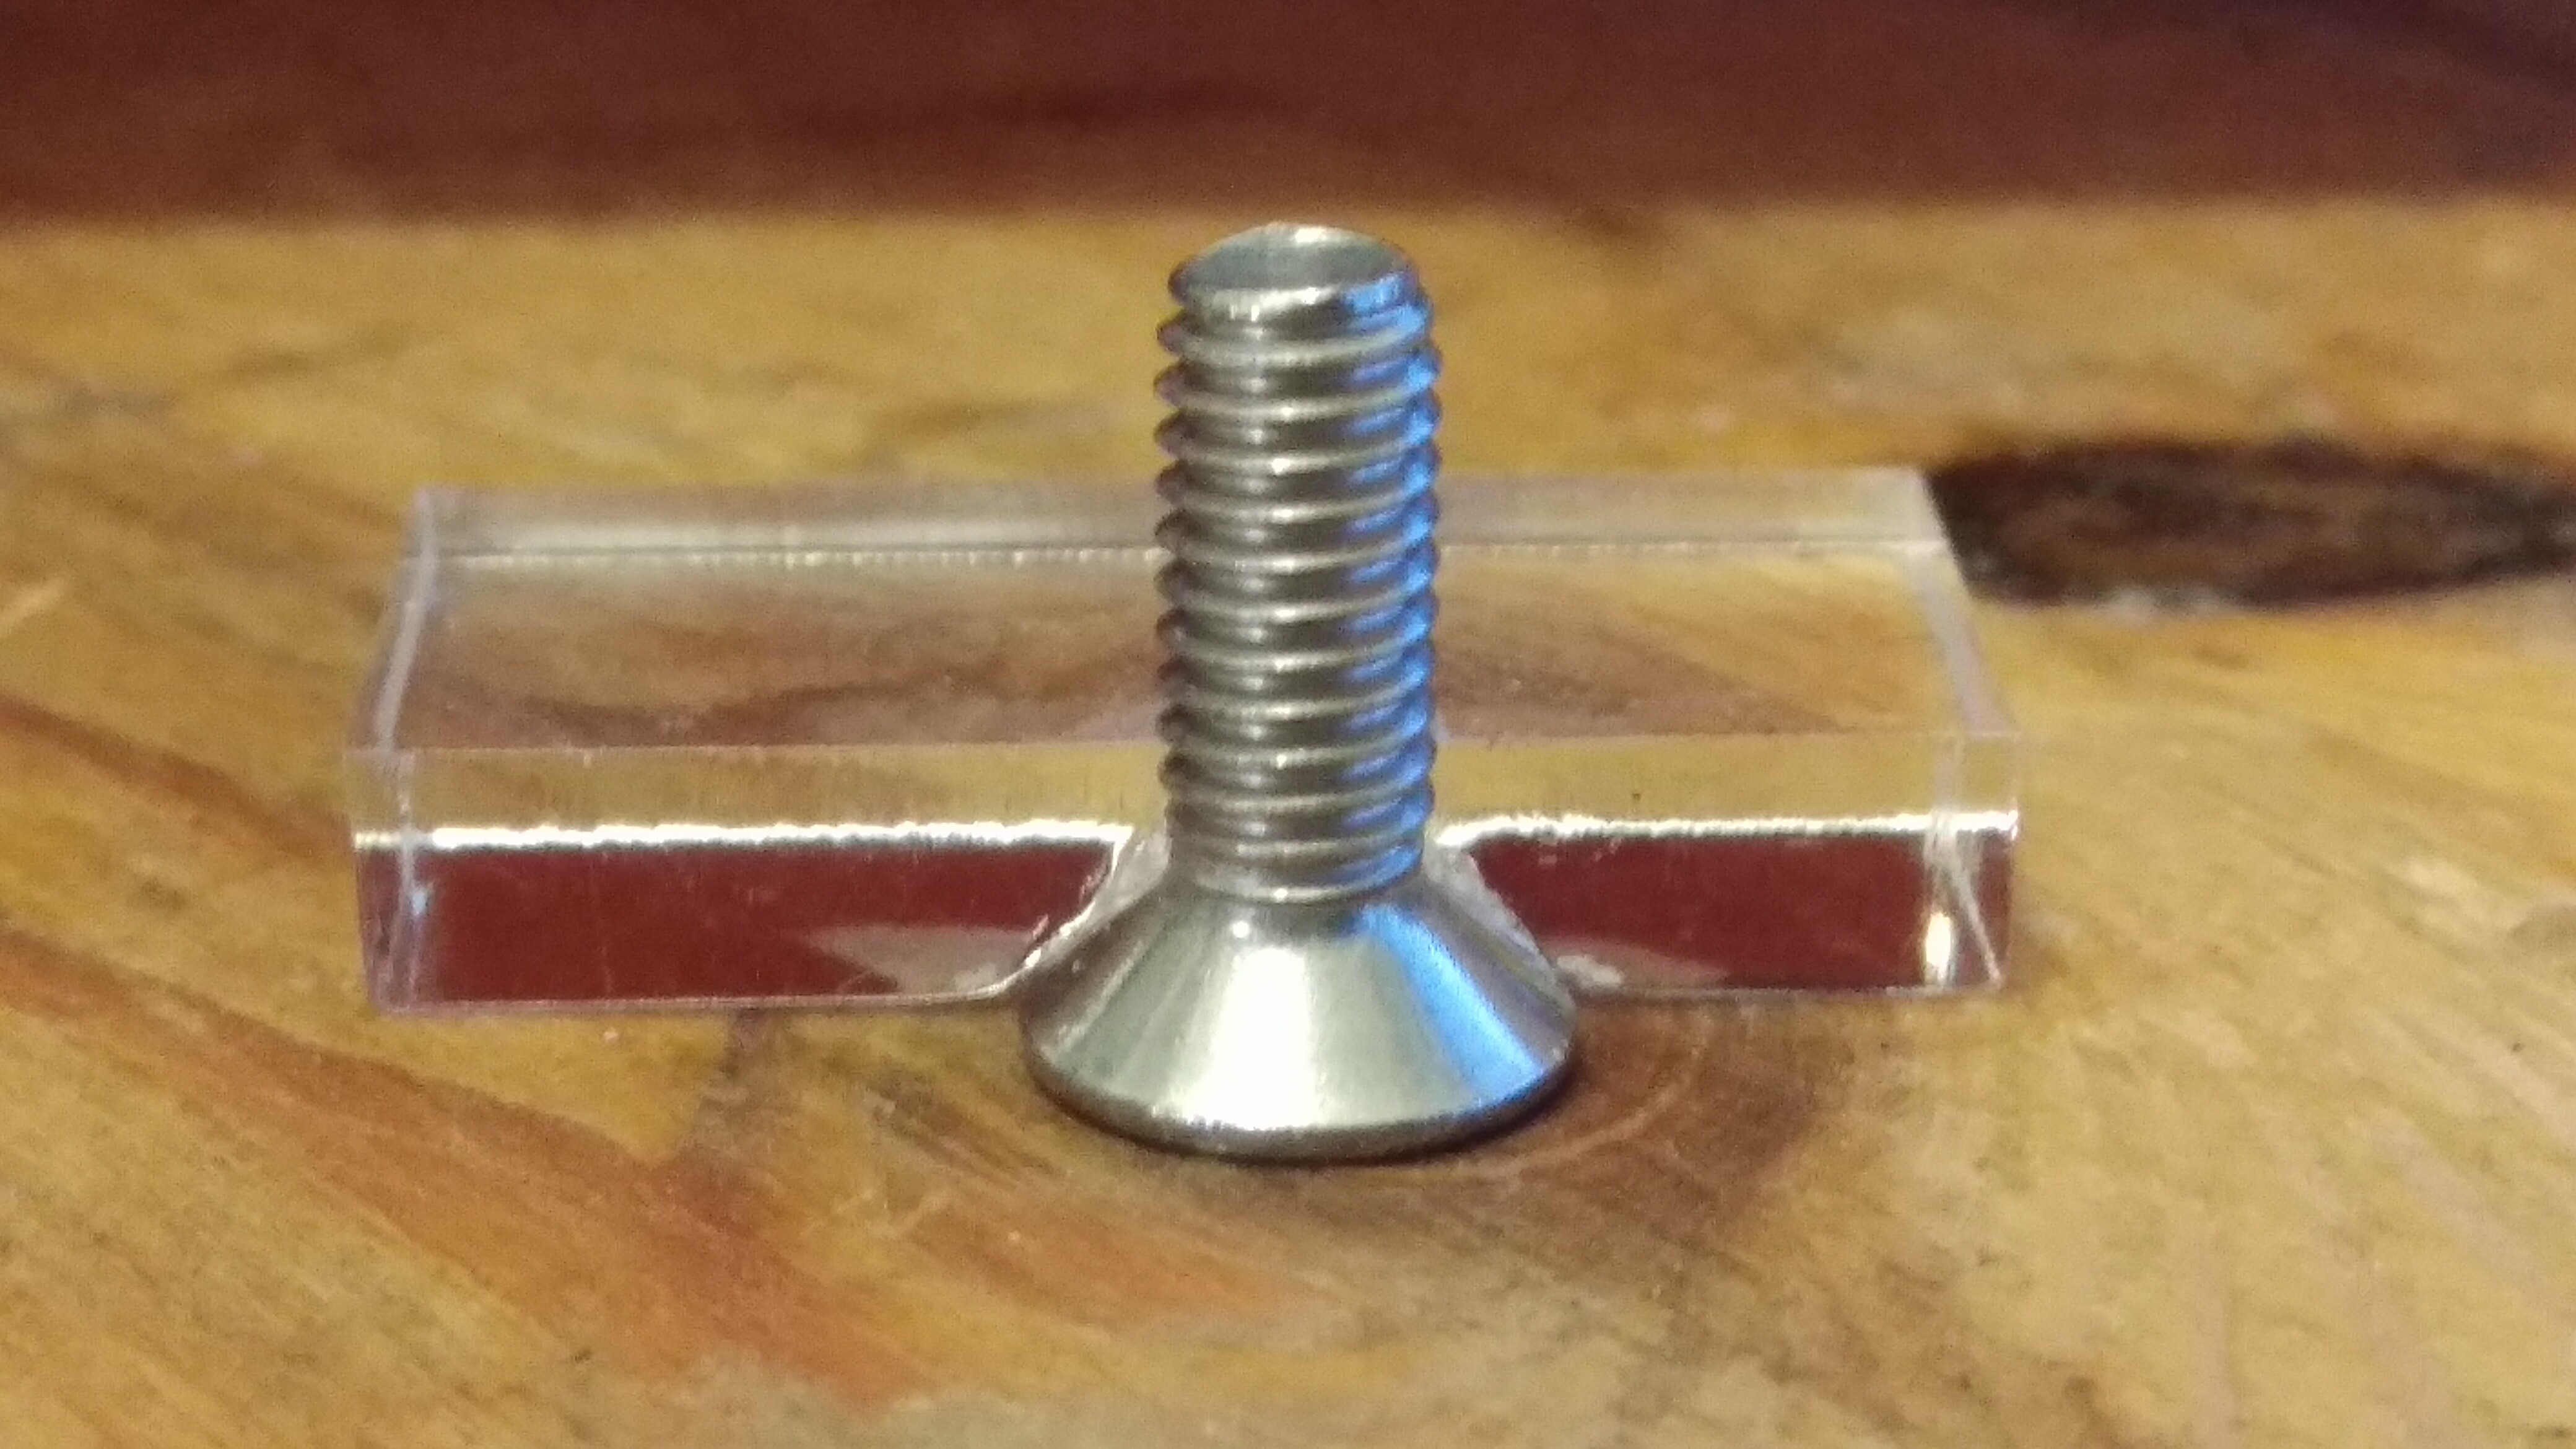
Interesting as an intellectual exercise, but I just make a hole and use a countersink bit to shape it.
I guess when you have a laser, everything looks like it needs ablation ![]()
And that’s what it was all about. i never used ramp feature before till i stumbled across this thread and thought it might just do the trick. I love challenges that are there to help me learn better the tools which are in my possession. Sarcasm followed by a smiley emoji is a good example ![]()
It wasn’t sarcasm. It was a play on the old ‘when you have a hammer, everything looks like a nail’ adage.
I’m not a cynic.
As to using a ramp for a countersink, if you’re a hobbyist, sure, but making stuff for a job, far too fiddly - I’ll make a hole with the laser, then countersink using the bench drill. Faster, more accurate.
I knew what you meant but sarcasm was also there which I like when it is being served with a smile - as you did. I have no intention of making countersinks anytime soon - trust me on that, thou counterbore holes are very handy when no other mechanical tools around.
I’ve used the laser to ‘route’ a rabbet when I was too lazy to change the bit on the router table and it worked surprisingly well in MDF and acrylic - less successful in wood, owing to the grain.
I wish I had more time to fiddle.
Of course, it is always fun and interesting to find “new features” of one’s tool and you are absolutely right that it should be relevant to something.
I can well imagine experimenting with a “chafing” feature on exterior edges. I make some 6mm acrylic parts which are relatively sharp-edged when they come from my laser and the edges need to be rounded a bit. I do this with a sharp knife - everything is fine. But if I could give the subject just a little extra time in the laser and be able to scratch the edges here or add a 45 degree chafing, it would give me an increased use value of my laser and a 100% similar end product. (The feature will be most relevant for larger symmetrical parts, so you can easily turn the workpiece to machine the other side.)
… so, it is not completely academic ![]()
I would use a small hand plane.
The Right Tool For The Job 
I see this with 3D printer guys - they will print for 12 hours to make a part I can cut, drill and glue in a few minutes.
The difference between a hobby and a job.
Or use a stone age hand ax. 
In the very first post in this thread is a picture of the mini edge cutter that everything is about - I could (and will) use it for the task.
But, really noticed, there are big differences to having to live off of his work or live for his work, I have the luxury of being able to enjoy the journey to the goal more than the goal itself. - however, I do not have a 3d printer nor a stone ax, maybe for Christmas? 

I have experimented a bit more with the offset-fill feature and I would like you to try to implement what you wrote in your post. Especially with square surfaces, there is a clear transition between changing the fill direction, which makes the surface a little too “rough”.
BUT - in that it is not a “problem” for anyone, you should spend your precious time on more important things and when you are at the bottom of the important ones, then this little experiment will be fine. ![]()
If that would get rid of the “gap” in offset fill it would be great improvement for me for sure. I do a lot of plaques that have a border and I had to stop using offset fil because of the missing line. The time saving was incredible from offset fill, but the end result just wasn’t good enough for the customer product. Thumbs up for this change Oz:-)
Cheers
David