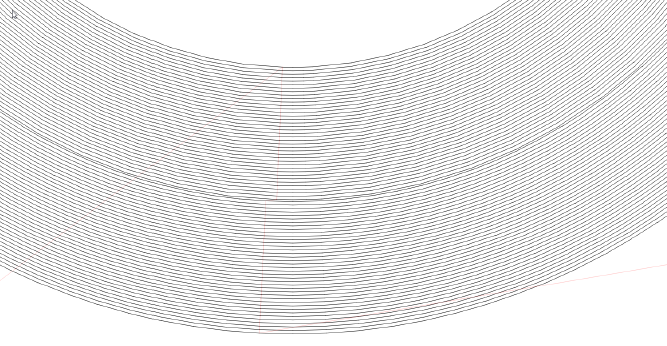
I have a bit of a problem with “Offset Fill”.
As the picture shows, I have a spot where the laser almost stops and makes an overburned mark. Is there anything I can adjust to get around this?

It’s an issue I also came across. It’s the nature of the algorithm, at one step it has stop, move on to the next line and then go on. I examined it with different lasers and those had different results.
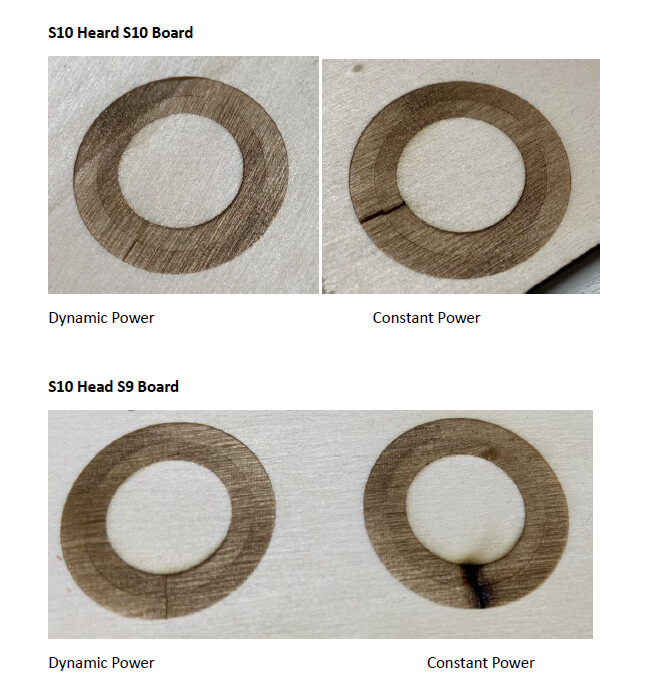
It looks like the more power the laser has, the more visible it is. Turn on dynamic power to reduce this.
I have no time to check my full documentation, I will do it later today.
2 Likes
I don’t know if it would be possible to change the algorithm to use a spiral movement instead of circles with a full stop / diameter change.
Edit: I just checked, and it seems that this was at least changed to avoid the 90° movement change of the head:
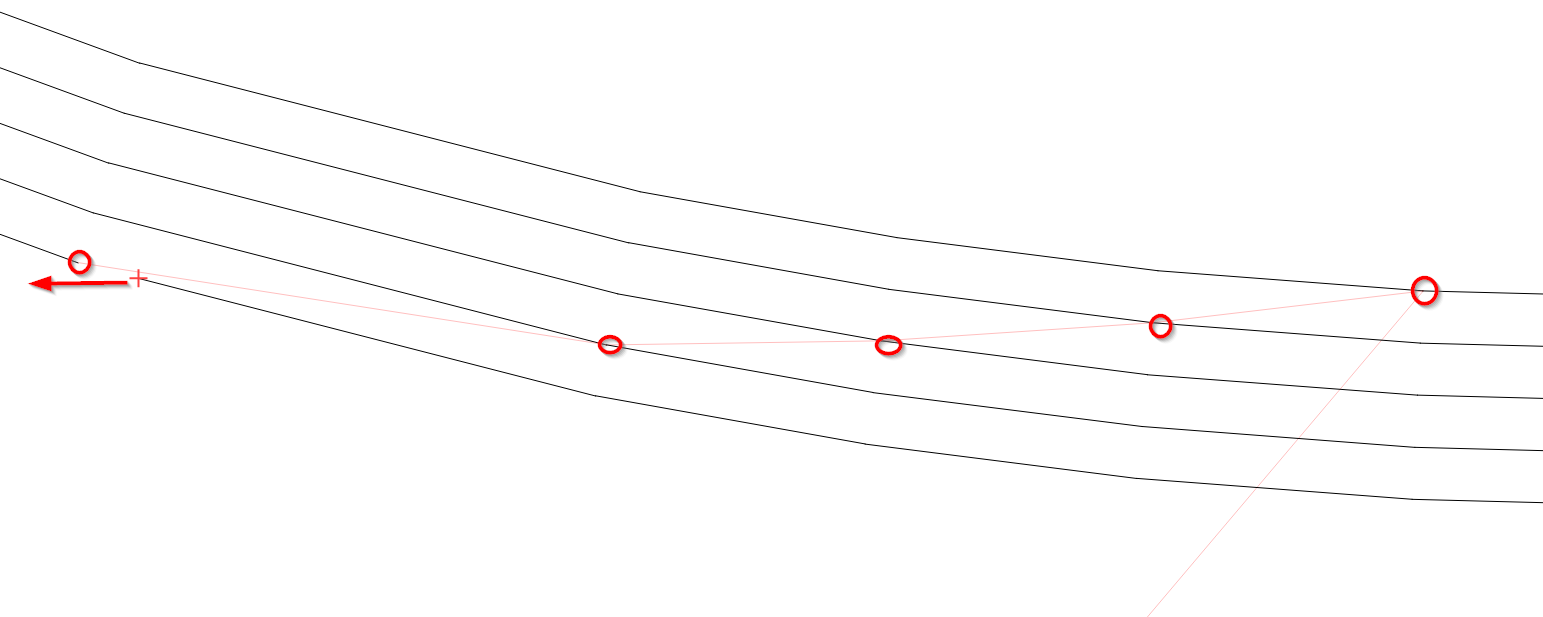
You can see here that every start of a new line is shifted to the left (it started at the top-right position)
I don’t see it the way you show it. If it was offset by a few mm it would be fine and not visible anymore.
I use Offset Fill a lot with my 40w/20w laser. I take advantage of the larger beam to fill in the remnants (unburned areas) that would normally occur. I learned the hard way that it is more aggressive than the Fill mode on burning. As @misken mentions, my material backs looked like swiss cheese until I turned off Constant Power.
@misken and @MikeyH , Thanks for your input, I’ll experiment with it a bit more and see if I can optimize it.
We’ve asked internally to see if we can shed some light on the inner workings with some Dev input ![]()
4 Likes
This topic was automatically closed 30 days after the last reply. New replies are no longer allowed.